Ultimate Guide To Blending Modes in Photoshop

The blending modes feature is one of Photoshop’s most undervalued tools for Photographers. Blending modes can be used to alter the ways in which each layer interacts with the layers below it, allowing for endless possibilities when it comes to setting the right tone or adding artificial lighting.

How to Master Blending Modes in Photoshop

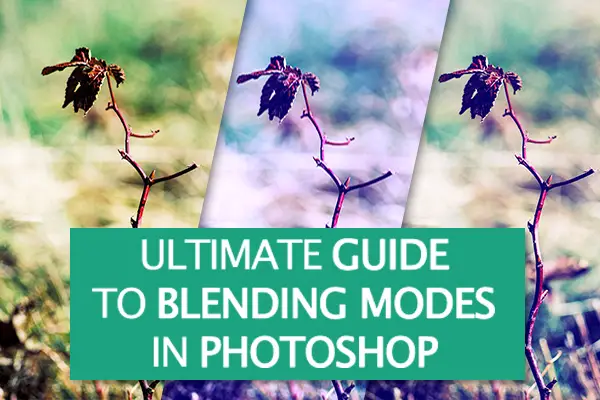
Graphic designers and digital illustrators use blending modes all the time to create interesting lighting effects or textures; however, most digital photographers don’t realize that blending modes can be useful when working with photographs, too. The right combination of blending modes can set a dramatic tone that is otherwise difficult to achieve.

Continue reading Ultimate Guide To Blending Modes in Photoshop

DIY Photography Projects

Photography can be an expensive hobby but if you’ve got a tiny bit of DIY skill, a few tools, and some free time then there are plenty of DIY photography projects to have a go at. Here are five worth a try:

Camera Chest Strap – designed to allow you to take photos while spinning a child around with two hands, though I imagine you could use to photograph any number of things while using your two hands in other activities. Looks like fun to play with and only requires scissors, some strong material, a needle and thread, and a luggage strap to make.

Remote Shutter Release – mainly for Canon cameras but apparantly also works with some Pentax and Nikon ones too. This requires a cheap handsfree phone headset and a knife and claims to be “so easy a 1st grader could do it”!

Photo  Puzzle Blocks – You know those puzzles for little kids that are made of wooden blocks? Well, here’s how to make one with your own photo (or photos) printed on.

Digital Picture Frame

Continue reading DIY Photography Projects

Tethered shooting on Ubuntu Linux using gPhoto2


Photo by Jacob Garcia

My D70, like most digital cameras, has a USB port that allows me to connect it to my computer and download photos. Many cameras also allow you to control them using your computer when they are connected. This is called tethered shooting. You click the shutter and a few seconds later the photo is displayed in all its glory on your big screen monitor. This can come in extremely handy in studio situations. It’s a great trick for quickly checking that you’re capturing the shots you want without squinting at a 2 or 3 inch LCD.

On a lark it occurred to me to do something goofy with my camera (more on that in a minute). On the way to crazy town I came up with a way to do basic tethered shooting on Linux.

Continue reading Tethered shooting on Ubuntu Linux using gPhoto2

Stringpods: Pocket-Sized Camera Stabilizers

On the off chance that I’m not the last photographer in the world to hear about stringpods, allow me to introduce them. A stringpod is a pocket-sized alternative to a tripod or monopod. It is a way to stabilize a handheld camera using a piece of string, a 1/4-inch bolt with a #20 thread, and a few washers. Essentially it works like this: the photographer secures one end of a string to the bottom of the camera. The other end of the string drops to the floor and the photographer steps on it. By pulling up on the camera gently, the string gets taut and helps to stabilize the camera.

I suspect that the MacGyver-quality of this little tool is what gives it such broad appeal (MacGyver is a television action hero known for inventing quirky tools from common items). Last week I found at least five images of stringpods, as well as numerous instructions how to make them. At least one flickr photographer showed a simple stringpod, while another showed a similar tool made using a thin chain instead of string. I even saw a video showing not only a stringpod,

Continue reading Stringpods: Pocket-Sized Camera Stabilizers

Quick Fix for Cluttered Backgrounds

Despite all that has been written about keeping the background of your photos simple, that goal is not always achievable. Sometimes your subject is in a place with a busy background everywhere. Or perhaps the subject is doing something that you don’t want to interrupt by walking around the person or requesting that she or he move to a different location.

I have found a very quick solution for such cases. Take the picture you want and then work on the background in Photoshop or another image editing program. First, I crop such images to remove part of the background. That alone makes the background somewhat less intrusive. But often I don’t want to eliminate it entirely; I merely want to de-emphasize it. One quick fix is first to blur the background slightly and then to adjust the saturation of both background and subject.

My brother PeteRecently, my brother came to visit. He and another friend of mine had an animated conversation in my kitchen. These were two very large guys and their expansive gestures and expressions really captured my interest. I grabbed a camera and took a whole series of pictures of them holding their conversation in my cluttered kitchen.

Continue reading Quick Fix for Cluttered Backgrounds

Ten Tips for Photographing Pets

This time of year, many photographers are trying to take pictures of their pets wearing fake antlers, Santa hats, or other seasonal trappings. Although I don’t indulge in that sport, I do love taking pictures of my pets and other animals, and I thought I’d share some tips that have worked for me and for others.

1. Be patient. Pets don’t often pose. Sometimes they sniff your camera or your sleeve. At other times they decide to crawl under a table or fly on top of a dresser. Just wait quietly until they settle down.

<i>Scanning the Neighborhood</i> by Michael Fletcher 2. Try to capture a characteristic action or activity. If you’re shooting your pet, you know its personality. Try to take a picture that reflects some characteristic, such as curiosity, goofiness, adoration, or self-possession. You do not have to include every inch of your pet, only the parts needed to express what you’re trying to capture. This image by Michael Fletcher certainly shows how alert this little dog is!

Continue reading Ten Tips for Photographing Pets

Playtime: Using Mirrors

I try to take pictures every day. Some days, of course, I’m inspired by something I see. At other times, I need to inspire myself and come up with an idea. This week, an idea was prompted by discovering an old discarded medicine cabinet that had mirrored doors. The doors were removable and provided me with two relatively large rectangles of mirrored glass.

One day, I decided to play with the mirrors, and it certainly was fun. First, I washed them to eliminate distracting blotches and spots. Then I tried laying various objects on them. I found that some objects are pretty boring on a mirror. For example, most thin flat objects do not produce interesting reflections. All you see are the edges. Plump or rounded objects reveal more of their undersides. If the underside is a different color from the top side, you can get interesting images. Although you can create the appearance of reflections using software, you will have far more fun experimenting with real ones.

clementine pieces
Irregularly shaped objects make the most interesting reflections, I think. It’s hard to tell where the object ends and its reflection begins.

Continue reading Playtime: Using Mirrors

Take Pictures at Night, Too

A year ago, I was afraid to shoot pictures at night. I thought it was a horribly complicated undertaking that would leave me frustrated and confused. Then I heard a fifteen minute talk on night shooting and saw a group of pictures taken one night by both inexperienced and experienced photographers. I was hooked.

Fine ArtsFirst, I loved the images that this group presented. Some were gaudy, while others were surreal, but even the greenest photographer was able to capture something interesting. Second, the process sounded relatively simple. The main requirements were a tripod and a willingness to play.

A few nights later, I went to a nearby town and took dozens of pictures. Some were disasters, but others were delights. Now I do night shoots frequently.

Continue reading Take Pictures at Night, Too

PhotoWorks Offers Retail Outlet for Photographers

PhotoWorks, which began life as Seattle Film Works, started out decades ago using movie film to make prints and slides. Today, many know them as an online photo sharing site, which offers prints and custom photo items, such as books, calendars, cards, and other gift items. I’ve often used this company. I buy prints from them, and last year, I made a book from old scanned family pictures.

Photoworks StorefrontNow this company offer Storefronts, a retail outlet for photographers, where the photographers can create and sell their own photo-related gifts. Right now, you can sell only books from this site. Soon you’ll be able to sell all sorts of products, including images and items that use images, such as coffee mugs, calendars, and so forth. In addition, PhotoWorks plans to offer widgets that will allow users to display their products on their personal websites.

You choose a user name, which gets incorporated into the URL. Choose carefully, since you cannot change this name later. PhotoWorks will take care of hosting your images, payments, and shipping. You can then have the proceeds either deposited into a Paypal account, or credited to your PhotoWorks account.

Continue reading PhotoWorks Offers Retail Outlet for Photographers

Photos Help You Sell

Many photographers started using digital photography only when they needed pictures for online auctions and sales. In fact, sales pictures are still a major reason why people use digital cameras. Luckily, shooting pictures to help you sell items is not difficult, but you should keep a few things in mind.

First, your picture should clearly show the item. Although this sounds too obvious to mention, it’s not. Many people upload blurry, dark images that make viewers squint at their screens and scratch their heads. Maybe the photographer thought, “Close enough!” However, potential buyers are likely to move on to something that they can see and don’t have to imagine.

For example, if a bookshelf has drawers, open one slightly so people will realize that they are not mere decorations. If you’re shooting a porcelain sugar bowl, be sure that the shape, pattern, and lid are clearly visible. If you’re selling a cup, show the handle and shape; if your product is a book, slant it so that buyers can see both spine and cover.

Continue reading Photos Help You Sell