Do you want to get better at creating long exposure photos? Long exposure photography is famous for tranquil and serene landscape shots, but when engaging in this type of photography there are many pitfalls that can ruin your shots.
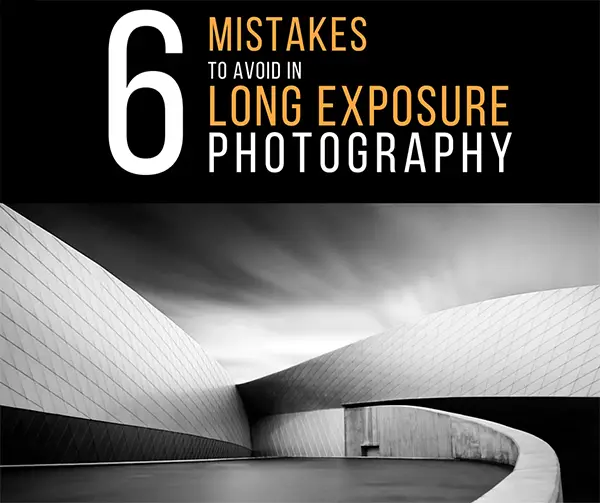
Below you will find a list of 6 common mistakes and how to avoid them.
Shaken and Blurred Photos
Even though it sounds obvious there are several factors that can lead to shaking. Strong wind can result in blurry shots if you don’t take your precautions when you want to capture fast-moving clouds that stretch across the sky.
To avoid wind causing blurred photos, use a stable tripod that doesn’t get swept away by the lightest wind. At other times, you would prefer a lightweight tripod, but with long exposure photography this is not the best.
To help make your tripod more stable, hang your camera bag below the center column. Also, remember to remove the camera strap or it will get caught by the wind and act as a sail that will create a little shake to the camera and tripod. Furthermore, if possible place yourself at the side or back of the camera and tripod to shield it a bit from the wind.

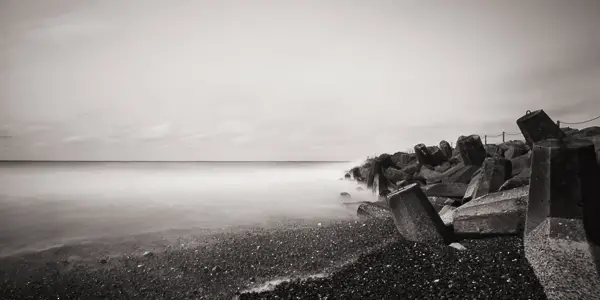
If you are shooting your long exposure shots on a beach be sure to place your tripod firmly in the sand. If you are close to the shoreline, the sand will be moved around by waves making your tripod slowly sink into the sand.
When shooting from a bridge or road, a bypassing train or large bus (or even a car), make the ground tremble enough for the vibration to travel through the tripod and your camera. Taking several shorter exposures and blending them in Photoshop into one long exposure, might help you not to waste too much time, because of shots being ruined by shaking conditions.
Even though your camera is placed on a tripod, your hand can introduce shaking when pressing the shutter. Remember to use a cable release or remote trigger instead.
Prepare the best to avoid shaking and just be patient if it happens and take the shot again.
Too Many Things “Moving”
If you are taking a long exposure of clouds sweeping over a landscape, you might want the flowers, bushes and grass to stay sharp and unmoving, to avoid that everything on the ground becoming blurred. To achieve this take one exposure with a faster shutter speed, without a filter and maybe even a higher ISO if it is dark to freeze the moving part. Back home you can blend this shot with the long exposure in Photoshop.
For example, a tuft of long grass in the foreground that sways in front of your camera covering your main subject will make it look hazy and unsharp. You can simply avoid this by becoming aware of what moves in the foreground when composing your shot and recompose or decide to take another exposure with a faster shutter speed and blend the exposures in Photoshop later, as explained above.
Color Cast From Poor Quality ND-Filter
Color cast is an unintended color change to an image caused by some ND filters. This means that your entire photo will look e.g. green, magenta or blue. Most times, you can easily remove this in Lightroom or Photoshop. If your ND filter gives you a color cast, you need to work with the color sliders in Lightroom to turn down the sliders for the color that causes the color cast.
However, for some photos this will not work. For instance, if you use an ND-filter with a magenta color cast and there are magenta colors present when you shoot it will be very difficult only to remove the color cast without affecting the magenta colors that you can find in the horizon during the blue hour. Buying a better quality filter is the solution to avoid color cast altogether.
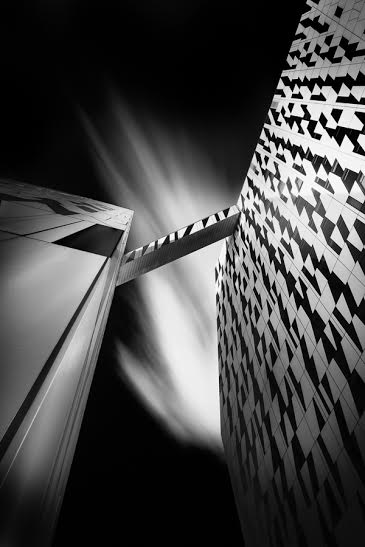
False Light Creates Light Streaks Across Your Image
Another common issue you will come across in long exposure photography is false light hitting the sensor during the long duration when the mirror in your DSLR is lifted up. During a long exposure, you want the light to hit the sensor through the ND-filter, but small amounts of light hitting the sensor without coming from through the ND-filter might show itself as strange uneven light streaks across your photos.
False light can come either from a wrong mounted or poorly designed ND-filter holder or light finding its way through the viewfinder and in this way affecting the sensor. However, there are easy solutions to solve this.
If you use circular screw on ND filter you will have probably had less false light coming in from the front of your camera. If you use the square filter holders, take a look at the design and if there are obvious ways for light to enter you might want to replace the filter holder with a better designed one. A little duct tape on the filter holder might close small holes allowing for less false light through the front of your camera.
Concerning false light entering through the viewfinder at the back of the camera, many cameras come with a viewfinder cap that shuts all light out. If you don’t have one, you can either buy one cheap or use a piece of black tape.
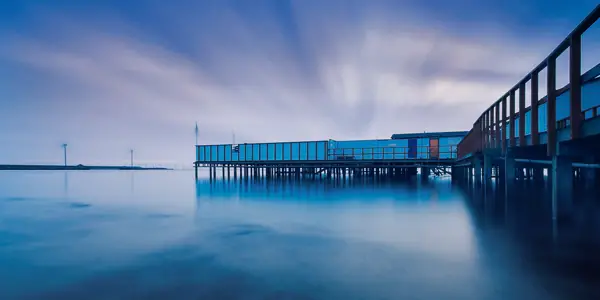
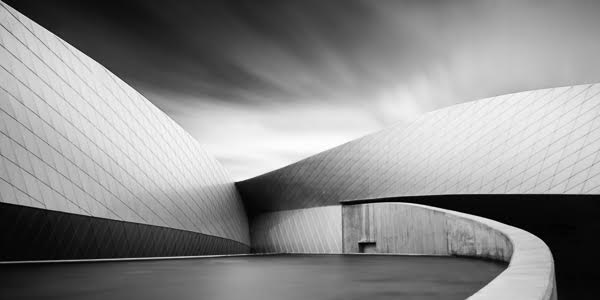
Too Much Clutter in the Scene
Keep it simple is the essence of Long Exposure Photography.
Simple almost minimalistic compositions and subjects work best. Avoid many trees or bushes or a cluttered scene in your compositions. Simplify by excluding any disturbing elements in the composition if possible. This makes your photos look more serene which compliments this genre very well.
Shooting in “Wrong” Conditions
Even though you cannot say that any condition, in general, is wrong for photography, it can be less than optimal for a specific type of photography. A cloudless day in bright sunshine is obviously not great for long exposure photography. False light will be a bigger issue and without clouds taking a long or short exposure will not differ from each other concerning the sky. If you want cloud streaks across the frame, aim for shooting when there is fast moving clouds with a cloud cover of about 60%. Too many clouds or foggy conditions will make everything moving, like water and clouds into one big gray mass that you cannot separate one from the other.
Make use of the blue hour or golden hour to get the best lighting. During the blue hour, you will get long exposure even without using ND-filters and with amazing blue, purple and magenta color hues. So if possible go shooting before sunrise or after sunset, so you can get really great looking photos.
Remember that even with these tips, a great composition is still essential for amazing photos.
What is your experience with long exposure photography? Share your thoughts below.
(c) All images copyright Peter Bredahl Dam


Love your photos, Peter. And thank you for this useful info!
Thanks for the feedback, Julia. Glad you found it useful 🙂
Great tips. What about photo staking long exposure? I am experimenting with it and I am getting quite nice results!
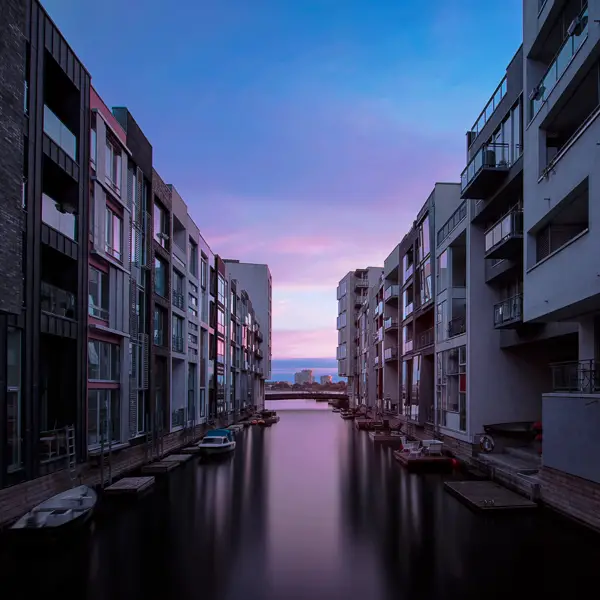
Thanks for your comment. Actually the last image in the article (with the pink and purple tones) is a result of stacking 7 x 30 seconds photos into one photo. I was standing on a wooden bridge, and the occasional cars that drove by caused the camera to shake. So I choose stacking to be able to capture it without getting shakes. I am considering doing an article on long exposure stacking later.
Thanks! Do you have a recommended process flow for blending a short exposure of foliage that is moving with the long exposure?