We found 739 results for your search.

Capturing Birthday Memories

ribbons_raydavisWe celebrated a 6th birthday here recently and, of course, one of the aims of the day was to get some nice photographs. But how does one go about getting good birthday photos? Well, here free of charge, are ten tips for you:
1. Have a designated photographer (or two). Get someone who is not in charge of putting the candles on the cake, keeping the dog away from the kids, paying the magician, and keeping track of which present came from which child, to keep a camera in their hands and use it often during the party. If you can get two people even better. If there are specific moments you know you want shots of let your designated photographers know what they are before the party starts.

2. Start early. The party preparation can make for some great photos too, especially if the kids are helping set up or if a family member is baking the cake.

3. Get the light right. If you’re having the party indoors try and arrange key moments like blowing out the candles and opening presents to be in an area with good lighting.

Continue reading Capturing Birthday Memories

The Big Three Basics

Recently we’ve explained some basic equipment terms so today I thought I’d continue with the beginner’s guides and introduce a few basic technical terms, starting with the Big Three:

Shutter Speed. Put in 4-year-old language this is the amount of time the shutter on your camera stays open. It is therefore the length of time the image sensor (in a digital camera) or film (in an old skool camera) is exposed to light.

Photographs are, generally, captured very quickly and so shutter speeds are measured in fractions of a second. The larger the number underneath the 1 (the denominator) the faster the shutter speed.

Moving from one shutter speed to the next halves or doubles the amount of light getting in. Slow shutter speeds can be used to introduce some blurring into a photo (e.g. a blurred background) or used with a tripod to get good night time photos.

Aperture. Again, in 4-year-old language, this is the size of the opening in the lens when you take a photograph. The larger the opening the more light that gets through the lens and “hits” the image sensor or film.

Continue reading The Big Three Basics

Get Summer Snap-Happy

dandelion_rdavisSummer is officially here and for now, here at least, the rain has stopped, the kids are out of school, and families are getting ready to go on holiday. Whether you want to get some summer fun photos of your kids, capture memories of your romantic holiday in Rome, or just get out and photography the landscape lighting is one of the most important things to get right and can be particularly tricky in summer. Bright light can cause all sorts of problems from glare to underexposure to squinting subjects in your portrait photos. Here are some tips to help you avoid those problems:
Use a polarizing filter
: if you’re using a D-SLR or SLR camera this is a simple solution to bright summer light, like Ray Bans for your lens a polarizer will filter out polarizing light which will provide richer saturation and reduce reflections on non-metallic surfaces.

Use your automatic settings: Your camera may have a setting for shooting in bright light (usually marked with a symbol of the sun) which can help you quickly and simply get better summer photos.

Avoid the brightest light:
Another simple,

Continue reading Get Summer Snap-Happy

GND & ND Filters…What the heck?

So there were a couple of comments on this post (actually all the comments!) related to GND and ND filters so I thought a quick post devoted to explaining the two might be appreciated by some readers. Here goes…

GND, or Graduated neutral density filters (also known as just graduated filters) are different from other filters in many ways, one of which is that they are often rectangular rather than circular but the functional difference is that part of the filter is a darker (neutral) colour that fades into the clear sections. The transition from neutral colour to clear can be either abrupt or gradual but the function is the same, reducing the difference in brightness between the ground and the sky. Therefore they are used mostly for landscape photography. GND filters also have numbers which indicate how many stops of light they reduce the brightness by.

ND or neutral density filters reduce light from all wavelengths passing through the lens across the entire filter (there is no clear part of the filter). They have three uses, firstly to reduce the brightness of light, secondly to allow the use of a larger aperature and finally to allow the use of a slower shutter speed.

Continue reading GND & ND Filters…What the heck?

A Beginners Guide to Photography Accessories

If you’re new to photography or you mostly just point, shoot, and hope for the best then there’s probably a whole bunch of photo equipment whose names you recognize but whose function you’re not really sure of. Well, here at Photodoto we live to help you out so here’s a few of those gadgets explained.

Lens Hoods: I mentioned printable lens hoods recently, which are free, but a sturdy plastic version will set you back anywhere from $10 to $500 depending on the lens you want it to fit. What do they do? Put simply, they eliminate glare and lens flare caused stray light.  Sometimes lens flare can be desirable in a photo but more often than not you want to eliminate it. Lens hoods usually have a completely non-reflective inner surface (for example felt) which absorb that unwanted light and prevents the flares on your photo. They come in petal and round styles with petal styles usually being more effective. Another effect of lens hoods is a deeper saturation and therefore richer colours in photos. Who needs one? Anyone who’s photographing outside, especially in sunny conditions will find a lens hood useful but they are especially useful on telephoto lenses because the smaller field of vision means the hood can be longer without obscuring the viewing angle.

Continue reading A Beginners Guide to Photography Accessories

Black and White Conversion: Channel Mixer Recipes

Black and white conversion is a mysterious process. There are many ways to do it and none is objectively any better than any other for every photo. So, these are guidelines, really, in the spirit of a recipe. But unlike following a recipe for baking a cake, we are not all trying to create the same photo. Keep in mind that every photo is different and will require slightly different values for any image editing technique.

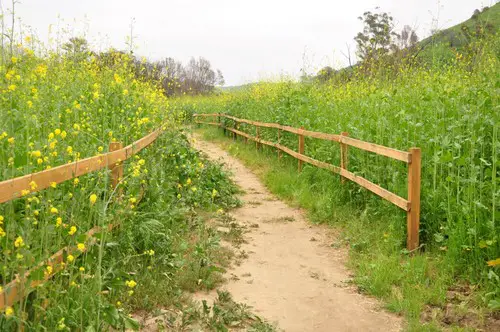
Here’s a photo I took on a hike recently with my kids:

Meadow path

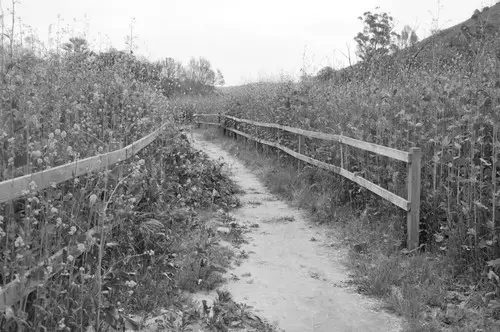
To compare with the channel mixer conversions below, first I’ll show the results from a simple average color desaturation. This is a simple conversion, it’s fast, and it’s very easy to do. In Photoshop it’s Image | Adjustments | Desaturate. In GIMP it’s Color | Desaturate.

deasat1

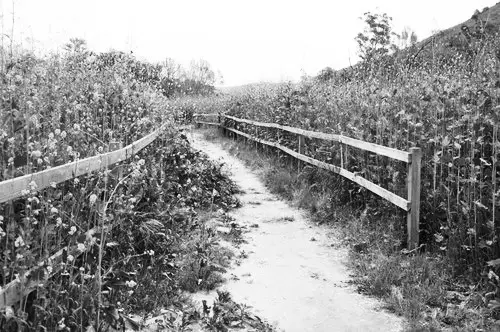
Many people, myself included, feel that this method often results in lifeless photos. If you’re going to convert this way, you’ll be doing yourself a favor if you also boost the contrast after the fact:

deasat2

I think the simplicity of just desaturating a photo and boosting the contrast has a lot of appeal.

Continue reading Black and White Conversion: Channel Mixer Recipes

A Very Basic Guide to Textures

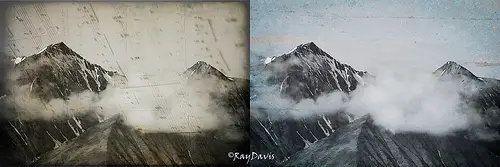
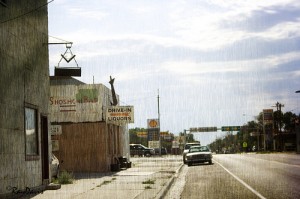
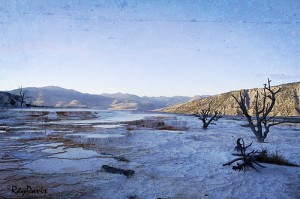
First off what do textures do? Well, things like this…

music-mountains
drive-in-liqour

yellowstone

Some are more subtle than others, obviously! So how do you add them to your photos? The easiest way is to use textures that other people have created. Some are free and some you need to pay for but either way this is what you need to do with them once you’ve downloaded them:

1. Open both the texture and the photo you want to edit in Photoshop. Click on the photo and check it’s dimensions.

2. Change the dimensions of the texture so that it’s as close to the same size as you can get it ( you can uncheck the constrain proportions box if you need to).

3. Still with the texture selected (rather than the photo) press Ctrl+A or Cmd+A (or go to file, select all) and little running lines should appear around the texture.

4. Press Ctrl+C or Cmd+C (or go edit, copy).

5. Select the photo and press Ctrl+V or Cmd+V (or go to edit, paste). The texture will be pasted over the photo so all you’ll see is the texture and not the photo underneath.

Continue reading A Very Basic Guide to Textures

Anatomy of a photo: Balvenie Scotch

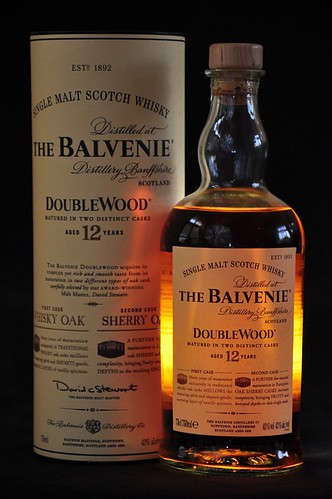
Several unconnected events converged to make this photo (below). First, I received a review copy of The Nikon Creative Lighting System by Mike Hagen (from rockynook and NikoniansPress publishing). A review is on the way. Second, and more importantly, I received as a gift a bottle of Balvenie Doublewood 12 year old single malt scotch.

Read on to get details of the lighting setup and what I think works and could be improved in this photo.

Balvenie Doublewood 12 Year Old

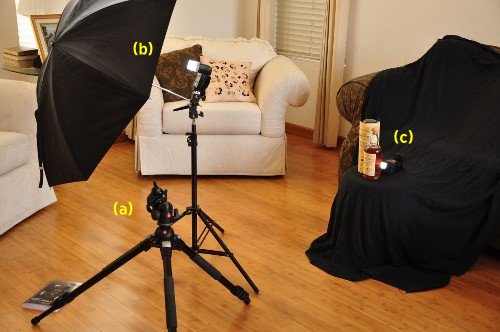
The setup

This scene was lit with two off-camera flashes. The first reflected from an umbrella directly to camera left set at -1.3 EV. The second directly behind the bottle, aimed at about a 45 degree up angle and towards the camera at 0 EV (TTL mode, normal sync). This flash was zoomed to 50mm. Both flashes were triggered wirelessly from the D90 built-in commander which did not contribute to the exposure. 98mm, 1/60s, f/5.6.

Flash setup

The good

Let’s talk about what I like in this photo and what I don’t like. First, the good. Overall, I got the effect I was going for.

Continue reading Anatomy of a photo: Balvenie Scotch

Digital Black and White Photos

Sometimes a photo just looks better in black and white. You know, from time to time you’ll be digitally rifling through a folder of photographs and there’ll be one or two that just don’t suit being in glorious technicolour. So what to do? Well here are a few tips:

1. Don’t write the photo off just because it doesn’t work in colour. It may look fantastic in black and white.

2. Don’t just convert to greyscale or desaturate. This will most likely look boring and low contrast. Most programs (including free ones like Picasa) have some kind of  “filtered black and white” option (in Photoshop this is the channel mixers). This allows you to select a colour filter (some programs will have more choices than others) which will let you keep much more of the detail in your photo. Play around with the different filters and see which ones work best for your photo.

3. Play with the photo in colour first. Before you convert to black and white do any corrections e.g. red eye removal, exposure, contrast etc. while the photos still in colour.

Continue reading Digital Black and White Photos

Video review: Canon Selphy CP760 Compact Photo Printer


(Video content may not be visible in feed readers/email. Click through to view.)

Girls think it’s cute but don’t count on it getting you any phone numbers on walks in the park. It’s cheap and easy but not a tramp. Give up? I’m talking about the Canon Selphy CP760 compact photo printer, of course.

I purchased the Selphy Sunday evening and through the miracles of the internet and a global transportation infrastructure it arrived on my doorstep Wednesday. And I’m so glad I did. It’s a fun little printer.

Despite it’s tiny size, the CP760 leans more toward the non-portable end of the spectrum than, say, the CP770 which comes in a plastic bucket or the ES30 which has an integrated handle and optional wireless and can run on batteries. No, this guy is intended to sit on a desk or table unobtrusively and quietly until needed. Although, technically, it’s small enough and light enough to move about if necessary and doesn’t require a connection to a computer to operate.

selphy_cp760

Color reproduction is very good at the default settings although reds are a little oversaturated for my taste.

Continue reading Video review: Canon Selphy CP760 Compact Photo Printer