Selecting foregrounds in the GIMP (video)

This video is a quick demonstration of the foreground selection tool in the GIMP, a powerful and free image editing application. The foreground selection tool gives photographers a quick and easy way to isolate portions of a photograph for masking or other effects.

Music by sunbyrn.

Continue reading Selecting foregrounds in the GIMP (video)

Anatomy of a photo: The silly faces project

The silly faces projectI recently published this photo on Flickr (click here to view larger) and it received a lot of interest so I thought I’d share how I made it. Taking 64 photos like this may look like a lot of work but it can actually be done quite easily. Here’s how I did it.

First of all, I used two flashes for lighting. An on camera SB-800 with diffusion dome pointed up and back and an off-camera SB-600 bounced into an umbrella to the right of the camera. You can do this without fancy lighting equipment. The important thing to remember is simply that the lighting must be consistent from shot to shot.

Continue reading Anatomy of a photo: The silly faces project

Free noise reduction plugin for the GIMP

GREYCstoration pluginI’ve been using the GIMP image editor (also known as the GNU Image Manipulation Program) (also known as the wonderful, open source, free photo editor with the awful name) a lot lately. Version 2.4.2. I highly recommend a second look if you haven’t tried it recently. The newest version has vastly improved controls for cropping and selections, a foreground selection tool, a healing tool, and better brush management among other enhancements.

But one thing my stock GIMP install didn’t have was a decent noise removal filter. That is, until I downloaded and installed the GREYCstoration plugin. Installing it is as simple as downloading and dropping the plugin into the GIMP plugins directory. Restart GIMP and you’ll find a new menu under Filters | Enhance | GREYCstoration.

Continue reading Free noise reduction plugin for the GIMP

Quick Fix for Cluttered Backgrounds

Despite all that has been written about keeping the background of your photos simple, that goal is not always achievable. Sometimes your subject is in a place with a busy background everywhere. Or perhaps the subject is doing something that you don’t want to interrupt by walking around the person or requesting that she or he move to a different location.

I have found a very quick solution for such cases. Take the picture you want and then work on the background in Photoshop or another image editing program. First, I crop such images to remove part of the background. That alone makes the background somewhat less intrusive. But often I don’t want to eliminate it entirely; I merely want to de-emphasize it. One quick fix is first to blur the background slightly and then to adjust the saturation of both background and subject.

My brother PeteRecently, my brother came to visit. He and another friend of mine had an animated conversation in my kitchen. These were two very large guys and their expansive gestures and expressions really captured my interest. I grabbed a camera and took a whole series of pictures of them holding their conversation in my cluttered kitchen.

Continue reading Quick Fix for Cluttered Backgrounds

Black & White Is the Key to Better Color

Lately, I’ve found a great way to use black and white to improve my color photographs. So, you say, that doesn’t make any sense, right? Well, I understand your confusion, but it’s really quite simple. What I mean by this, is you can convert your photo temporarily to black and white and perform some editing to make your photographs more appealing in color.

sunbathing.jpg

This is a photo I took at Hanauma Bay in Oahu of a lady sunbathing. It’s a nice photo. I’m actually fairly happy with how it turned out. I had taken it a couple of years ago, so I though I’d try reworking it using my black and white trick.

Continue reading Black & White Is the Key to Better Color

Learning Photoshop

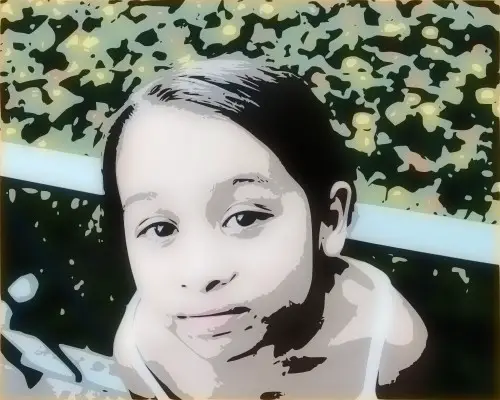
For more than a year, Photoshop was the bane of my photographic world. I wanted to learn it, but each time I tried, I came away feeling frazzled, inept, and not too bright. I just wanted to master the basics. Perhaps I could learn to remove small distractions from an image or brighten a dark spot. For example, I took a picture of a couple with their dog, and an upturned chair in the background made it appear as if the dog had horns.

Picture before PhotoshopPicture before Photoshop
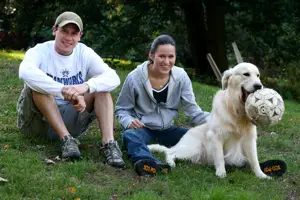
Many of my friends could use this program, so I began with optimism. First, I took a class. The instructor cheerfully zipped though his list of topics, while I watched, listened, took notes, and tried to follow the steps on my laptop. That didn’t work, though, because while I took notes, I missed details, and while I was trying to find a tool or command, he was often moving on the next topic. I finished the class but recognized that I needed to find another way to learn the program.

Continue reading Learning Photoshop

Photo enhancement going too far?

Before and afterThe Telegraph UK has an interesting article talking about how everyone from the kid next door to Hollywood celebrities are getting work done on their photographs.

The manipulation of photos is a given in the image-is-everything world of celebrity. Earlier this week, the Duchess of York appeared in Italian Vogue. With a tiny waist, sculptured cheekbones and a wrinkle-free face, she bore no relation to the frumpy Fergie who looked every one of her 47 years when papped out jogging recently.

The author theorizes that social networking services like Facebook are partially responsible. That users of those services want to look as attractive as possible to other members and that they are willing to pay to do so.

Personally I have retouched portraits of clients, friends and family. I think it’s possible to make flattering alterations without being false. Technique, camera angle, lighting, 12 megapixel clarity and a dozen other factors all contribute to images that may be technically “true” but neglect the fact that our eyes and brain don’t work that way. That human vision is colored by memory and attention and feeling. In a real sense,

Continue reading Photo enhancement going too far?

Anatomy of a photo edit: Our love is all of God’s money

Our love is all of God's moneyI think that post-processing is an integral part of photography whether you are processing your own black and white prints in a smelly darkroom or using Photoshop. As my abilities as a photographer have improved over the years, I’ve found it more and more likely that I will shoot a photo with a particular final look in mind. That was the case when I shot this photo recently so I thought I’d share my editing process with you. If you like this article, you may also like my previous Anatomy of a photo edit: Ready in 3 minutes.

Continue reading Anatomy of a photo edit: Our love is all of God’s money

Patches for Pictures

Recently I read an article about two new tools that are being developed to help digital photographers remove items from their images. Suppose you had taken picture of a great small town main street, but when saw the image you realized that three parked cars obscured the view and just looked messy. If only you could remove them! However, if you did, you would be left with a void.

Apparently, you are not alone. At least two teams are trying to solve this problem. One is developing a scene-completion algorithm that searches for a patch for your picture. It quickly scans thought a database of millions of images on Flickr, looking for images of the same subject, taken from the same position, with the light falling from the same direction. The algorithm narrows down all the choices first to 200 and finally to 20 or so. Ultimately, user are given a choice and select the one that looks best to them.

Another team is trying to create a library of clip art, taken from the Label Me library of images. This library could supply patches for missing picture parts.

Continue reading Patches for Pictures

Convert any photo into an illustration

Here’s something we’ve never tried before here at Photodoto.com: a tutorial screencast. This screencast shows a fast, fun, and easy way to convert any photo into an illustration. Please let us know if you had any problems viewing it. Also, leave a comment if you like the screencast format and would like to see more posts like this one. Thanks for watching!

Click To Play

Links in this screencast:

  • Inkscape – free vector graphics application similar to Illustrator, Freehand, Corel Draw
  • Click here to view a higher quality Quicktime version of this screencast.

Here are the before and after photos shown in this screencast:

Before

After

Continue reading Convert any photo into an illustration