I’m happy to continue our series of tutorials on creating your favorite Instagram filters in Photoshop. Before going to the tutorial, I’d like to share with you a few interesting facts about Instagram that you probably don’t know!
Did you know that New York City is the most geotagged place on Instagram? Or that the most Instagram users are located in the United States, Brazil and Japan?
16 billion photos have been uploaded to Instagram, and this number increases day by day. Instagram is all about selfies, cats, kids, lips, nails, and other parts of the human body. Just kidding!
There are also a lot of cool food and travel shots! Let’s keep following the trends, and use Instagram filters without Instagram itself (but with Photoshop). Below ,you’ll find two detailed Photoshop tutorials on how to mimic Sierra and Brannan Instagram filters in Photoshop. Scroll down and enjoy!
Sierra
Applying Sierra filter to your photos will give low contrast, high exposure, and a slightly dodged center. It looks like daydreaming.
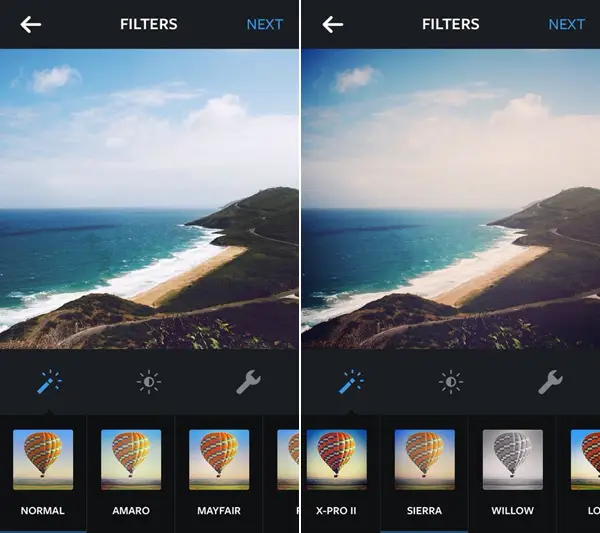
Sierra is able to wash out skin tones from a photo, so it’s better to use it for still life and landscape shots.
Note: For this tutorial, I used Adobe Photoshop on Windows.
- Open the image you would like to edit in Photoshop.

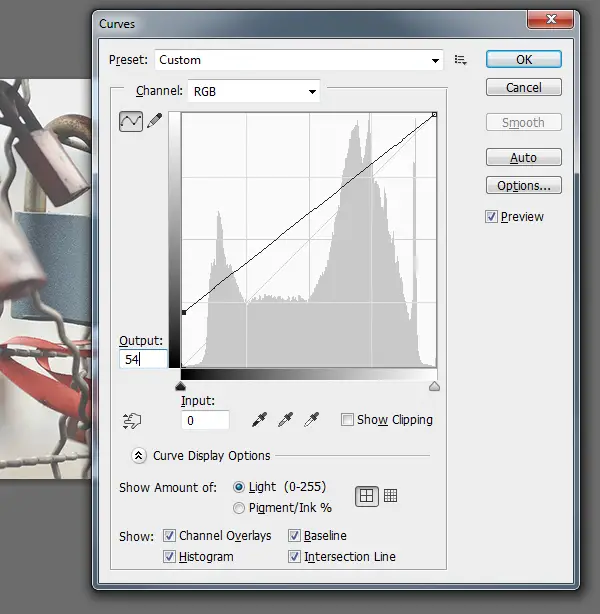
- To mimic a faded Sierra look, adjust the Curves (Ctrl+M) by going to Image > Adjustment > Curves and change the Output to 54.
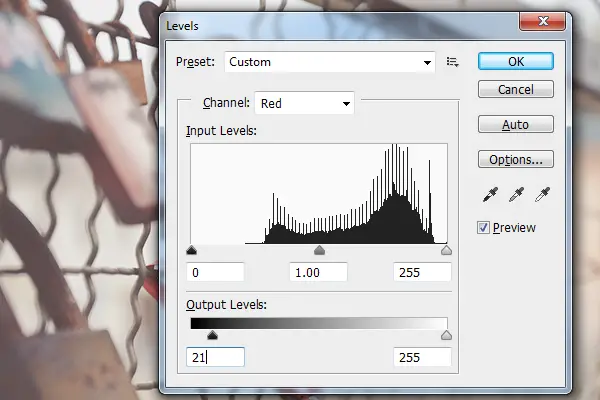
- Then move to Levels (Ctrl+L) or go to Image > Adjustment > Levels. Select the Red Channel, and, in the dropdown menu, increase the Output Levels to 21.
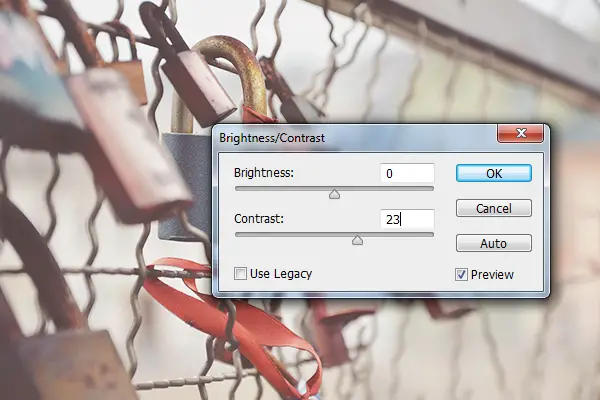
- Now it’s time to play around with contrast. Go to Image > Adjustments > Brightness / Contrast. Change the contrast to 23.
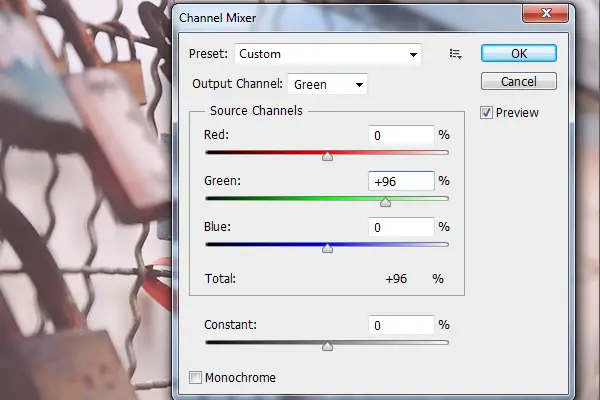
- Adjust the Channels by going to Image > Adjustment > Channel Mixer. Click on the Green Channel in the dropdown menu, and change the Green to +96 in order to give the photo less of a green effect.
- After that, we need to create a vignette as on the original Instagram filter. To do that, save the image as it is, and reopen it in Camera RAW. You can do this by exiting out of the current window and going to the File > Save As > Camera Raw (and choose Camera Raw format in the drop-down window). Then, exit out of the current window, and go to File > Open As > Camera Raw. Select your image, and then select “Camera Raw” in the “Format” drop-down menu.
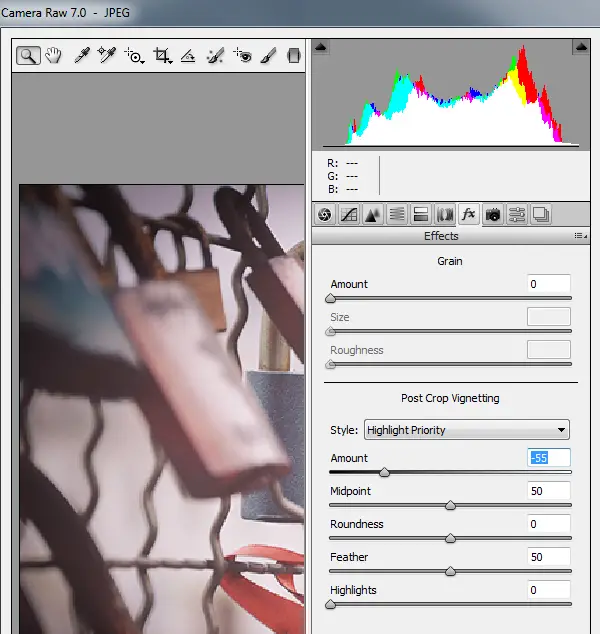
- Once you have the file open in Camera Raw, select the Effects menu on the right-hand side of the editor. Select the “Highlight Priority” to the “Style” in the drop-down menu. Change the Amount to -55 to create a vignette frame. Click on save the image when you’re done.

Brannan
Brannan adds high contrast and exposure to your photo, giving it some stylish metallic tint. This photo effect is soft and washed out, like a photo from old granny’s album.
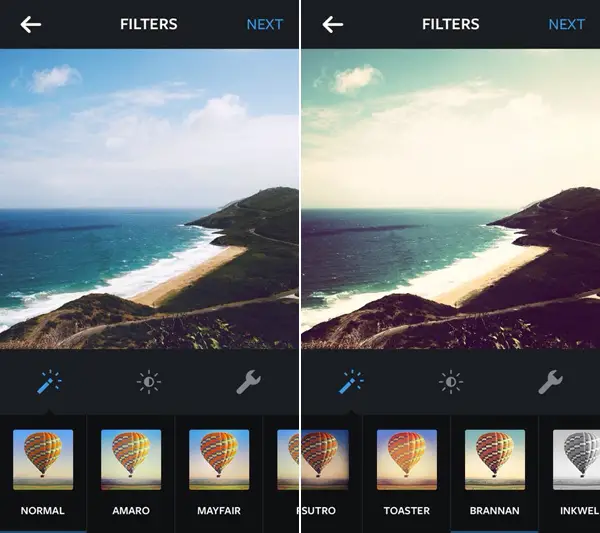
Brannan is a sepia-like filter that will look perfect for close ups and landscapes. Use it if you want to apply some dramatic, gritty shadows to your photography.
Note: For this tutorial, I used Adobe Photoshop on Windows.
- Open the image you want to use in Photoshop.
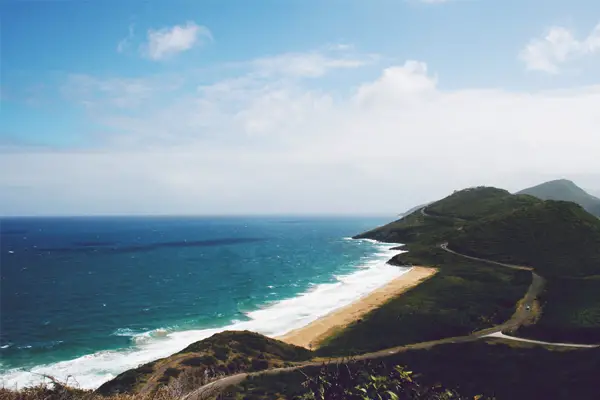
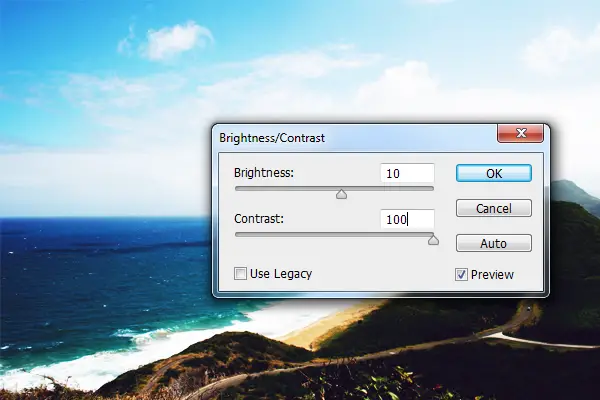
- Open the Contrast/Brightness window to increase the image contrast. Go to Image > Adjustments > Brightness / Contrast. I decided to move the Contrast slide to the end to 100 and the Brightness to 10, but you do as you want and as it fits your particular image.
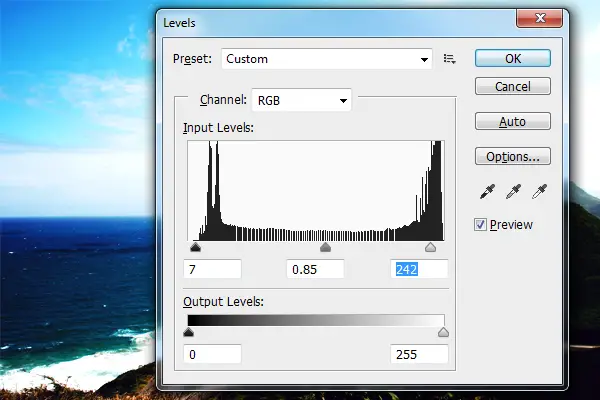
- To add this cool dramatic effect to your photo, open Levels (Ctrl+L) by going to Image > Adjustment > Levels. Staying at the RGB Channel, change the slider arrows as shown below:
- To add this Instagram’s yellow tint to the image, create a new layer (Ctrl+Shift+N) and fill it with a warm, beige color: go to Layer > New Fill Layer > Solid Color. I chose color #f3efa7. Click OK after that.
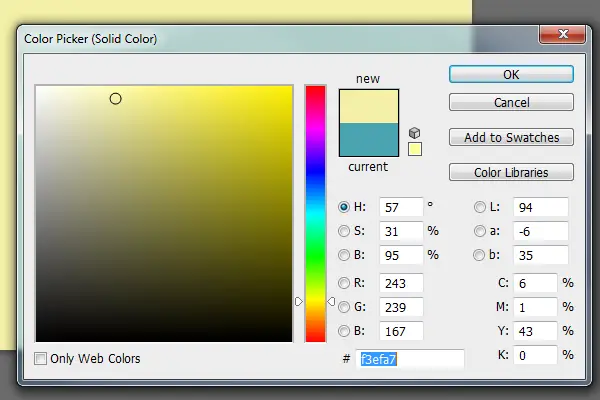
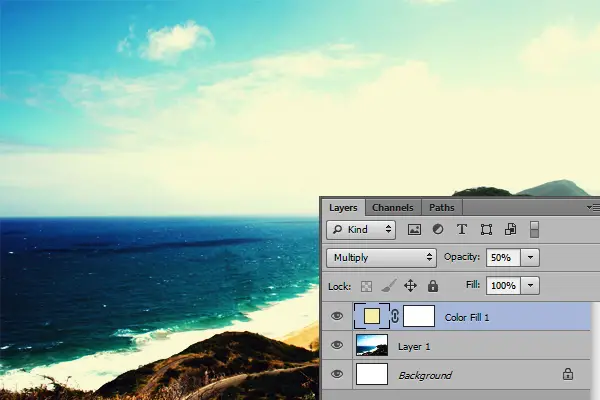
- Change the Blending Mode to Multiply and the Opacity to 50-60% of the filled with color layer.
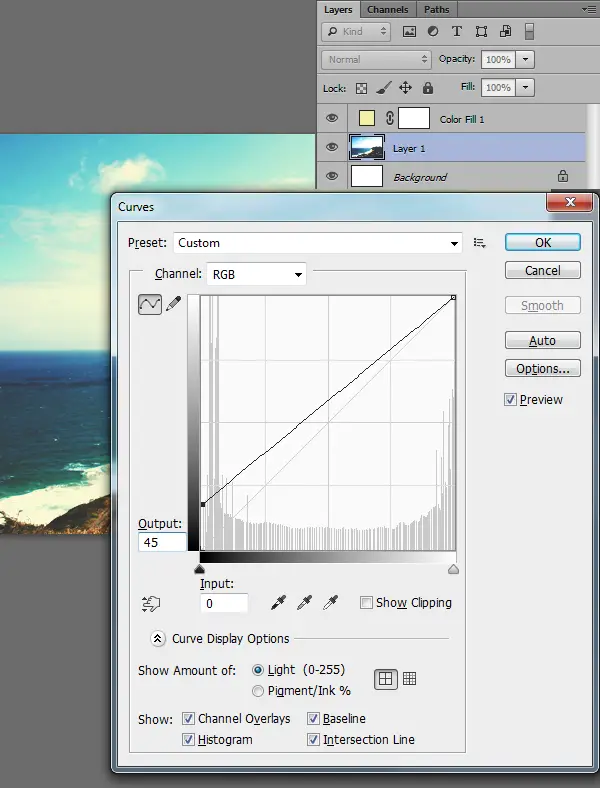
- To add a faded look, play around with Curves (Ctrl+M). Go to Image > Adjustment > Curves and decrease the Output to 45.
- Brannan filter also requires adding a vignette. So do the same as with the Sierra filter. Save image as it is and reopen it in Camera RAW. You can do this by exiting out of the current window and going to the File > Save As > Camera Raw (and choose Camera Raw format in the drop-down window). Then, exit out of the current window, and go to the File > Open As > Camera Raw. Select your image, and then select “Camera Raw” in the “Format” drop-down menu.
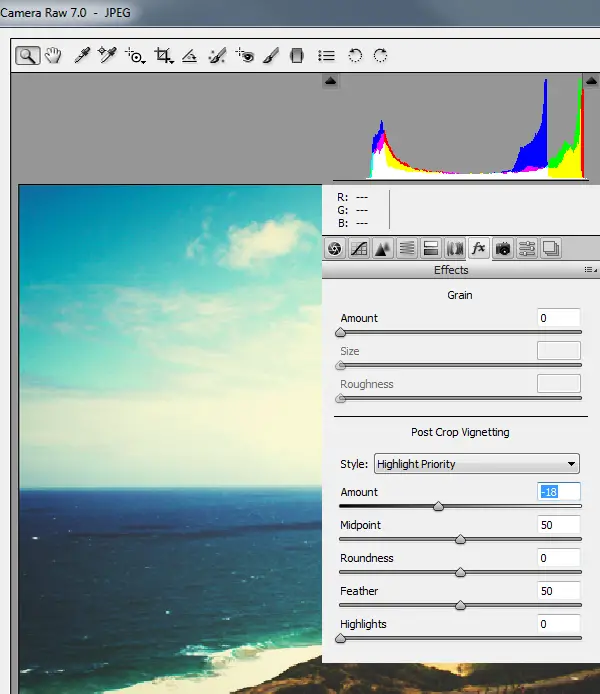
- Once you have the file open in Camera Raw, select the Effects menu on the right-hand side of the editor. Select the “Highlight Priority” to the “Style” in the drop-down menu. Change the Amount to -18 to create a vignette frame.
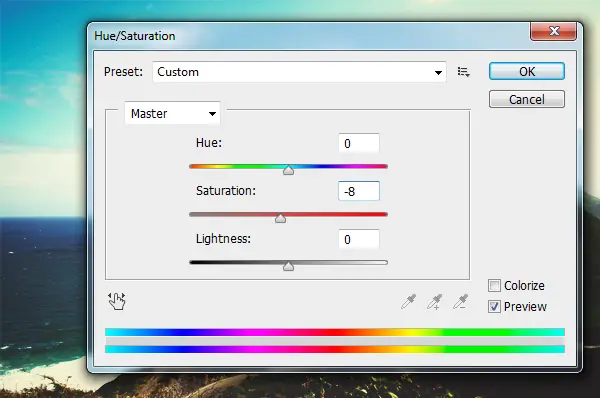
- if you’re not satisfied with the results, you can also change the saturation of the image. Go to Image > Adjustments > Hue/Saturation and decrease the saturation to -8.
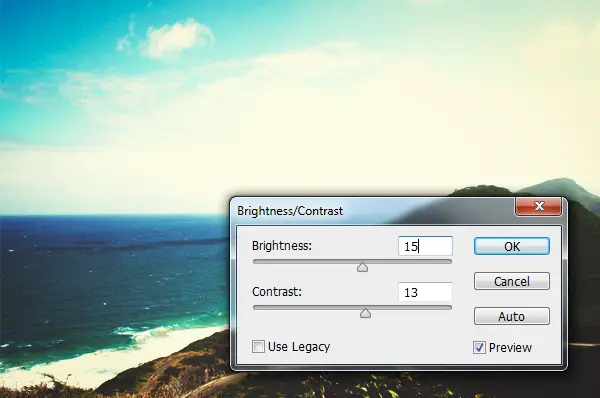
- And the last step would be adjusting contrast and brightness. Go to Image > Adjustments > Brightness / Contrast. Change the contrast to 13 and brightness to 15.
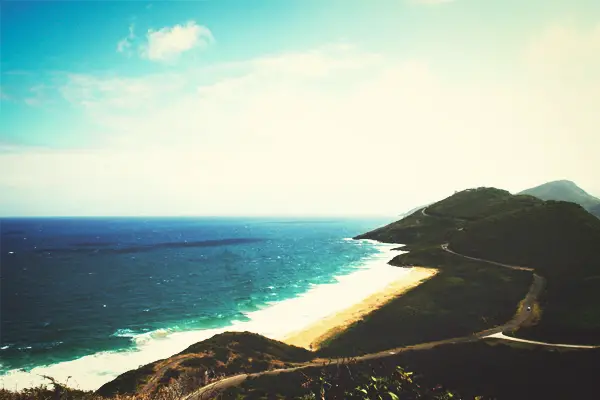
That’s what I’ve got!
Join the Conversation
I hope this Instagram filters tutorial turned out useful for you. As you see, they’re quite simple and easy to recreate. Don’t forget to check out our previous Instagram filters tutorials: EarlyBird, Amaro and Mayfair, Nashville and 1997.
I’d be happy to see your own tutorial results, so feel free to share our photos and ideas in the comment field below. Any feedback is welcome!



“Instagram is all about selfies, cats, kids, lips, nails, and other parts of the human body. Just kidding!”
Whew, that’s reassuring!
While I’m not a fan of filters, I admit I have seen some very nice results from a few tastefully applied filters. Some photos have gone from “blah” to “wow!” with the right filter.
By the way, the artwork for the article says “How to make Instagram Filters in PHOTSHOSHOP: Sierra & Brannan.” There’s a typo in Photoshop.
They look even better and more powerful when done in Photoshop! Nice tutorial, thanks a lot!