We all love the web for its ability to let you communicate with other people in various ways. That’s why Instagram’s so famous today. It’s our way to share visual stories of our lives with people around us. Instagram’s so popular not just because of the sharing option, but because of a set of gorgeous filters you can apply to your images before uploading.
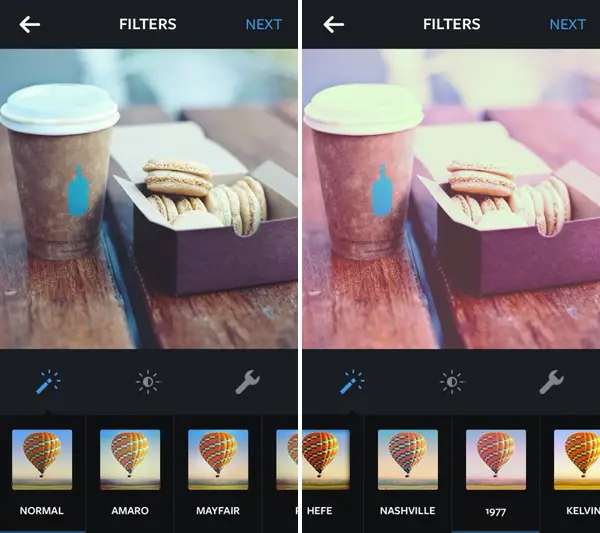
I have already covered here how to create Amaro and Mayfair Instagram filters in Photoshop. Today, I’m going to get you through the process of creating Nashville and 1977 photo effects from Instagram. All Instagram filters were inspired by vintage cameras and film. Old, vintage aesthetics of Instagram filters should be available for all people, even if you don’t have an iPhone or a luxurious smartphone. Just scroll down and learn how to create the Instagram filters Nashville and 1977 with Photoshop.
Nashville
Applying the Nashville filter to your image gives it low contrast, high exposure and warm temperature. It adds a pastel, slightly pink and pleasant palette to your photo. Nashville is one of the most popular Instagram filters, and I personally love it.
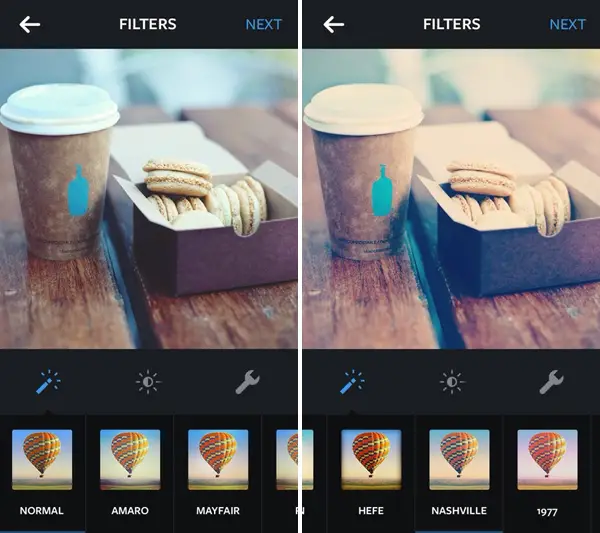
This photo effect could be applied to any picture ranging from mountains to your pet lying on the bed. So let’s go right to the tutorial!
Note: For this tutorial, I used Adobe Photoshop CS5 on Windows.
- Open the image you want to edit in Photoshop and create a new layer.
- Create a new layer: go to Layer > New > Layer (Ctrl+N).
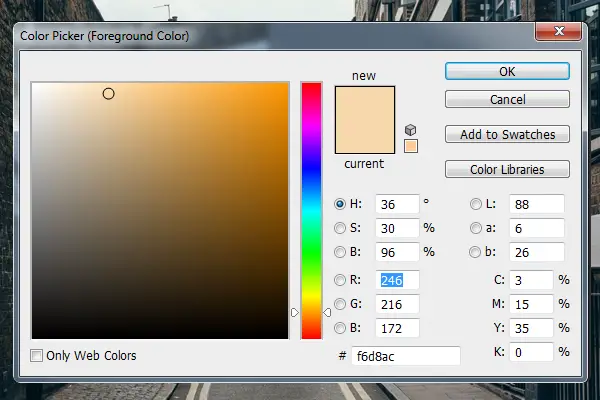
- Take a Paint Bucket Tool (G) to fill all of the image with yellow color. I picked the color #f6d8ac.
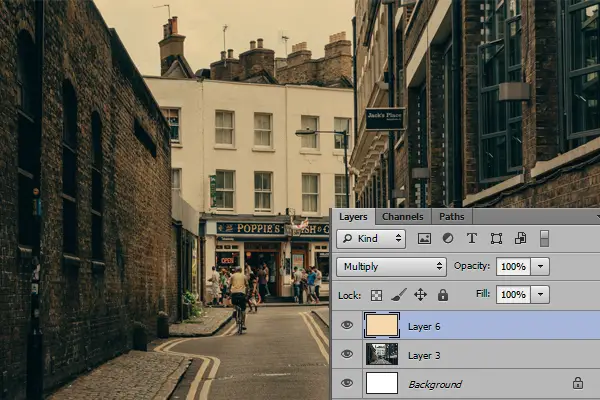
- Leave the opacity 100%, but change the blending mode into Multiply, as shown in the picture below.
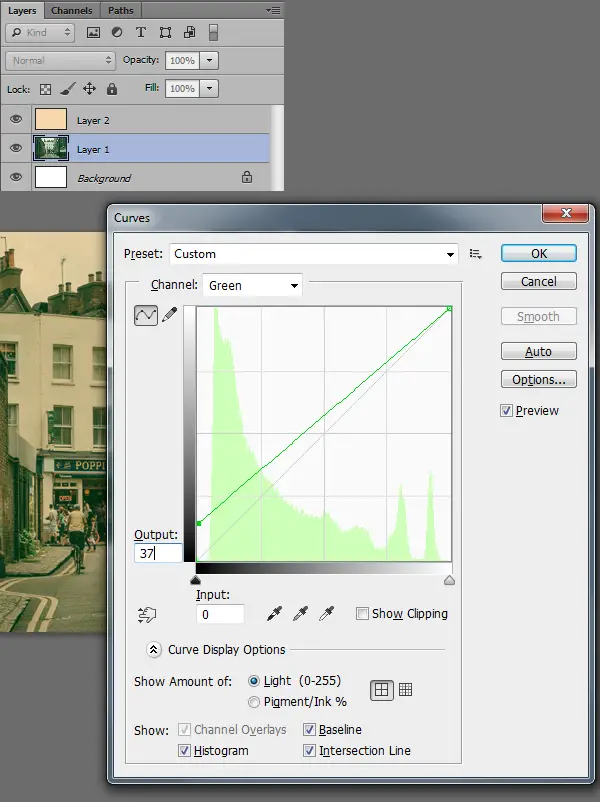
- Now let’s play around with curves. You can open the curves window at the top right side at the adjustments panel, or just press Ctrl+M. Open the green channel and set the output +37.
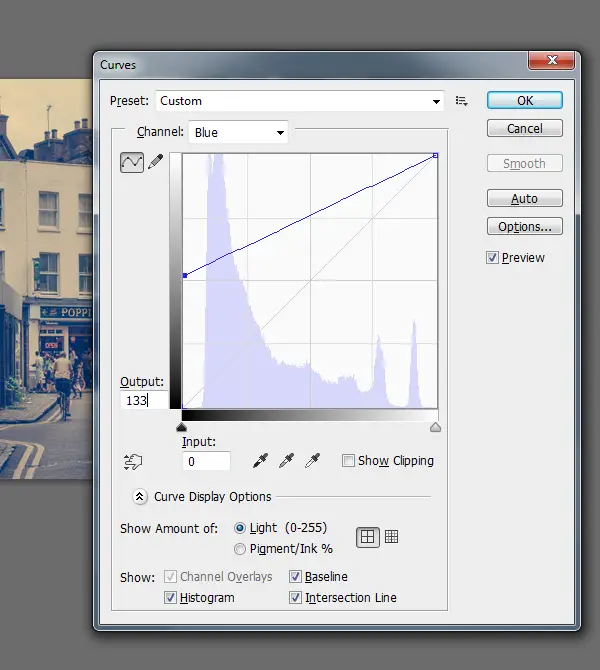
- Then go to a blue channel, and change the output to 133. And click OK. We’re done with curves at the moment.
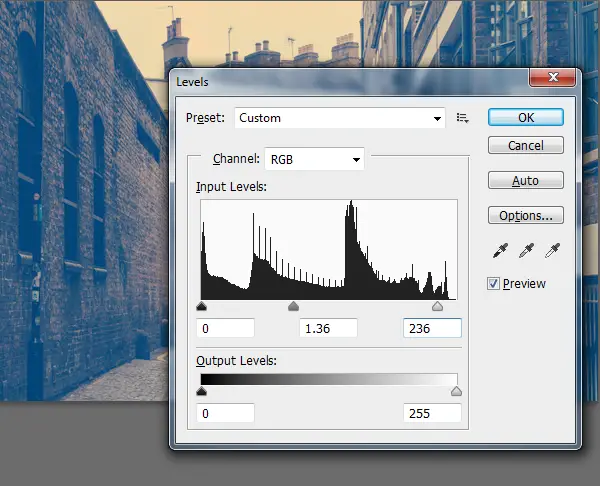
- Open the levels window: go to Image > Adjustments > Level. Change the gamma to 1,36 and also the input to 236.
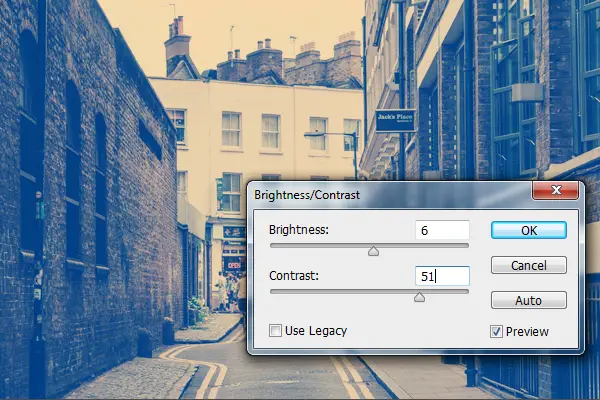
- Now let’s play with the contrast by going to Image > Adjustments > Brightness / Contrast. Change brightness to 6 and the contrast to 51.
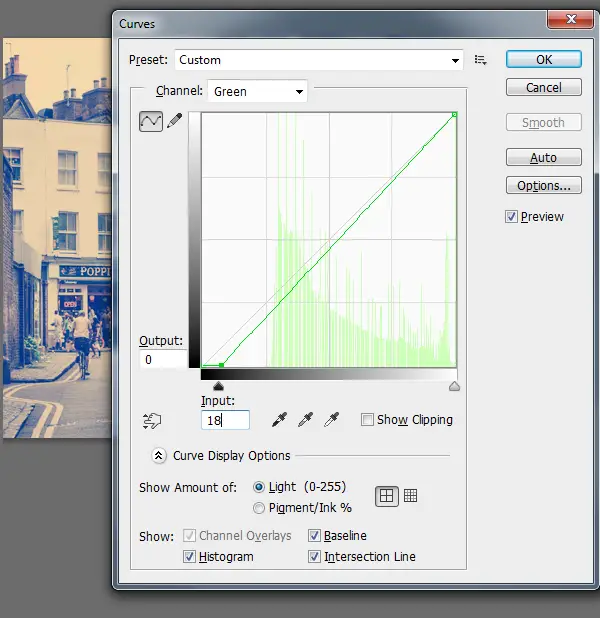
- Let’s get back to the curves again. Press Ctrl+M, switch to the green channel and change the input to 18.
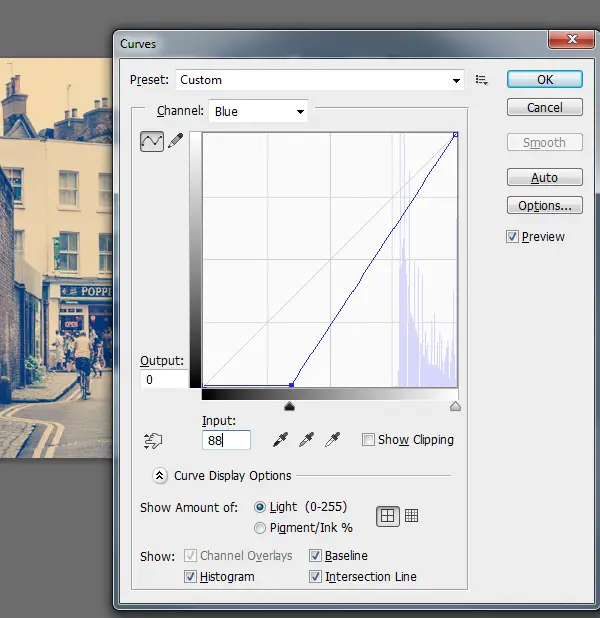
- Go to the blue channel and change the input to 88.
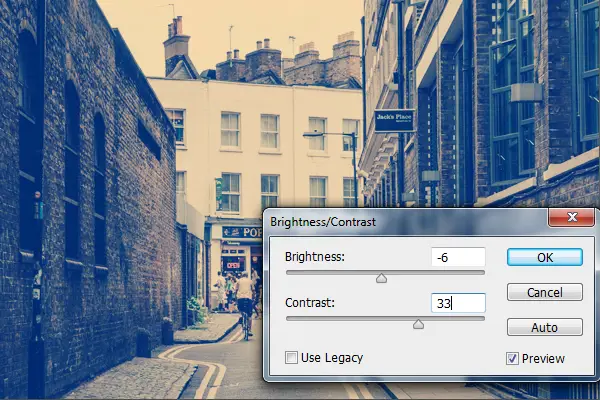
- Let’s get back to the contrast: Image > Adjustments > Brightness / Contrast. This time, change the brightness to -6 and the contrast to 33.
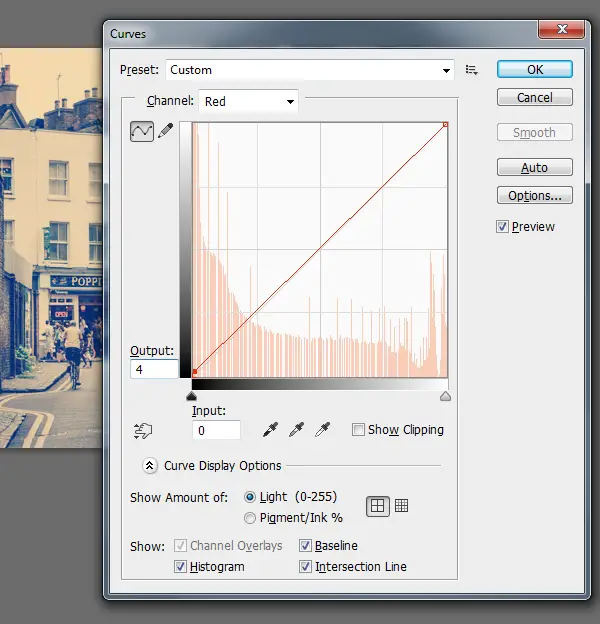
- Now we need to add some pink tint to the image, so go to the curves (Ctrl+M) and red channel, and change the output to 4.
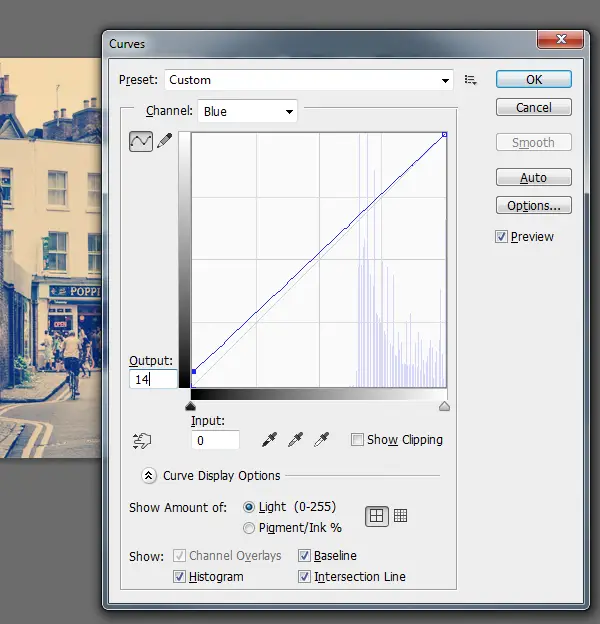
- Go to the blue channel and change the output to 14.
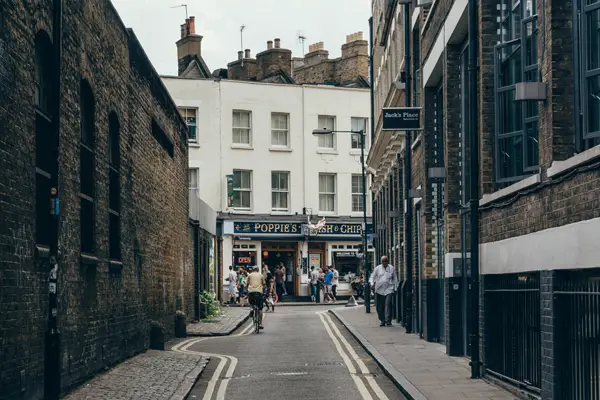
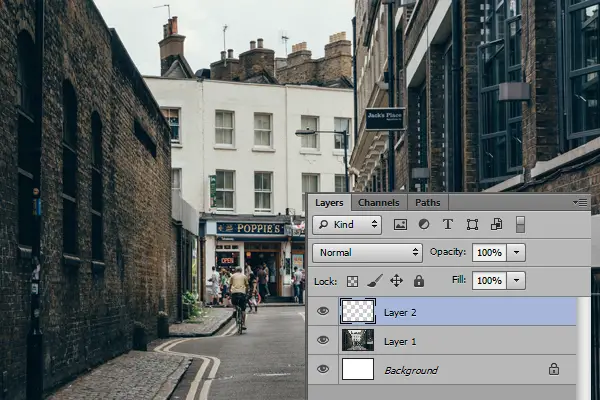
And…that’s it! Our Nashville photo effect is pretty much done! You can see my result below.
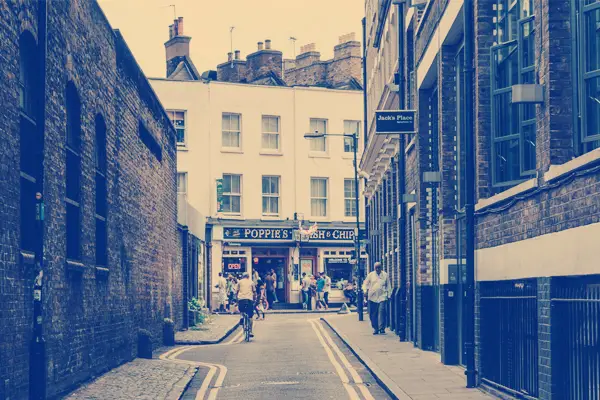
Remember that the results may vary on different images. This is just a concept; you can play around with contrast, curves, levels and strokes to get the personal photo effect and a unique piece of art!
1977
The 1977 Instagram filter makes your photos look like they came from a time machine, like they were taken back in the 70’s. Red tint and high exposure are its major features.
As for me, the 1997 photo filter works better for detailed shots or some beach and urban scenes.
- Open the image you want to edit in Photoshop and create a new layer.
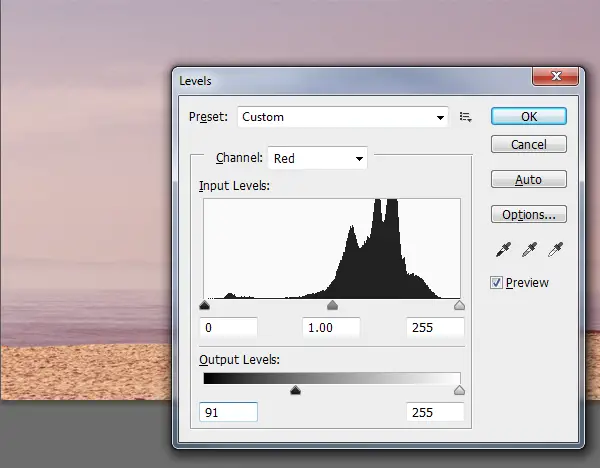
- To replicate a warm, red tone, open Levels: go to Image > Adjustments > Levels (Ctrl+L). Select the red channel and change its output to 91.
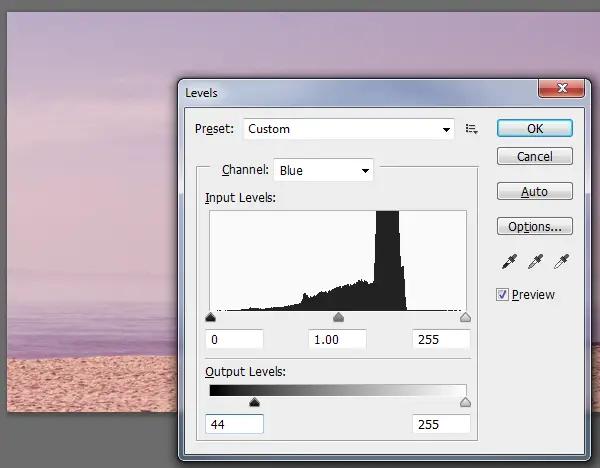
- Then go to the blue channel and change the output to 44.
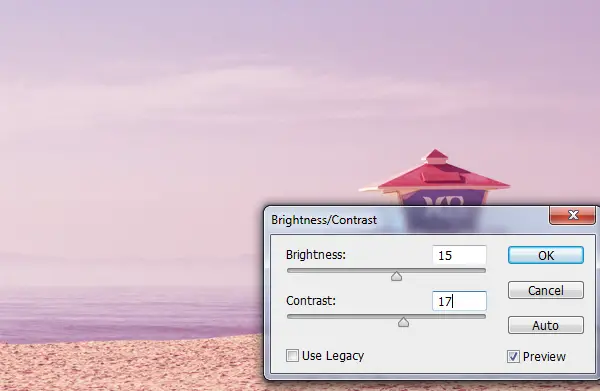
- It’s time to play around with contrast a bit. Go to Image > Adjustments > Brightness / Contrast. Change the contrast to 17 and brightness to 15.
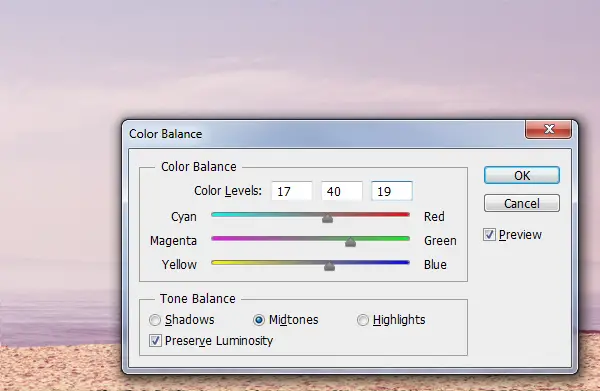
- Fine-tune the colors of your photo with Ctrl+B or by going to Image > Adjustments > Color Balance. Increase red, green and blue midtones, as shown in the picture below.
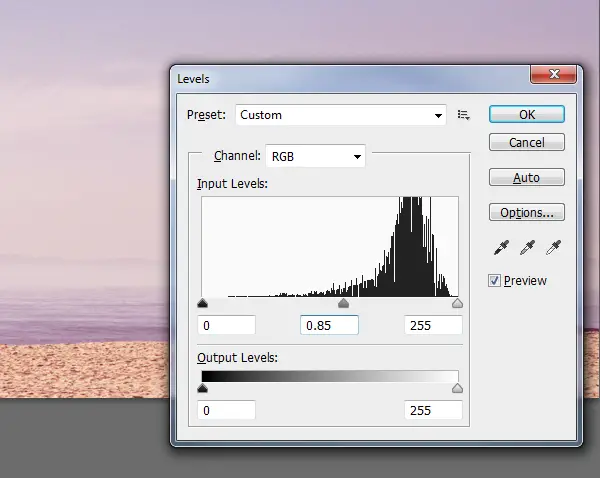
- Adjust all the levels by going to Image > Adjustments > Levels (Ctrl+L). Keep the channel RGB and move the slider to 0.85. It will emphasize the shadows of the image.
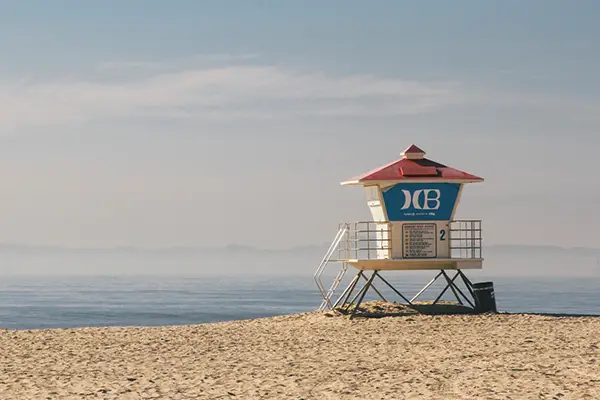
That’s it! It’s really quick and easy to mimic the 1977 Instagram effect.
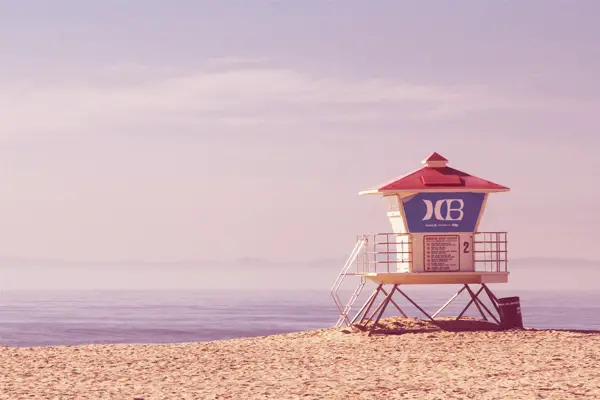
And, once again, remember that the results may vary on different images. This is just a concept, you can play around with contrast, curves, levels and strokes to get the personal photo effect and unique piece of art.
Join the Conversation!
You see, it’s not that difficult to recreate Instagram filters in Photoshop yourself, and it’s so much fun! Hopefully, these efficient tutorials were helpful for you.
Make sure to check out our previous Instagram photo filters tutorials: EarlyBird, Amaro & Nashville.
Also, follow the best travelers and foodies on Instagram! All these showcases were made to get the most of this photo-sharing application. Join the conversation in the comment field below, and don’t be shy to share your own tutorial results. Any feedback is welcome!


0 comments