For every photographer, it is a dream to get everything right in the camera. However, it is not possible every time, you cannot always get your shots right. Sometimes, magnificent moments happen in a flash. In such cases, you cannot meticulously adjust your camera setting and look for the perfect lighting to get the perfect picture.
For example, if you are a wedding photographer, you need to be on the toes, so that your camera does not lose even a single memorable moment.
However, when you are taking hundreds of photos in a few minutes of time it would be difficult to concentrate on the lighting, frame, color, sharpness, contrast, etc. Similarly, a wildlife photographer would face the same obstacle in capturing the long-waited splendid moment.
Fortunately, the era of computers has indeed provided a solution for such a strenuous problem by means of Photoshop. The digital photo-editing platform has enabled the creation of the so-called perfect pictures from an imperfect genesis. Photoshop is proclaimed as a wizard that is capable of turning a poor shot with an extraordinary subject into magnificent photos. Many expert photographers say, “it has bridged the gap between film and digital”.
In addition, Photoshop shines as a star of hope for budding photographers who cannot afford powerful cameras. It serves as an advocate for the talents incarcerated by money. It enables one to create powerfully detailed images even from a low-end camera. Besides, it is a boon to those who want to post wonderful pictures on social media and stream in a load of thumbs-up.
Further, the advancement in both hardware and the software of computers has made it possible to alter the photos beyond the perceived horizon. Now it is easy to whiten the teeth, alter the skin tone, change one color into any color, create beautiful sunrays and many more. Integrating the possibilities, it could be claimed that virtually nothing is impossible with the aid of Photoshop. Elon Musk might be spending billions of dollars to build a rocket to go to mars, but you could create few layers in Photoshop to reach Mars virtually.
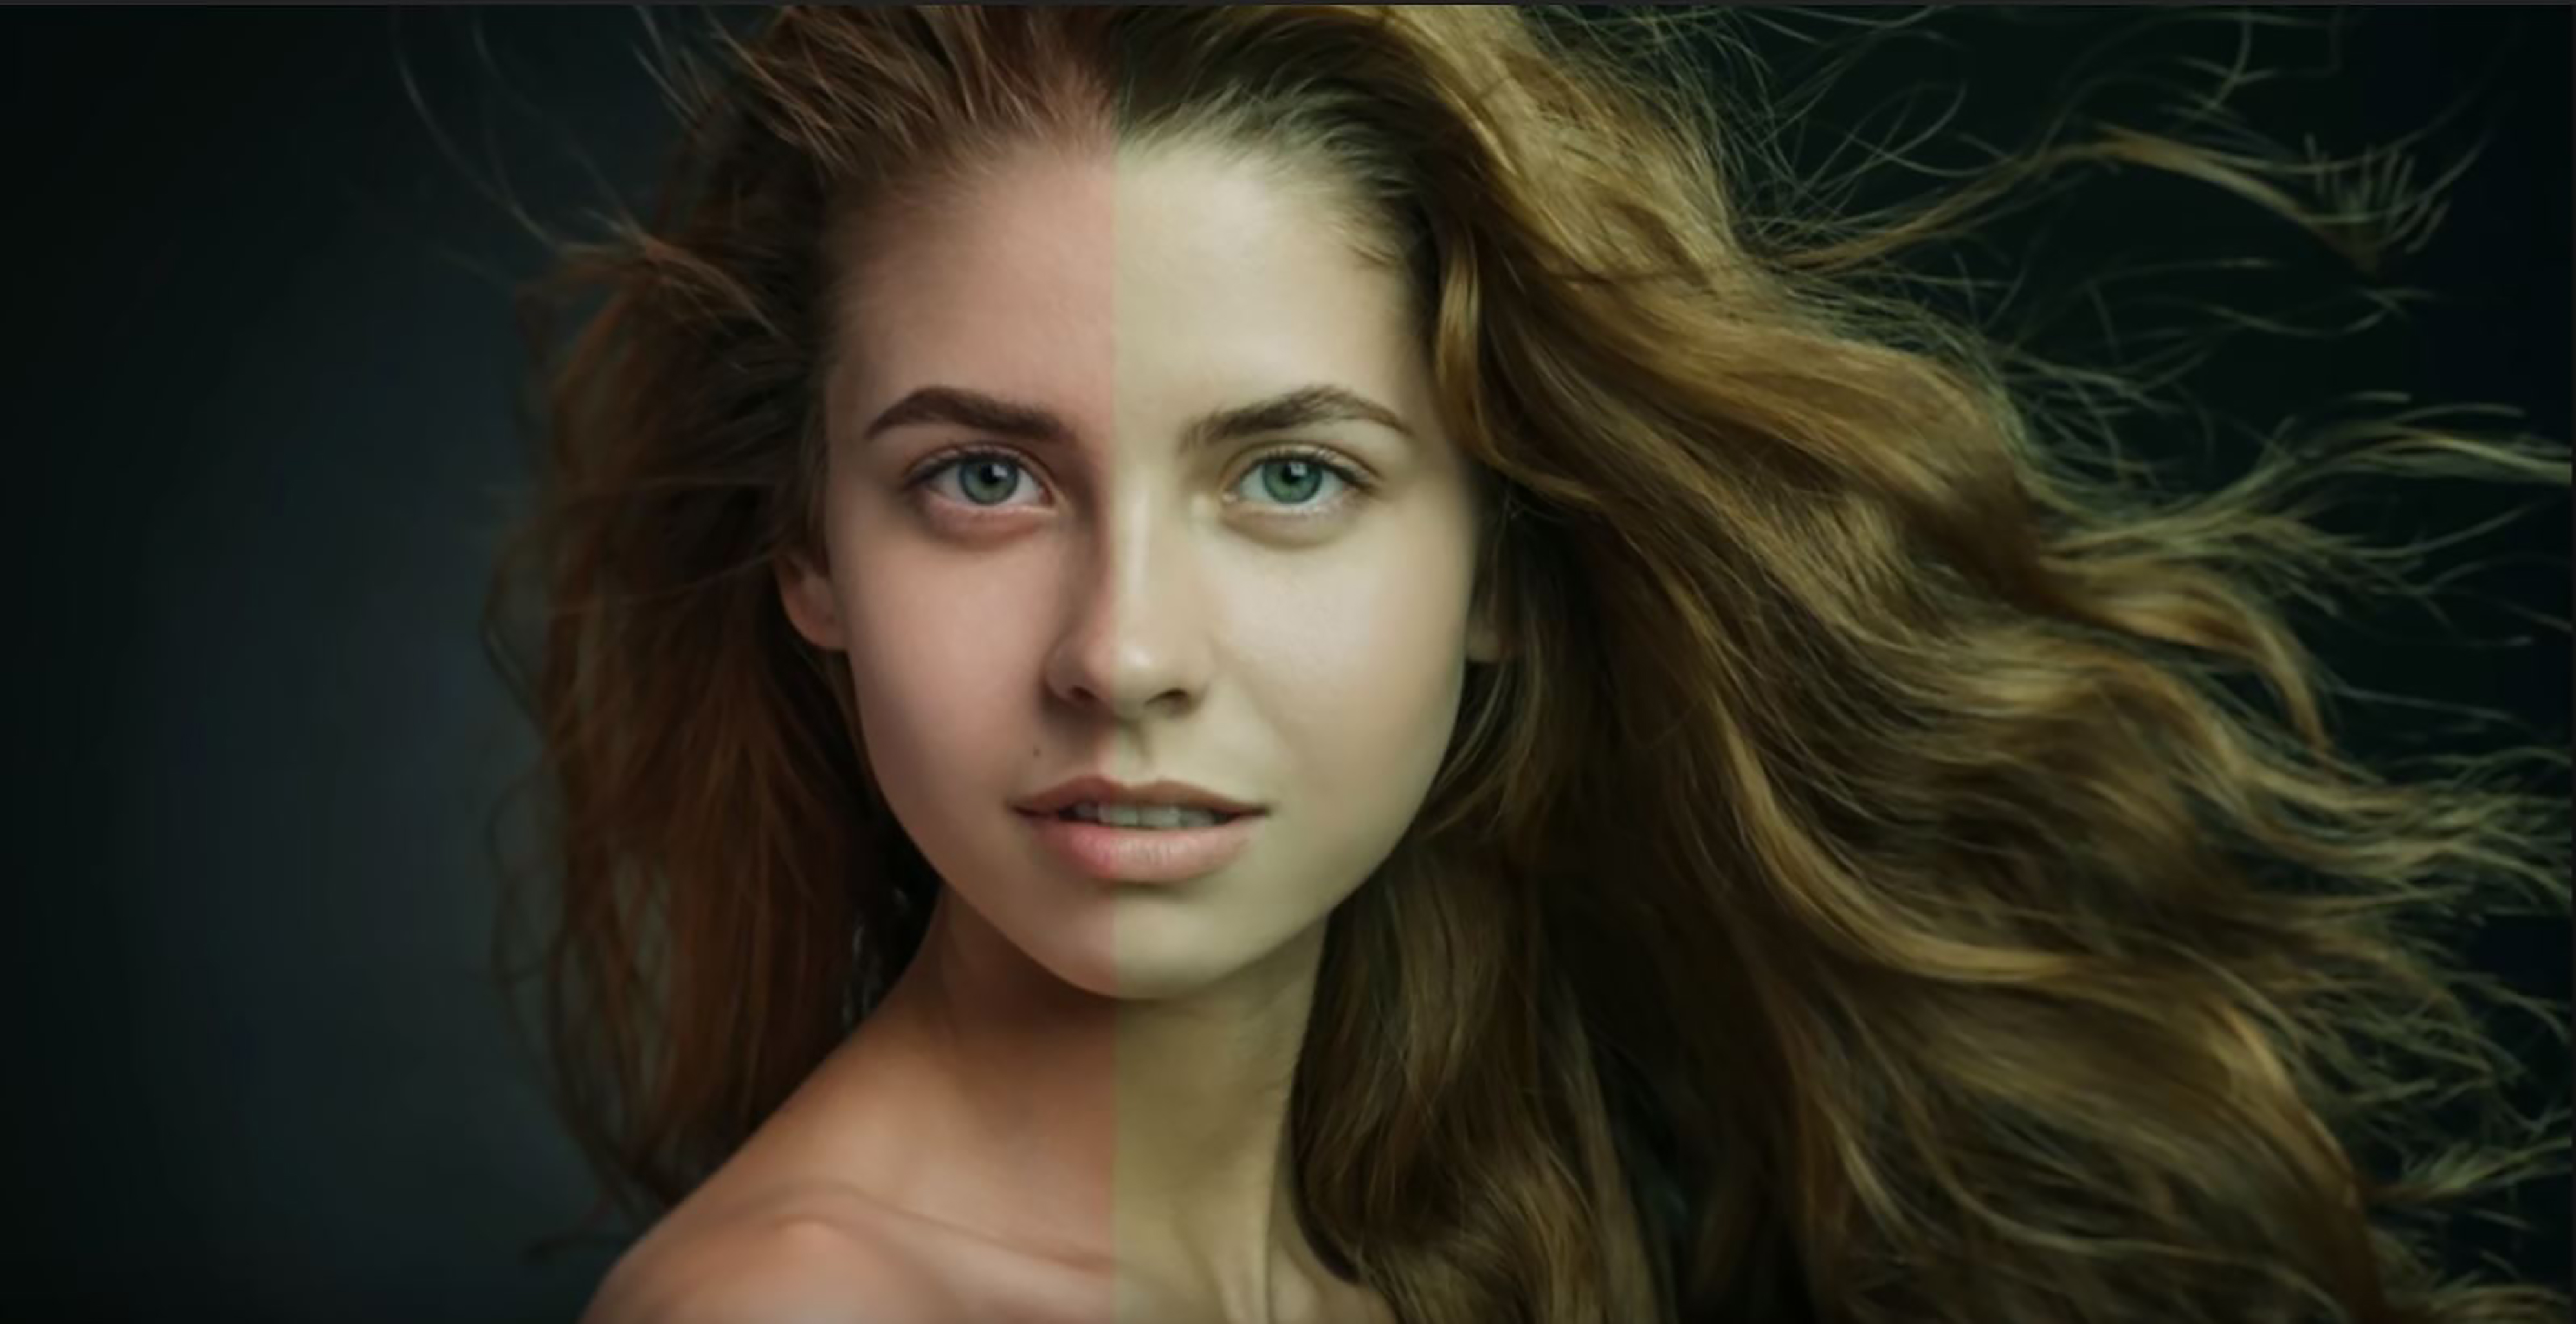
Trick 1: Fixing Skin Tone With Just One Button
Conventionally, altering the skin tones in the picture is tedious work. However, following just a few steps and clicking one button can make it happen in an instant. Here is the procedure to obtain beautiful skin tones in one button.
Step 1:
A skin color palette is required, which could either be downloaded from the internet or created on your own.
Step 2:
Open the folder containing the downloaded color palette file.
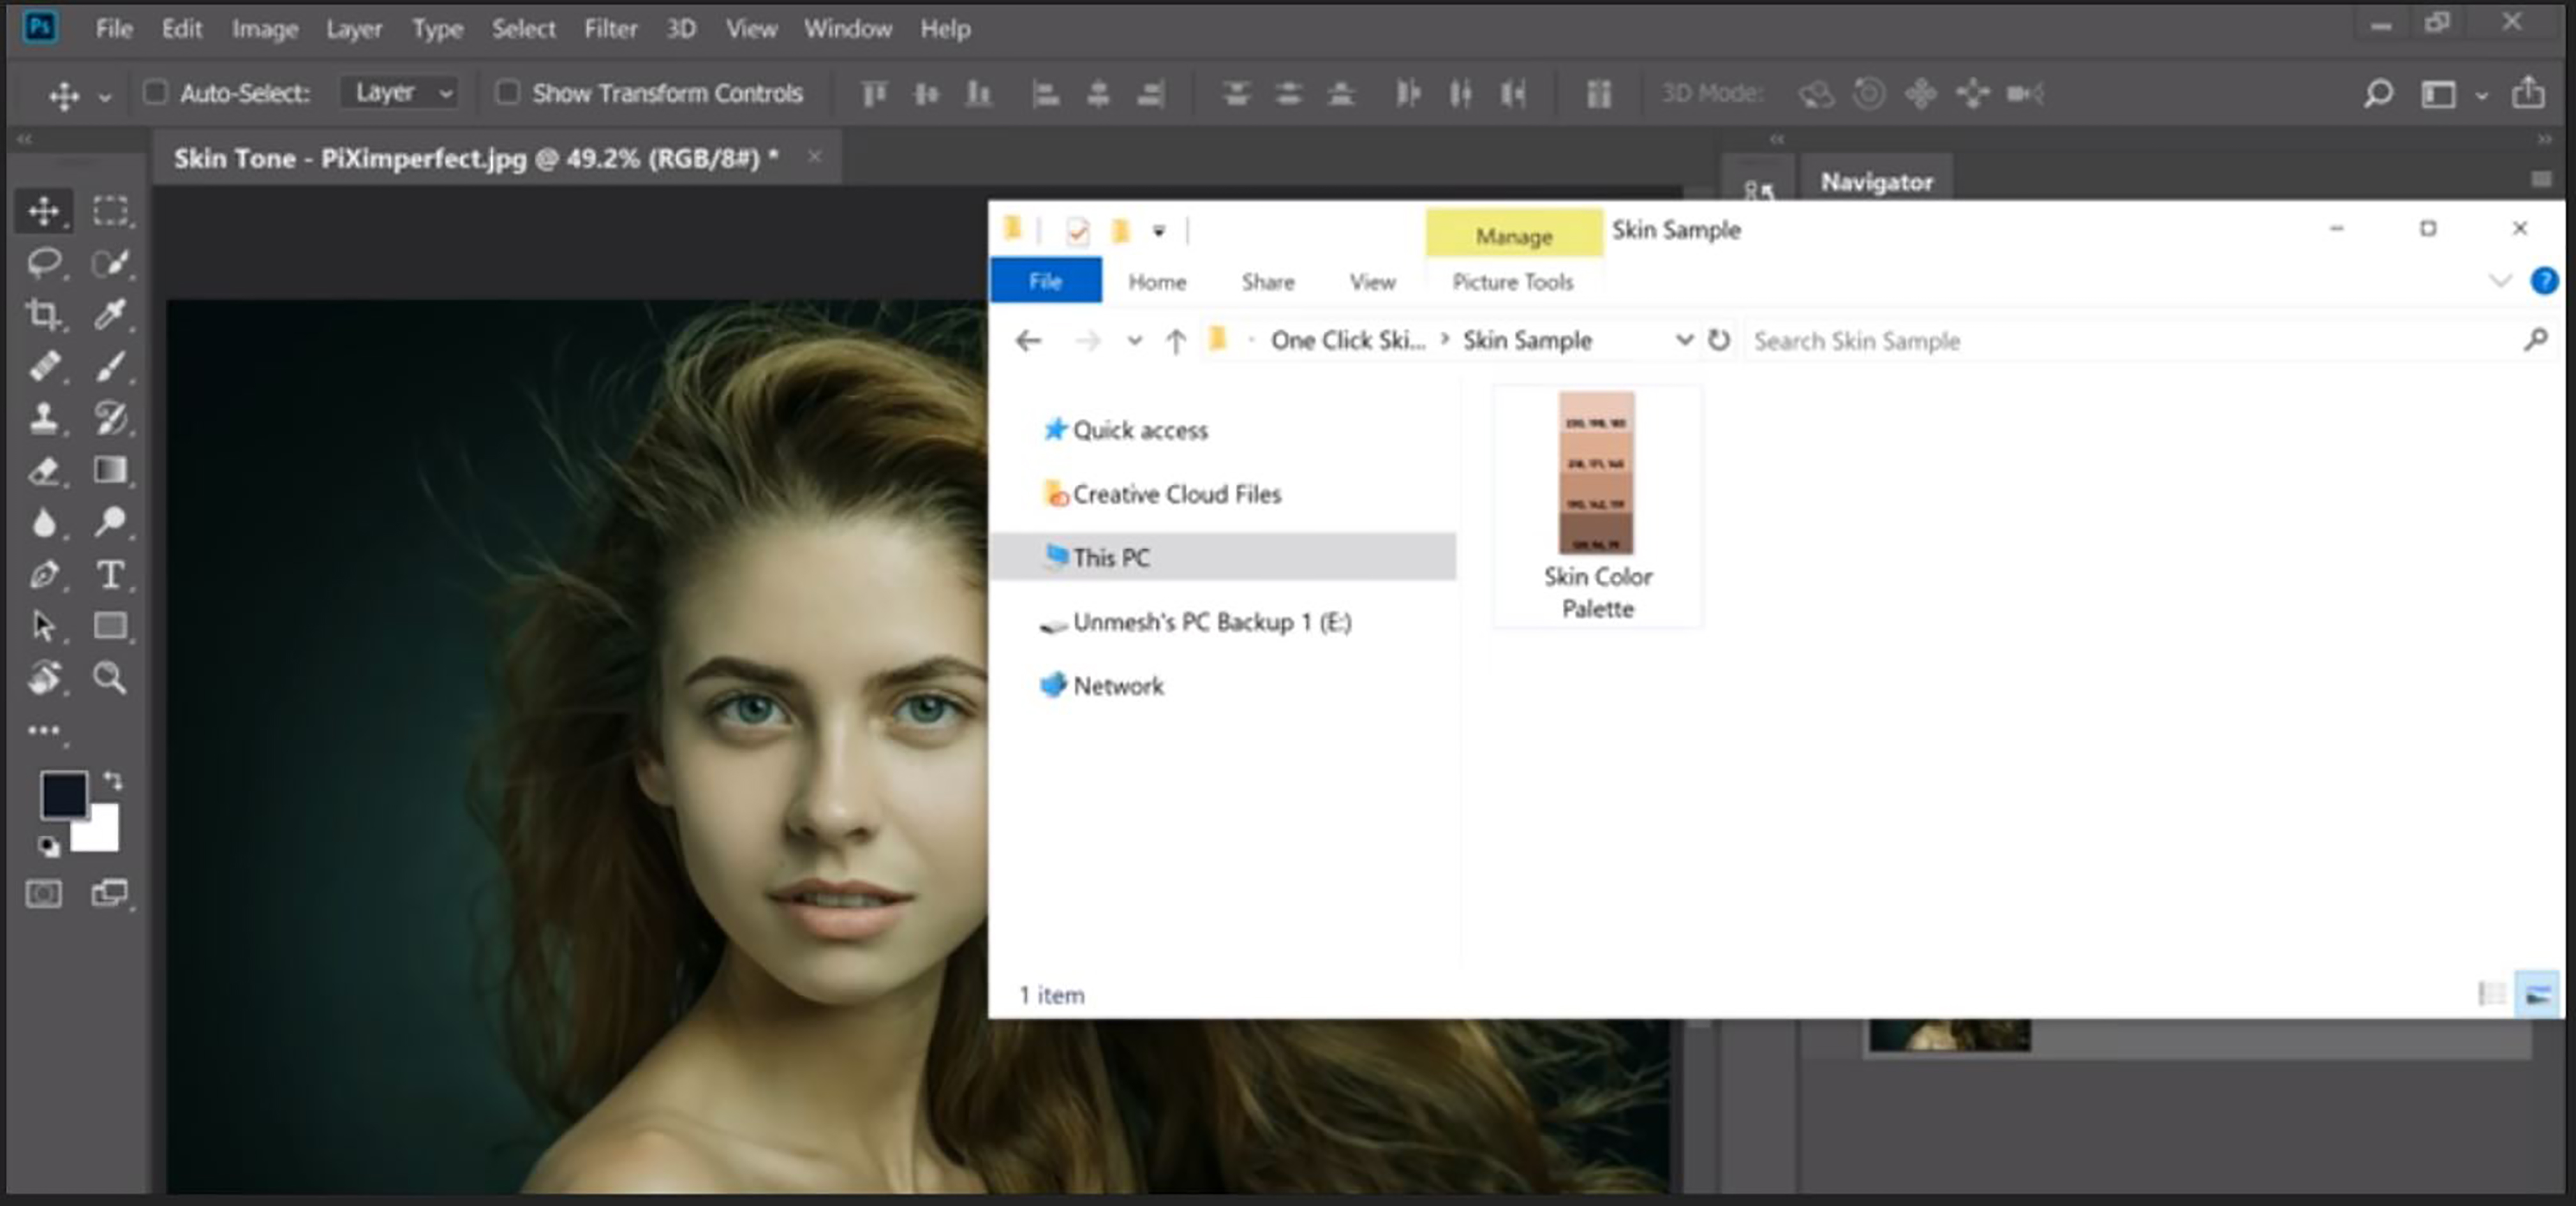
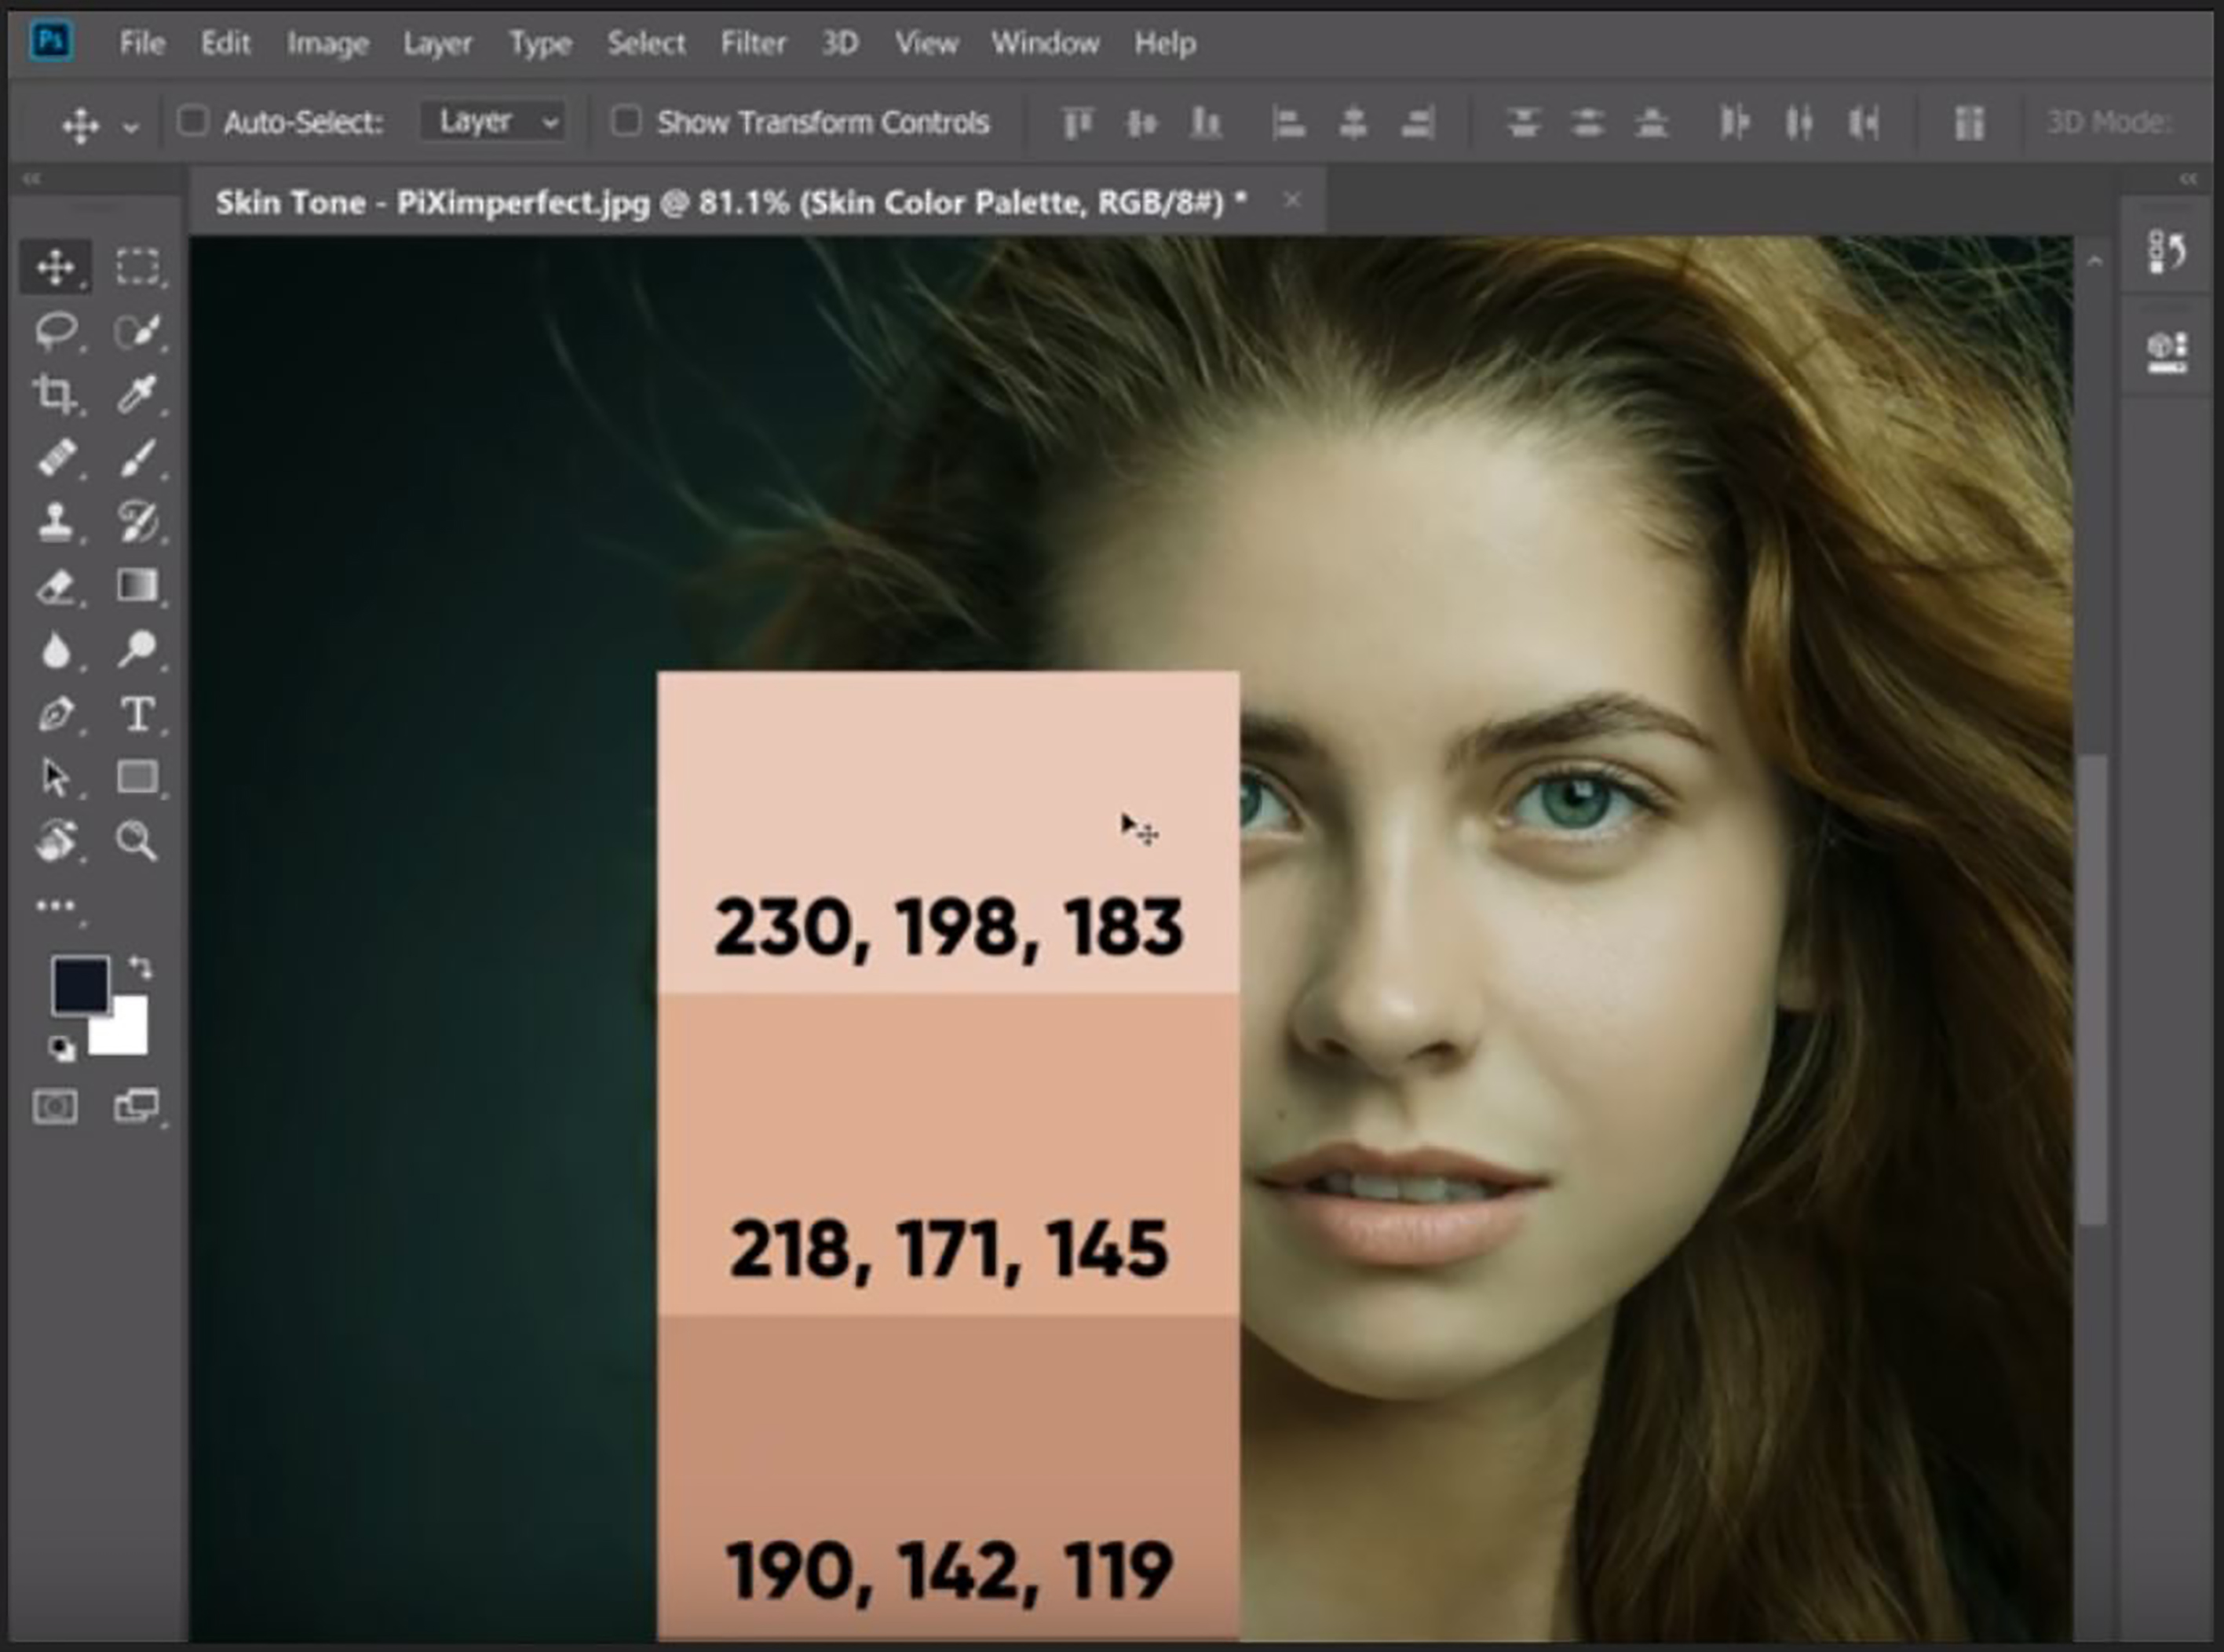
Then, pick and drop it over the image in the Photoshop file.
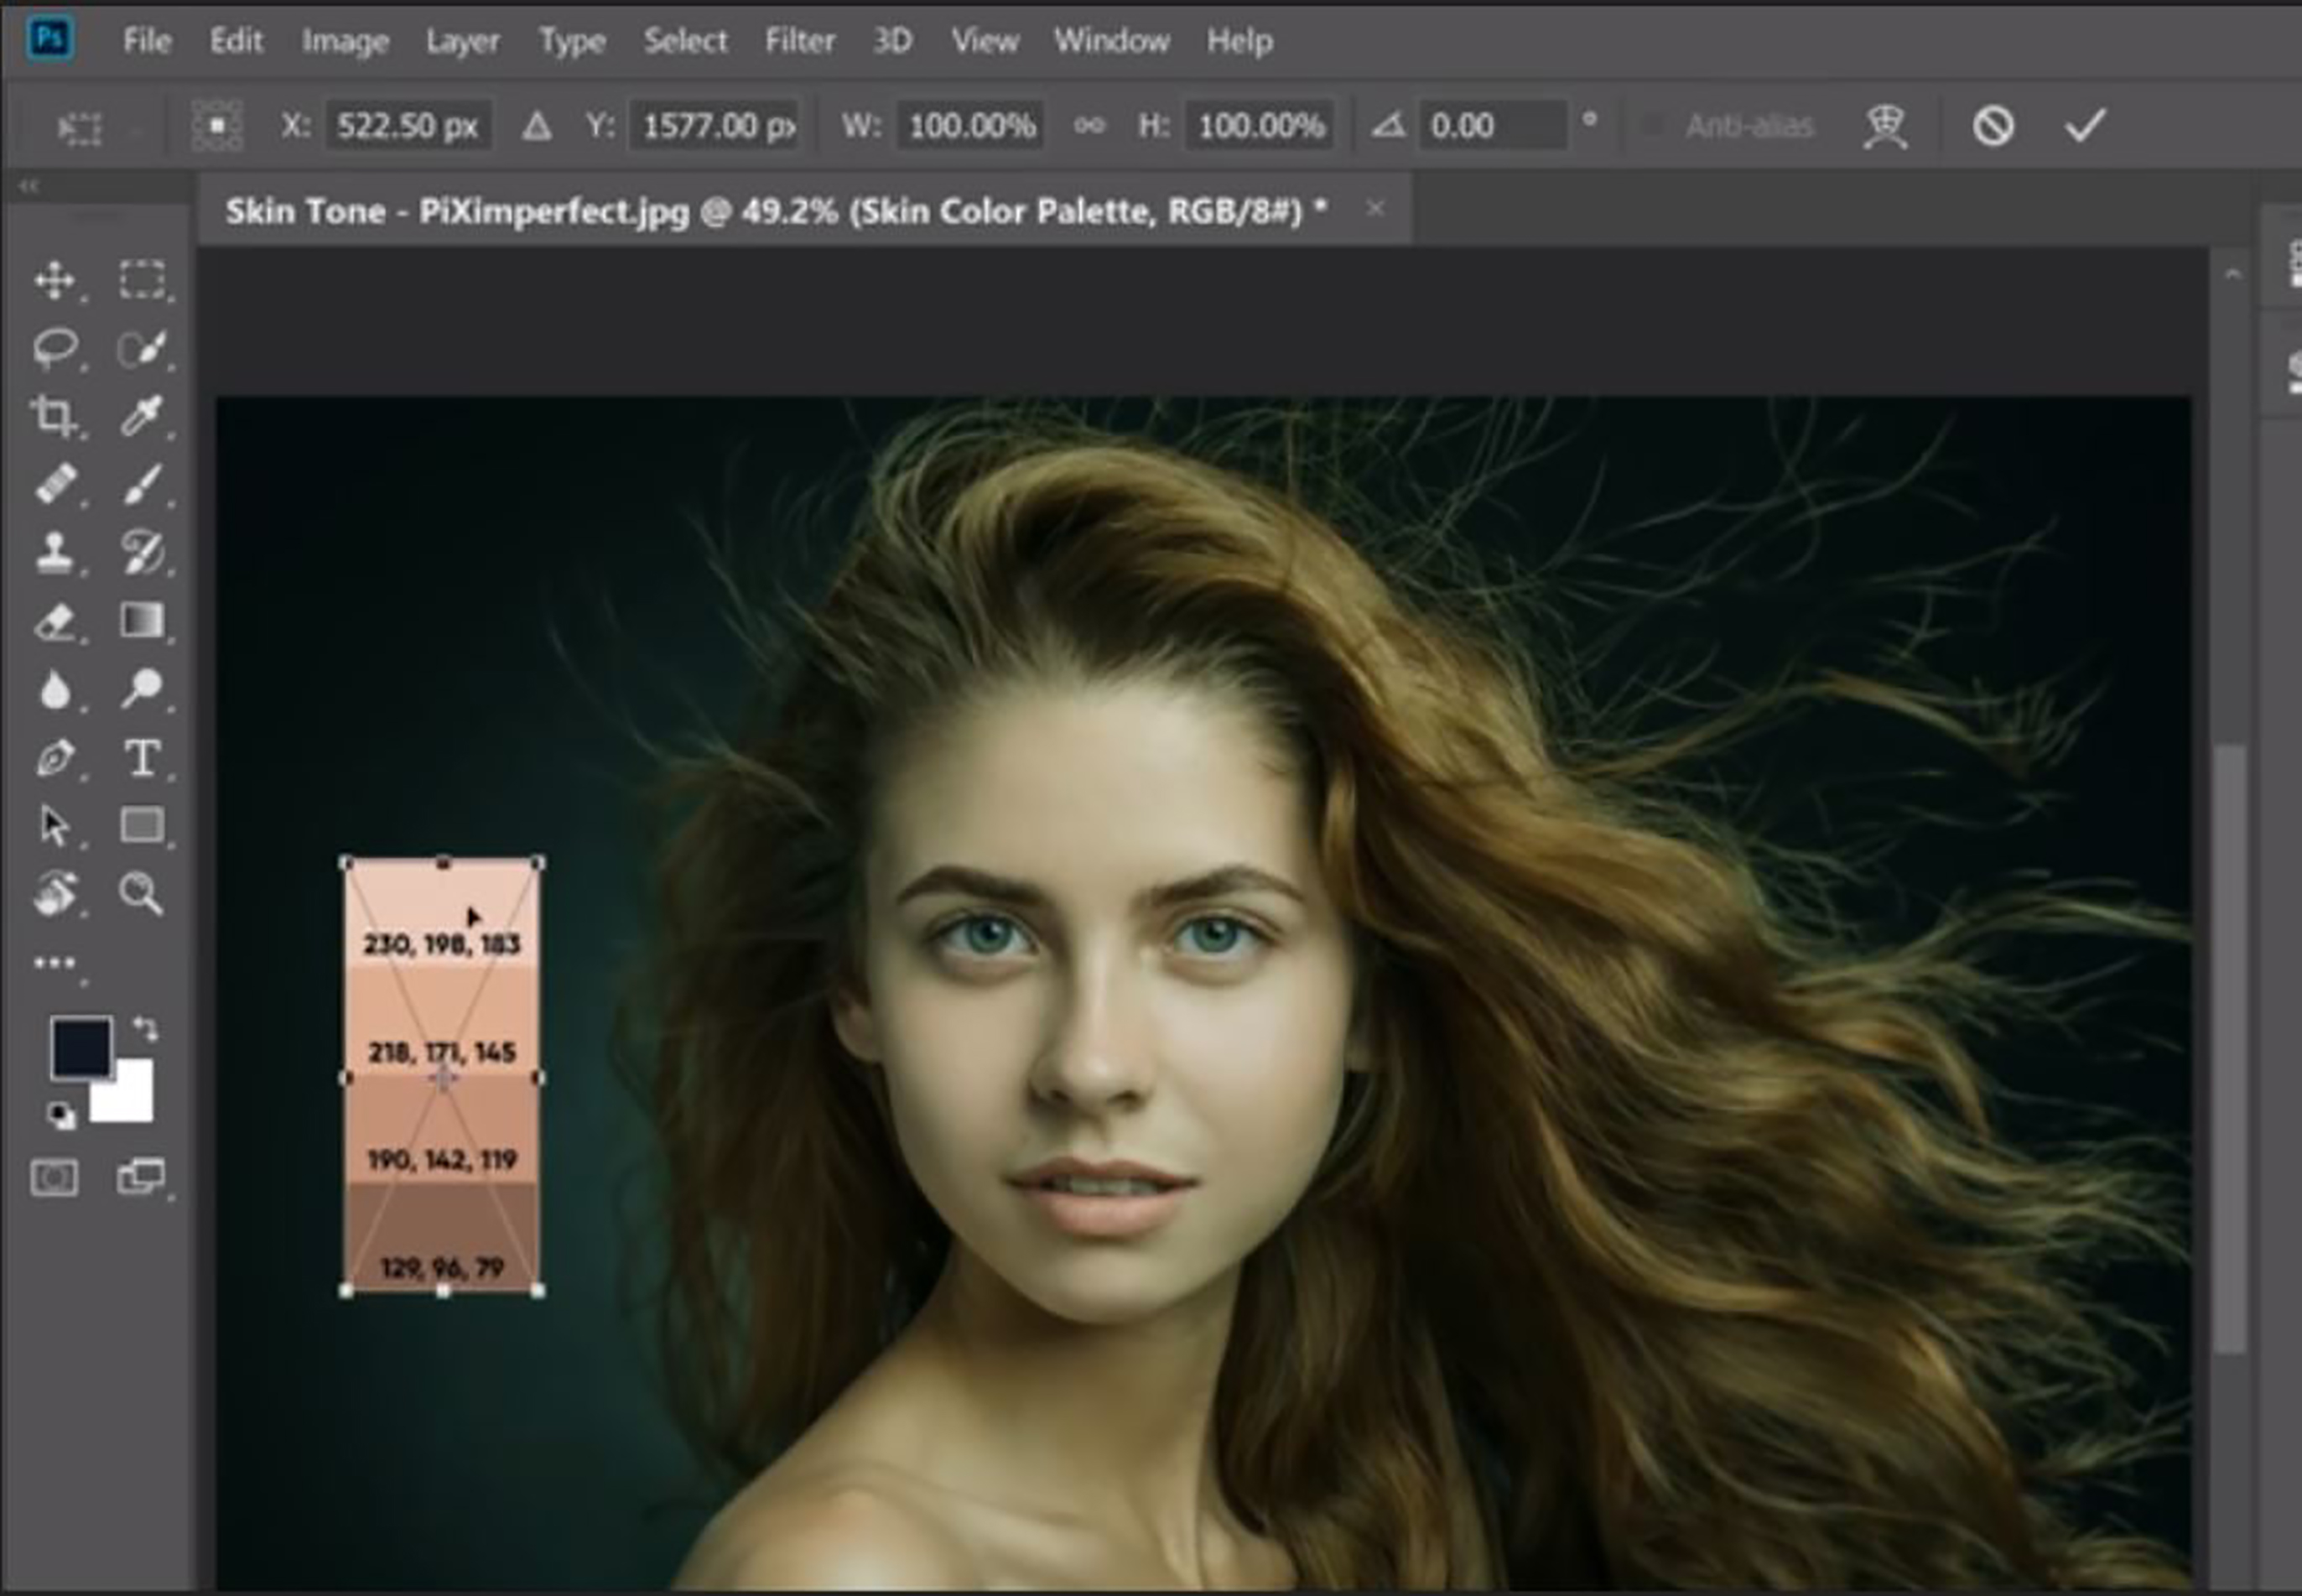
The numbers listed over each color are the RGB values. Consider which color would appropriately match the person in the photo.
Step 3:
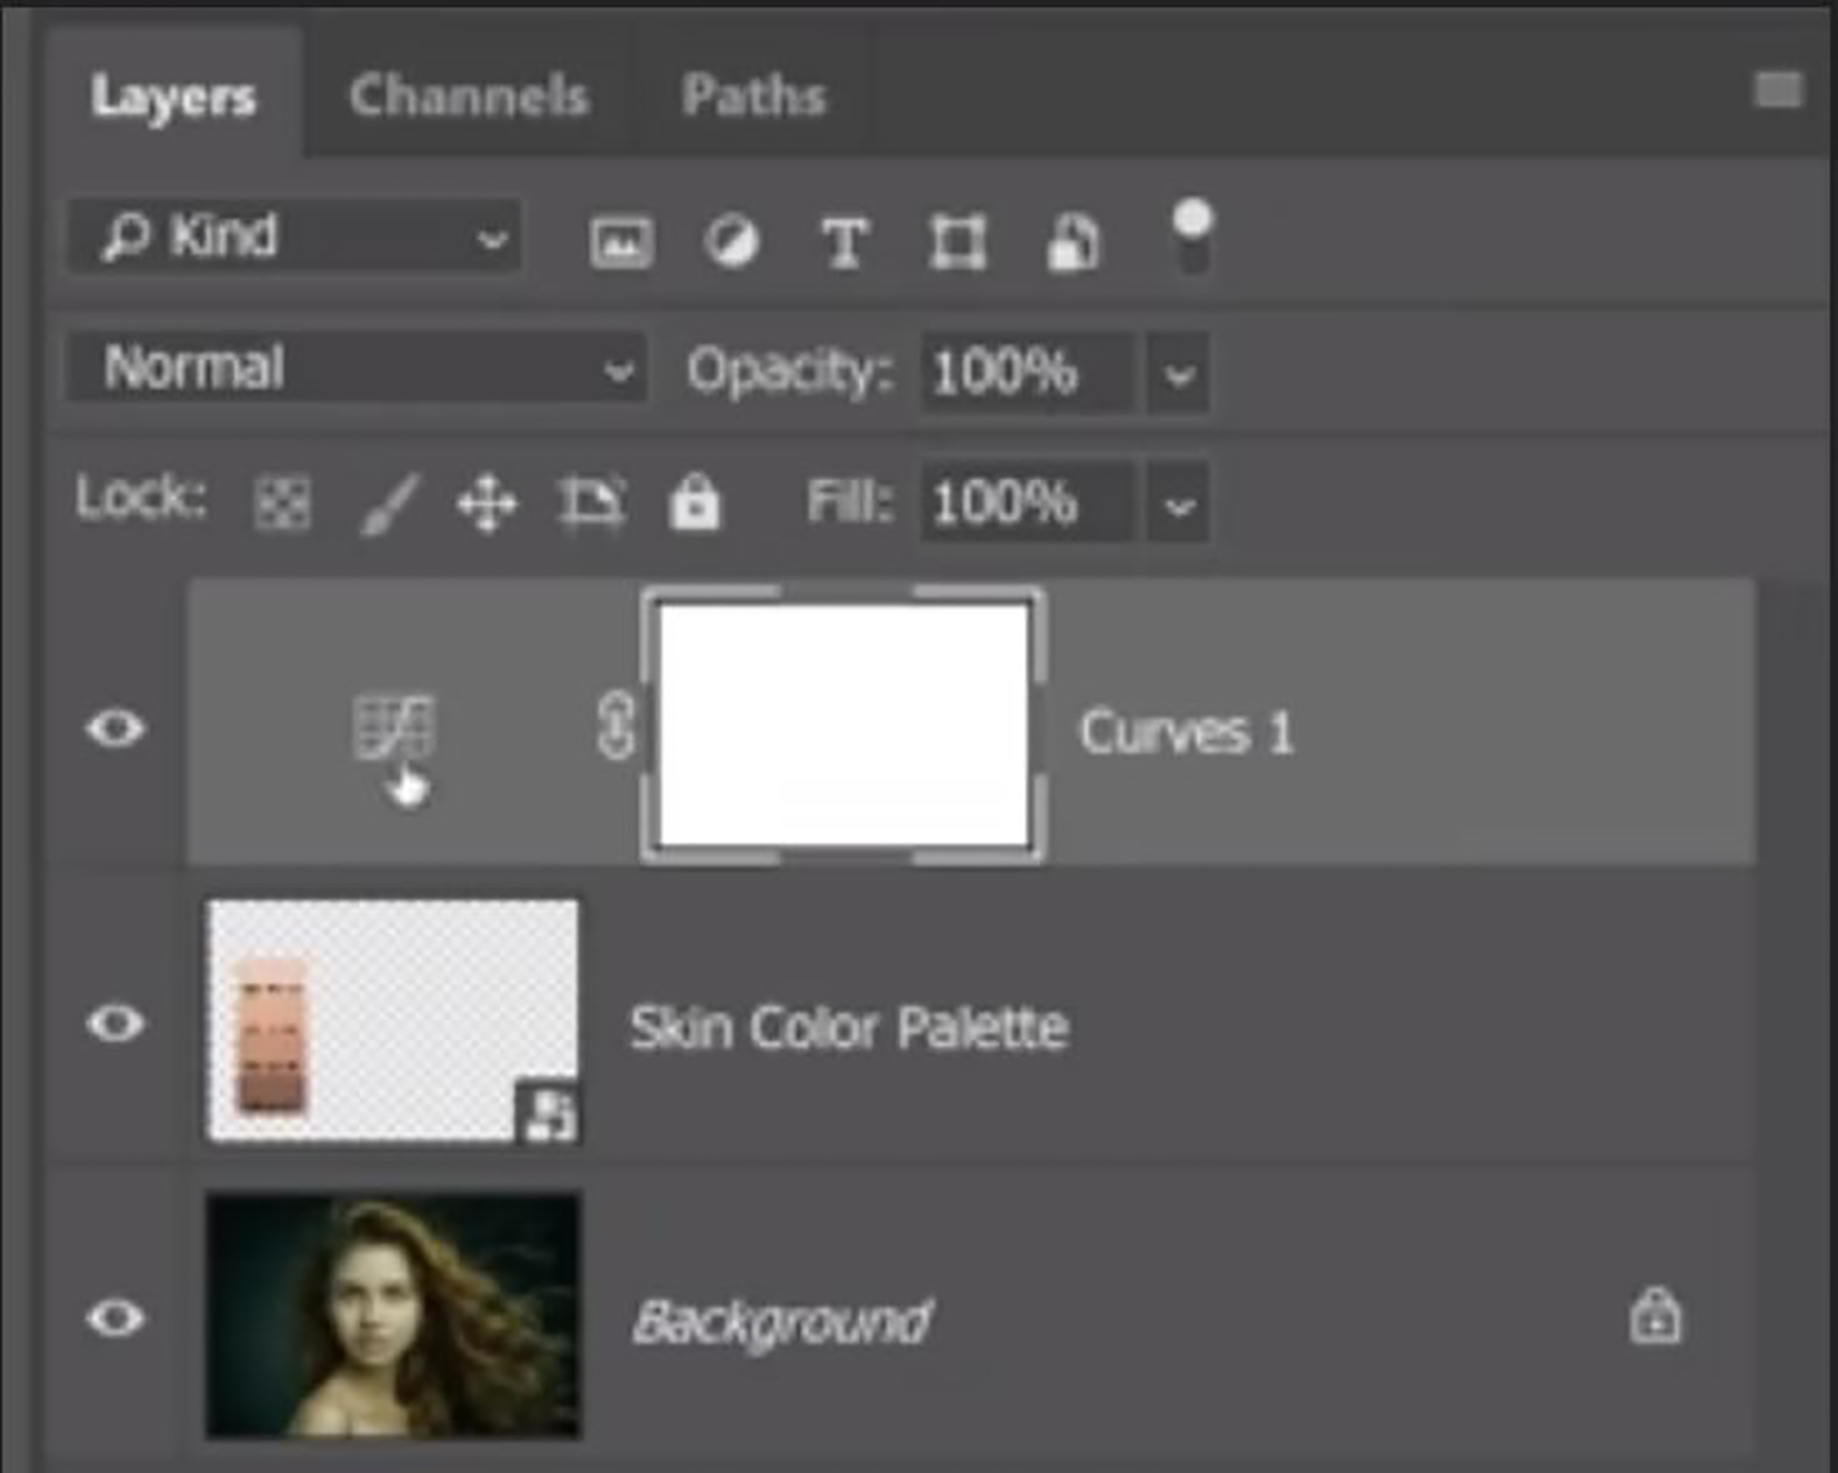
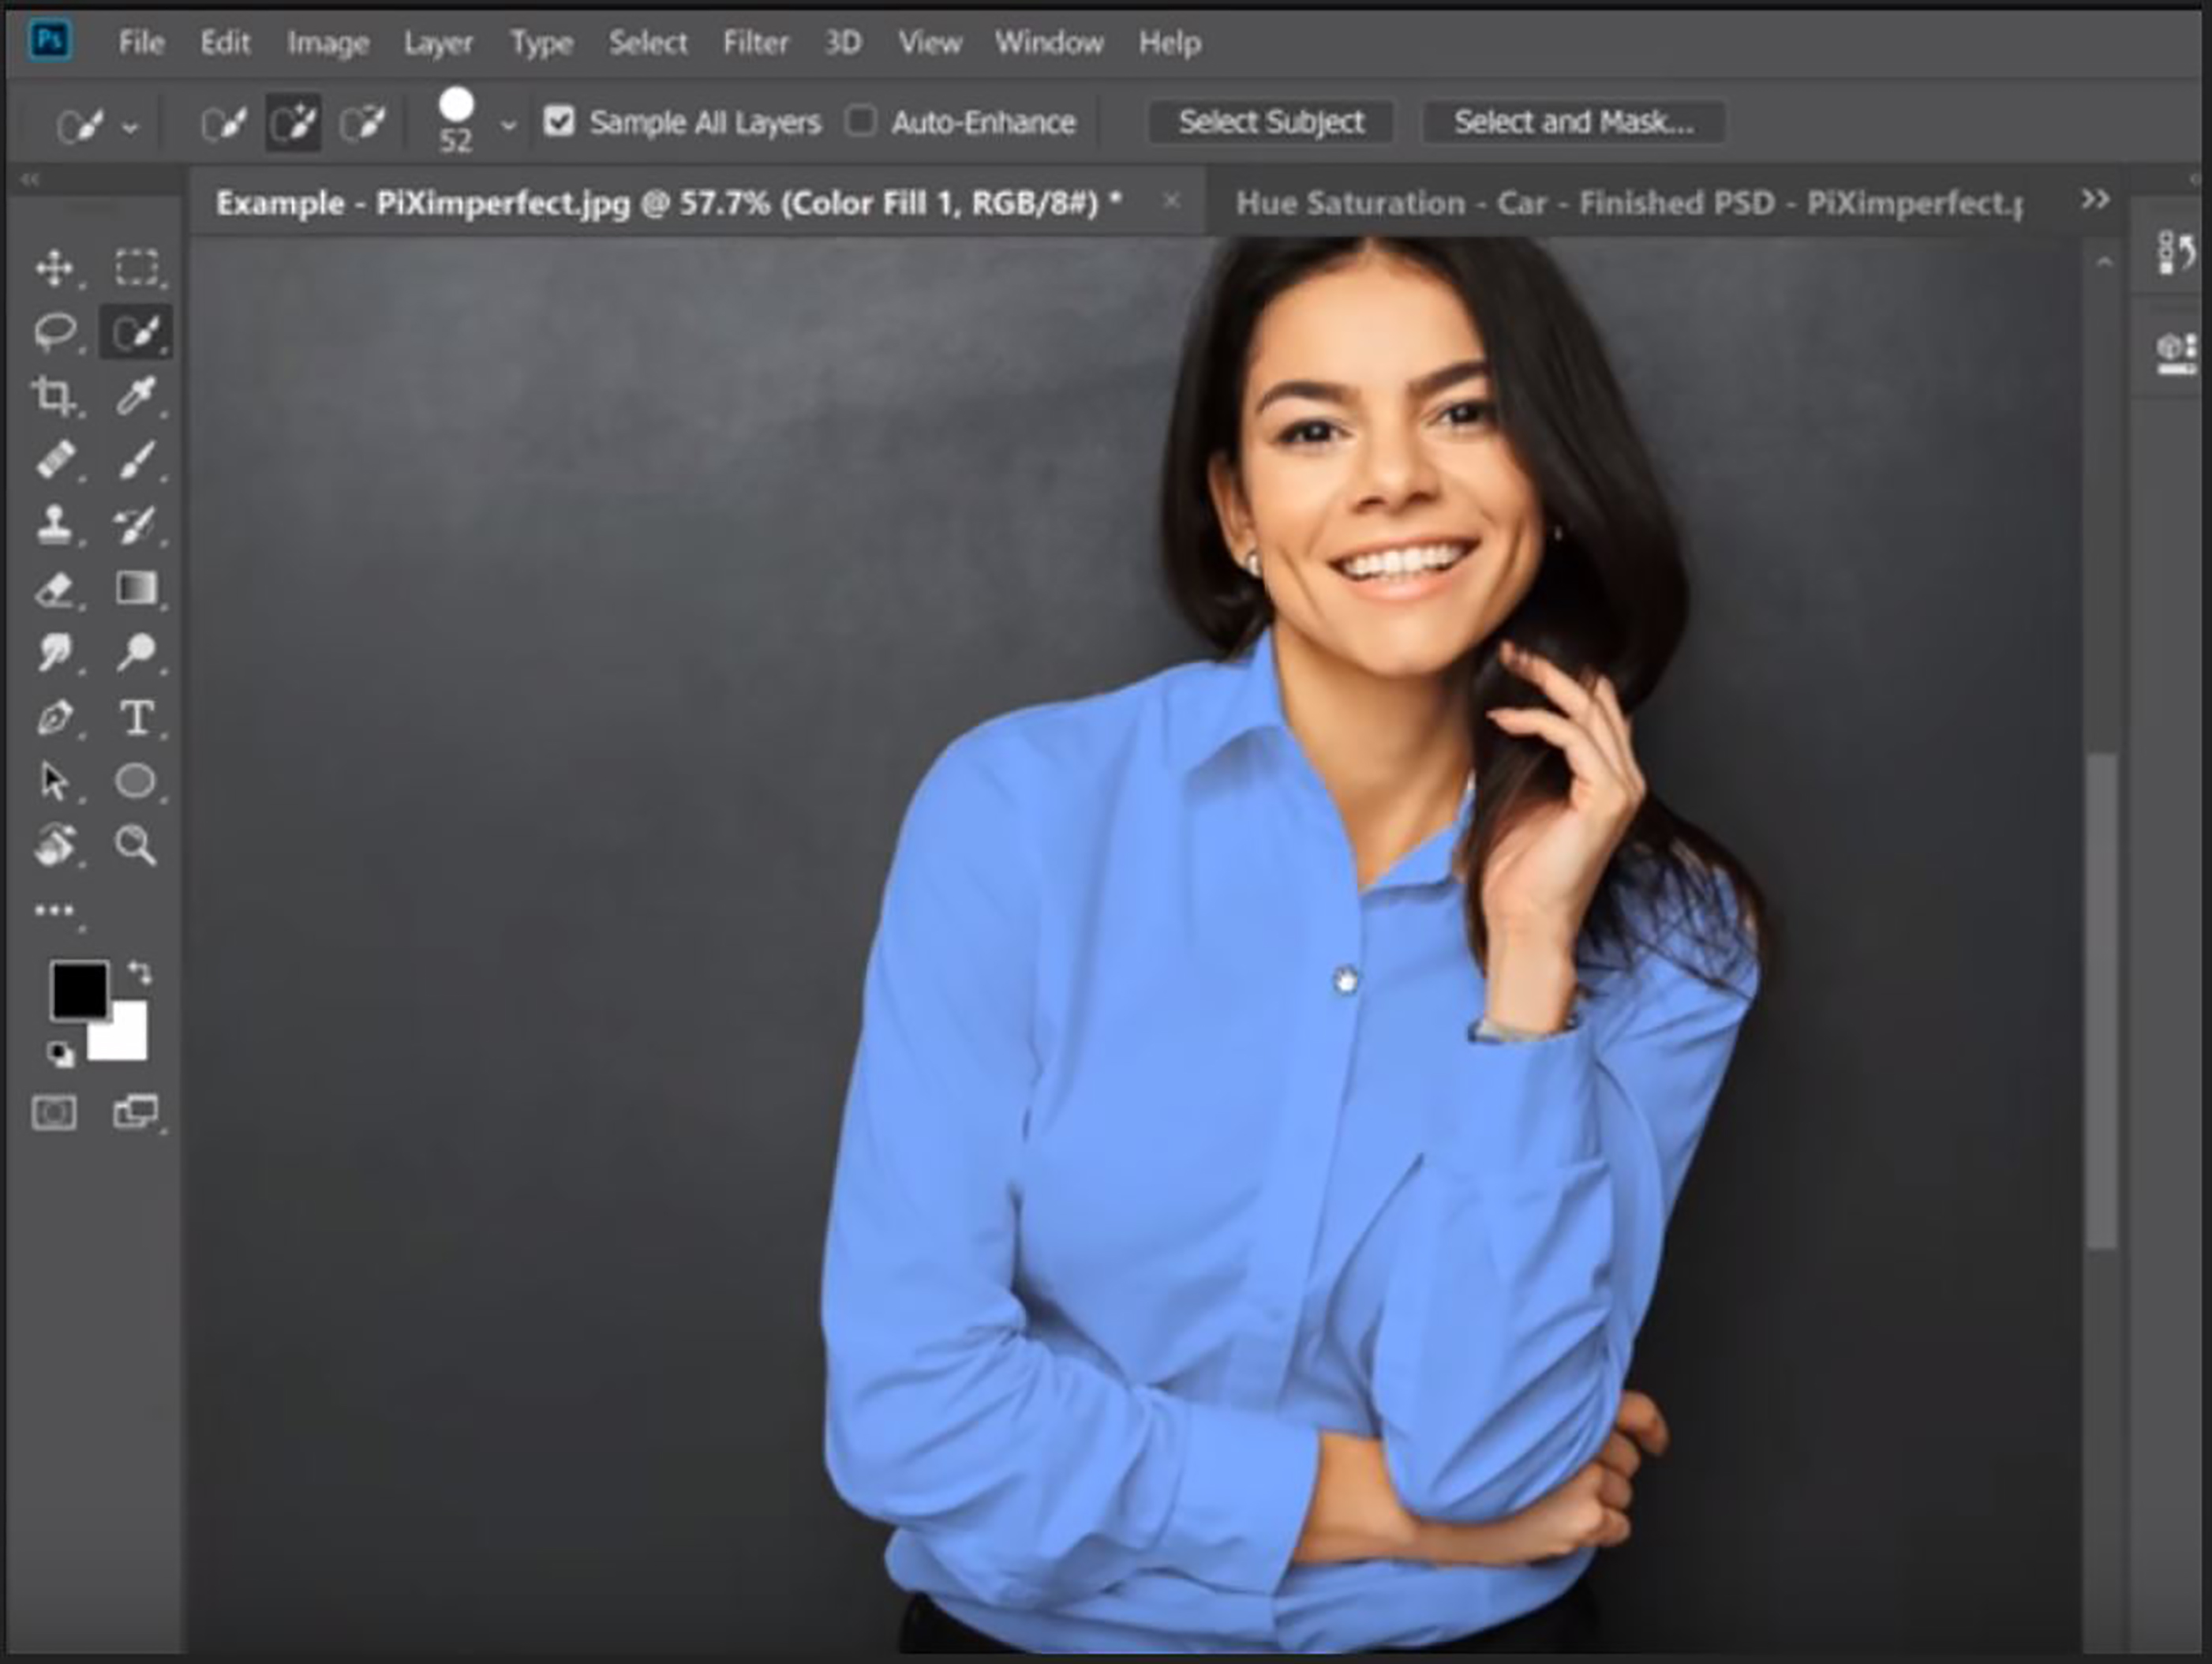
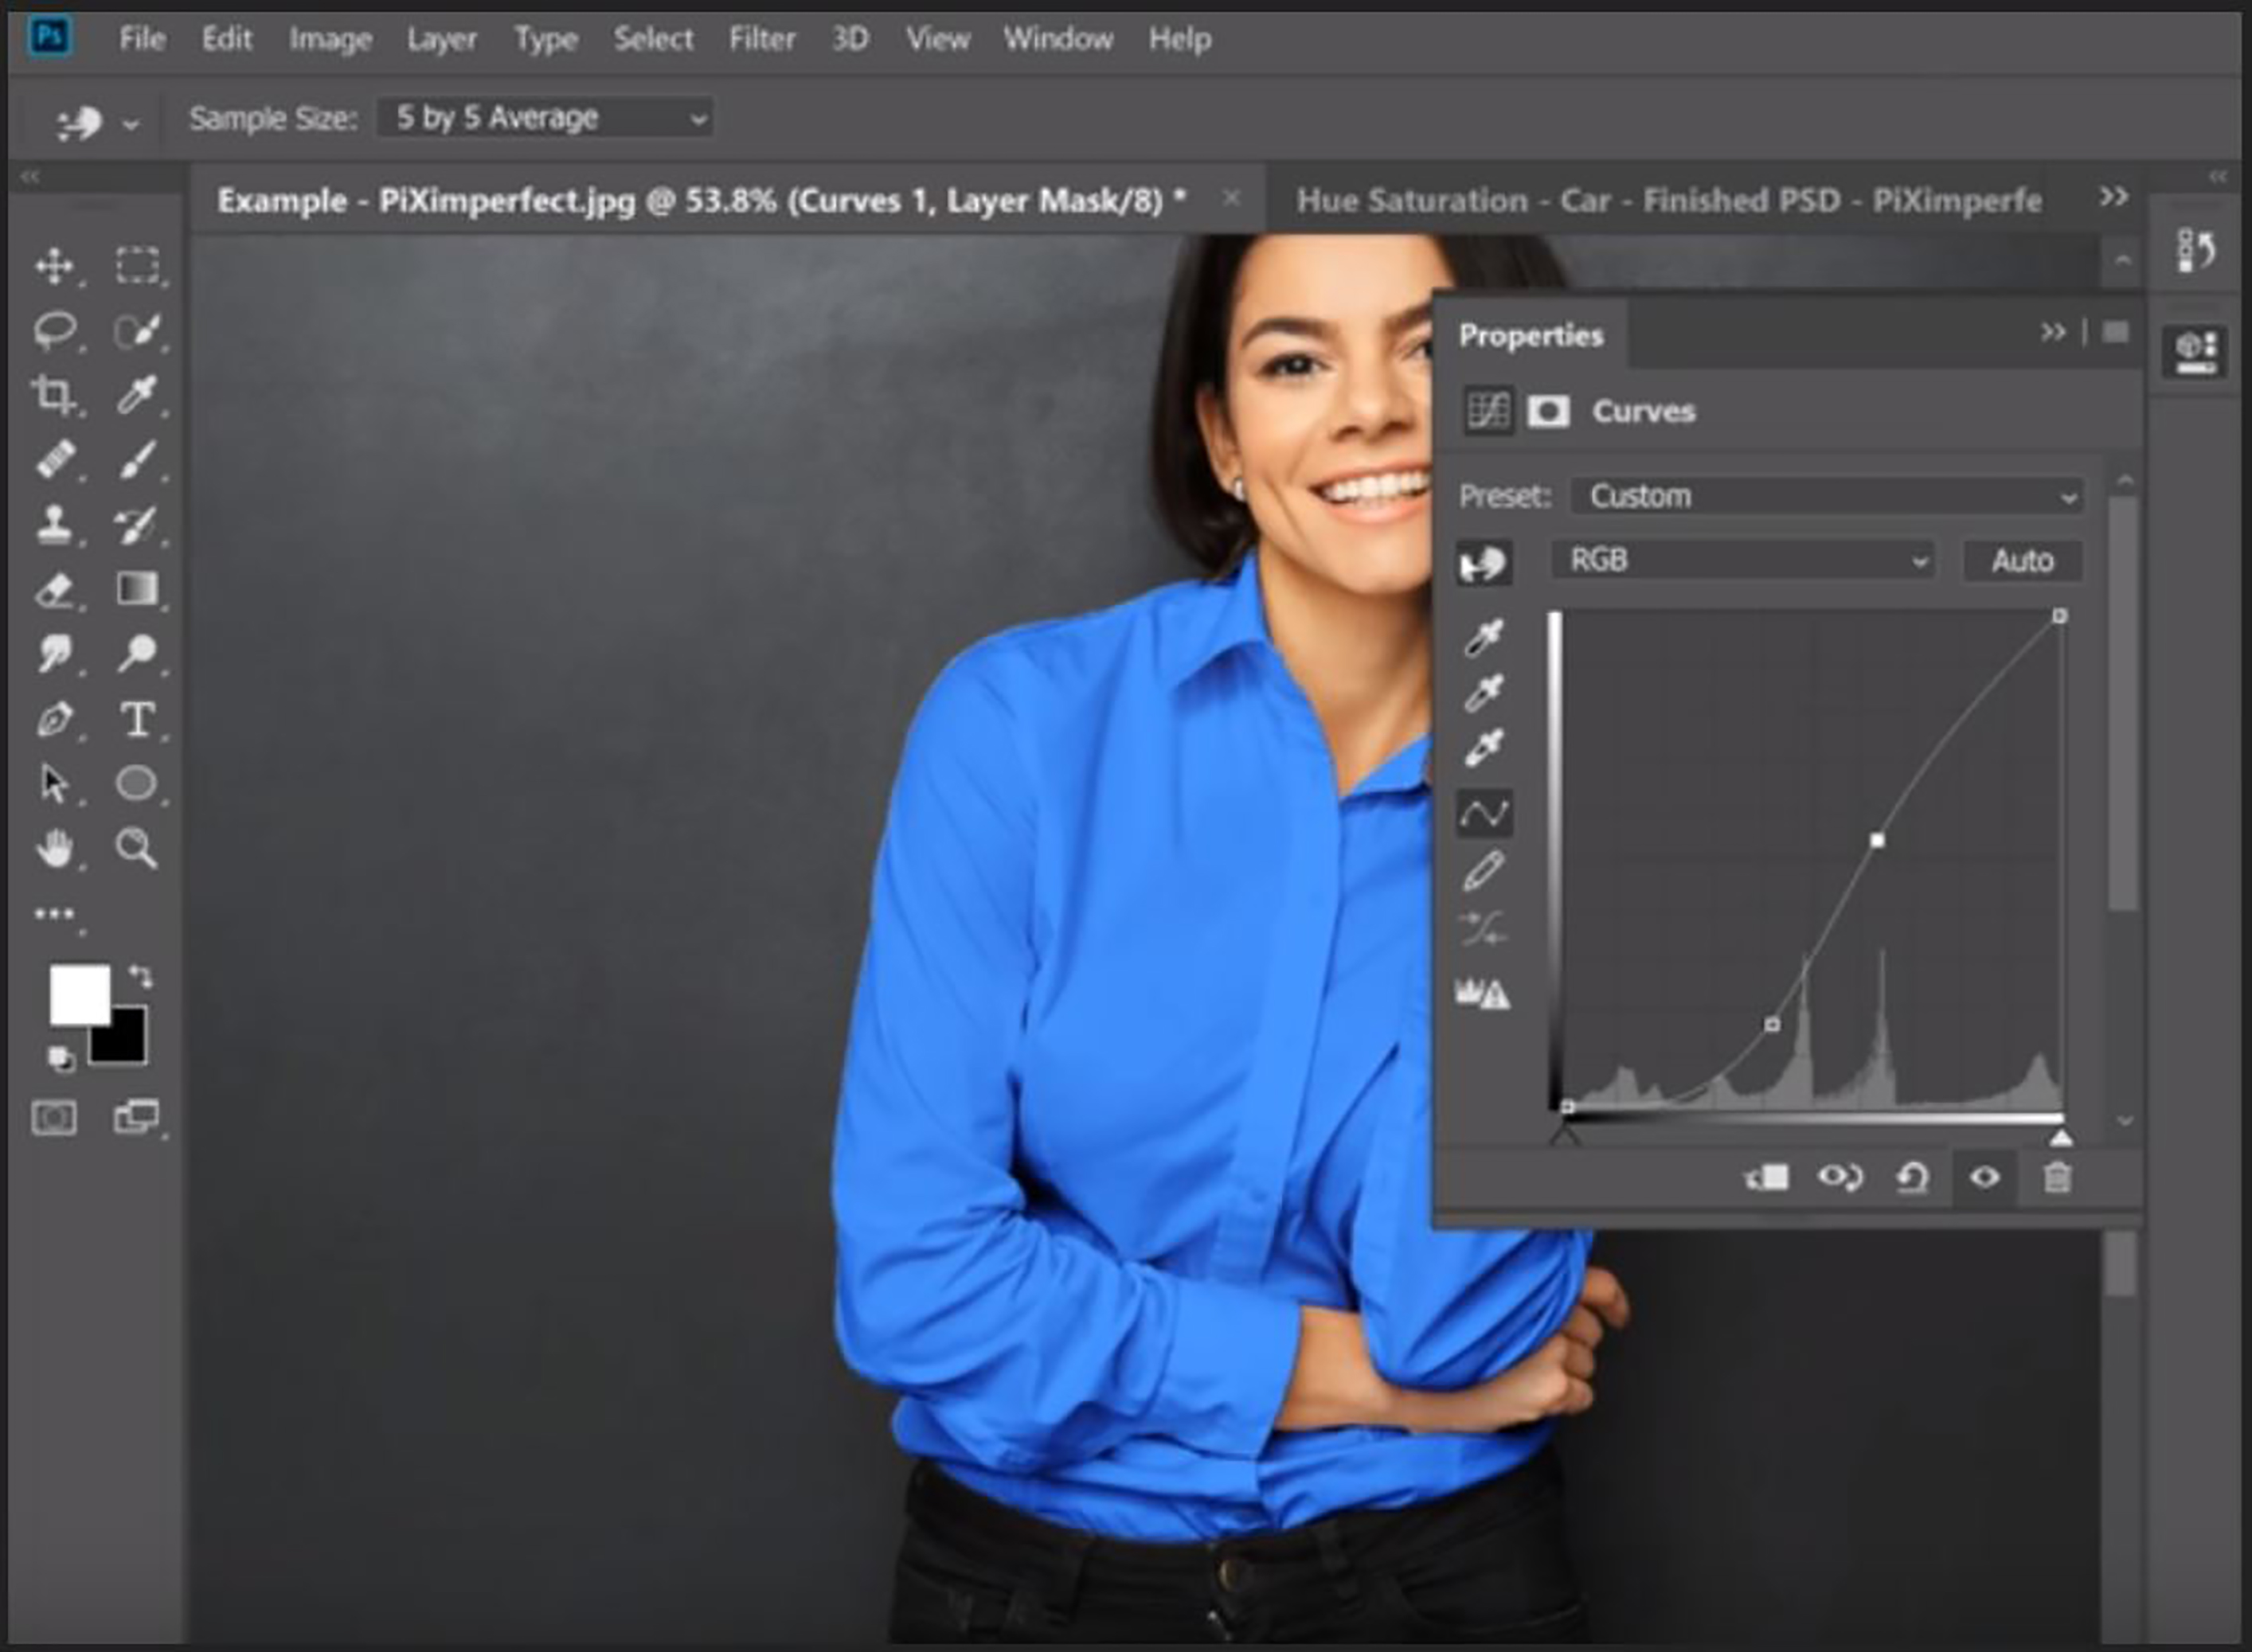
This step involves sampling the chosen skin tone. Select the ‘curves’ option under the ‘adjustment layer’ menu. Then, make sure the symbol is selected in the ‘layer panel’.
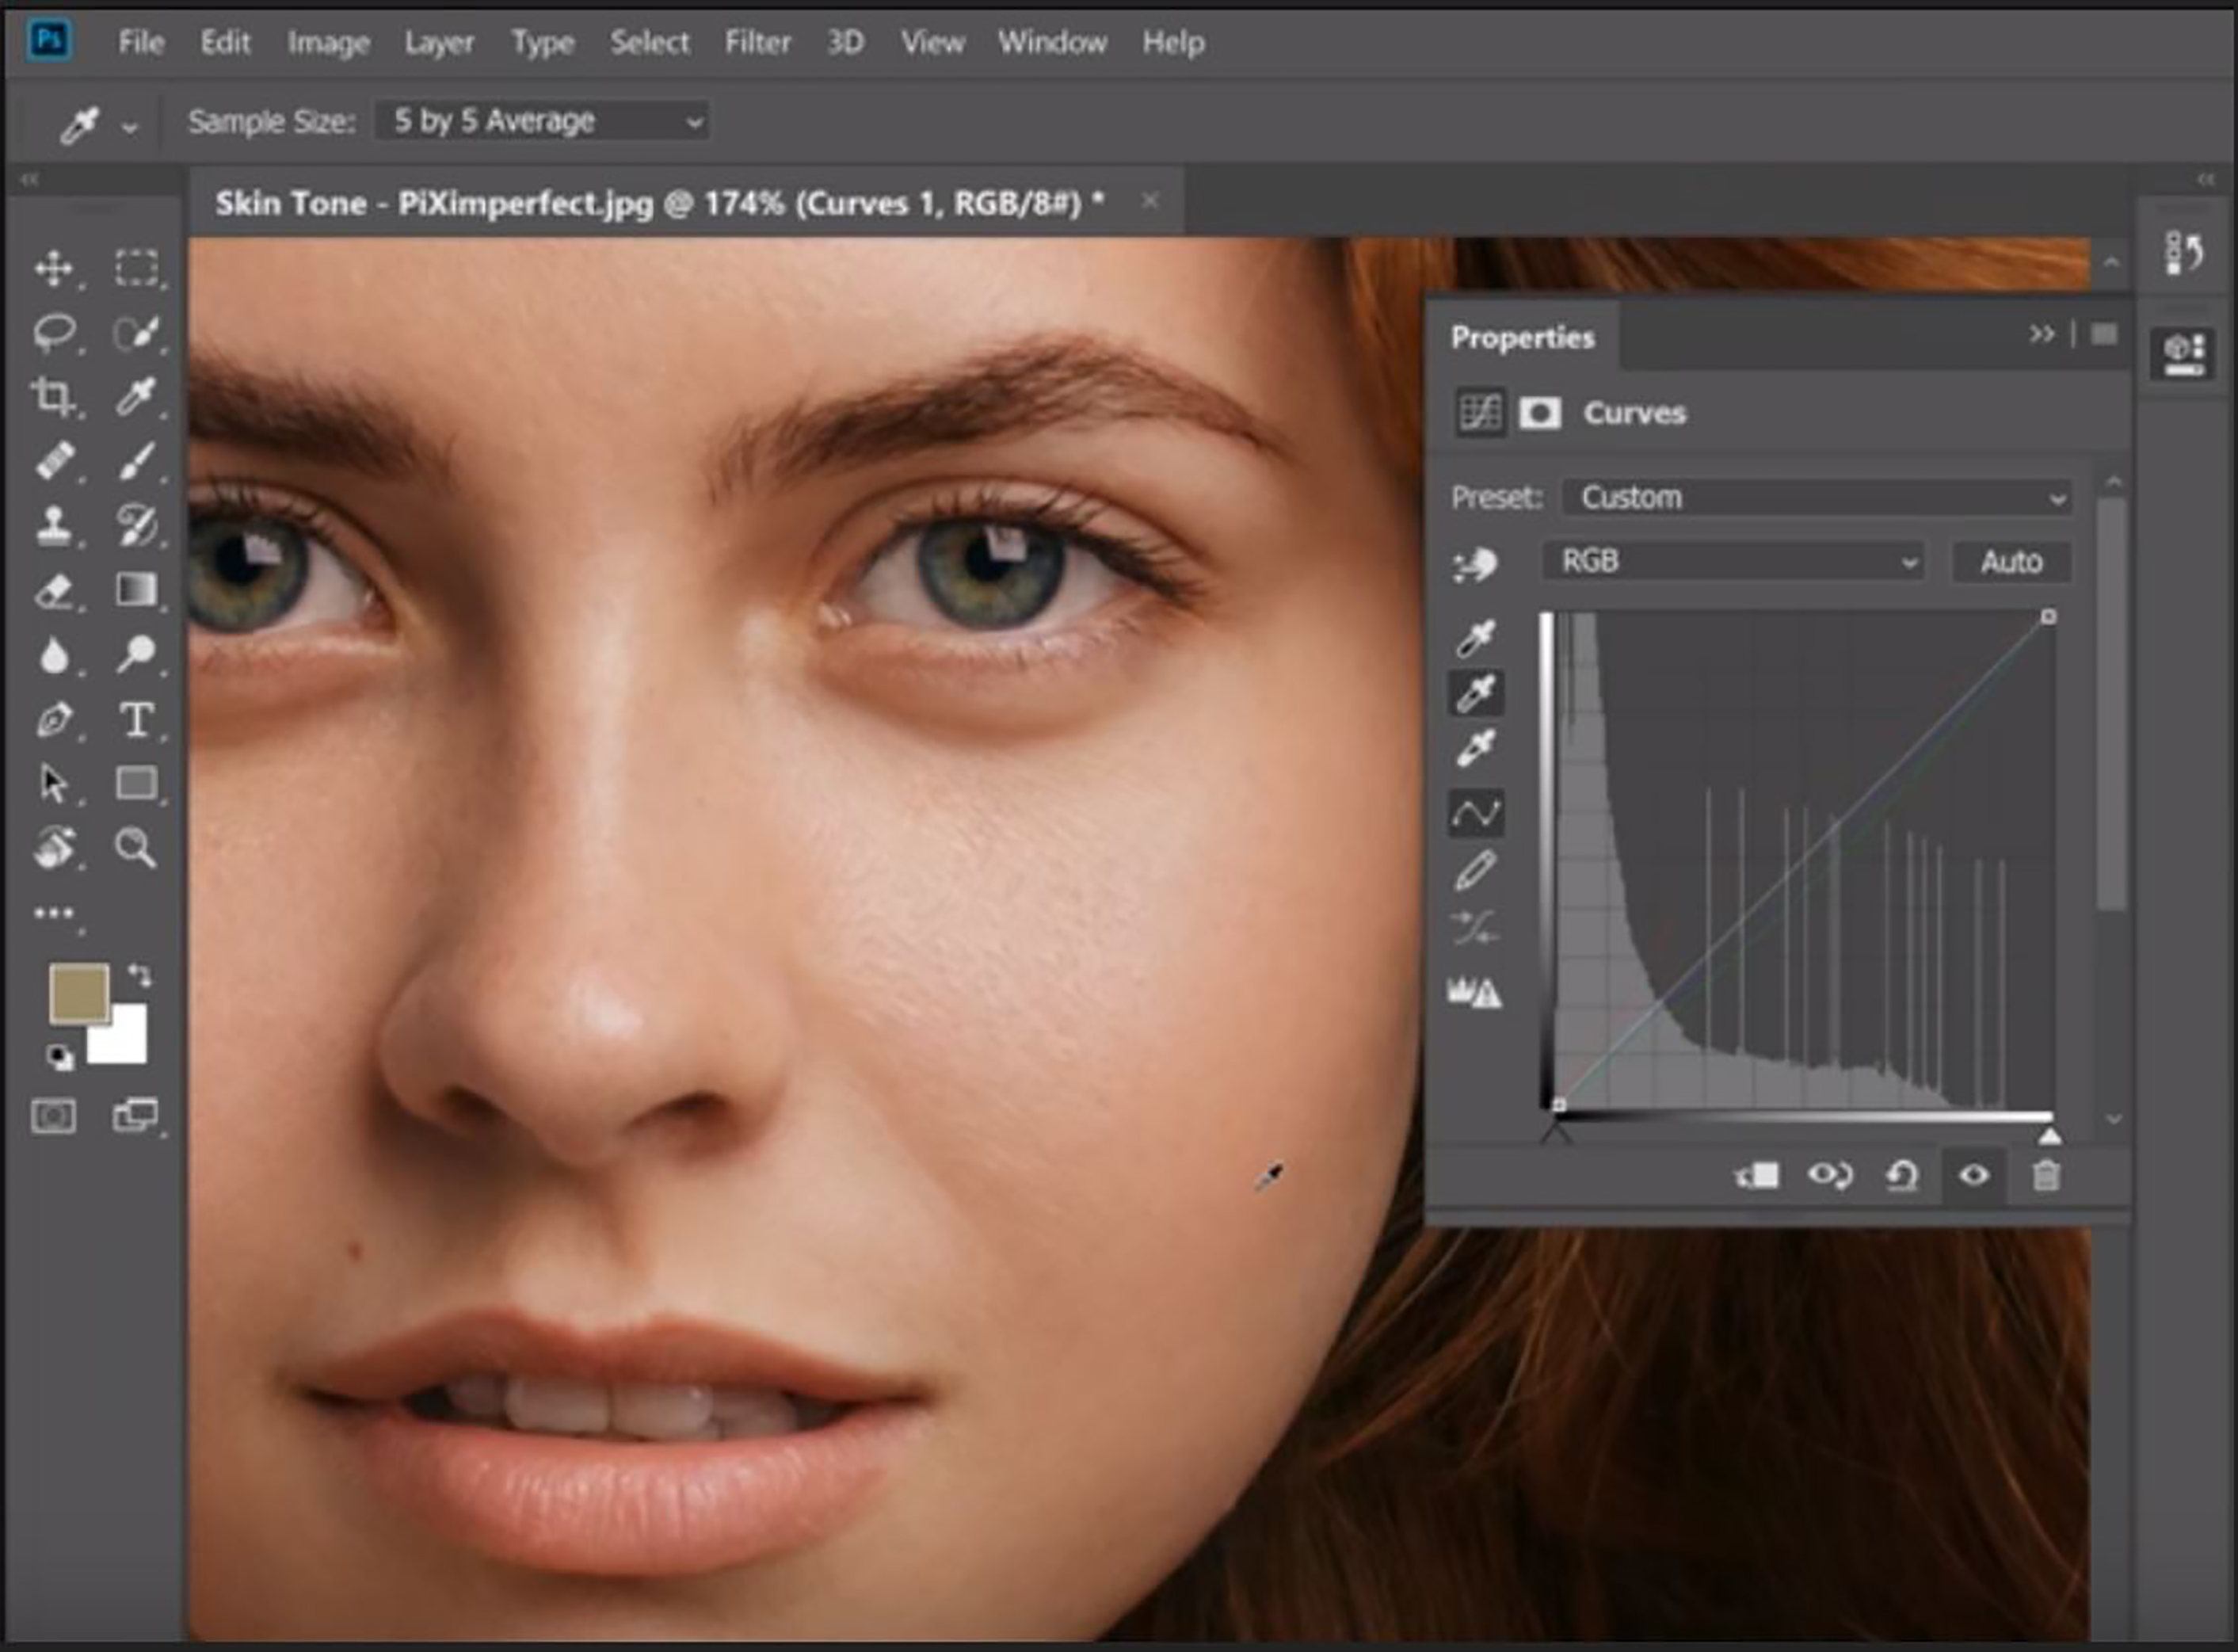
Next, double click on the middle eyedropper tool and sample the chosen color.
Step 4:
The final step is to click the eyedropper over an appropriate region on the face to change the skin tone.
It is advisable to ensure that the hue level is reduced before applying the skin tone.
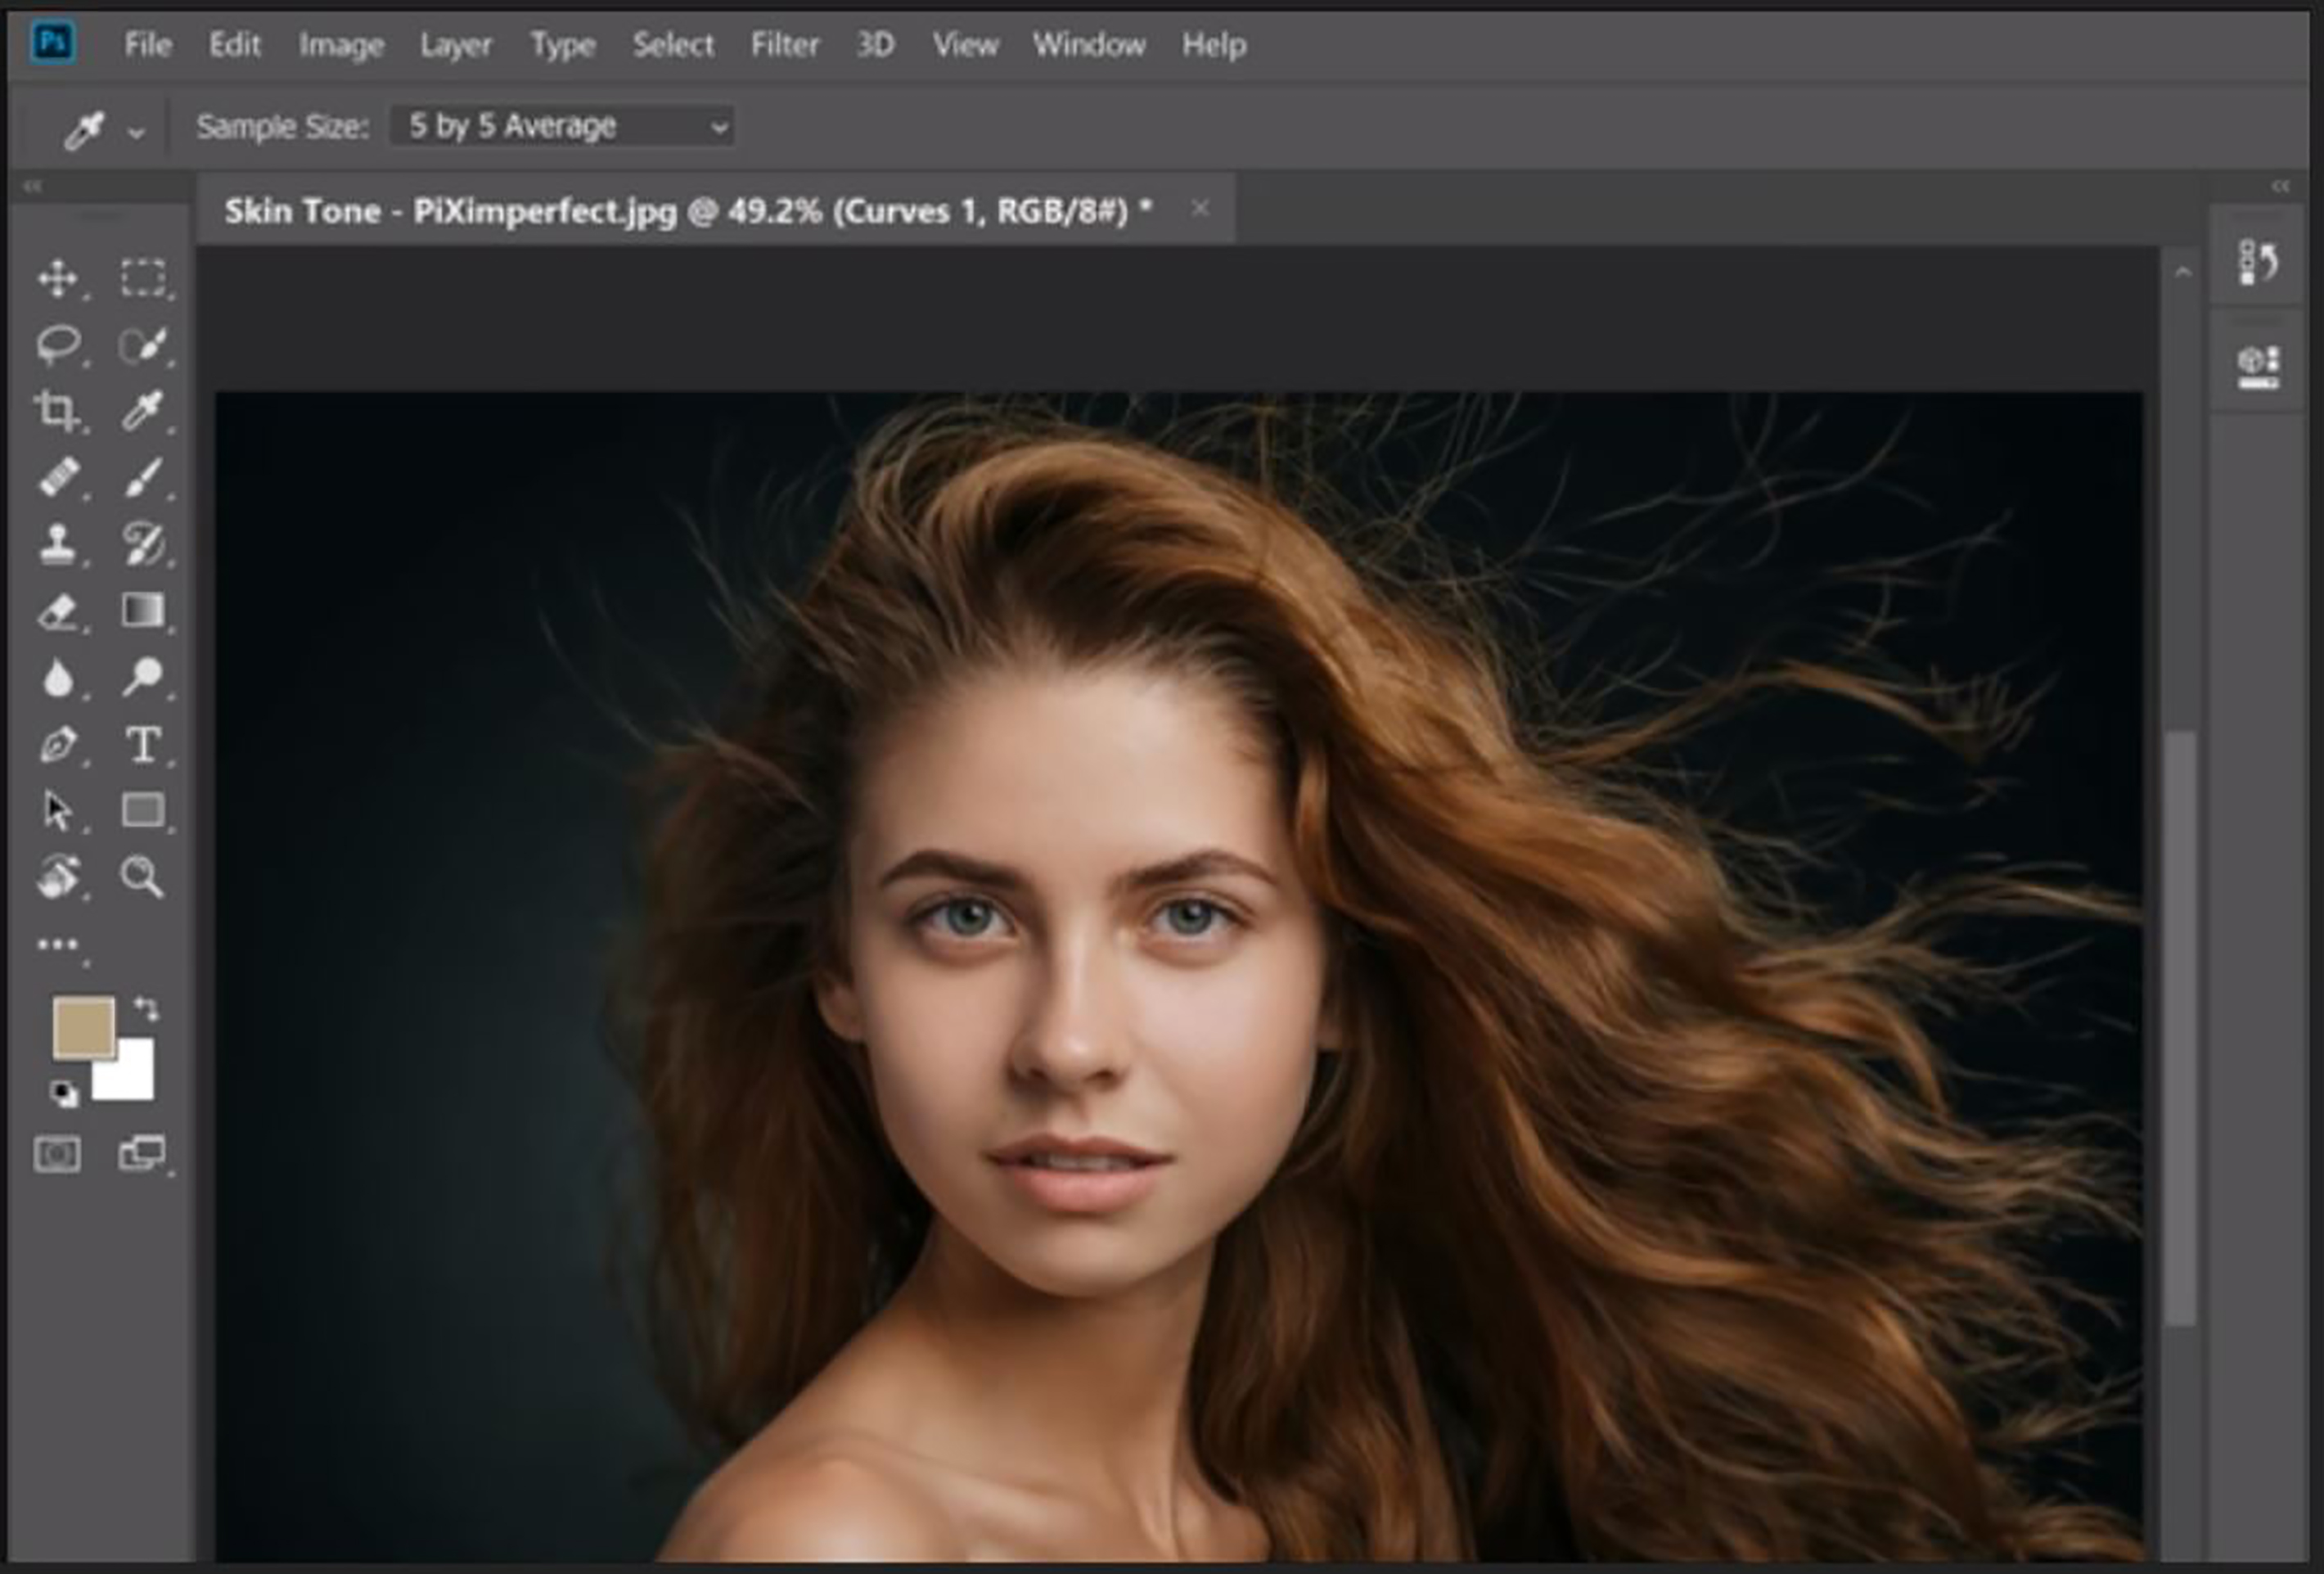
This is one of the simplest methods to change the skin tone using a predefined color palette. As it is very well known that there is no such thing called a perfect skin tone, you could always try building your own skin tone palette.
Trick 2: Whiten Teeth In Two Steps
If you do not want to reveal your cheese-toned teeth to your friends on social media and the only glitch on your beautiful portrait is the yellowish teeth, here is a simple trick to solve the problem. Not only yellow teeth, even if you had not brushed your algae coated teeth for years, you could daringly pose grinning to the photos. Because Photoshop could coat your teeth, in a few minutes, like it is shown in toothpaste advertisements.
Although there are many ways to turn your teeth white using Photoshop, they would make it look like a fake. Hence, the following steps would describe the appropriate procedure to coat a layer of white that looks natural.
Step 1:
The first step is the selection of the teeth. Initially, a duplicate layer is created and it is selected.

Then, click the ‘magic wand’ tool to select the required region.
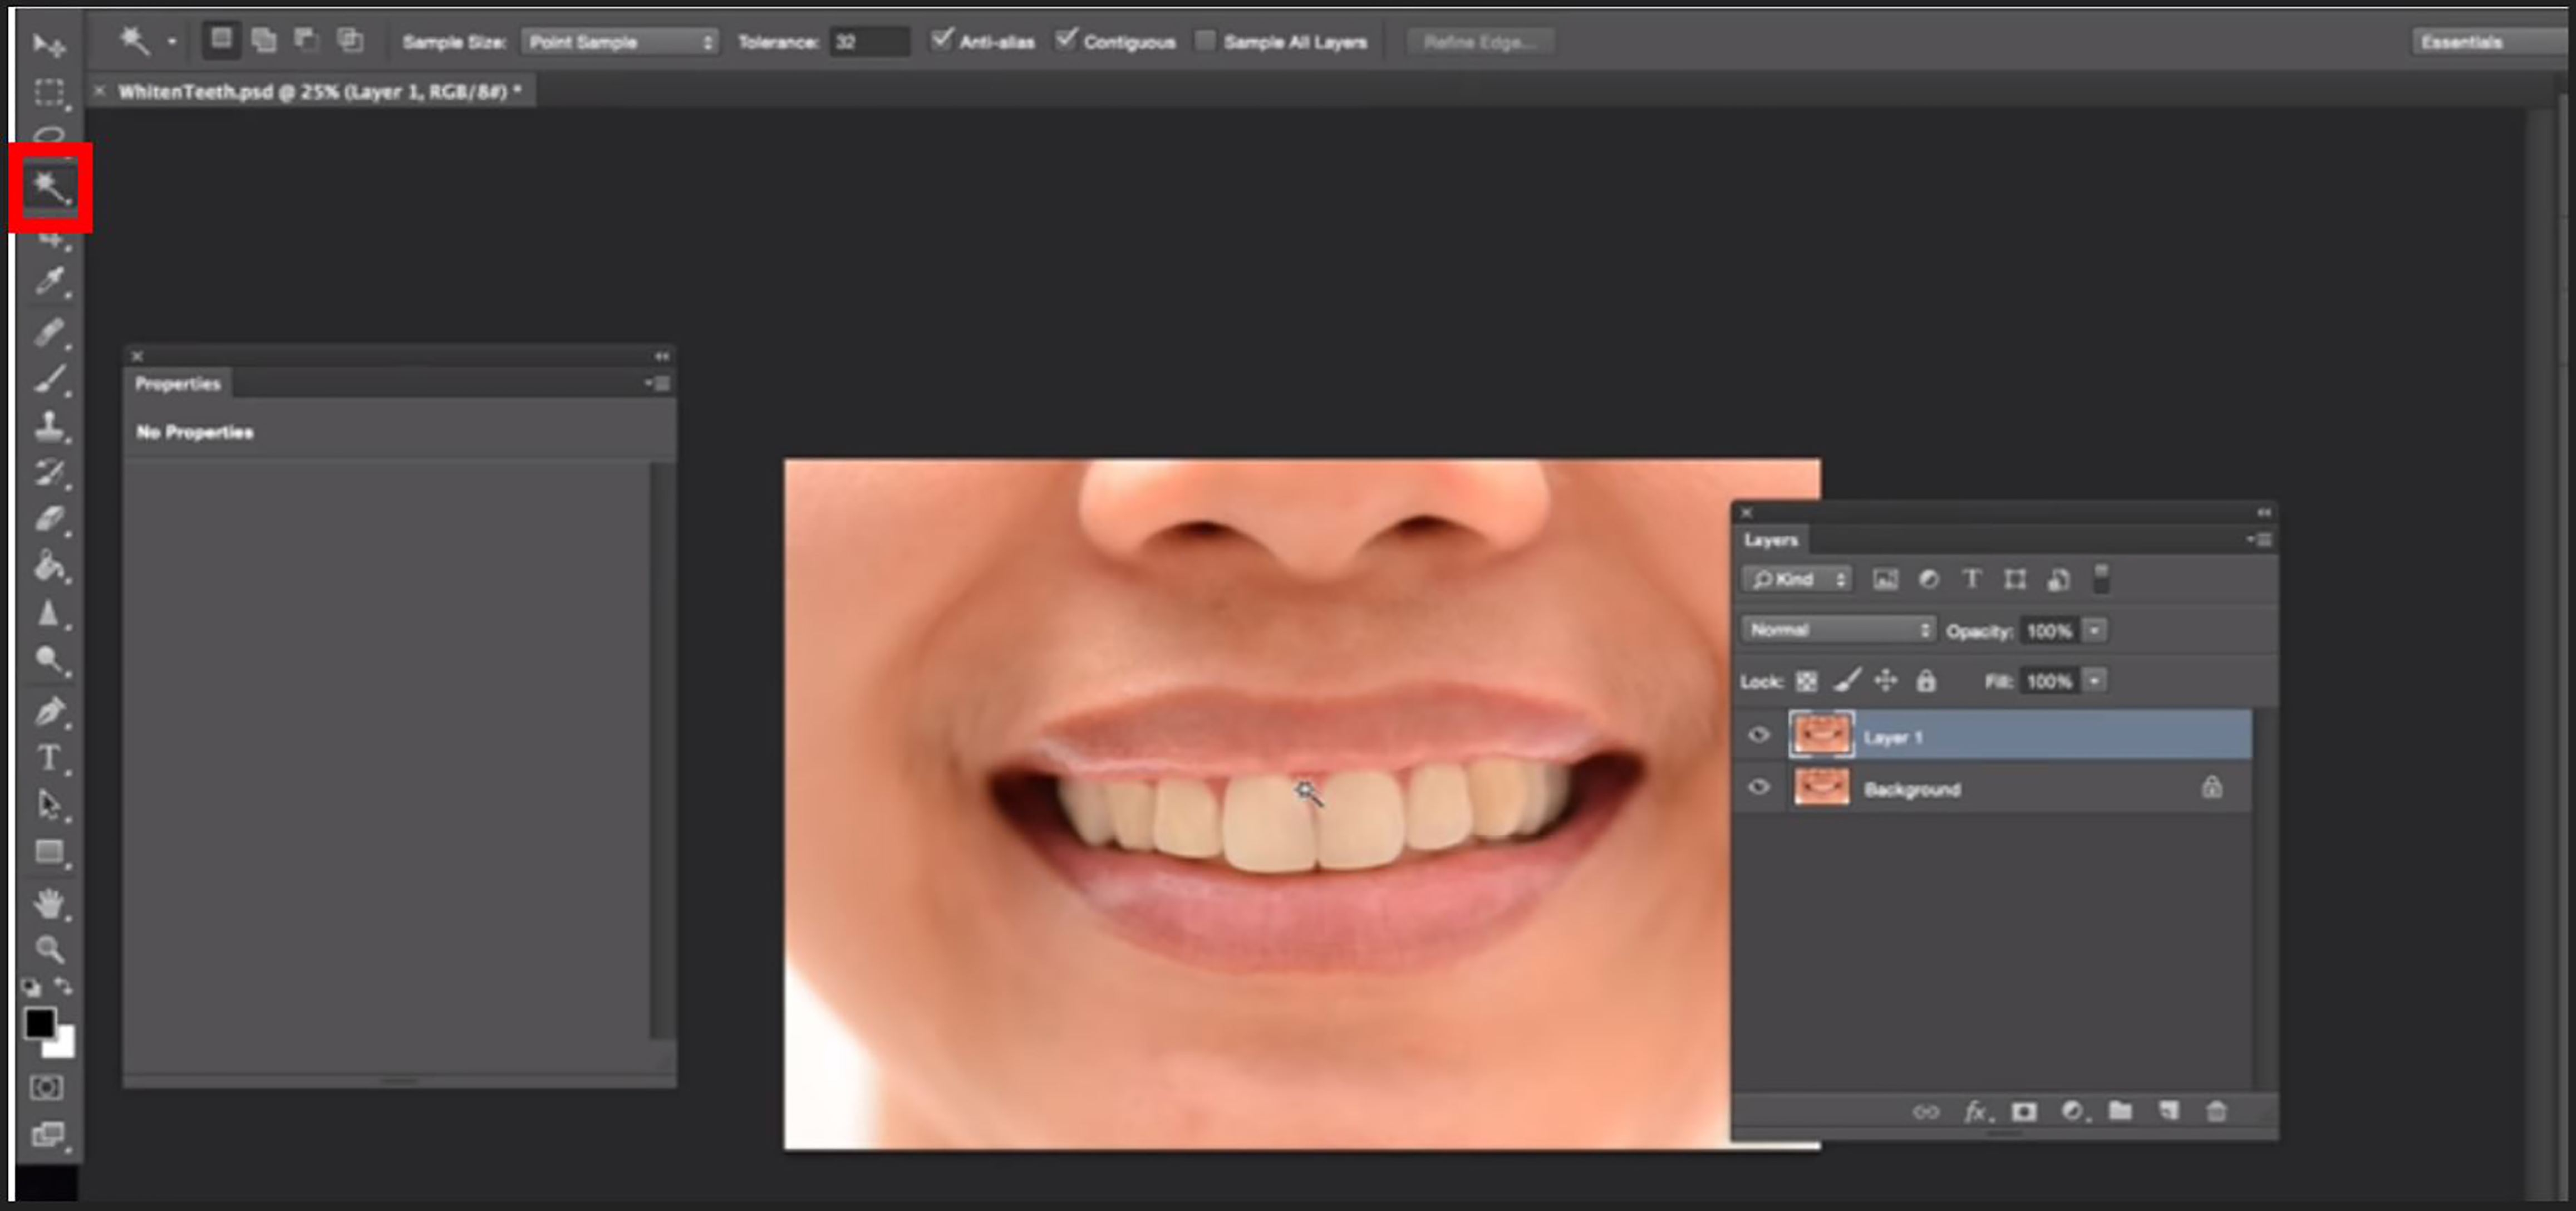
If the required region is not completely selected, hold the shift button and click to add more.

Sometimes, the ‘magic wand’ tool would not make a perfect selection. In that case, create a quick mask for your selection.
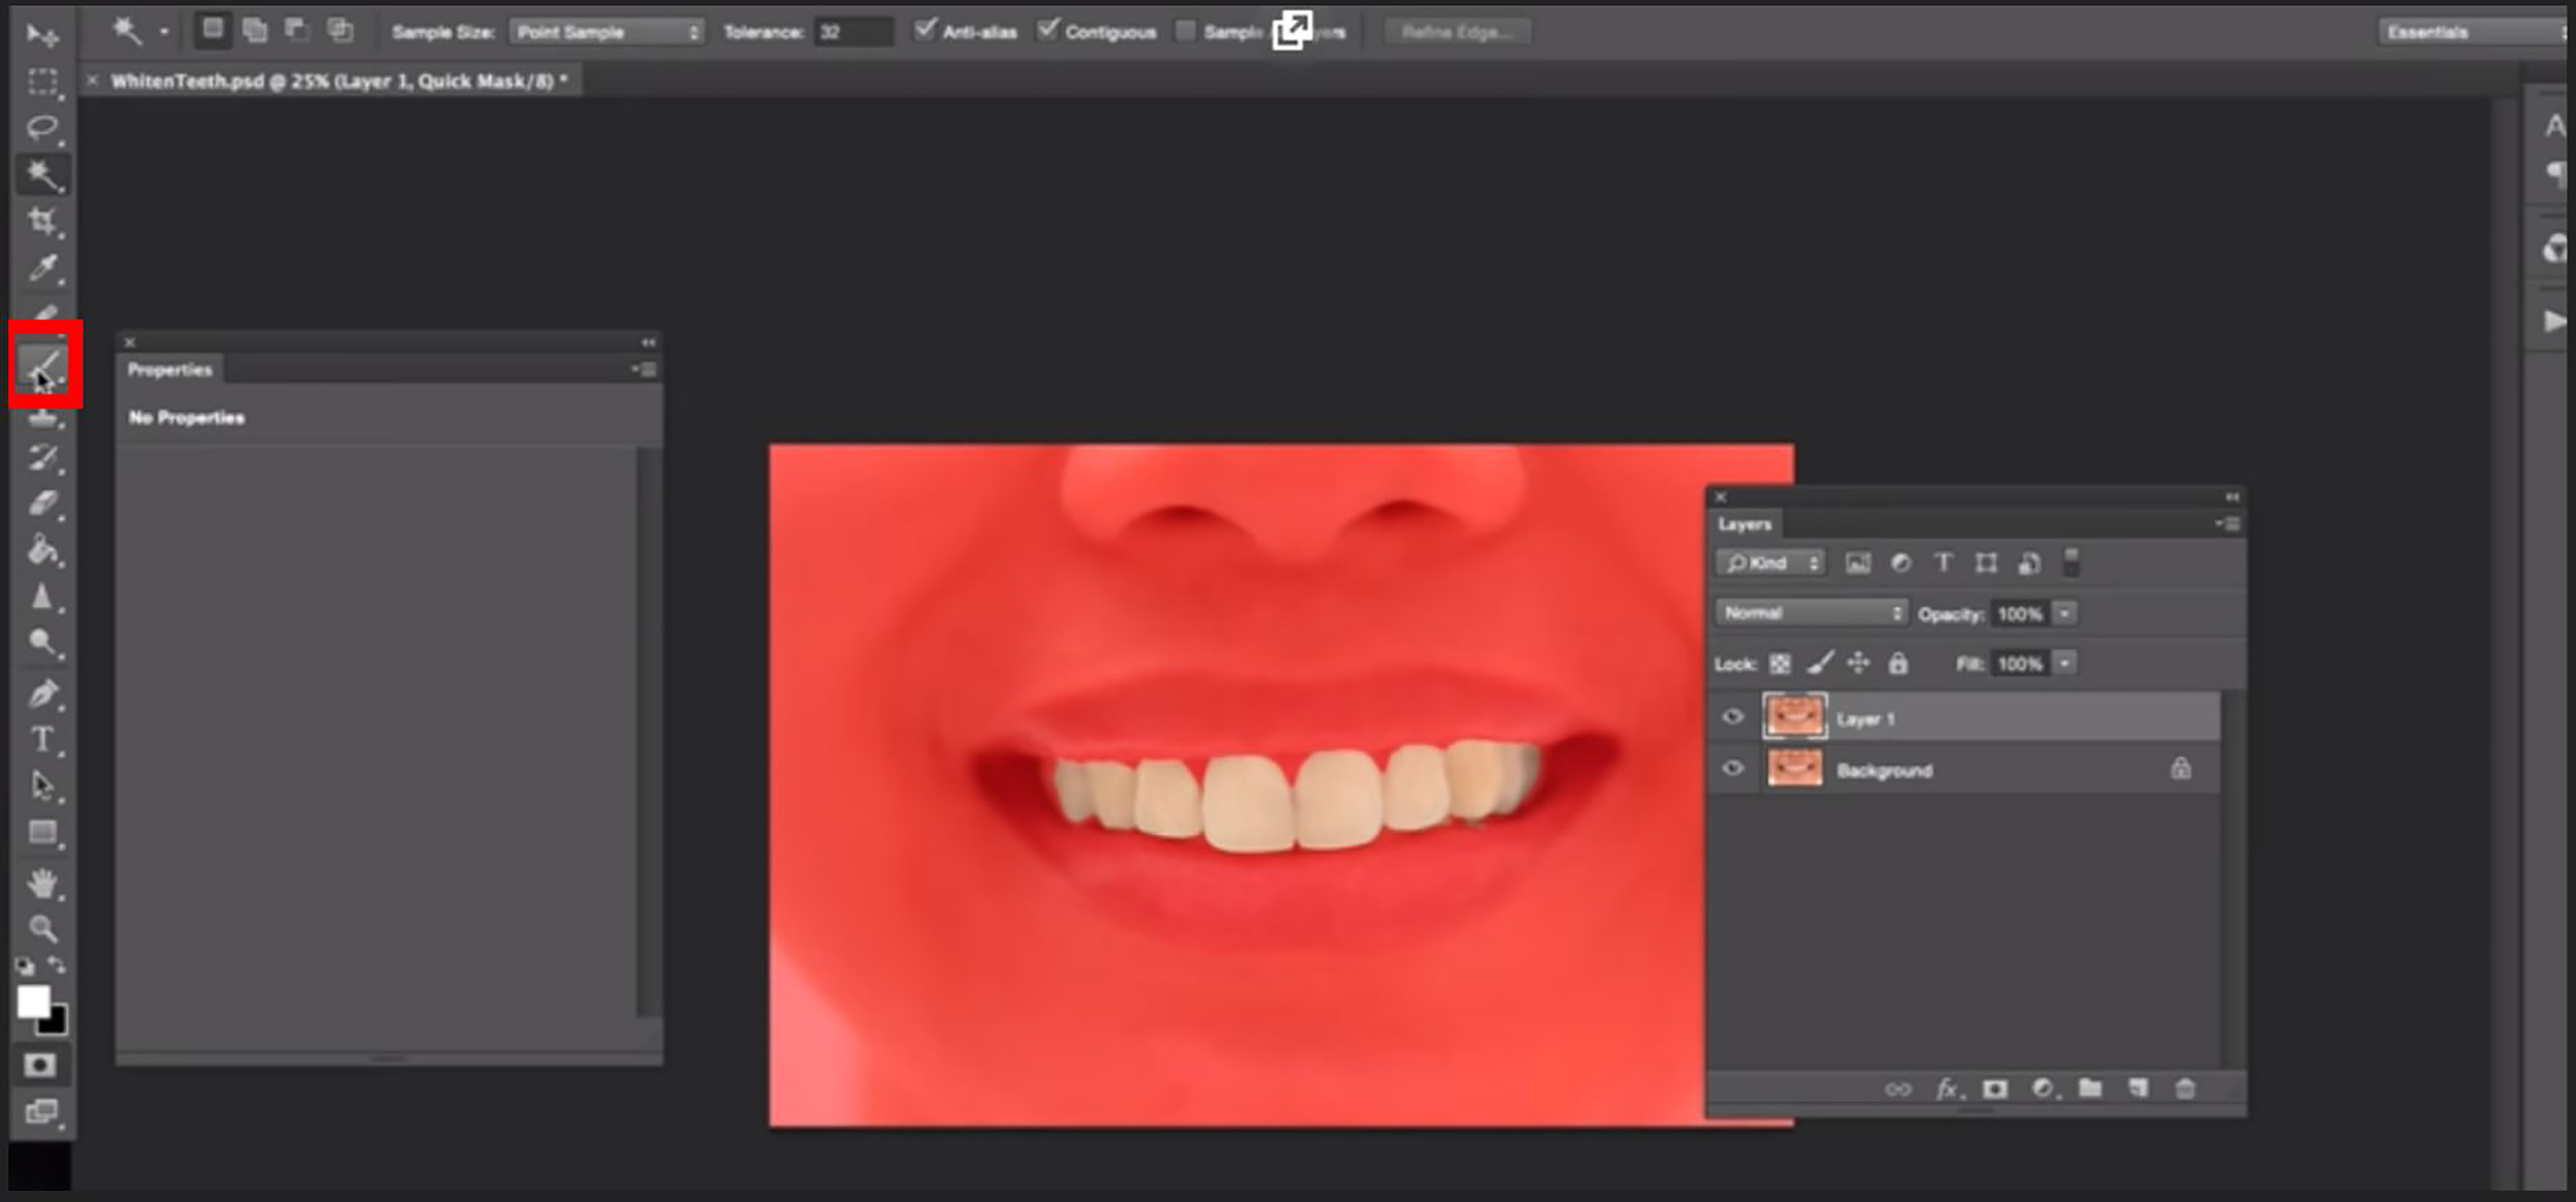
Then, click on the ‘brush’ tool, choose the appropriate size and ensure that white color is enabled.
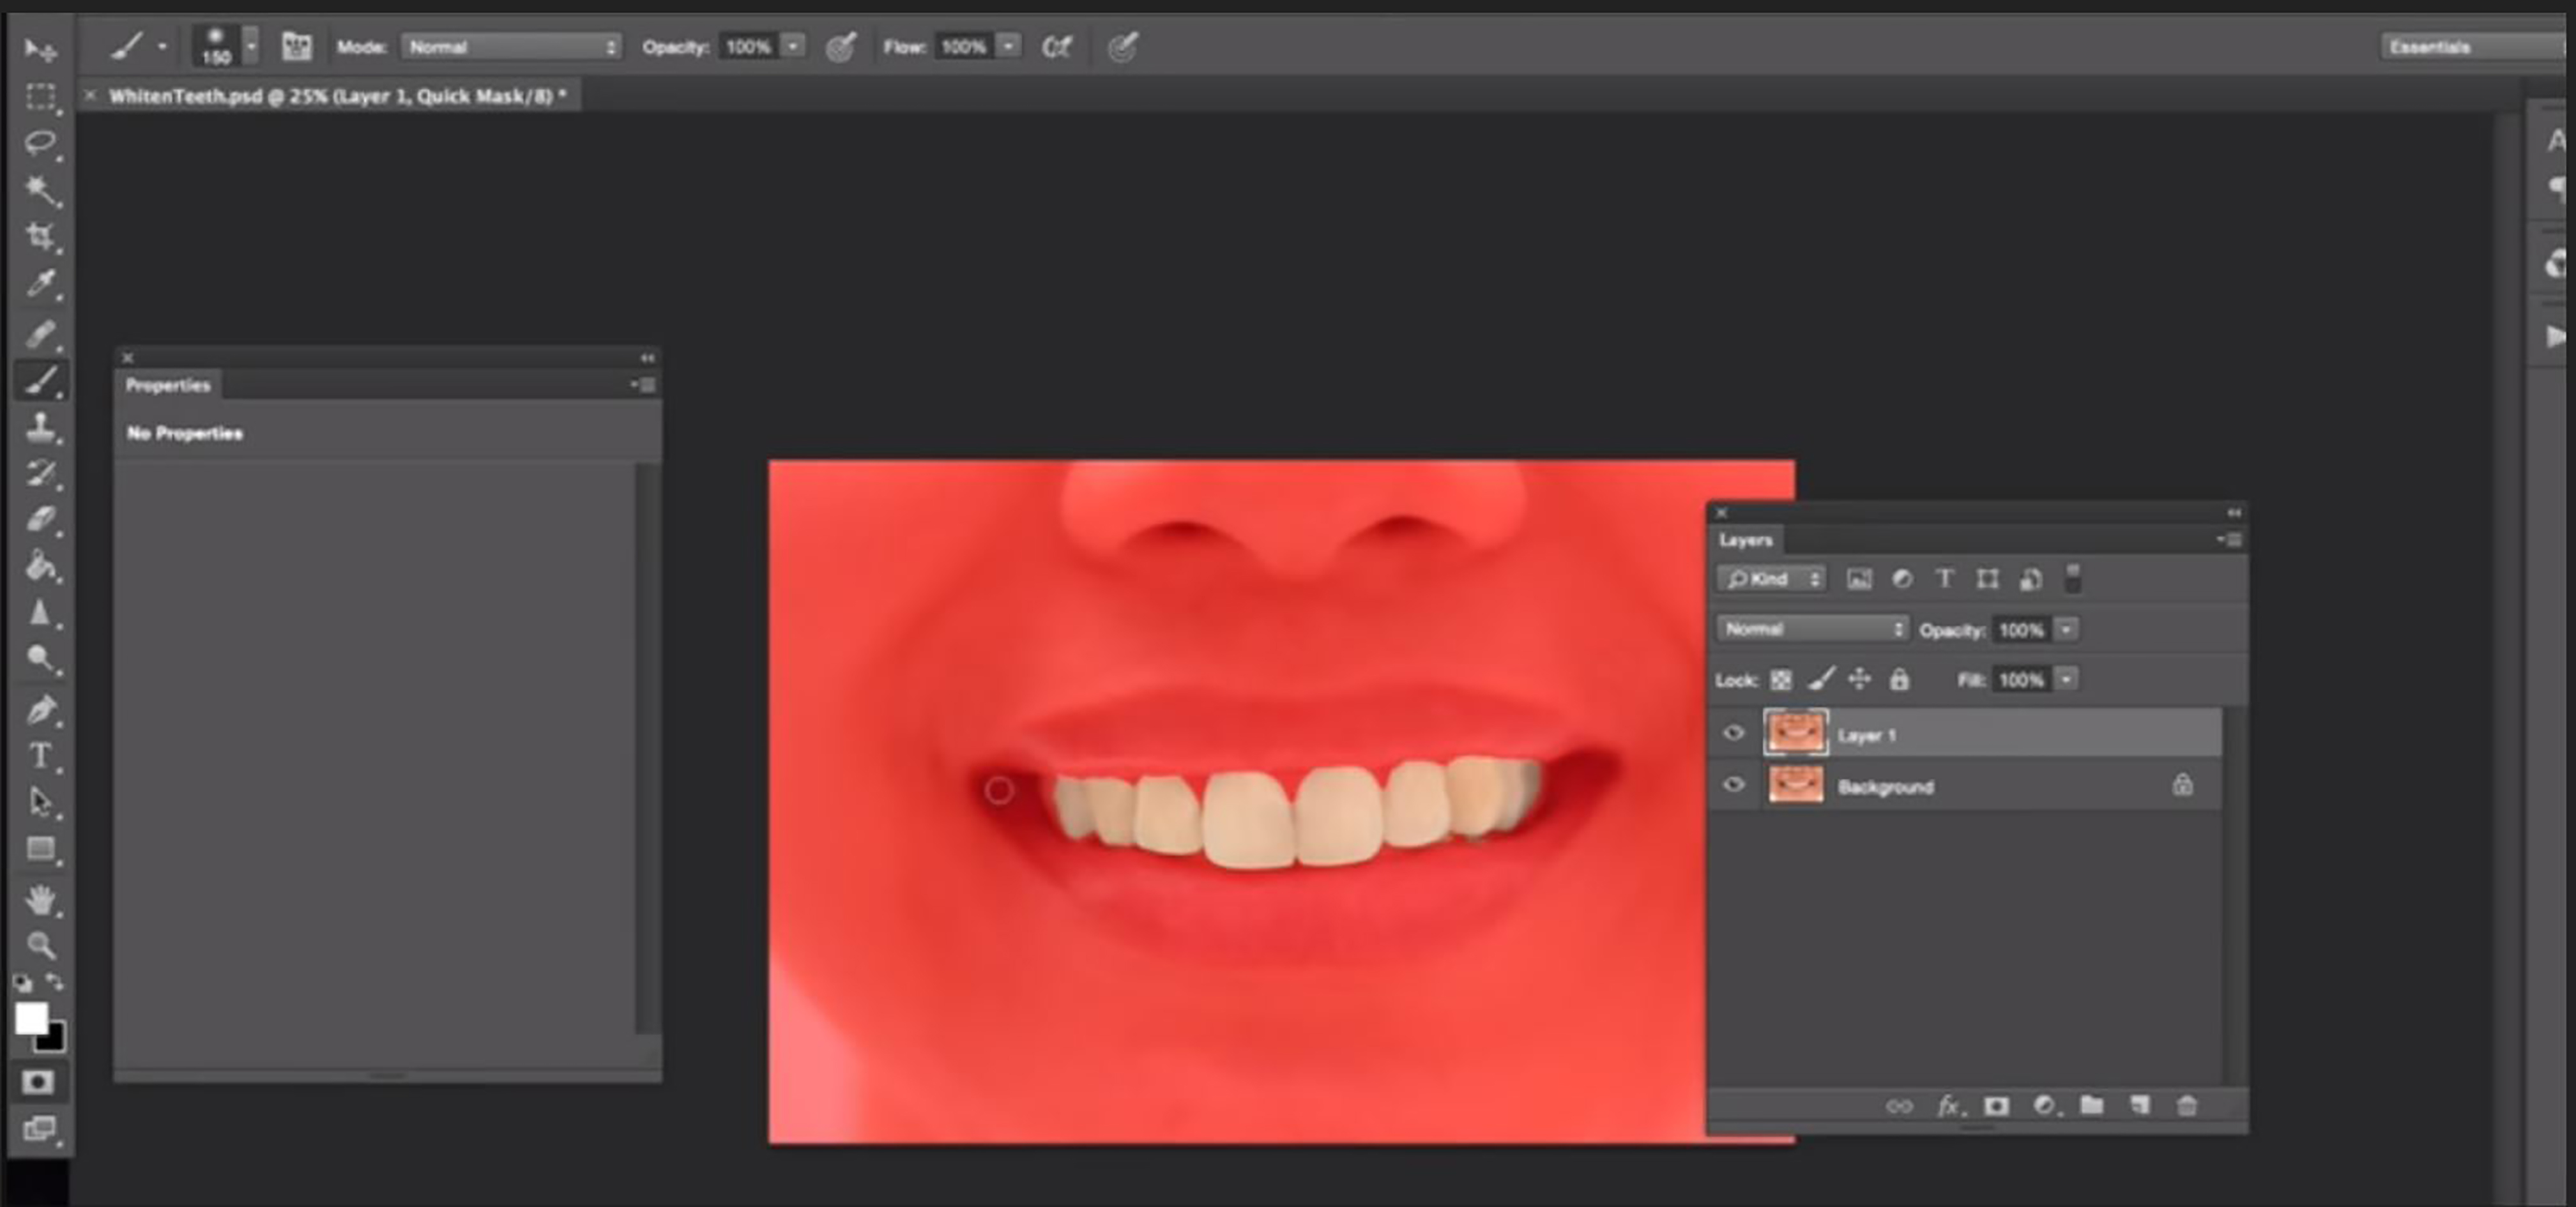
Now, select the remaining part of the teeth and to avoid fuzziness in the selection it is recommended to keep the hardness high.

Finally, exit the quick mask.

Step 2:
Click on the ‘hue/saturation’ option under ‘adjustments’ in the ‘image’ menu.

Then, change the ‘master’ to ‘yellow’ as shown in the image, to get rid of the yellow.

Next, lower the saturation and adjust the lightness accordingly.

Finally, open the ‘curves’ under the ‘new adjustment layer’, to make brightness adjustments (Ensure that the selection is active, or else it would alter the whole image).


It is highly recommended to make subtle changes, seldom it would look unnatural.

Trick 3: Change White To Any Color
In Photoshop, it is easy to convert one color to another. Contrarily, it is difficult in the case of white. From the below picture, it is clear that there is no change in the white color of the shirt with respect to the change in saturation.

Altering the colorize and adjusting the hue and lightness brings about a change similar to the picture shown below, which is not satisfactory.

So how can you change white to any other color? The answer is simple, follow the steps given below.
First, select the white object; in this case, it is a shirt. The selection could be made using a ‘quick selection’ tool from the toolbar. If you have selected unwanted areas, to subtract hold the ‘alt’ button and click to deselect unwanted areas.

Then, click on the ‘adjustment layer’ drop menu and select the solid color option.

For example, a bright color is chosen.

In the layer panel, change the blend mode from ‘normal’ to ‘multiply’.
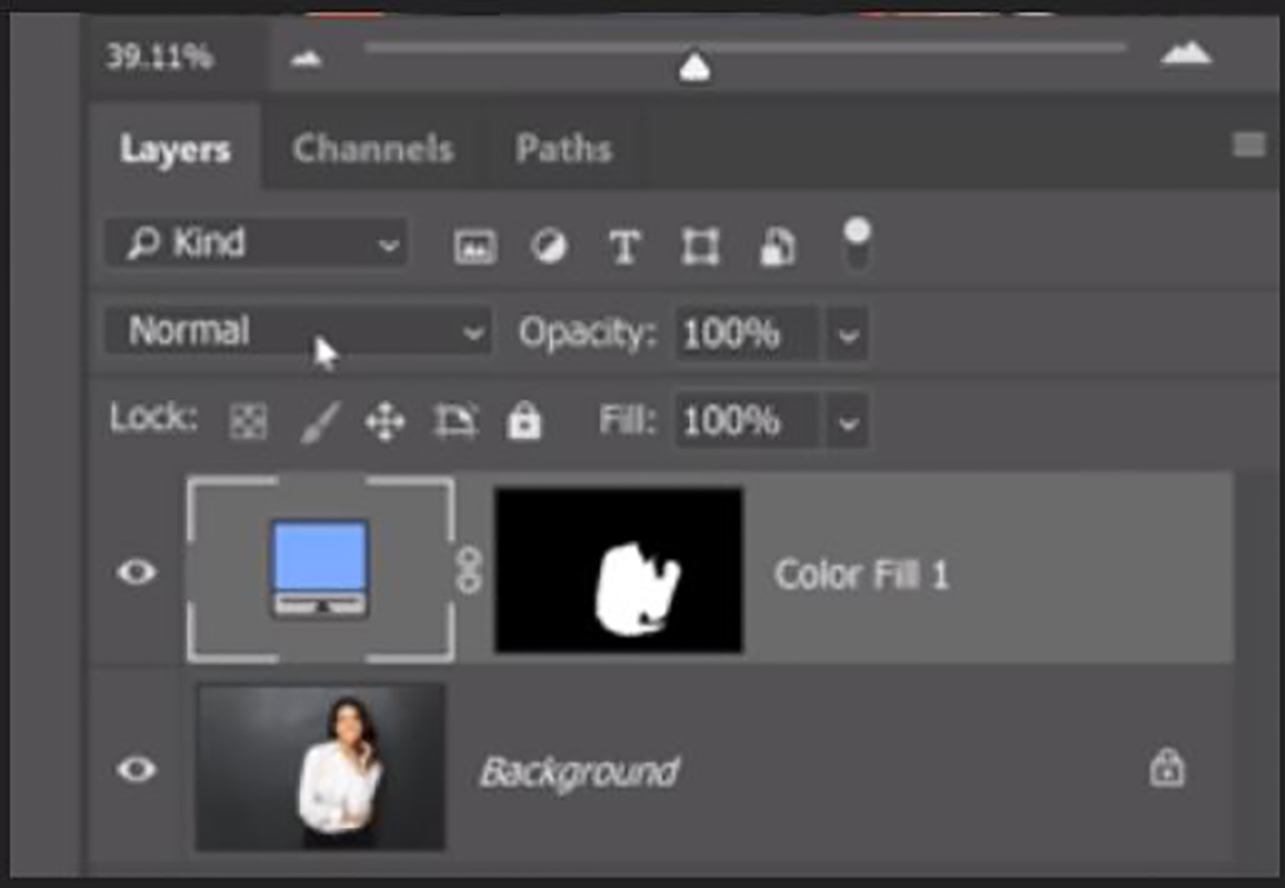
The ‘multiply’ option enables to darken the white with the opted color.
Next, to make it more natural the brightness has to be adjusted. For this purpose, use the curves as shown in the image to adjust the brightness of the color.
If you want to convert the white color into any dark color, consider adding some highlights. For this, you have to add an extra curve and alter its layer style. Under ‘blending options’, adjust ‘this layer’ and the ‘underlying layer’ to generate the highlights.
Trick 4: Merge All Existing Layers
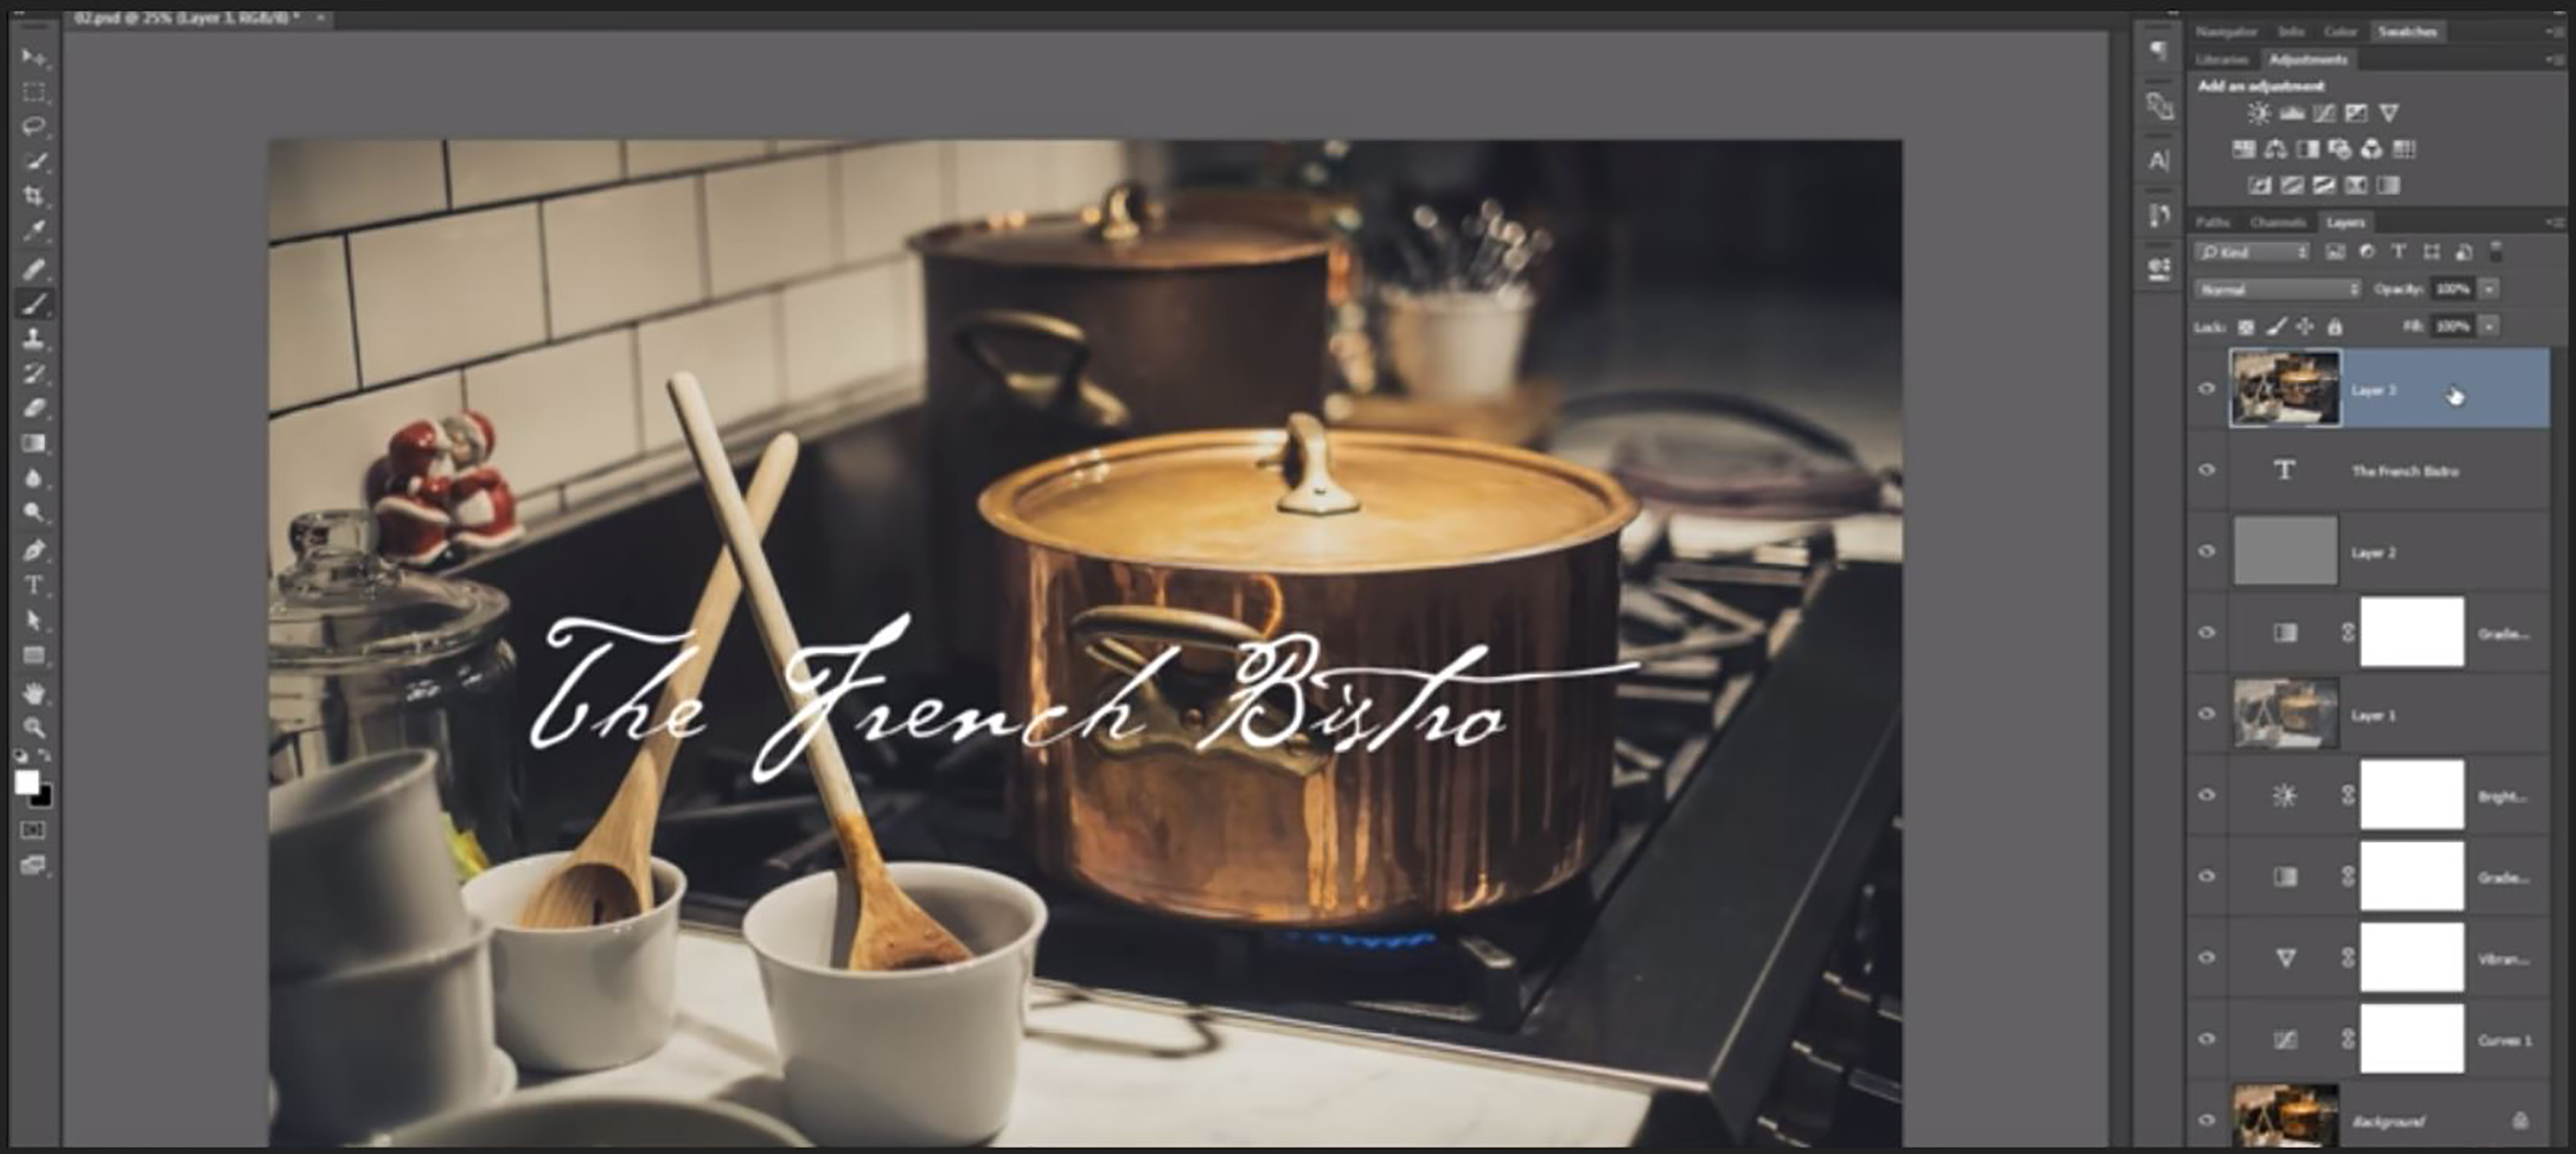
If you are working on a big project and it consists of many visible layers, it is always necessary to manage these layers to avoid confusion. Merging layers would actually help you in such a scenario.
After finalizing the contents of the layers, it is essential to merge them. Merging layers combines visible, linked and adjacent layers into a single layer. Hence, it enables you to reduce the size of your file, because it replaces the features of the lower layers with the binding upper layers.
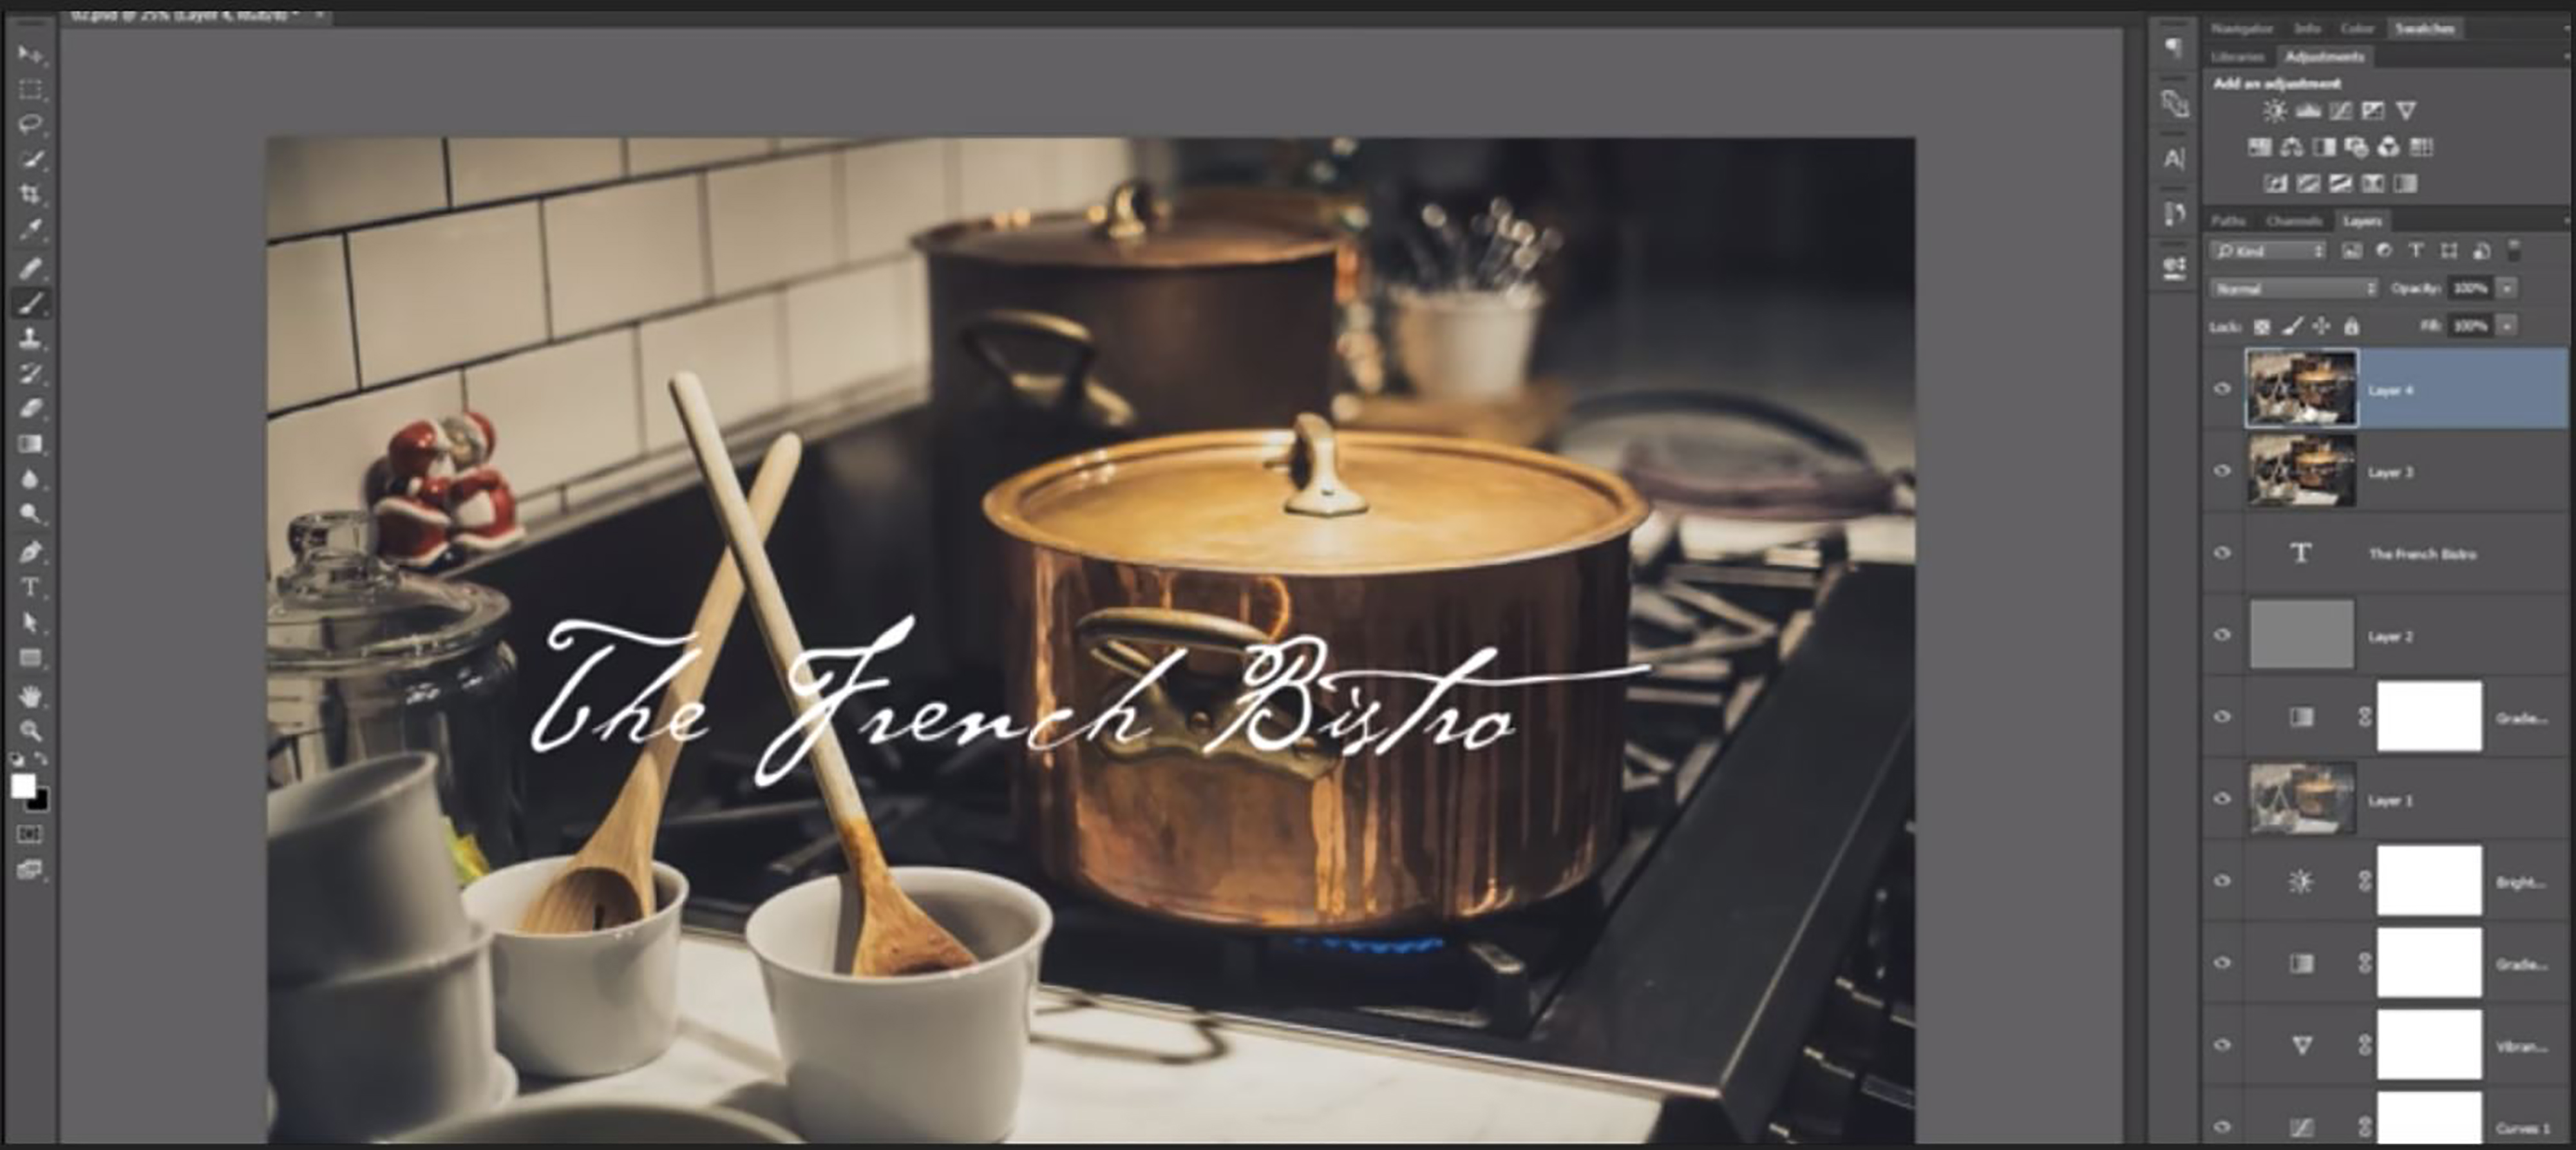
First, make certain that you have enabled the visibility of only those layers that you want to merge. Then, click on the top layer to make it active.
Finally, hit the hotkey combination “CTRL+SHIFT+ALT+E” to merge everything that had been selected, into a nice new layer.
Trick 5: Create Beautiful Sunrays
Did you say creating sunrays? Indeed, with the mastery of Photoshop, you can consider yourself as the virtual-omnipotent.
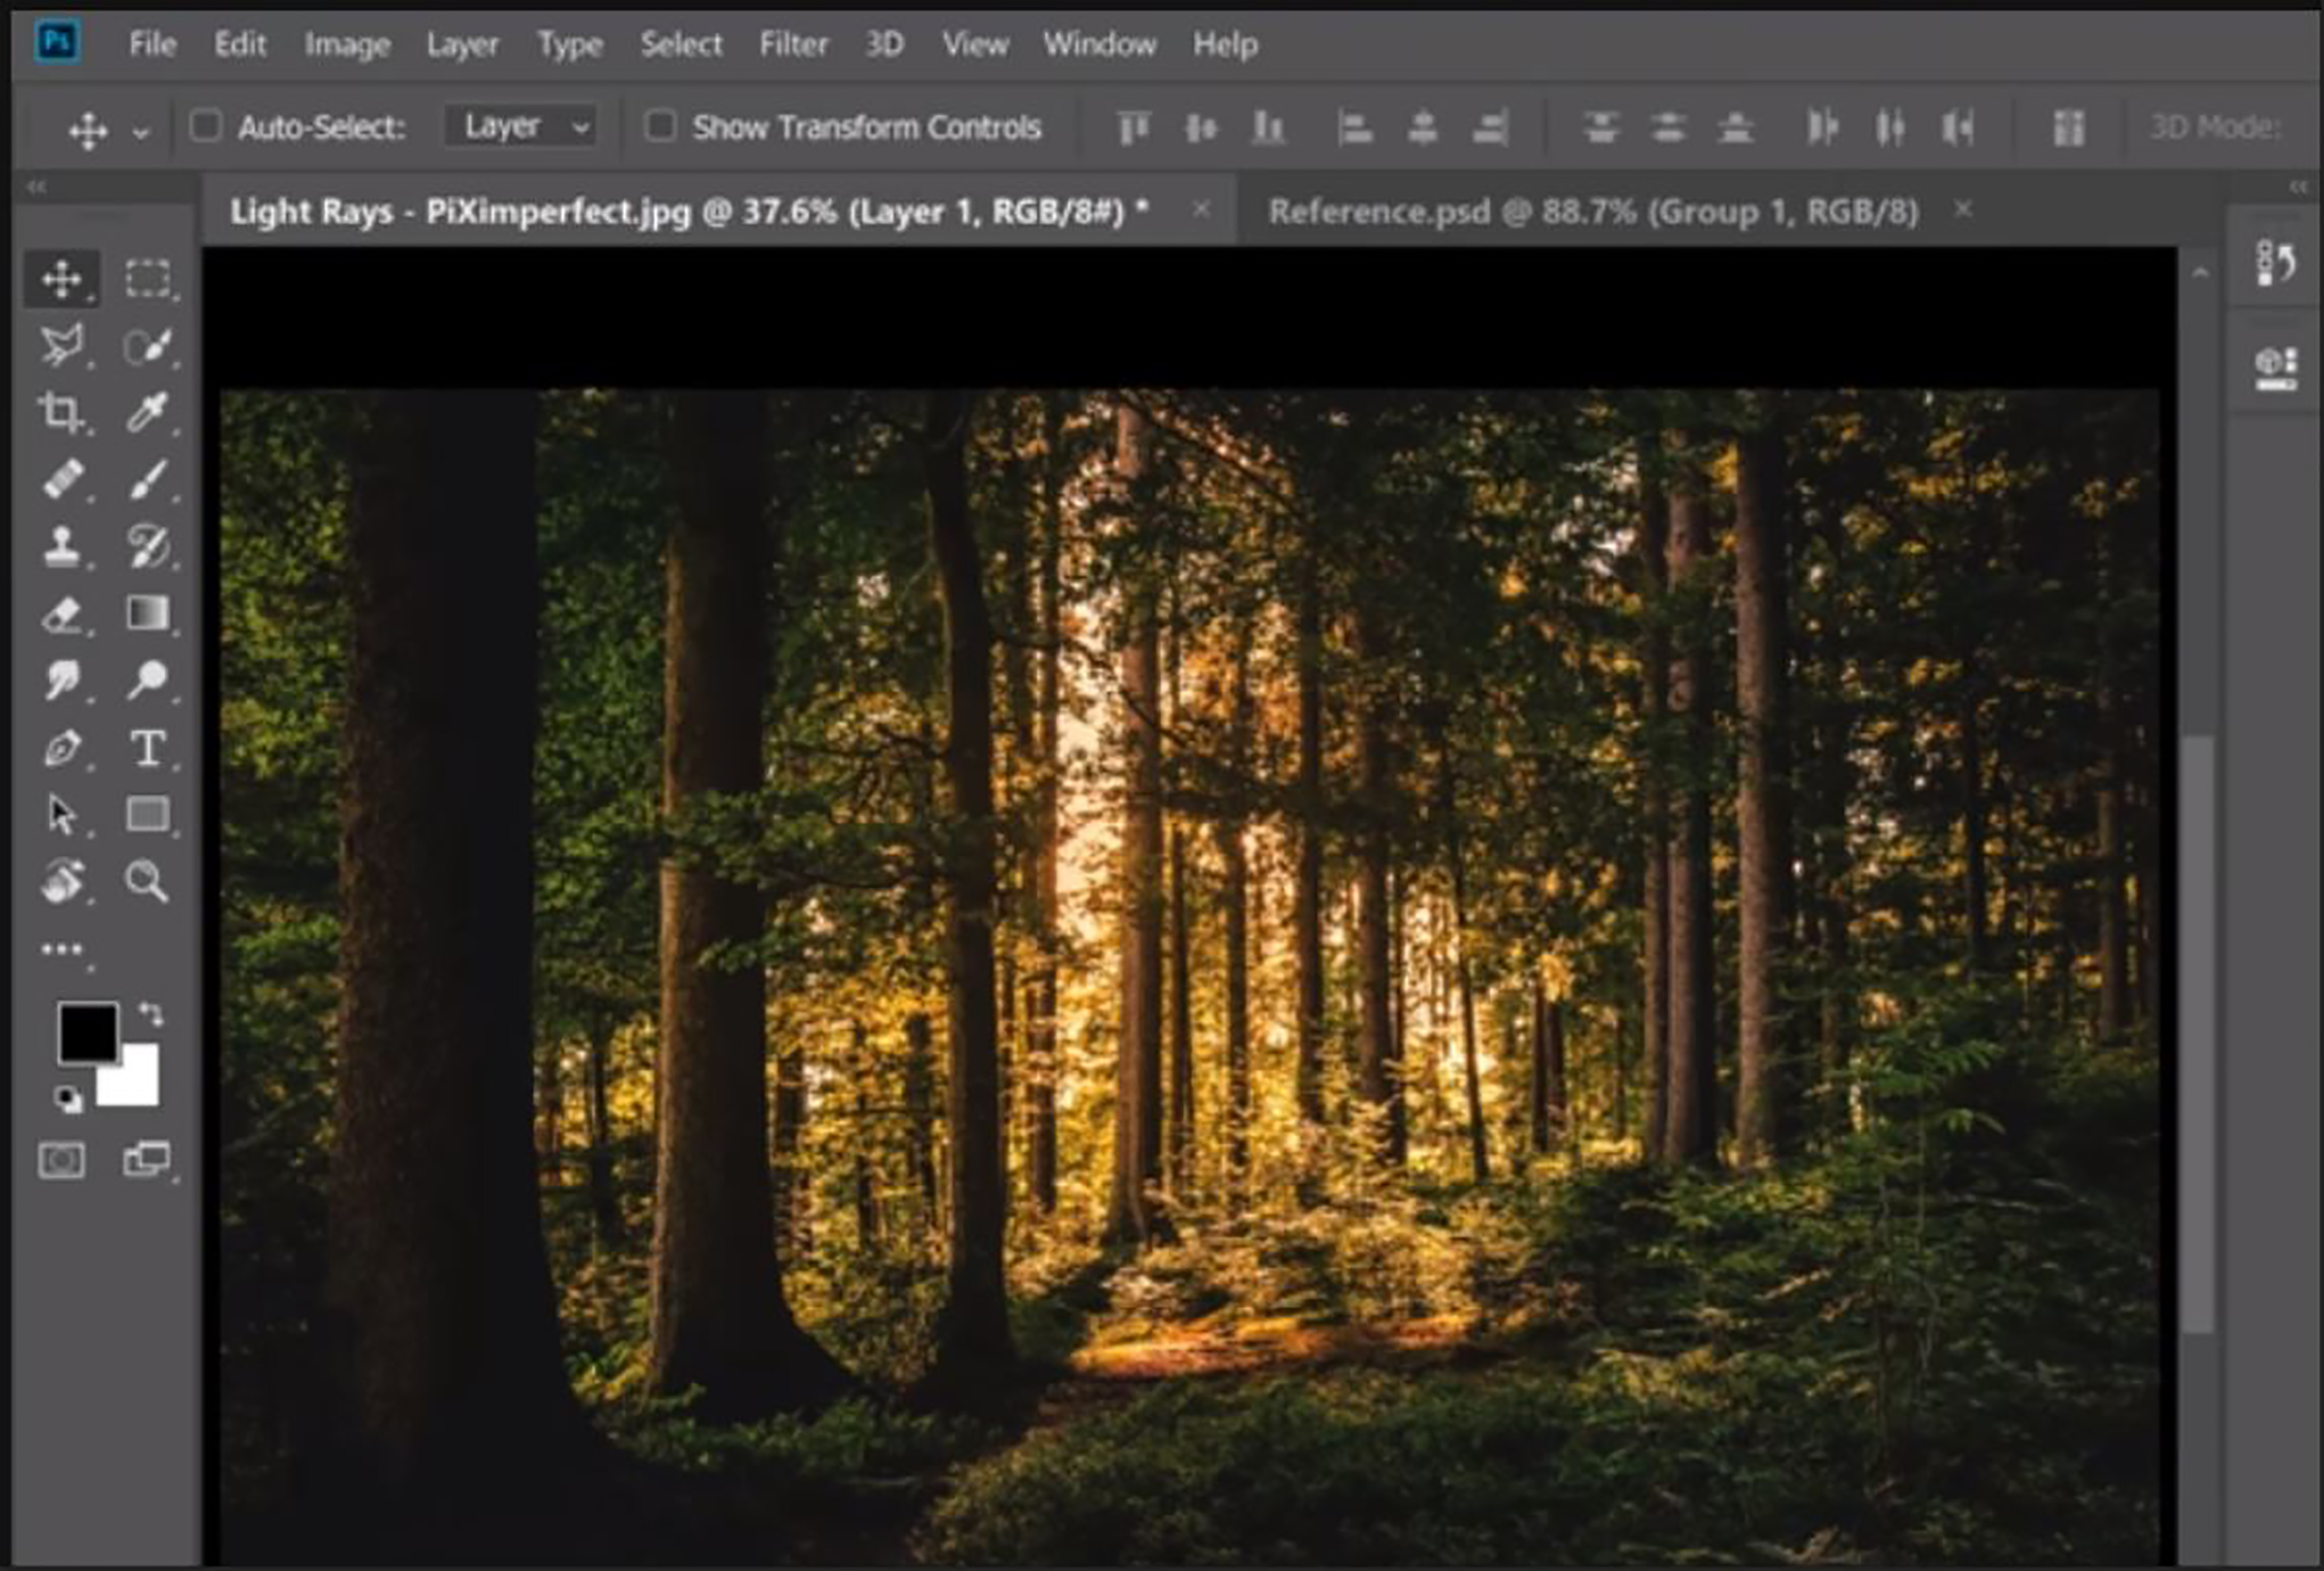
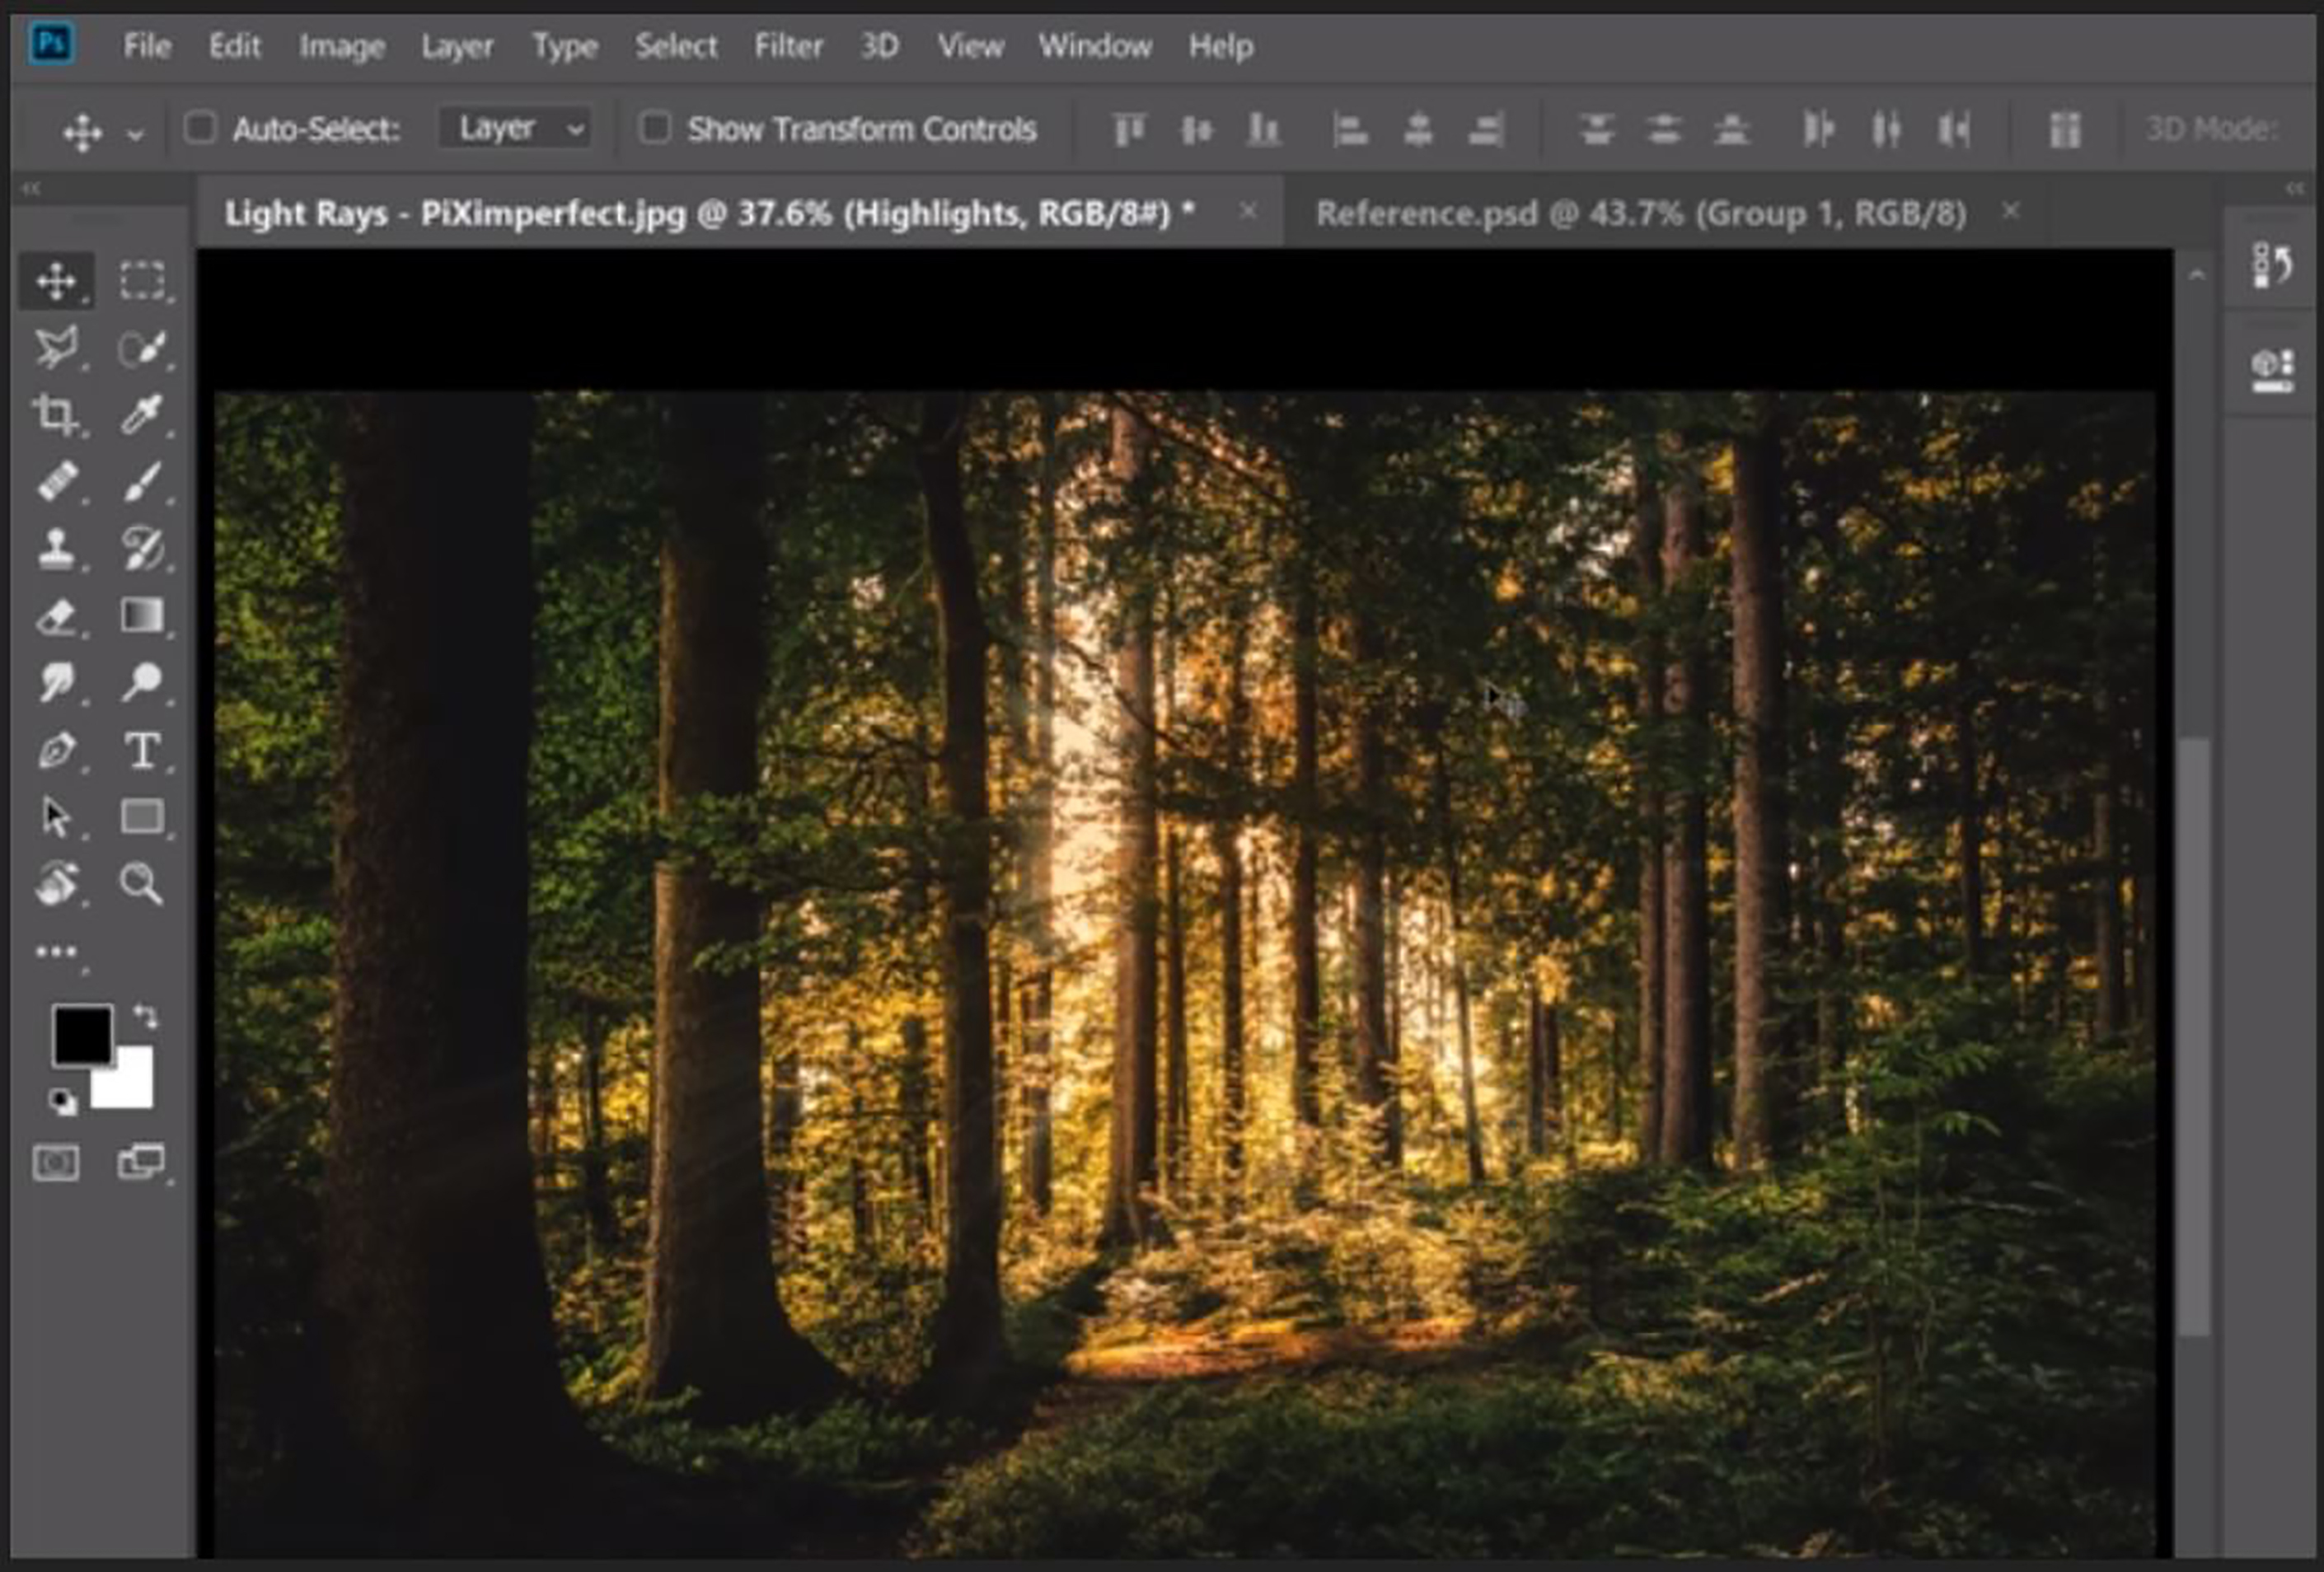
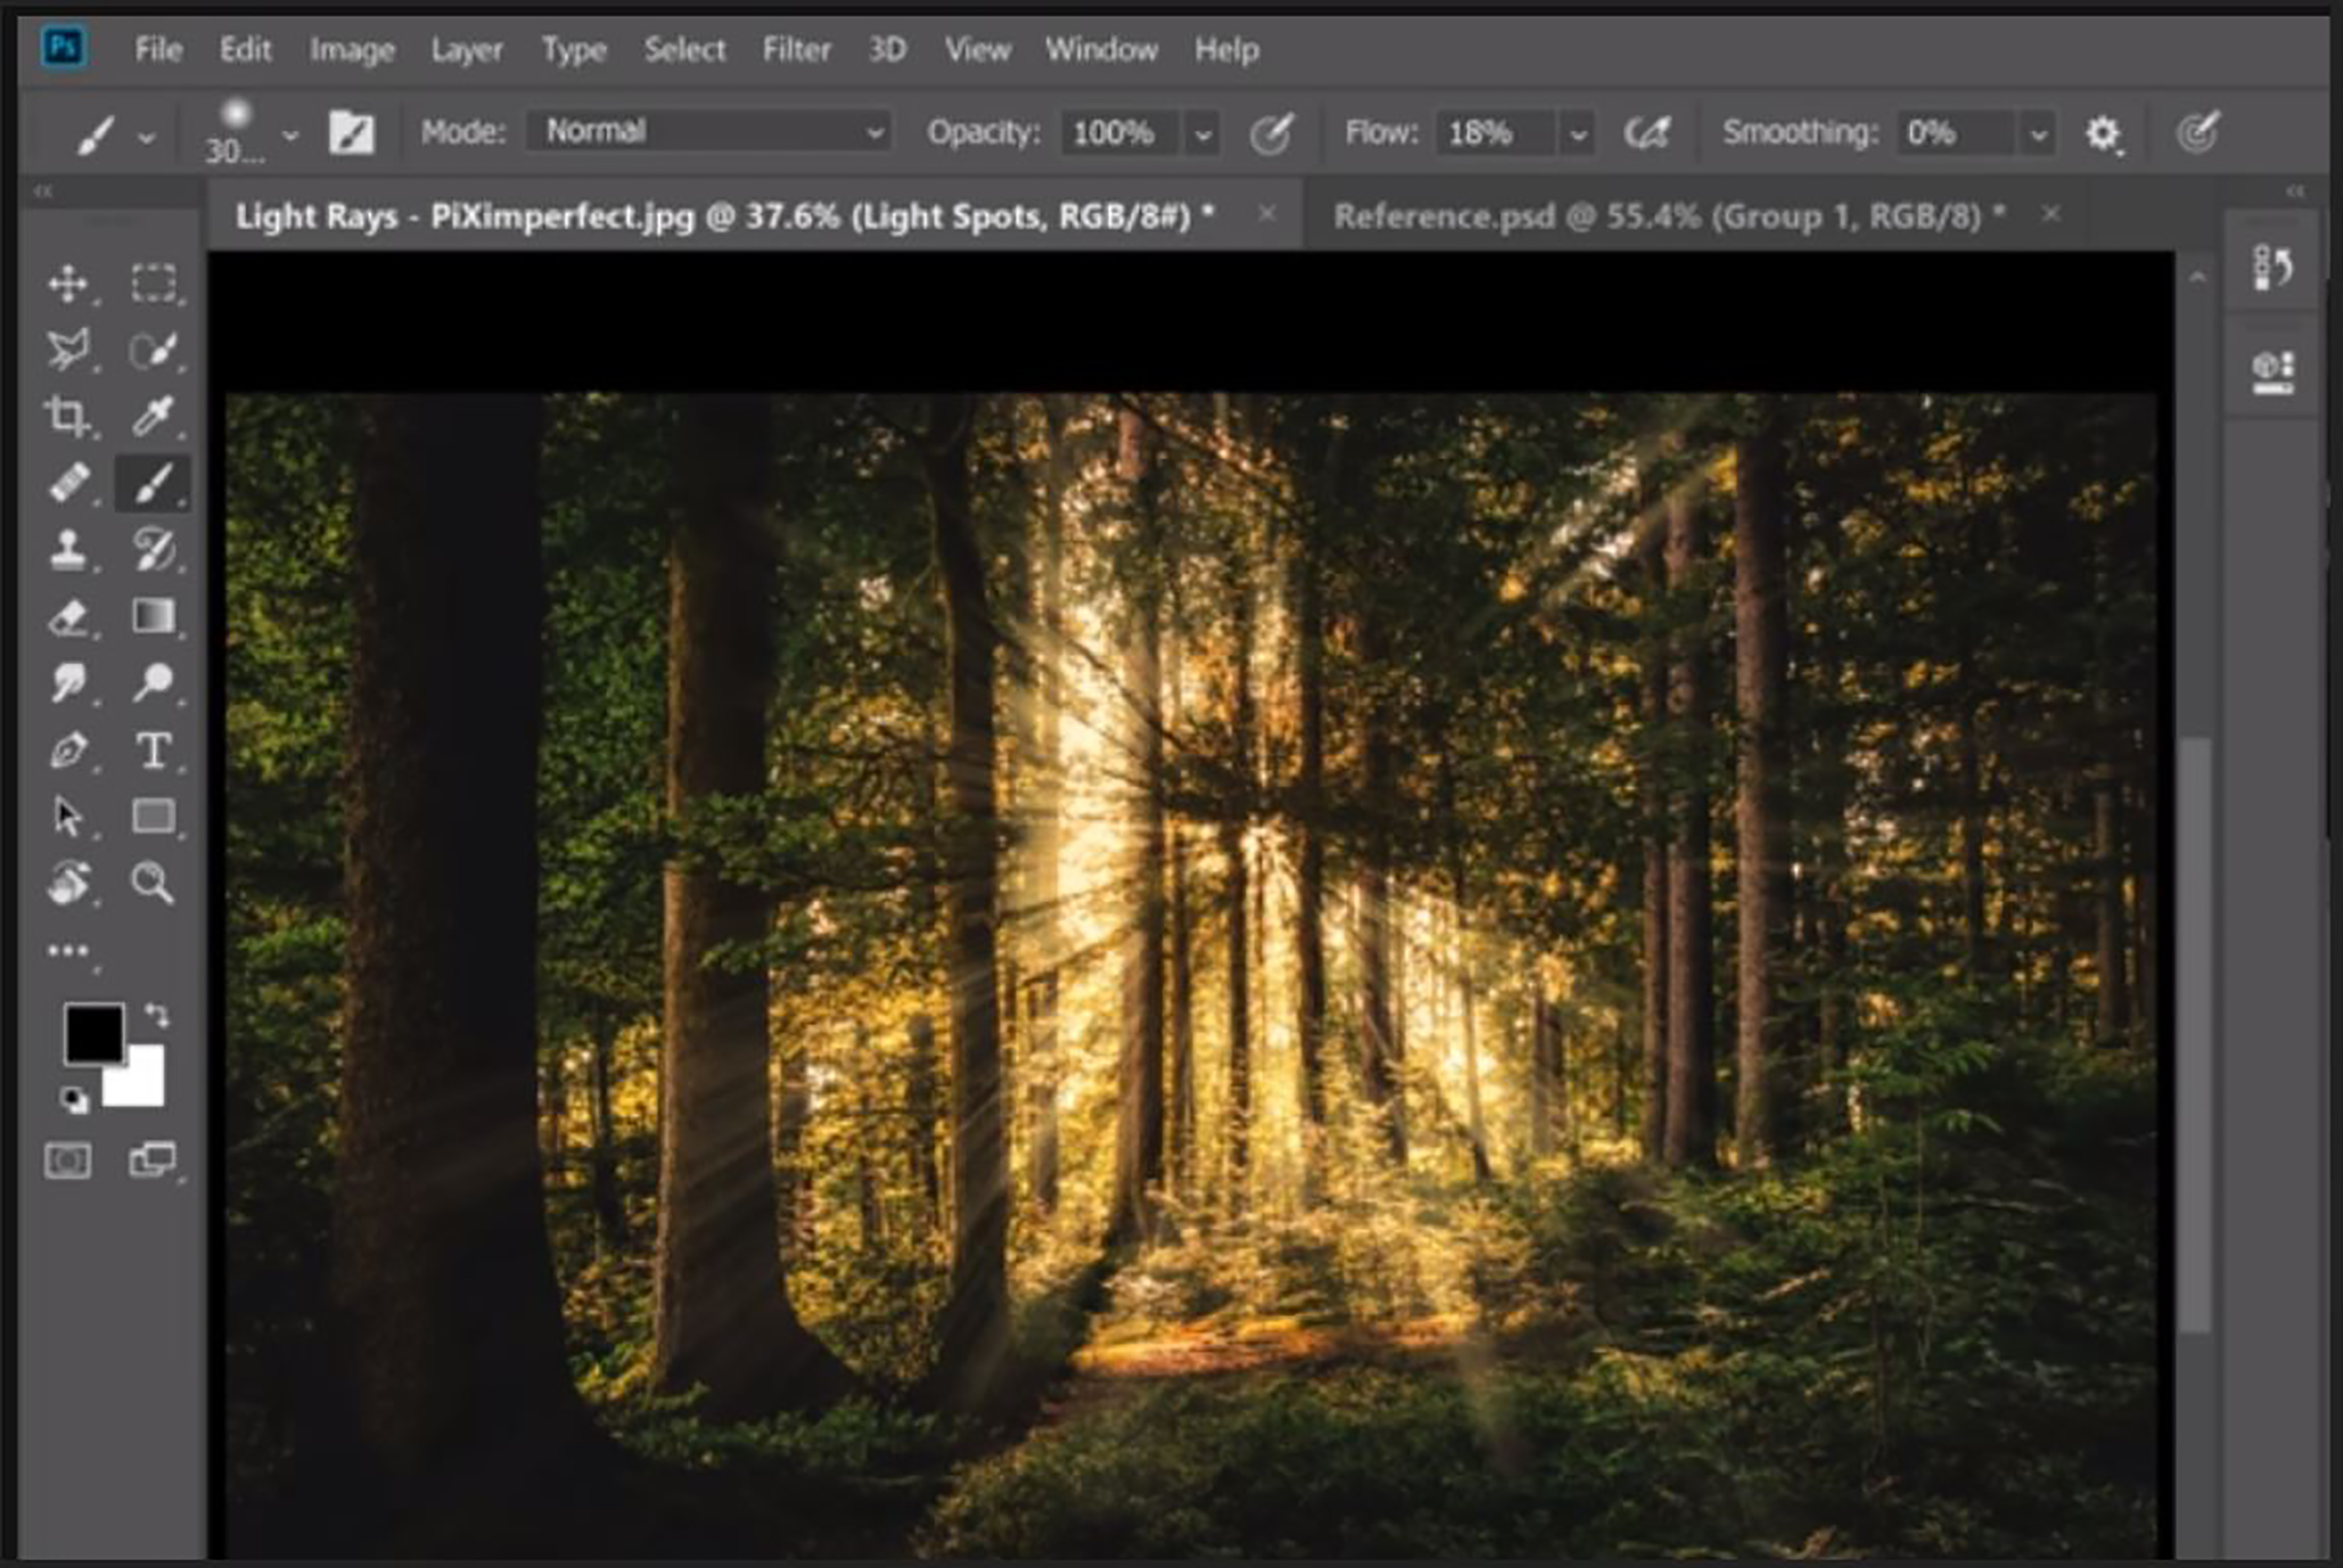
Photoshop allows you to create sun rays through the trees in a wood or windows in a room; in any case, the concept remains the same. You could make this happen with the help of a few blend modes and filters. Here is an example of creating sunrays through the trees in some woods.
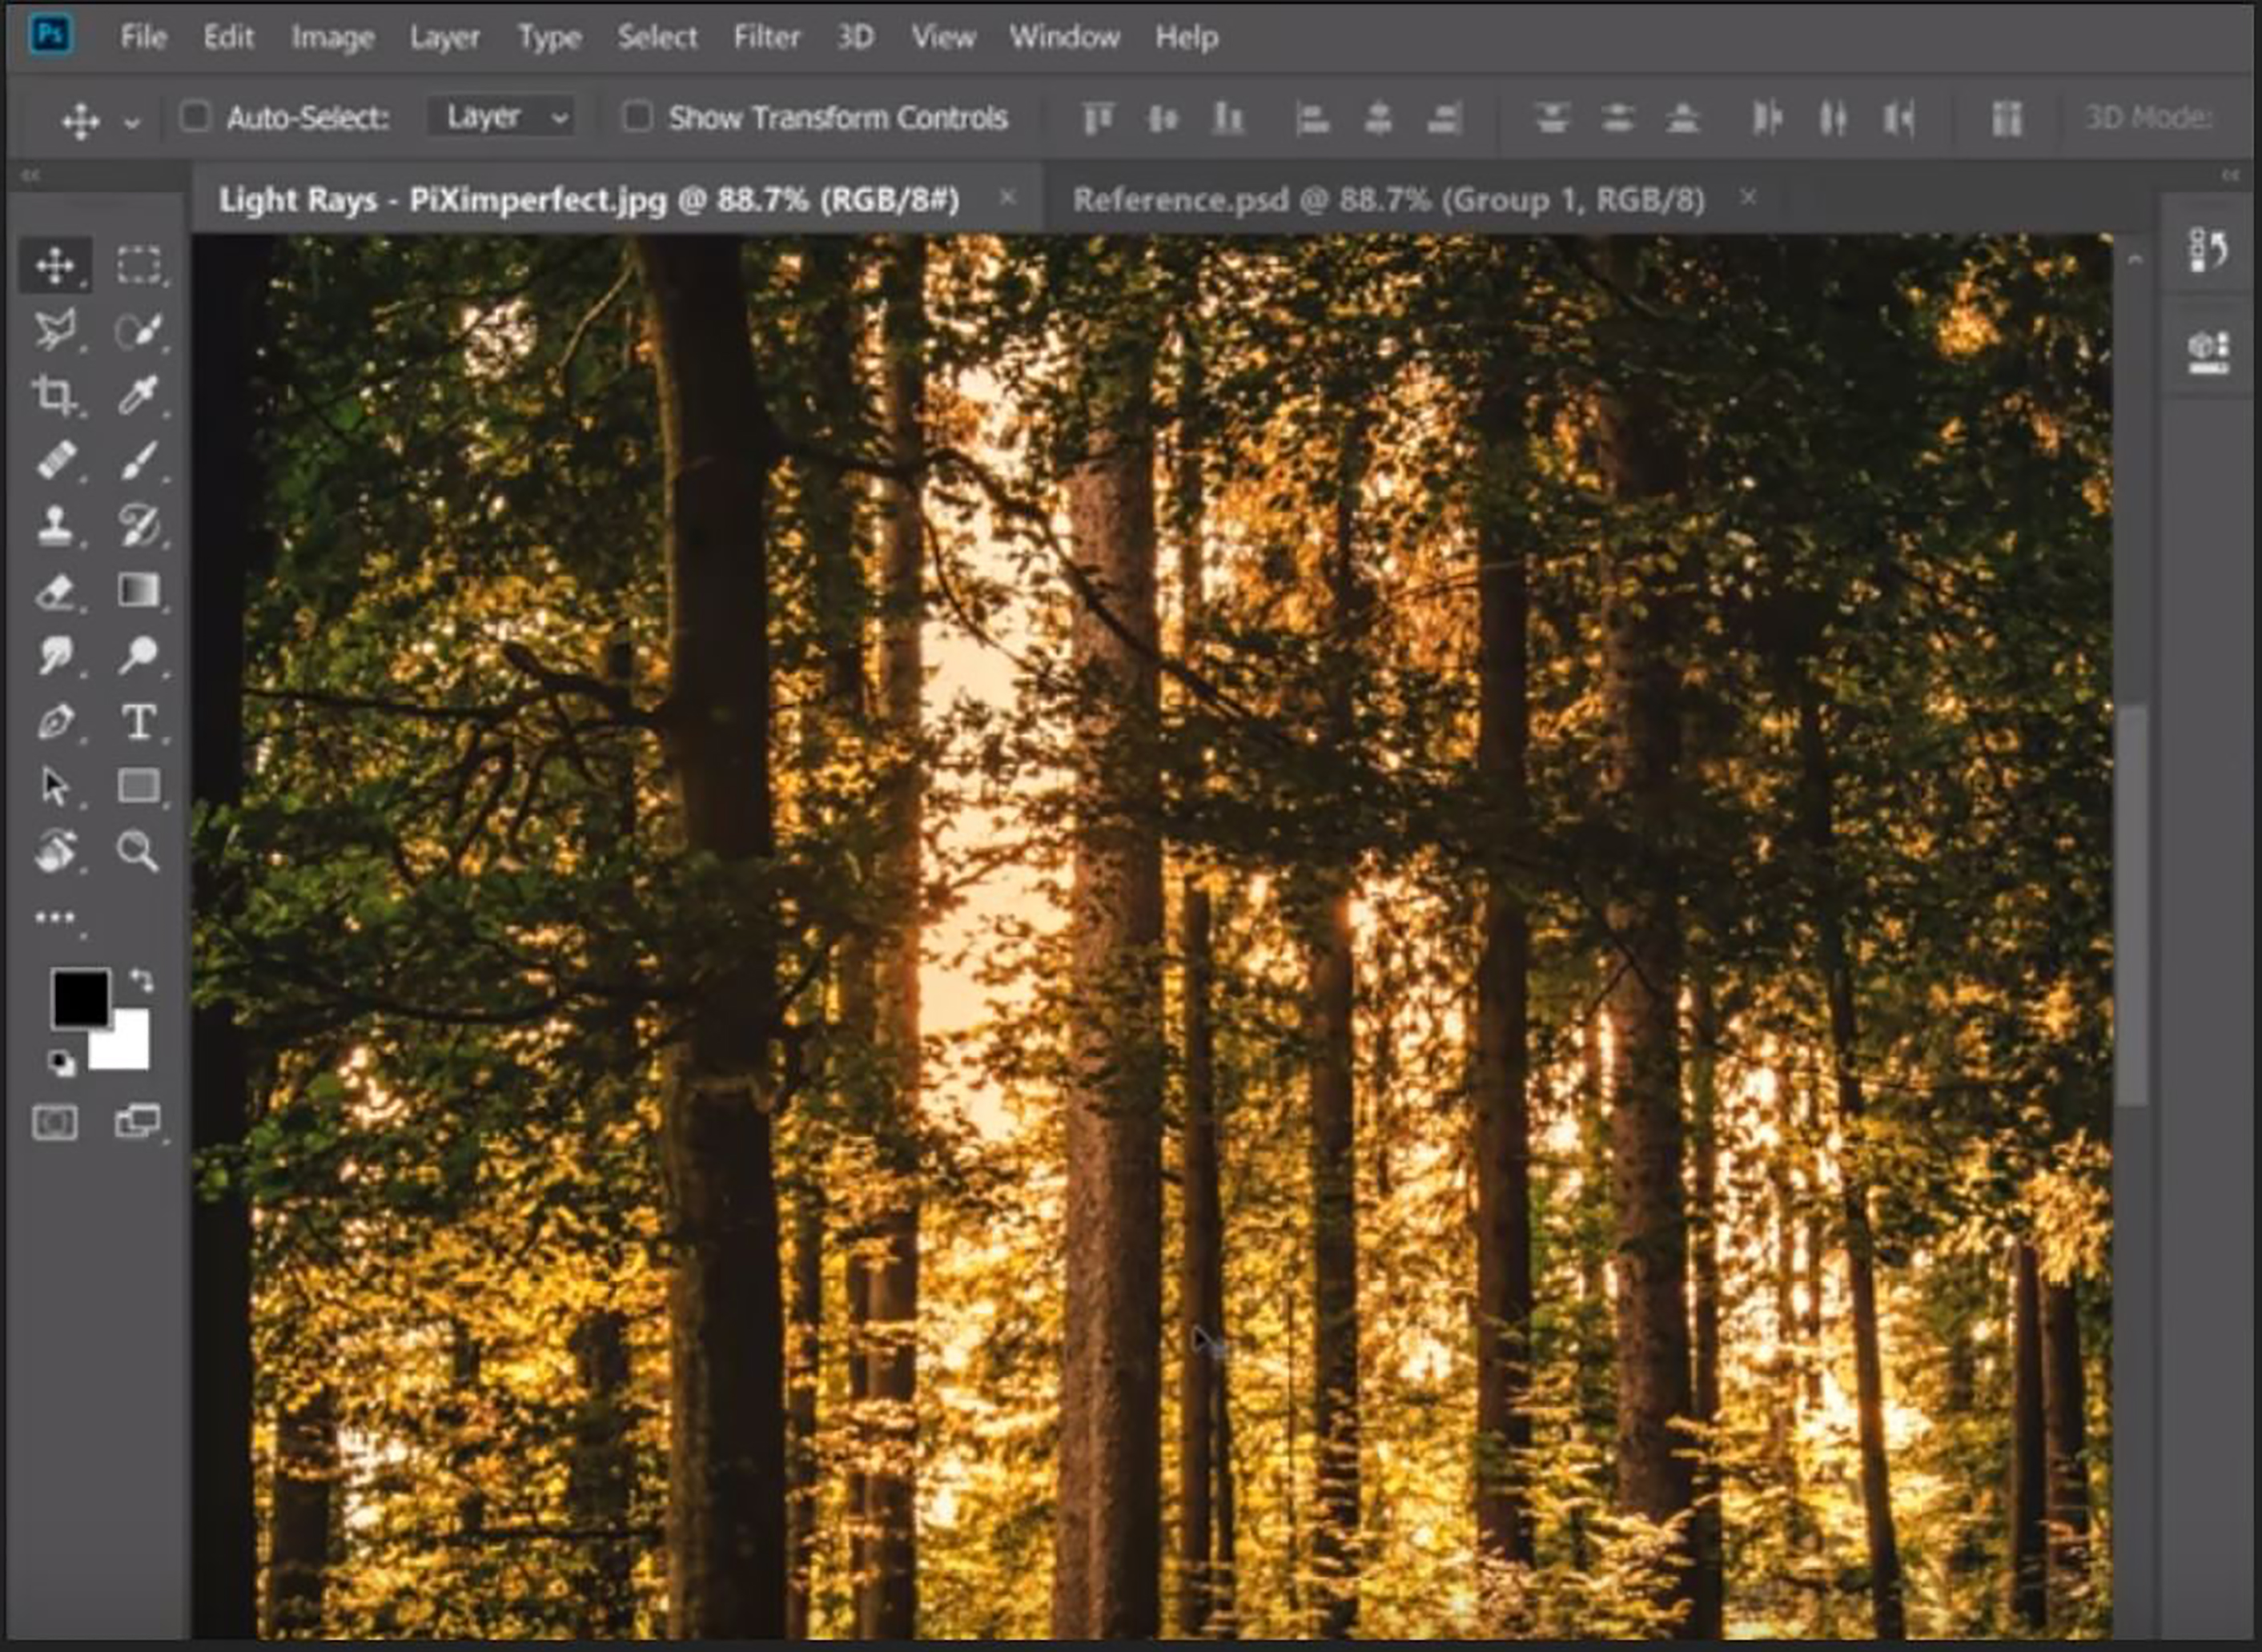
Studying the image, you could have identified that there are already some openings and bright areas. This could be used as a base to create the sunrays.
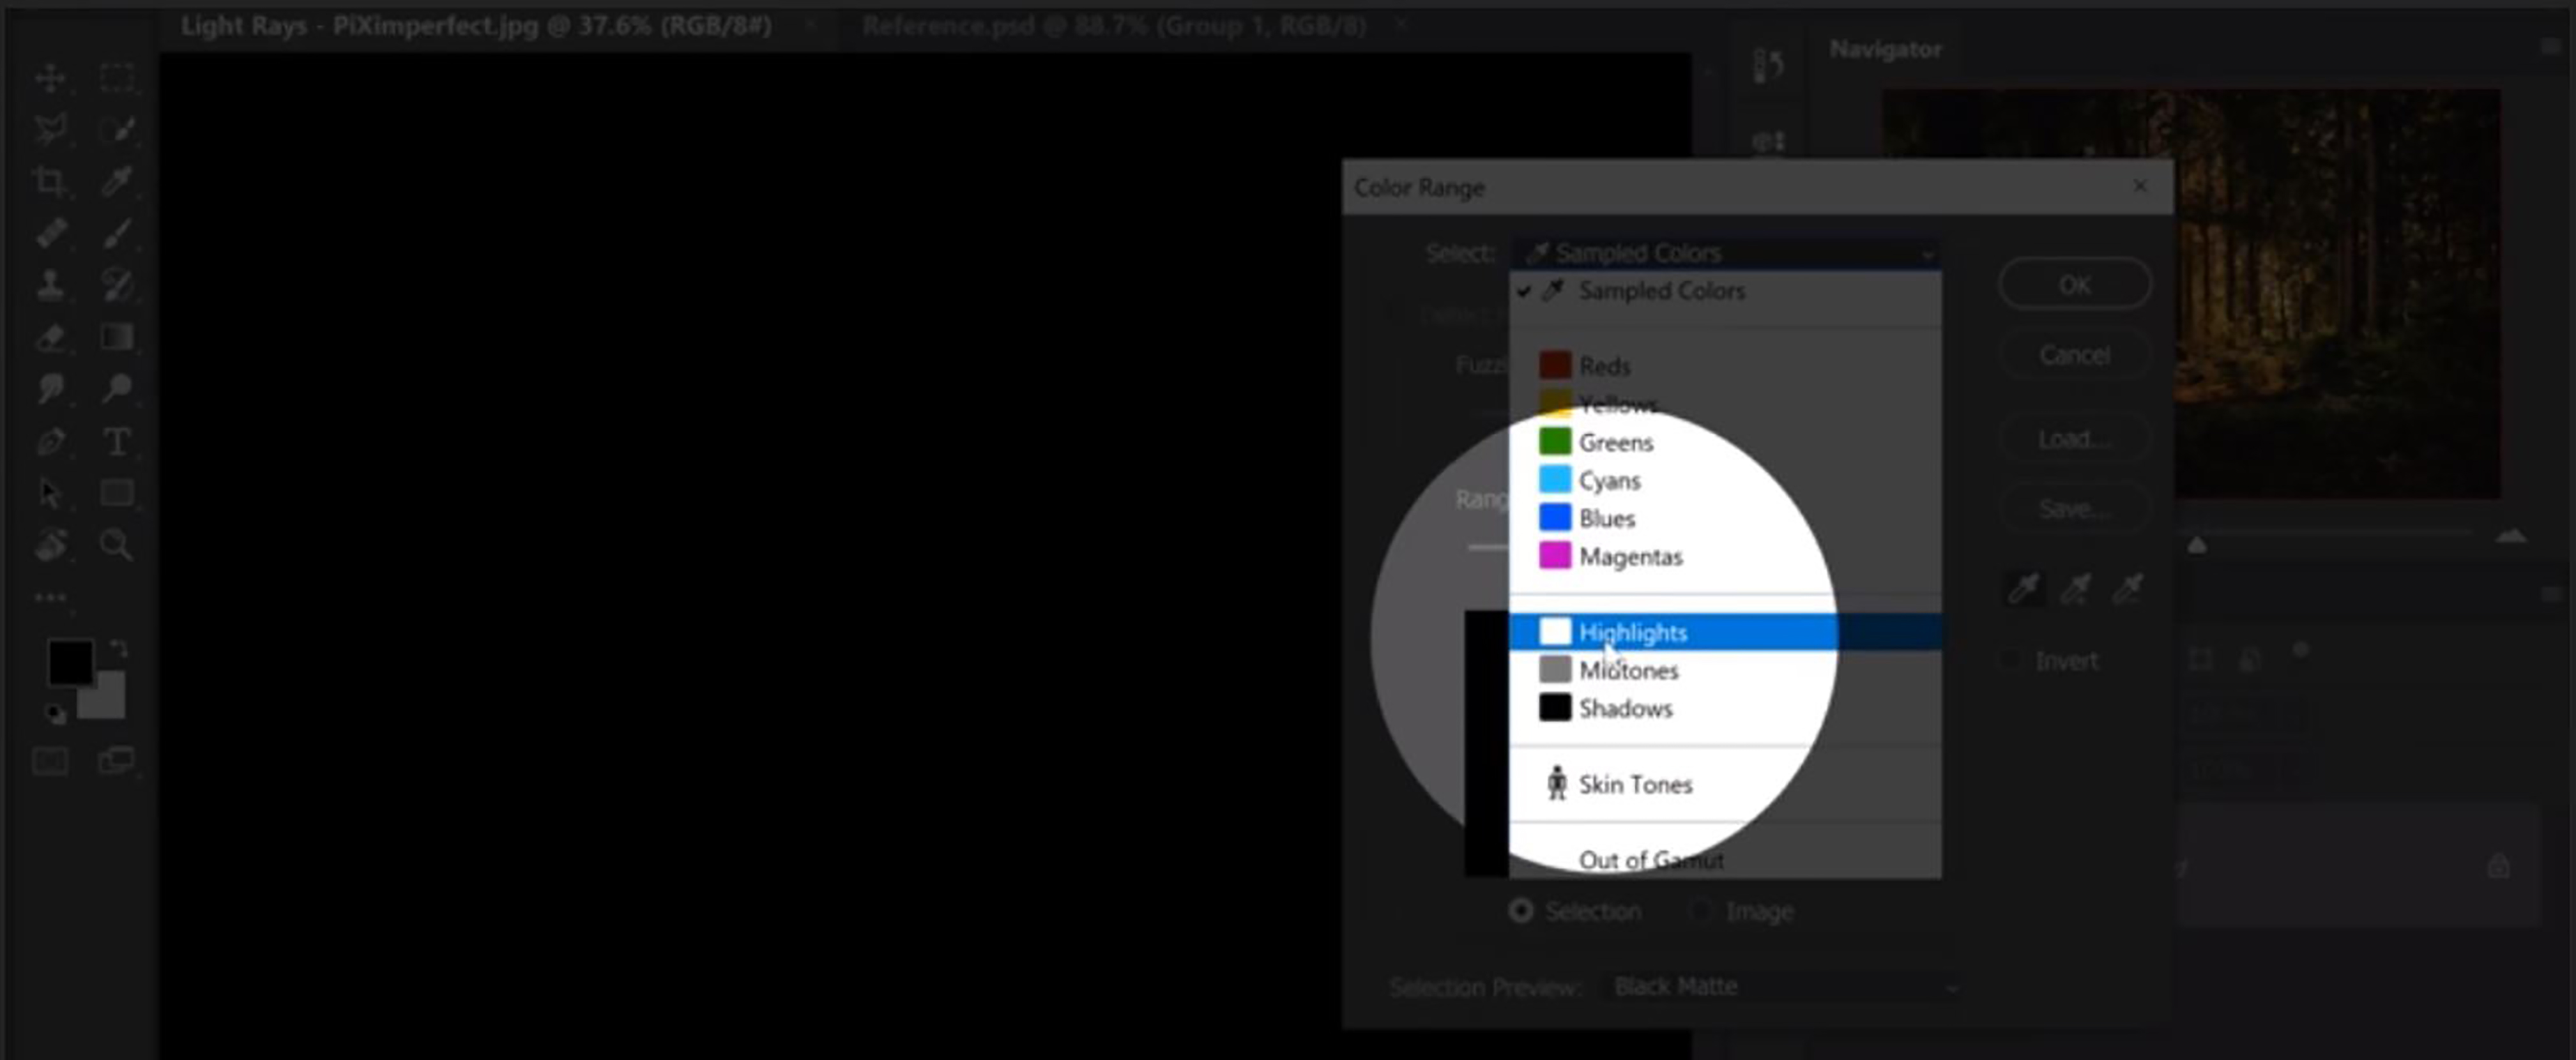
First, click on the ‘color range’ under the drop down menu as shown in the figure.

Then, select ‘highlights’ and decrease the ‘fuzziness’ to 0.
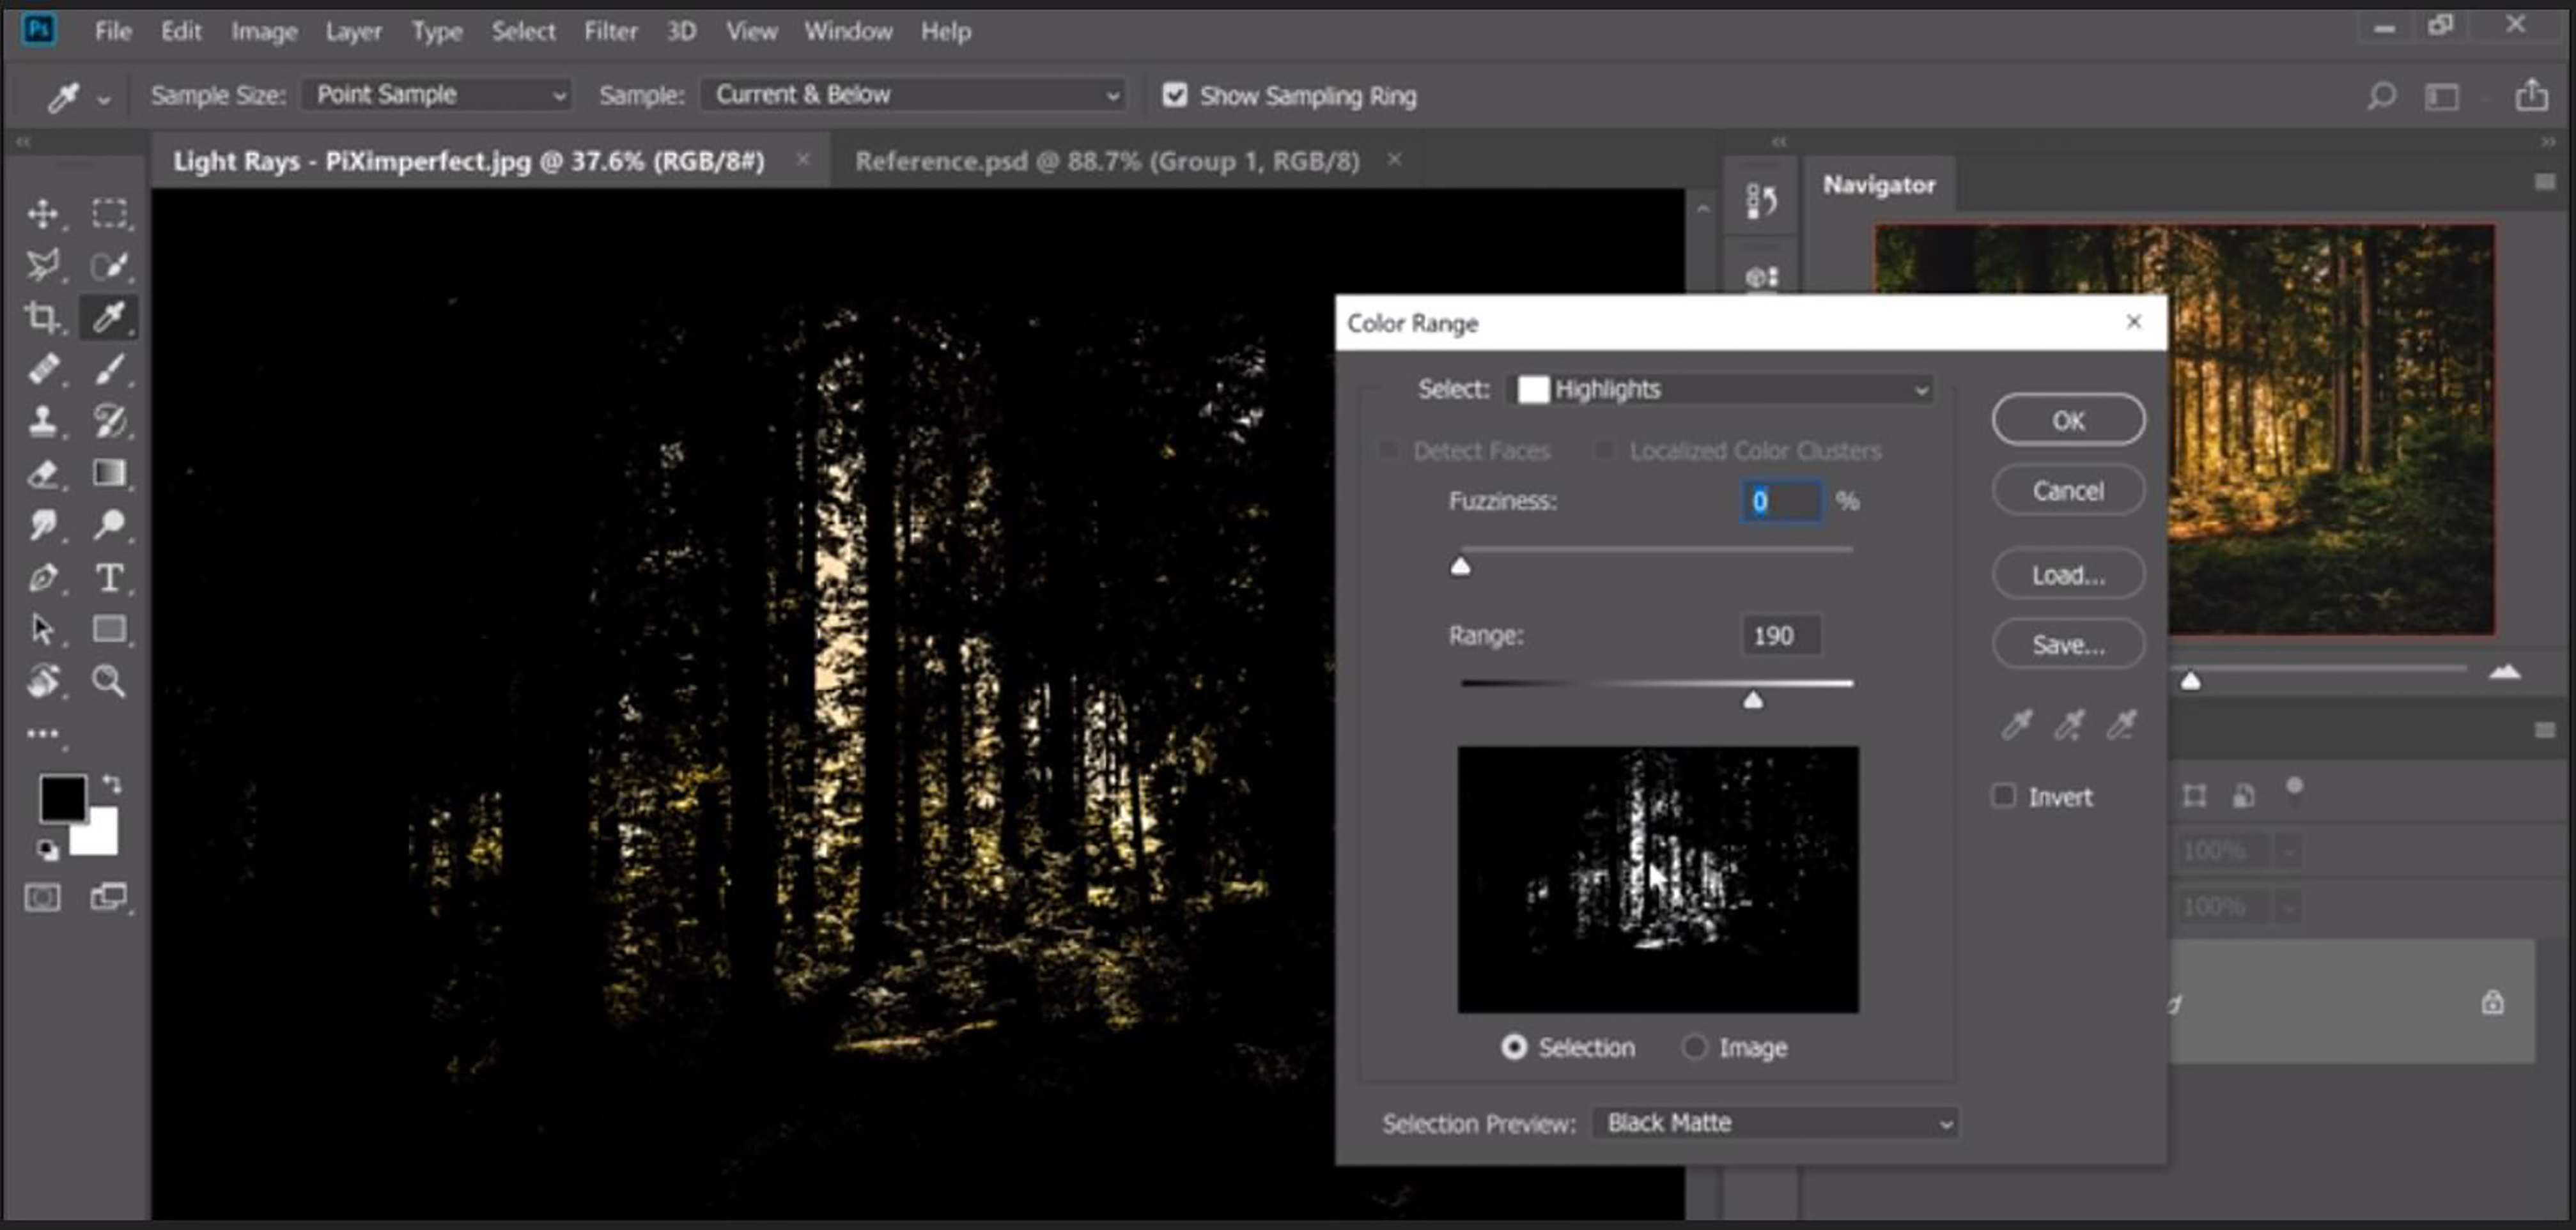
Now, by increasing the ‘range’ you could select the required bright areas in the image. Consider altering the ‘fuzziness’ slightly to enable a better selection.
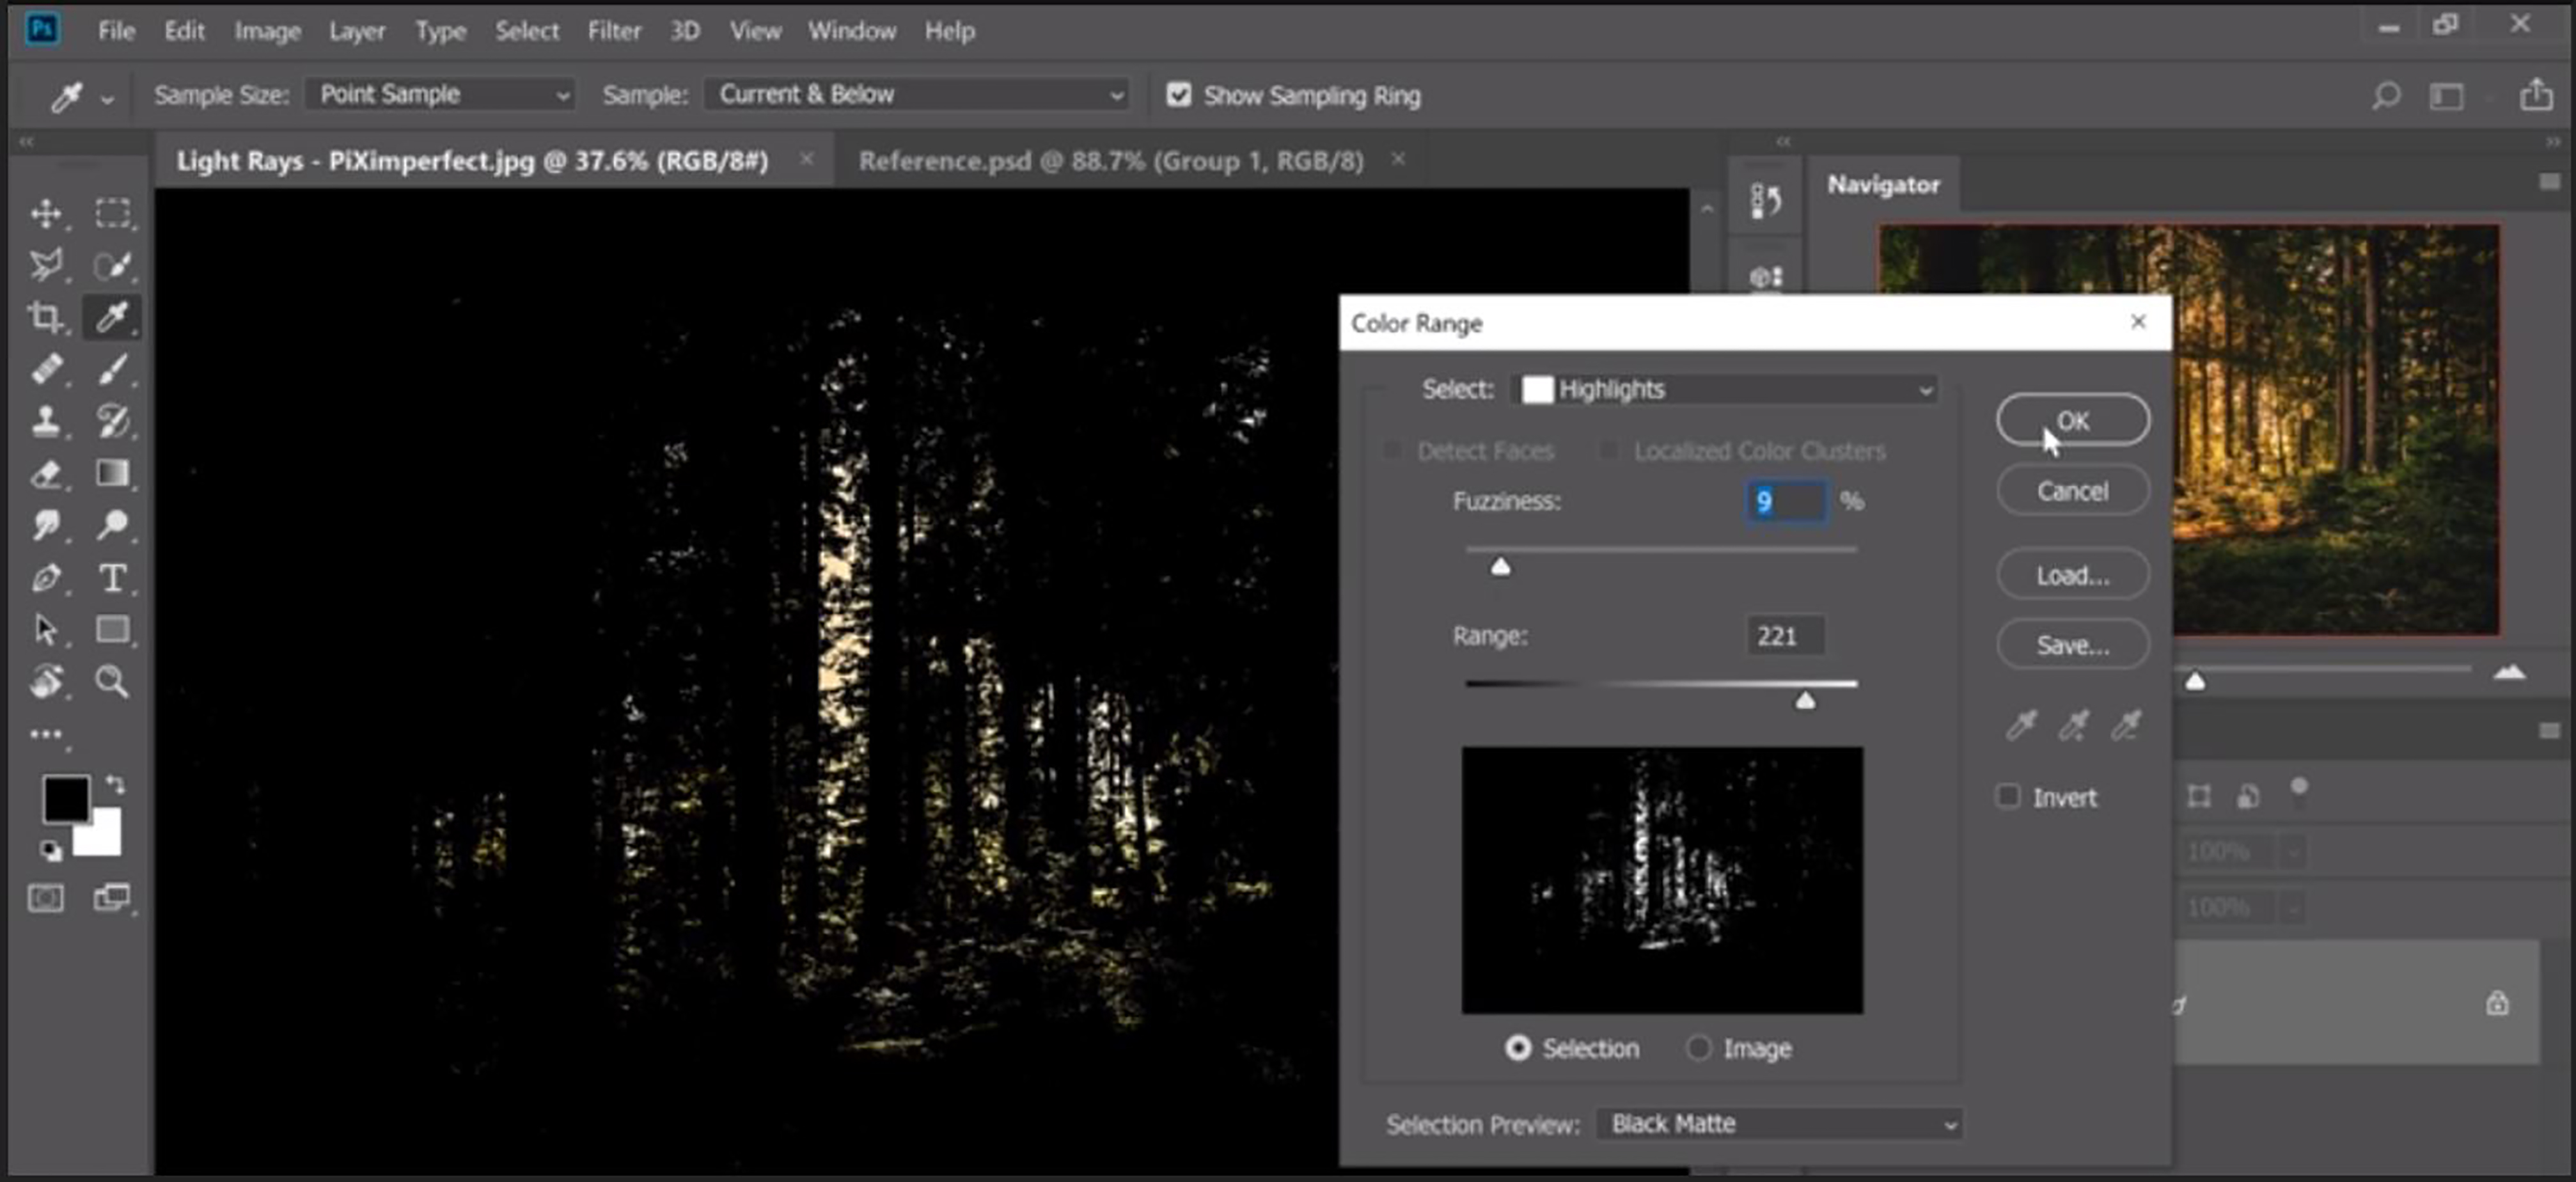
After selecting the required portion of the image, create a new layer.
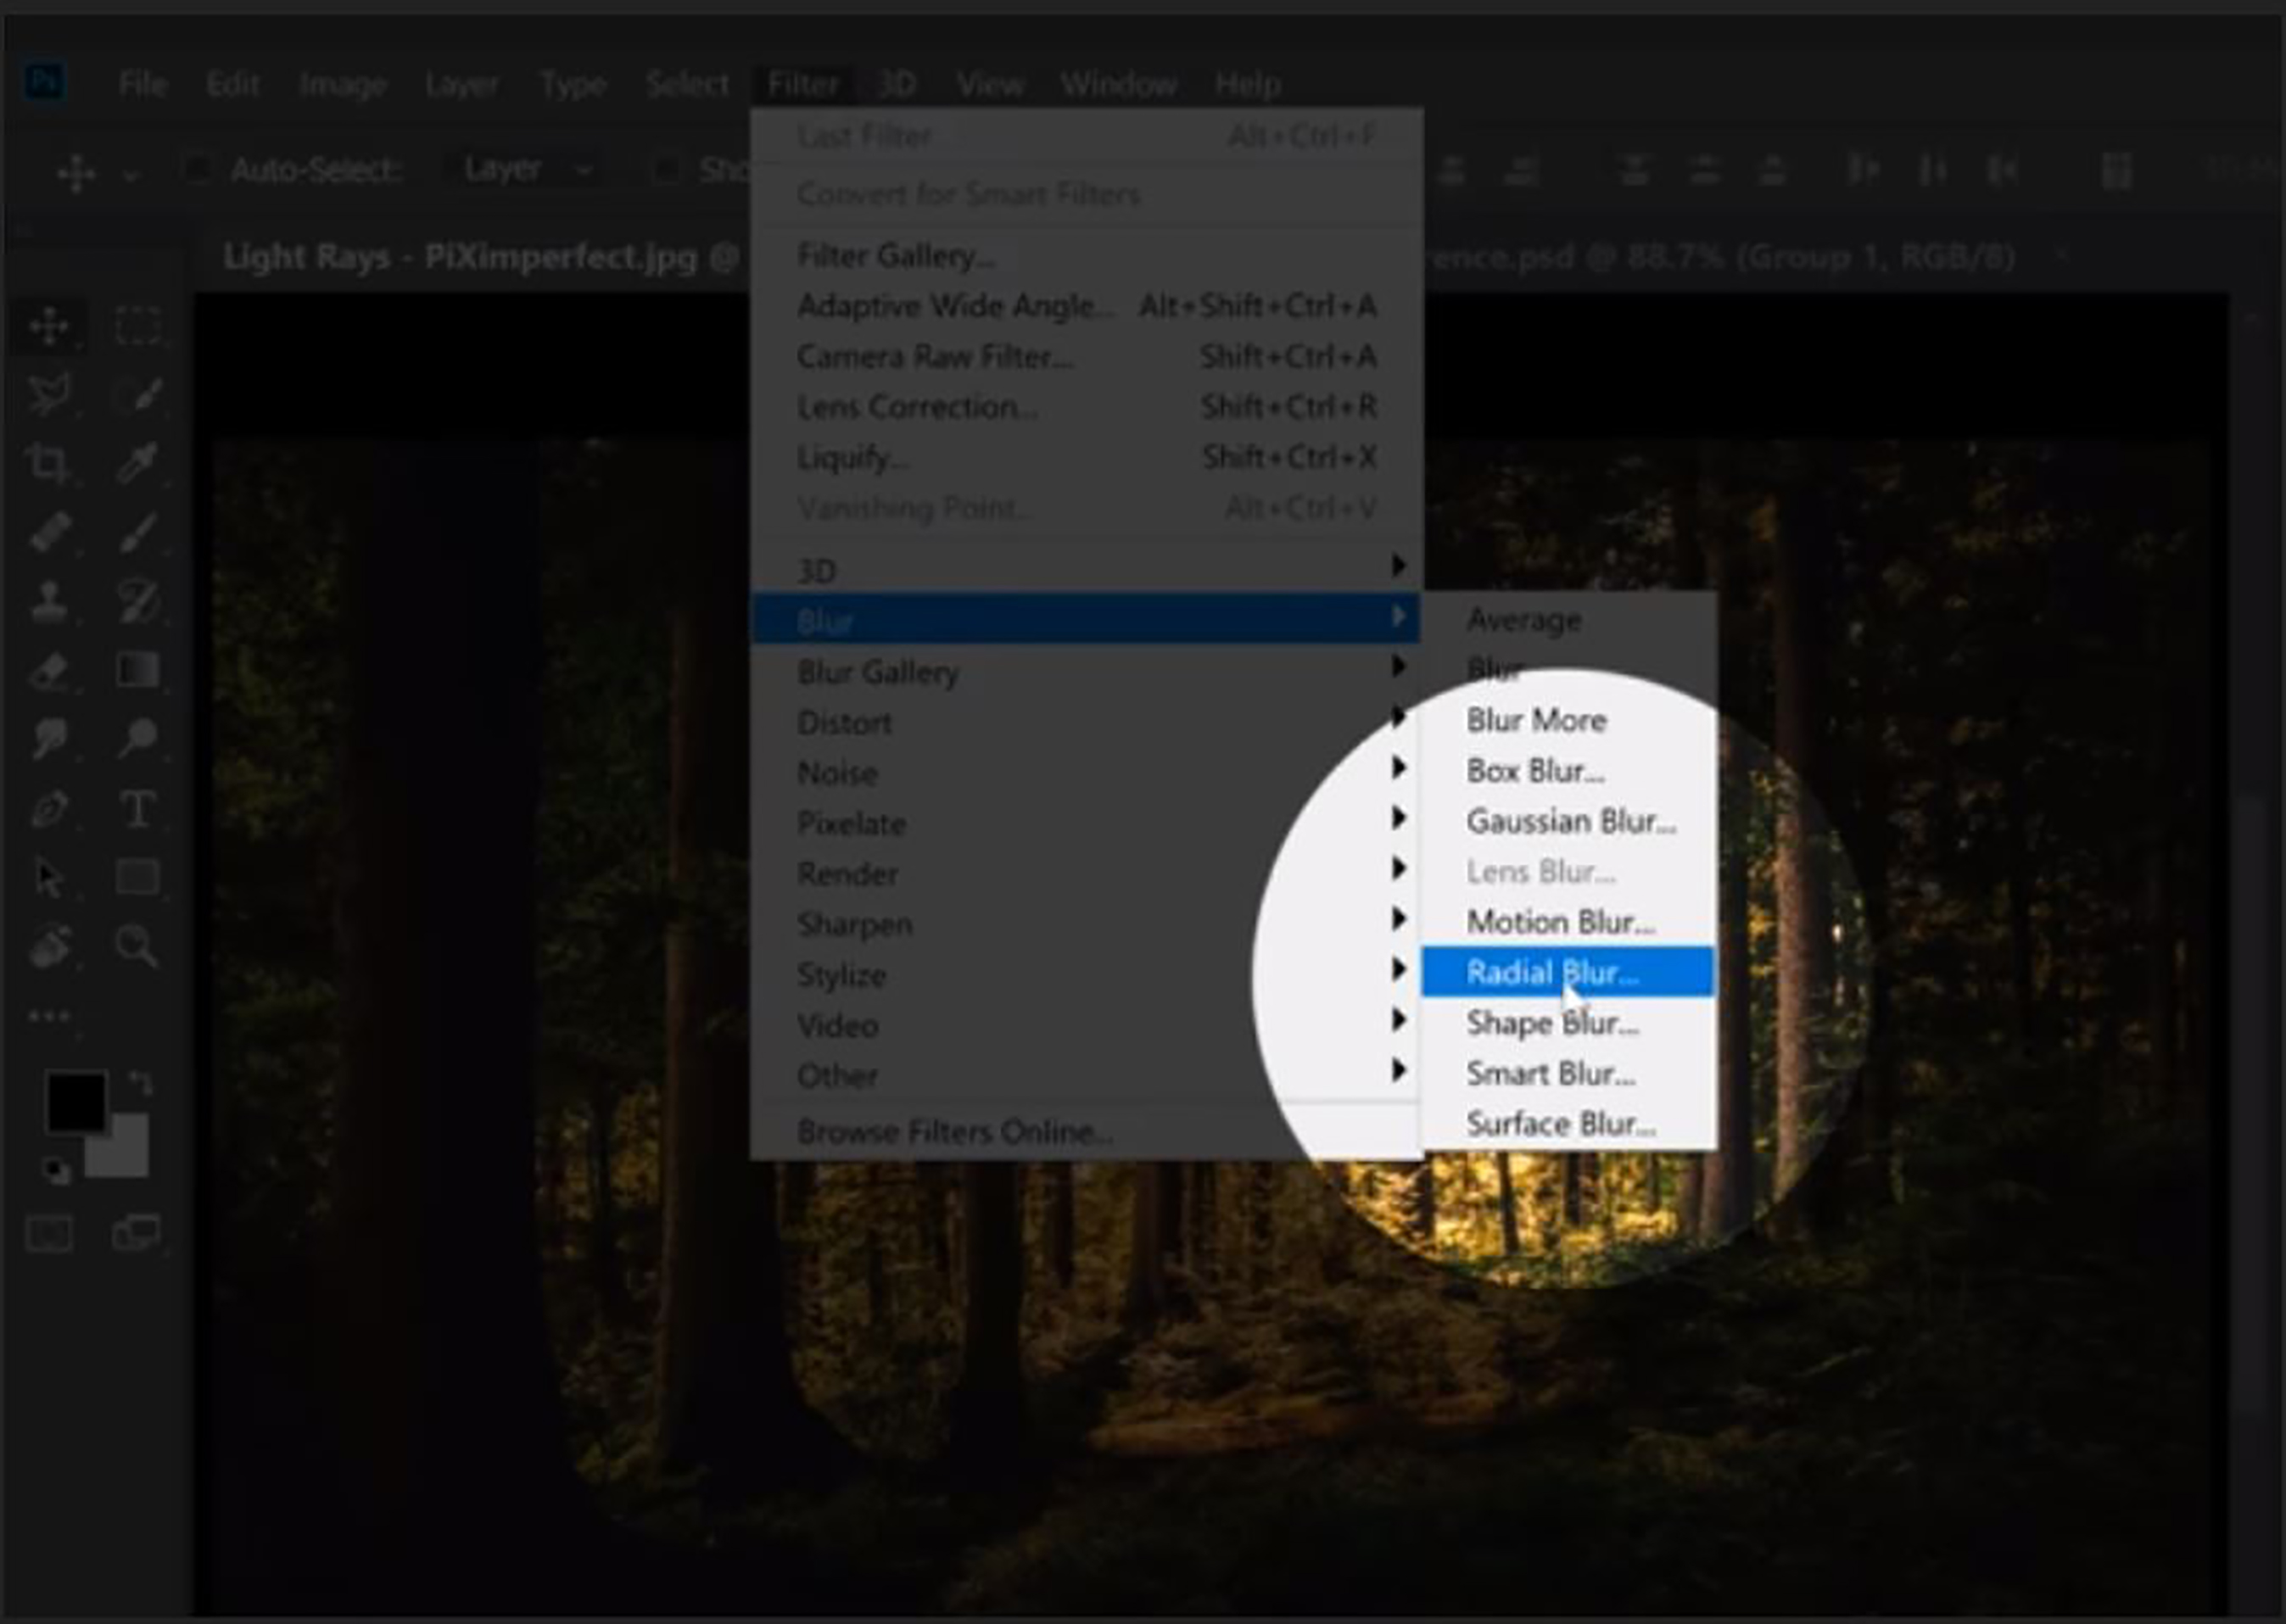
Second, blur the bright areas to create light rays. This could be done by using the ‘radial blur’. The ‘radial blur’ option is available in the ‘filter’ menu, under ‘blur’.
Once the ‘radial blur’ tool is opened, choose ‘zoom’ under ‘blur method’ and alter the amount to 100, as shown in the figure.
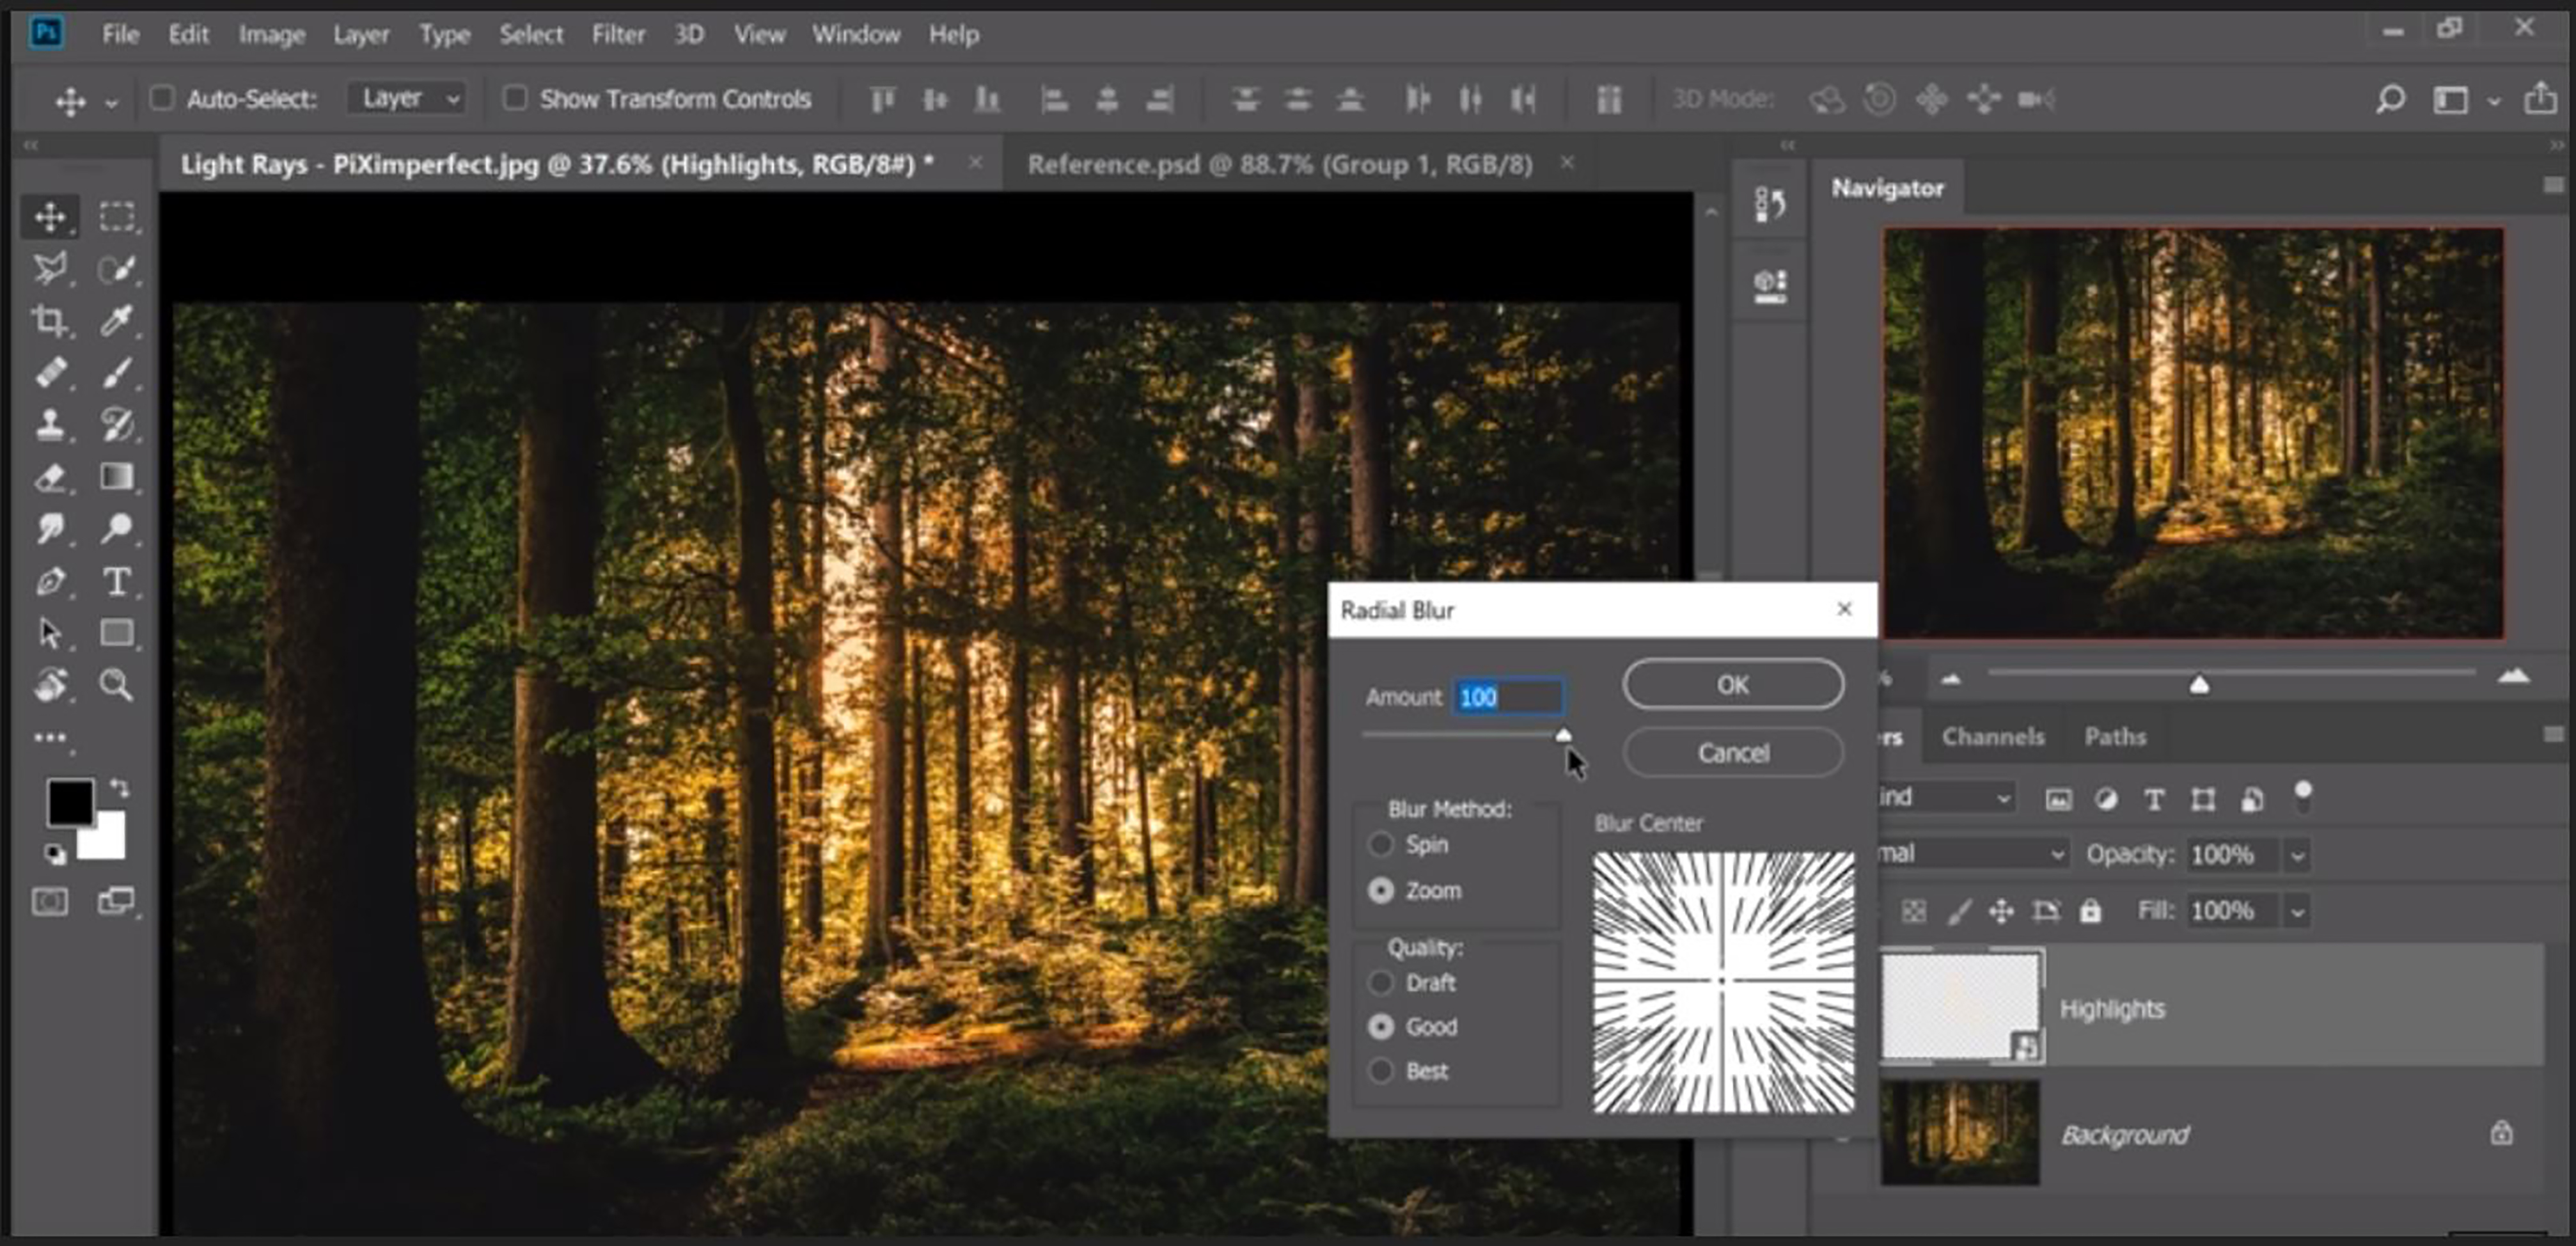
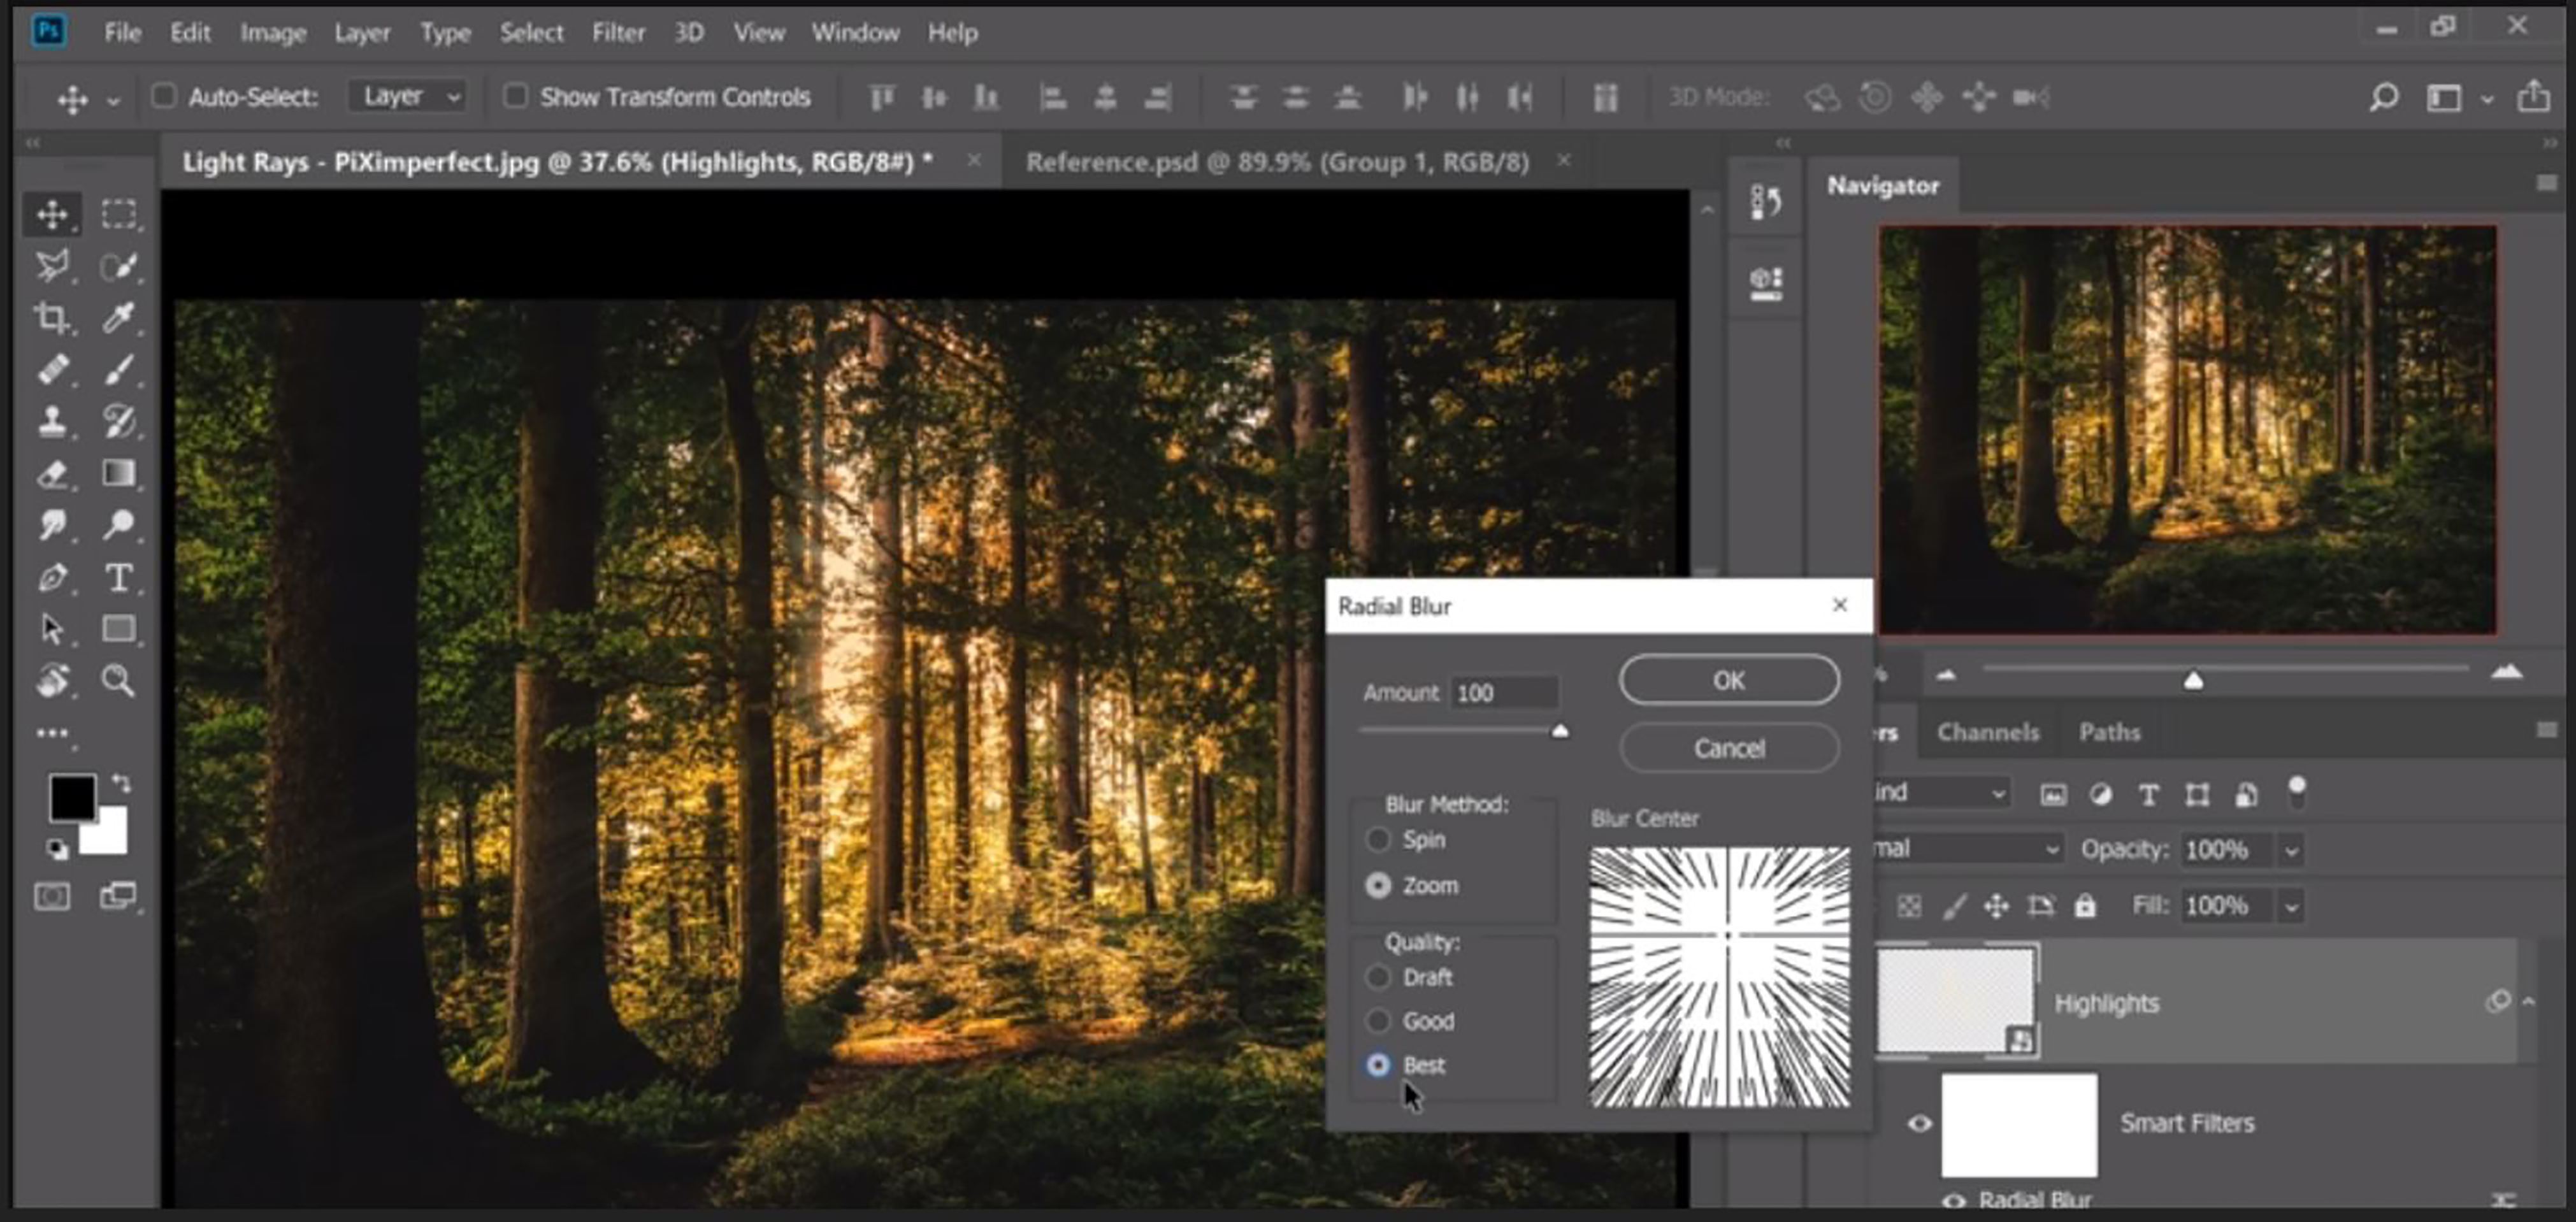
Then by analyzing the image, the projection of shadows would reveal the position of the sun. By guessing the position of the sun, adjust the blur center. It is recommended to keep the quality as ‘draft’ before fixing the position of the sun because of high quality consumes time. Once the position of the sun is fixed, change the quality to ‘best’ and click ‘OK’.
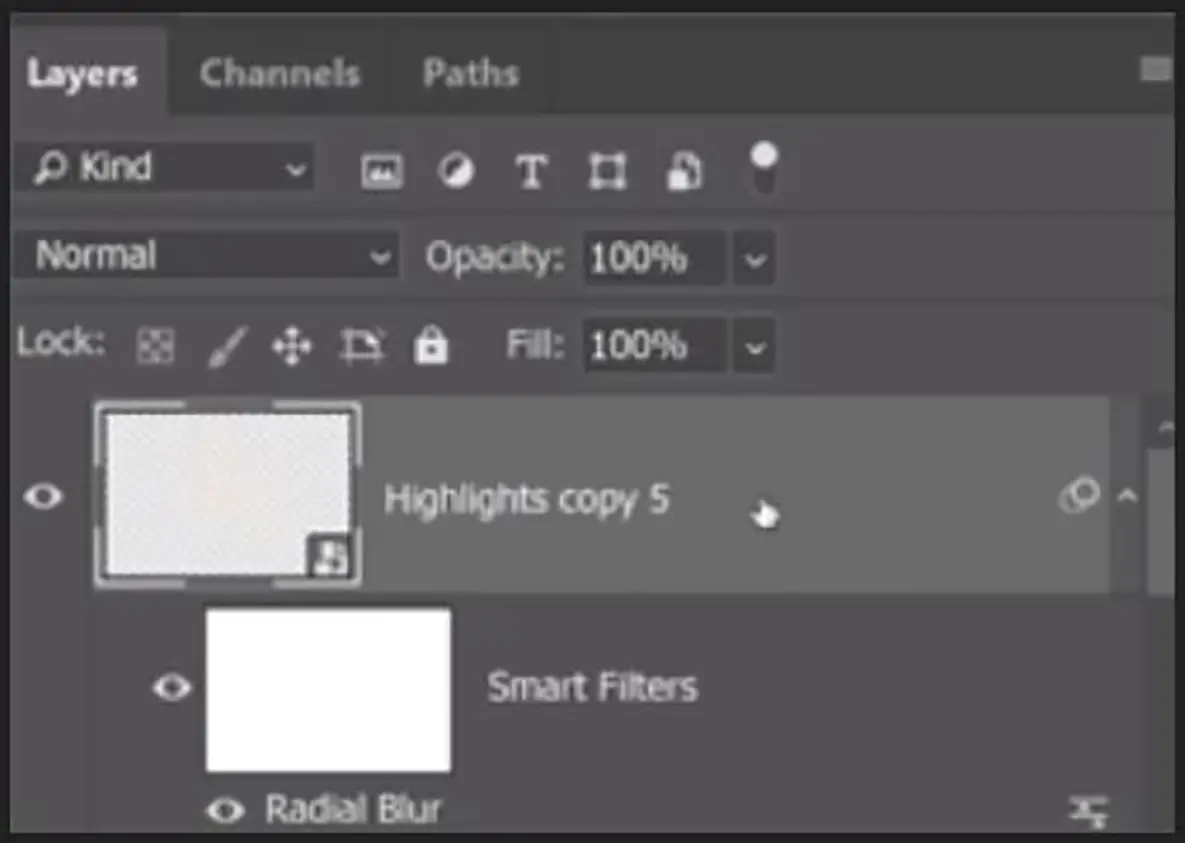
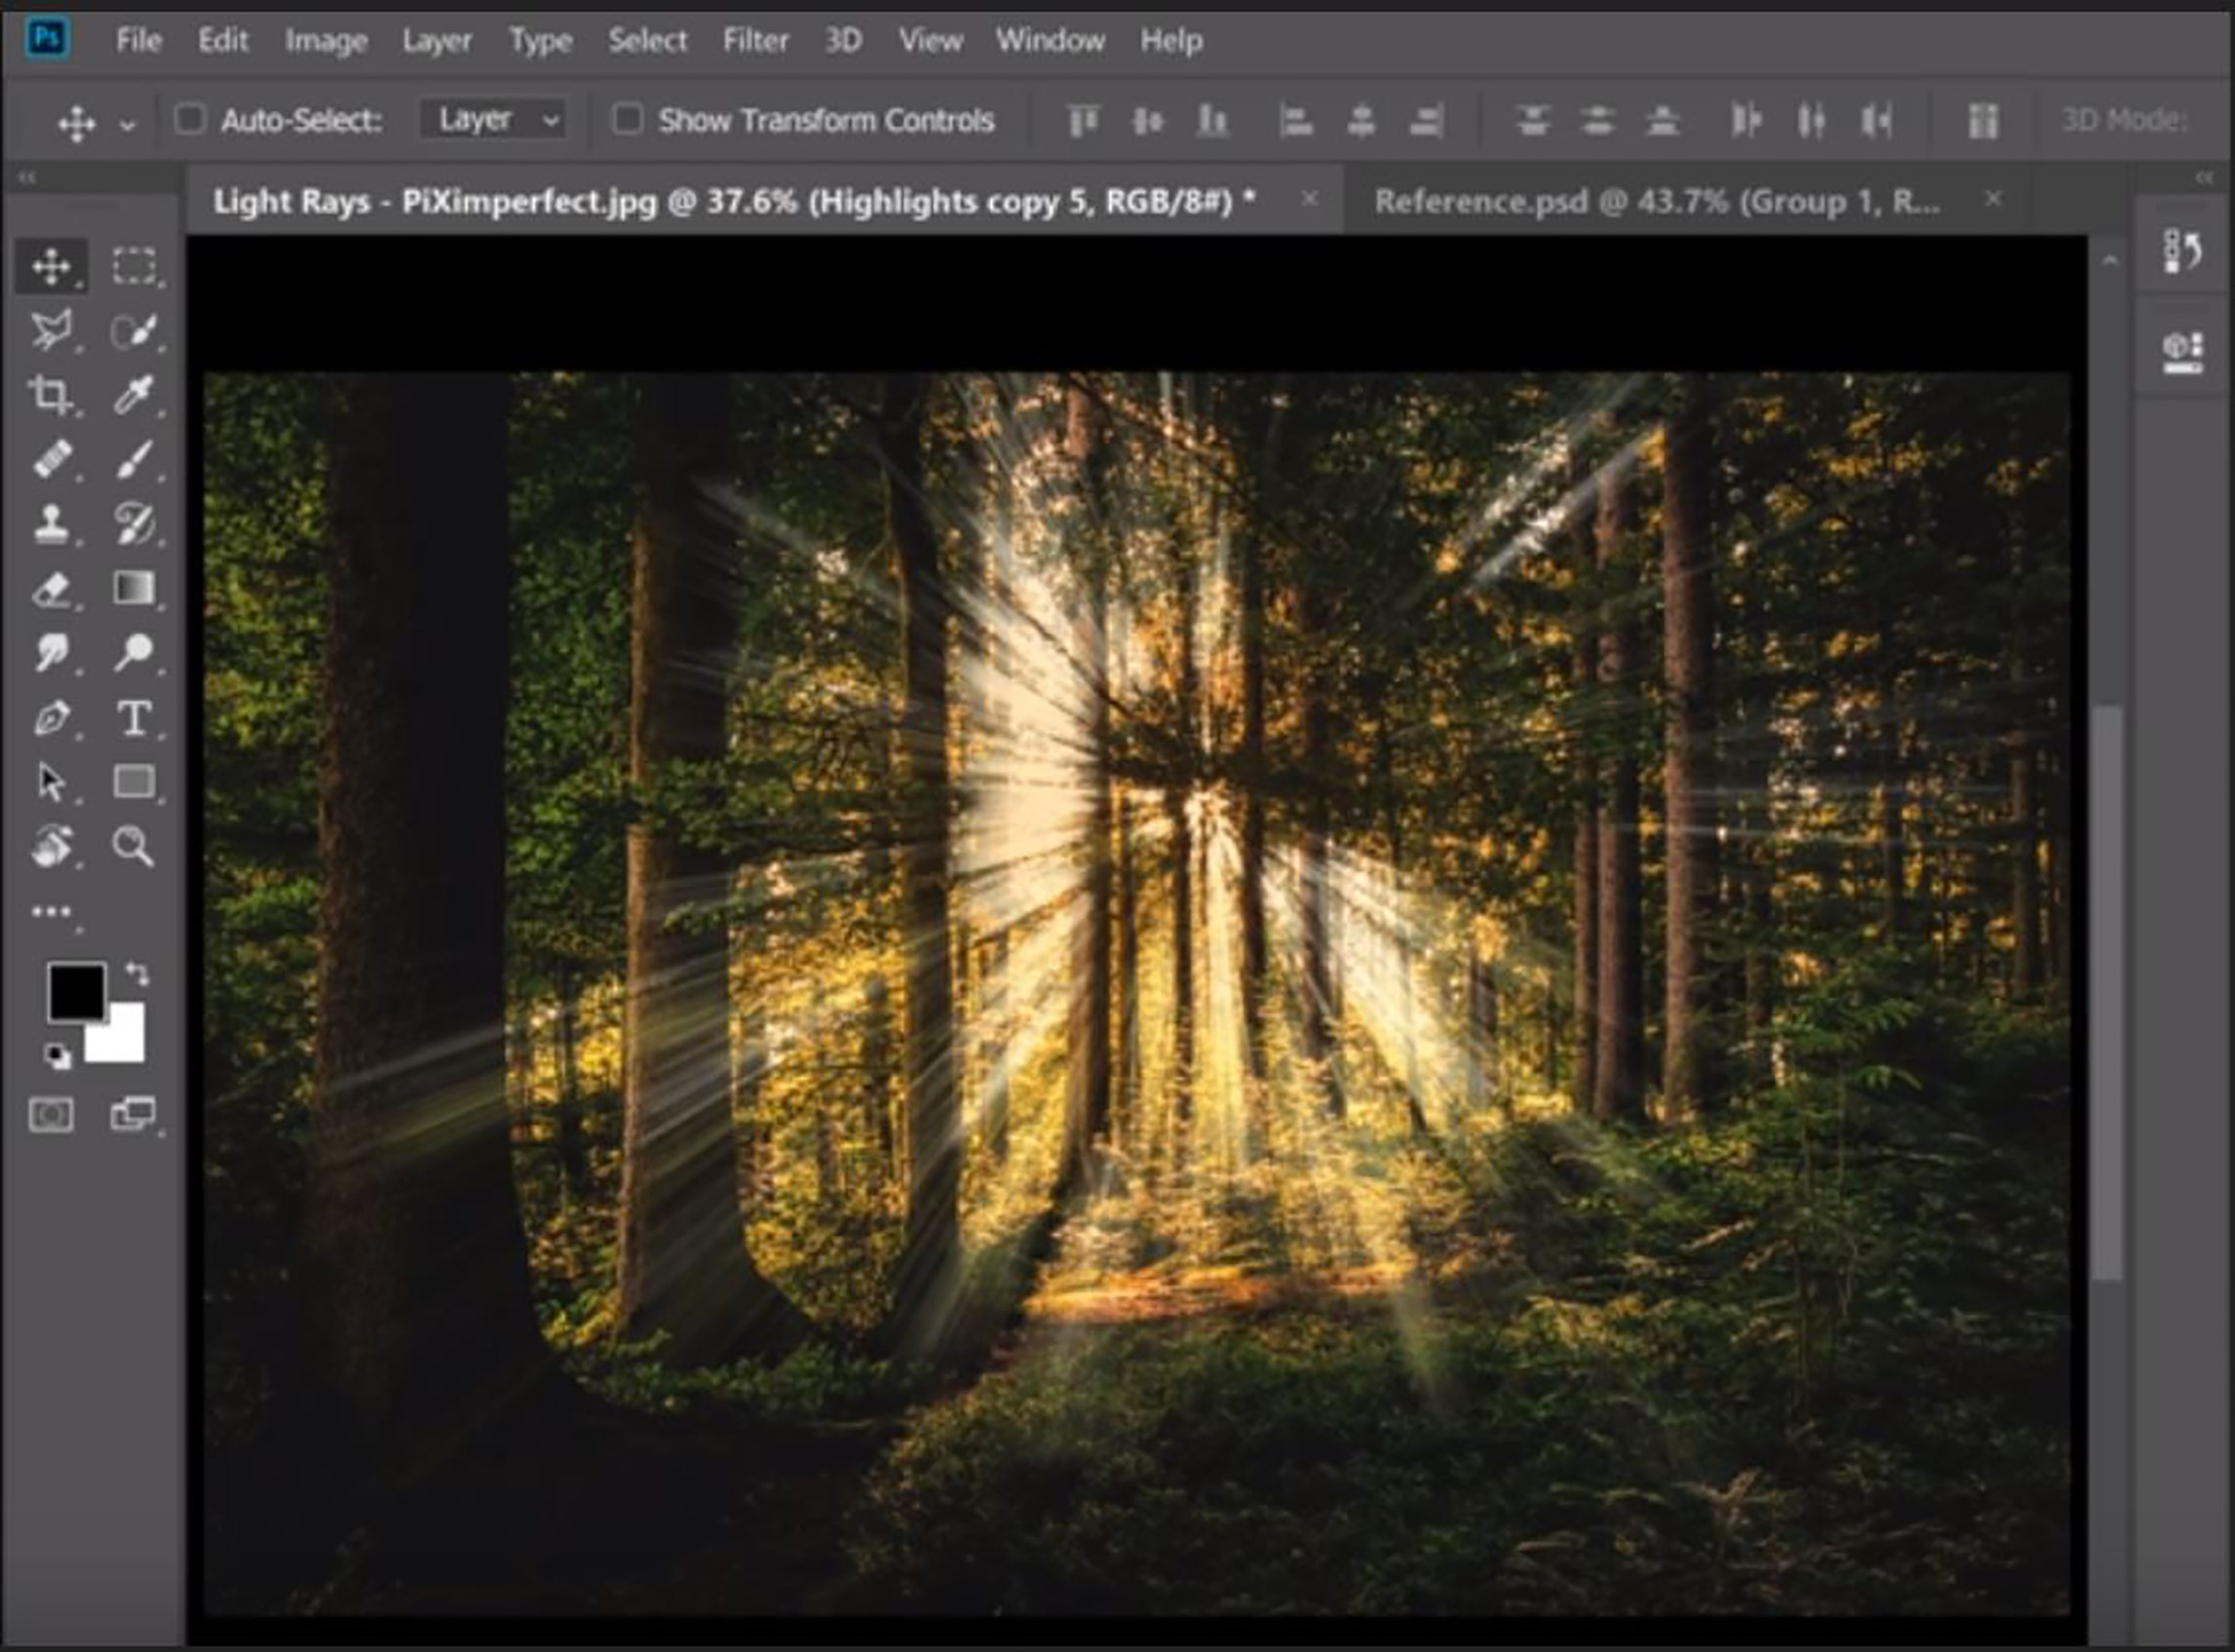
From the above image, it is obvious that the intensity of the sunrays is low. There is no need to panic, as the intensity could be increased in just one step. To increase the intensity, just make a few copies of the highlight (CTRL+J).
Technically, sharpness should increase moving closer to the sunlight. However, the highlighted area is far from the light source and is little sharper.
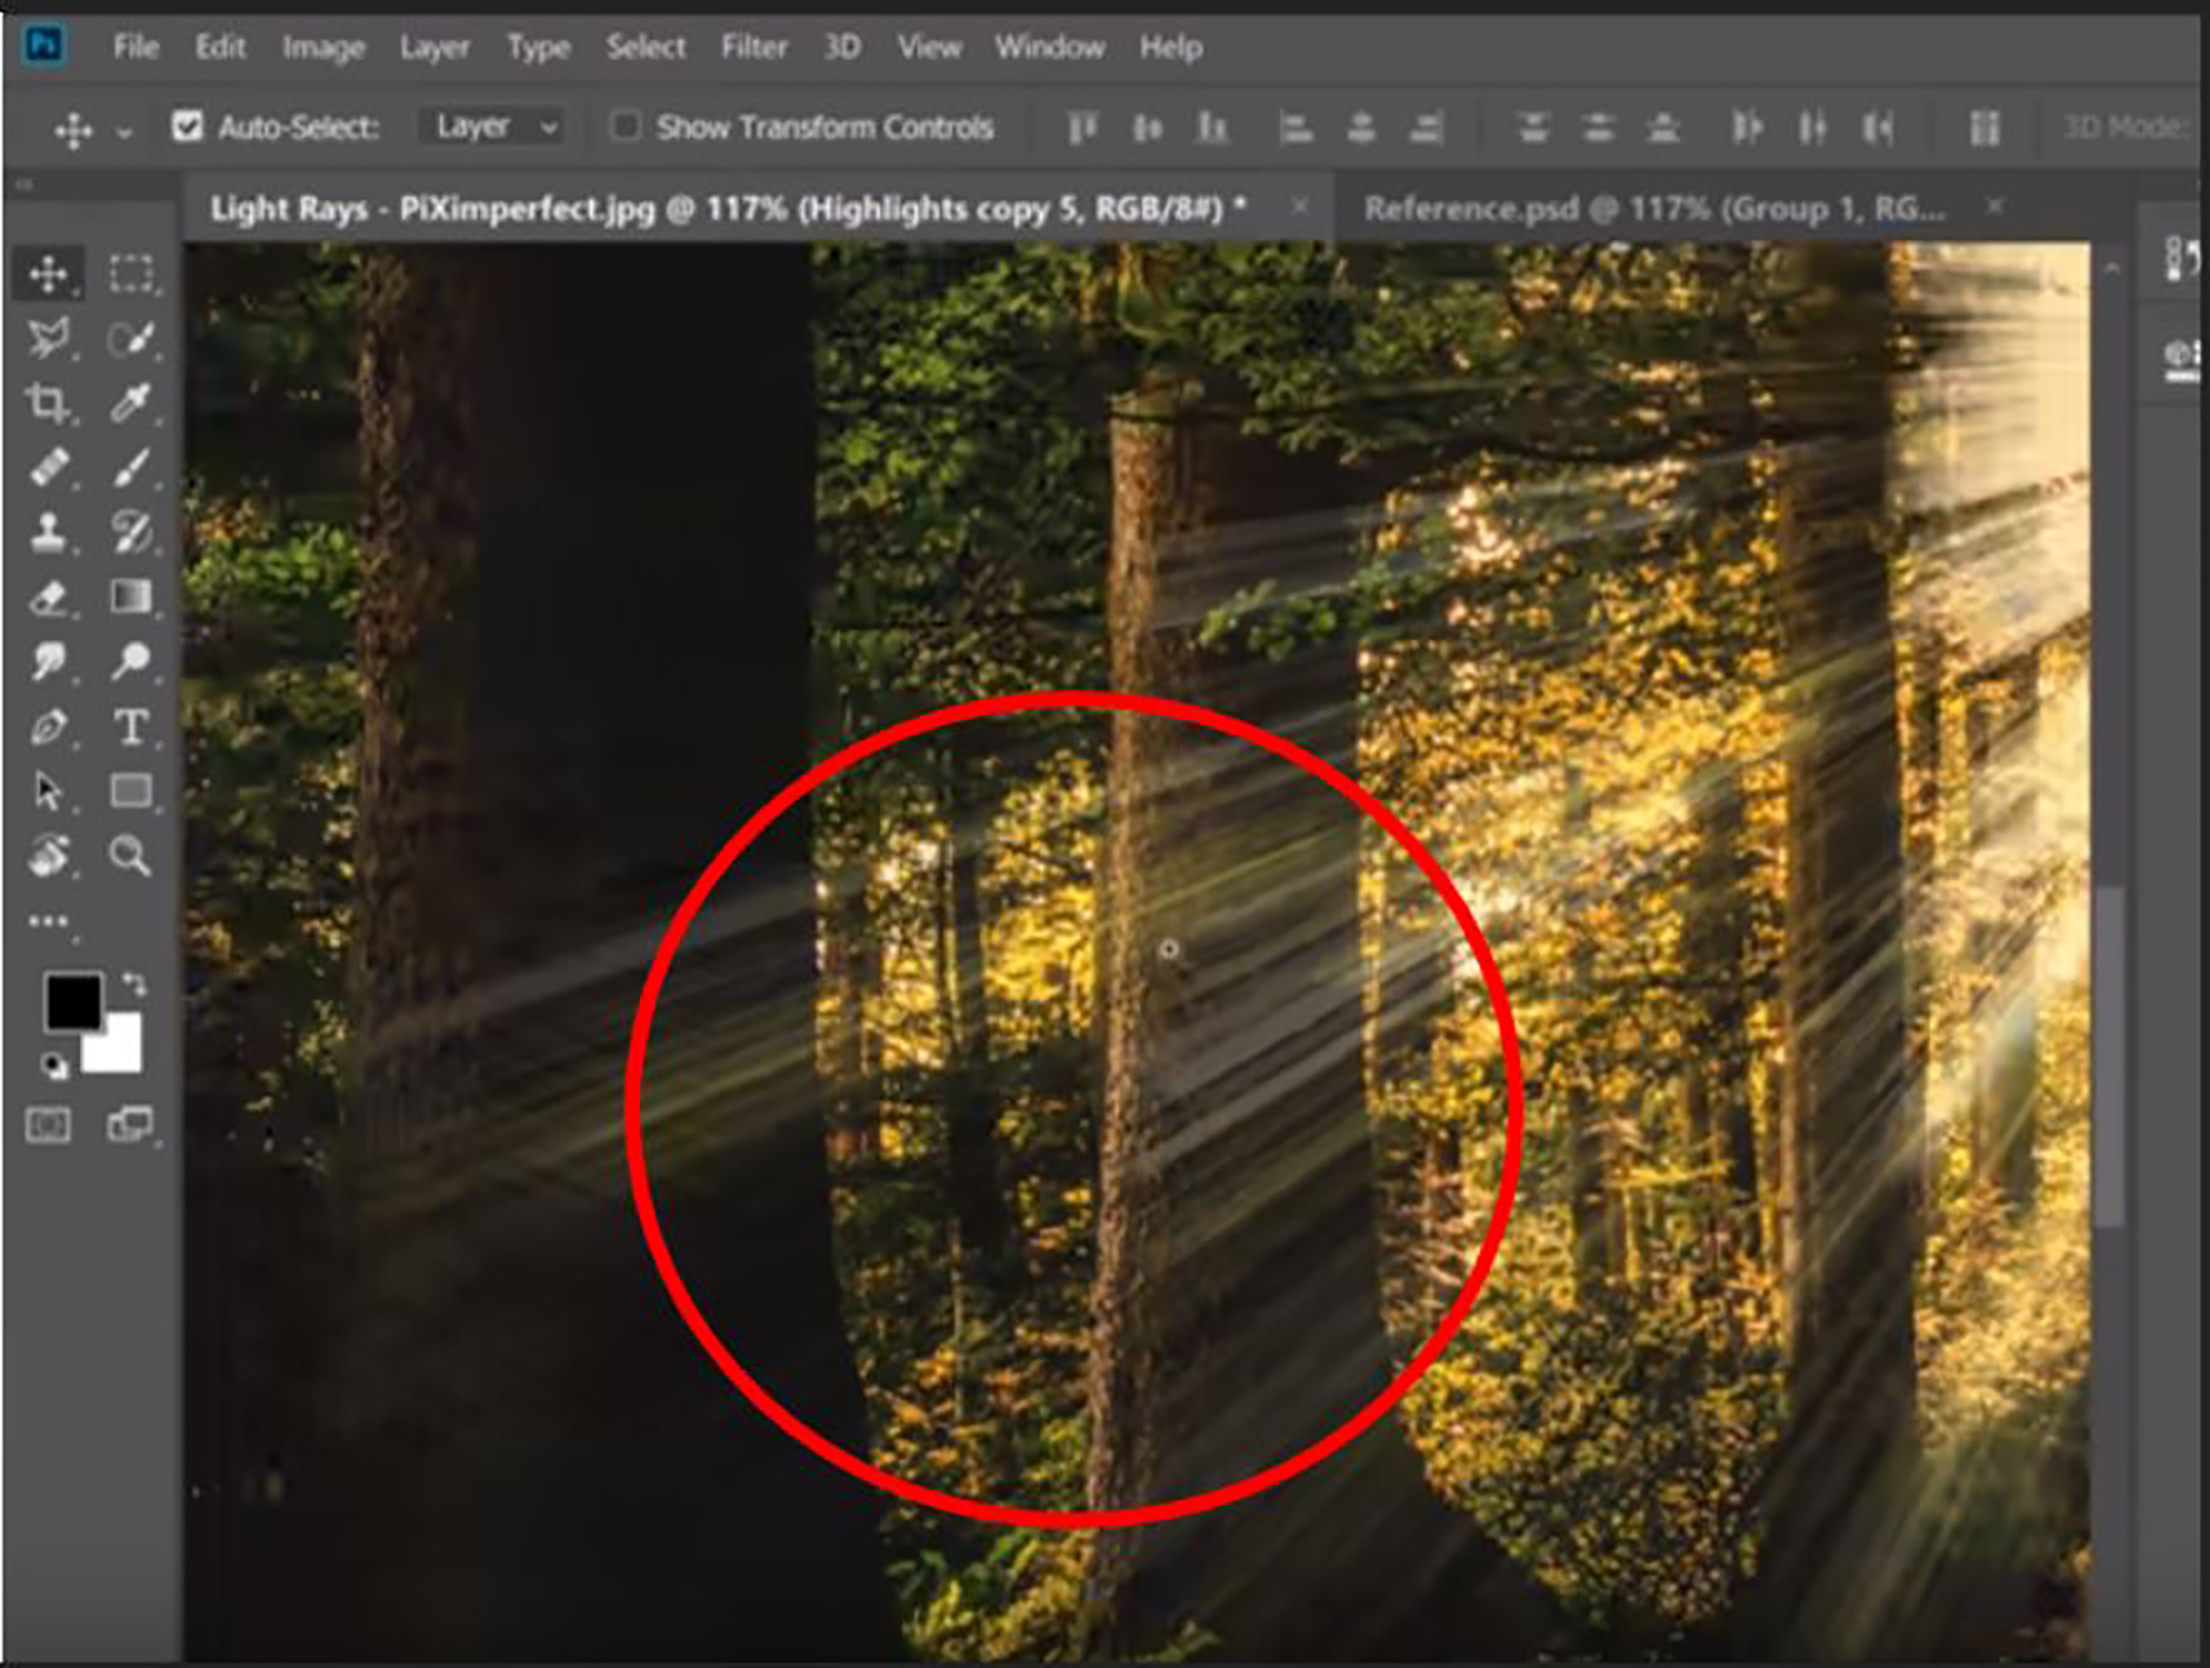
How to modify it? The answer is very simple; blur that particular area.
First, holding the ‘shift’ key, select both the topmost and bottommost highlights. Then right click over the first highlight and select ‘convert to smart object’.
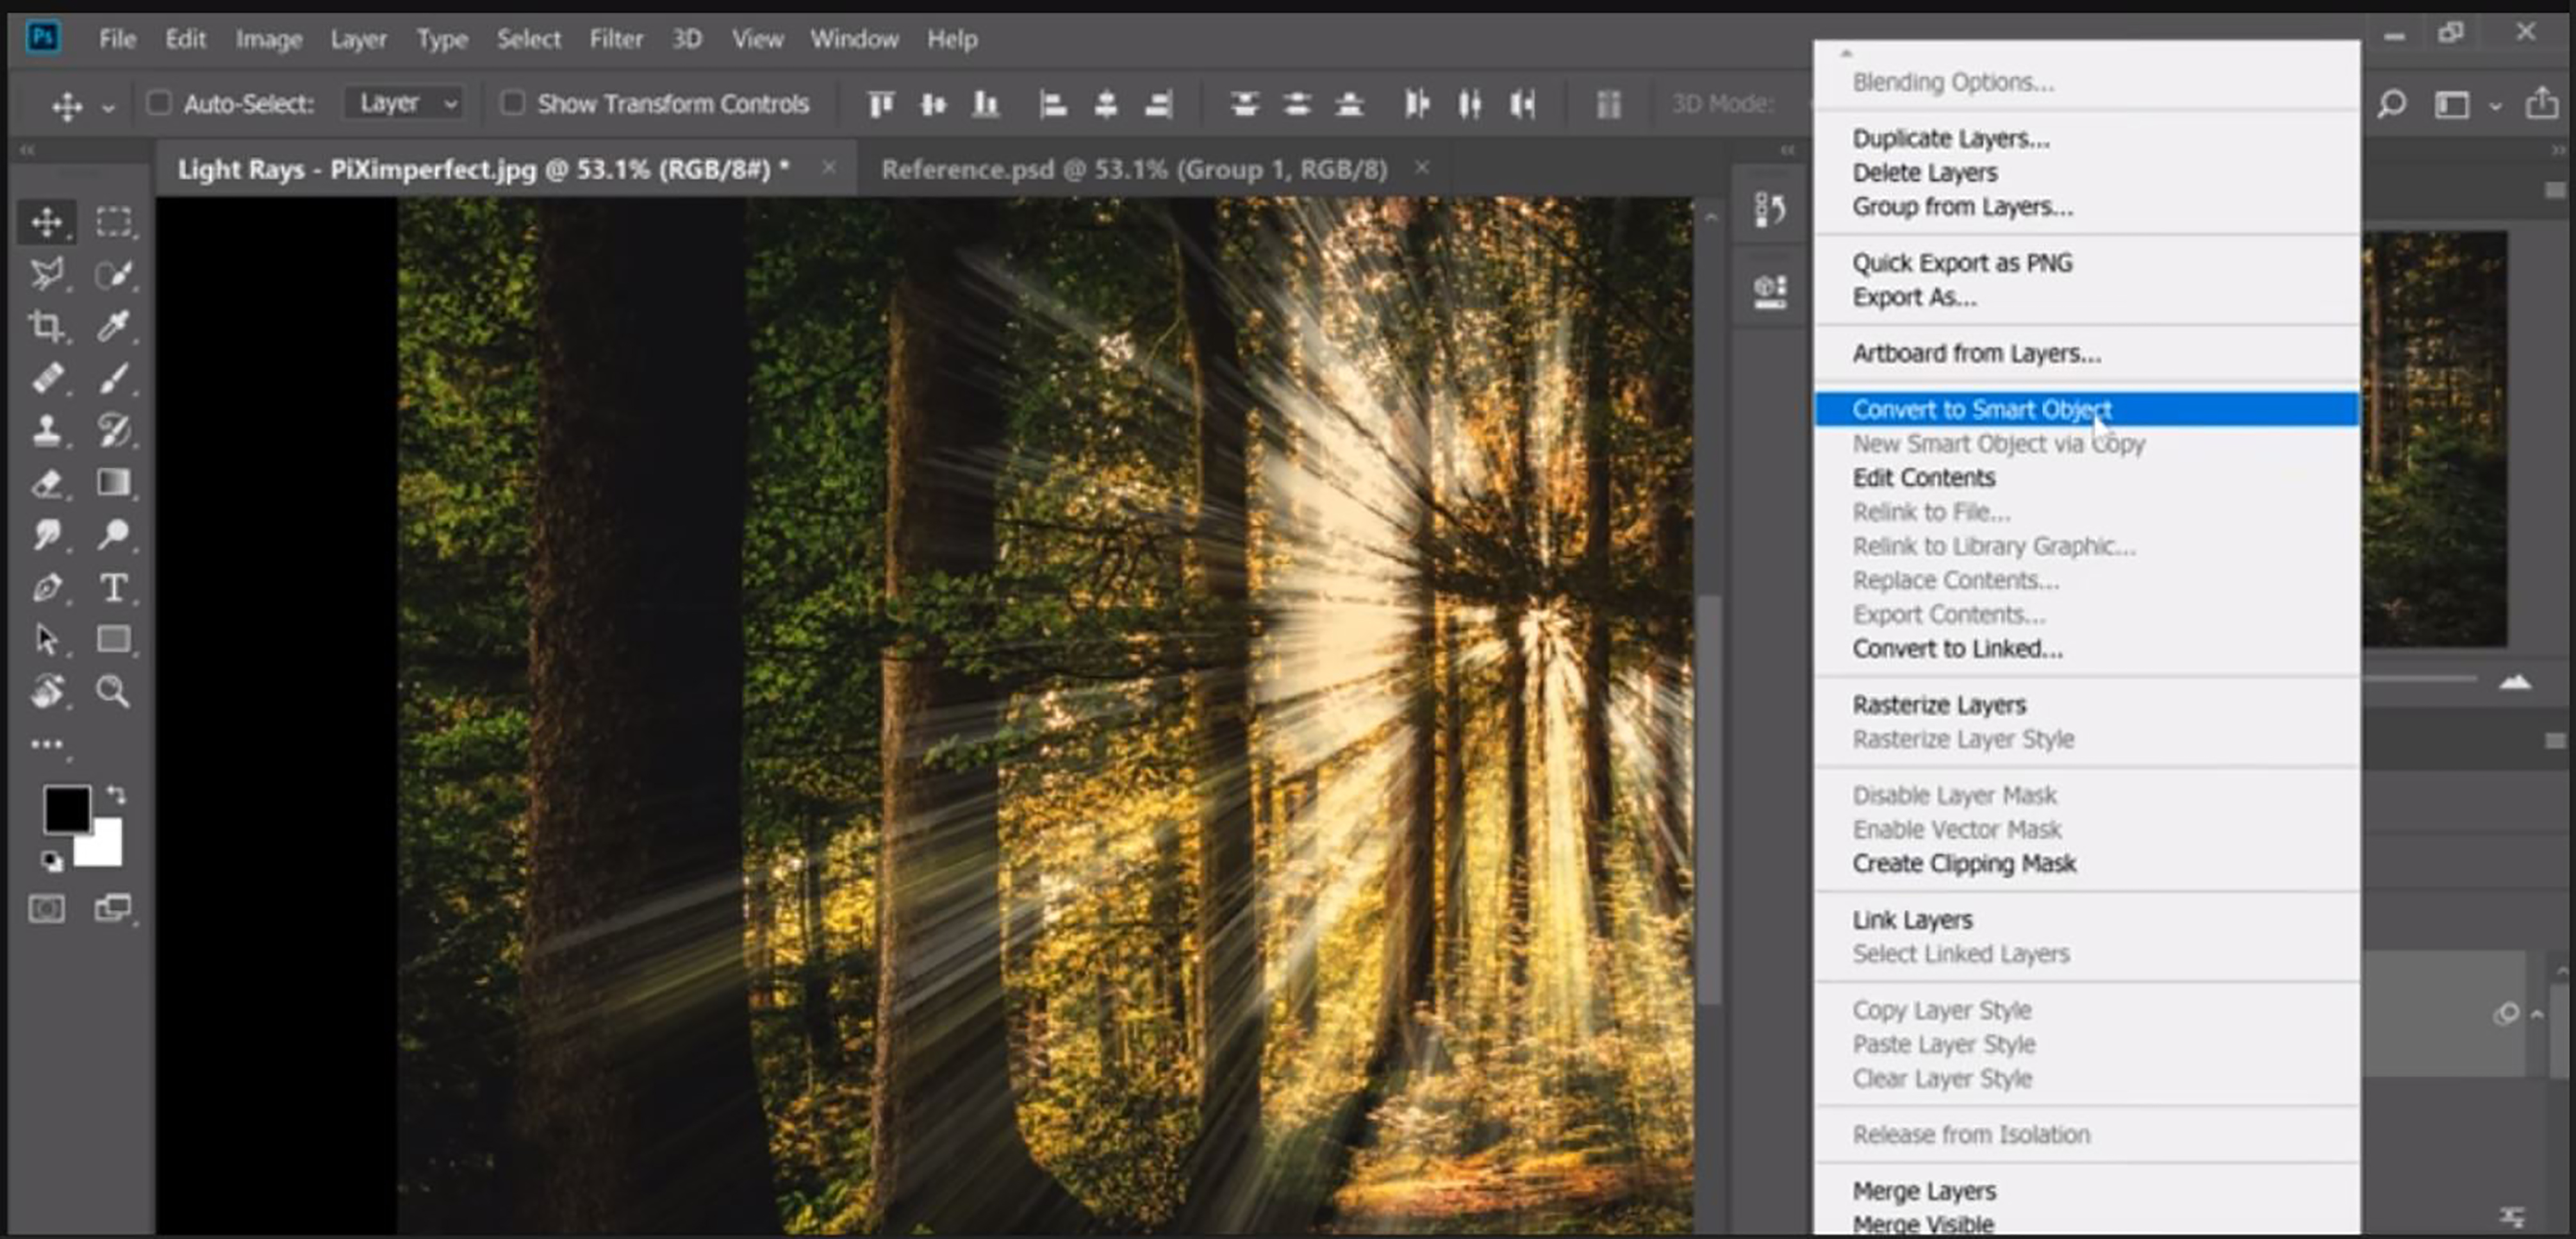
This converts all the highlights into a single smart object, which helps us to handle it with ease.

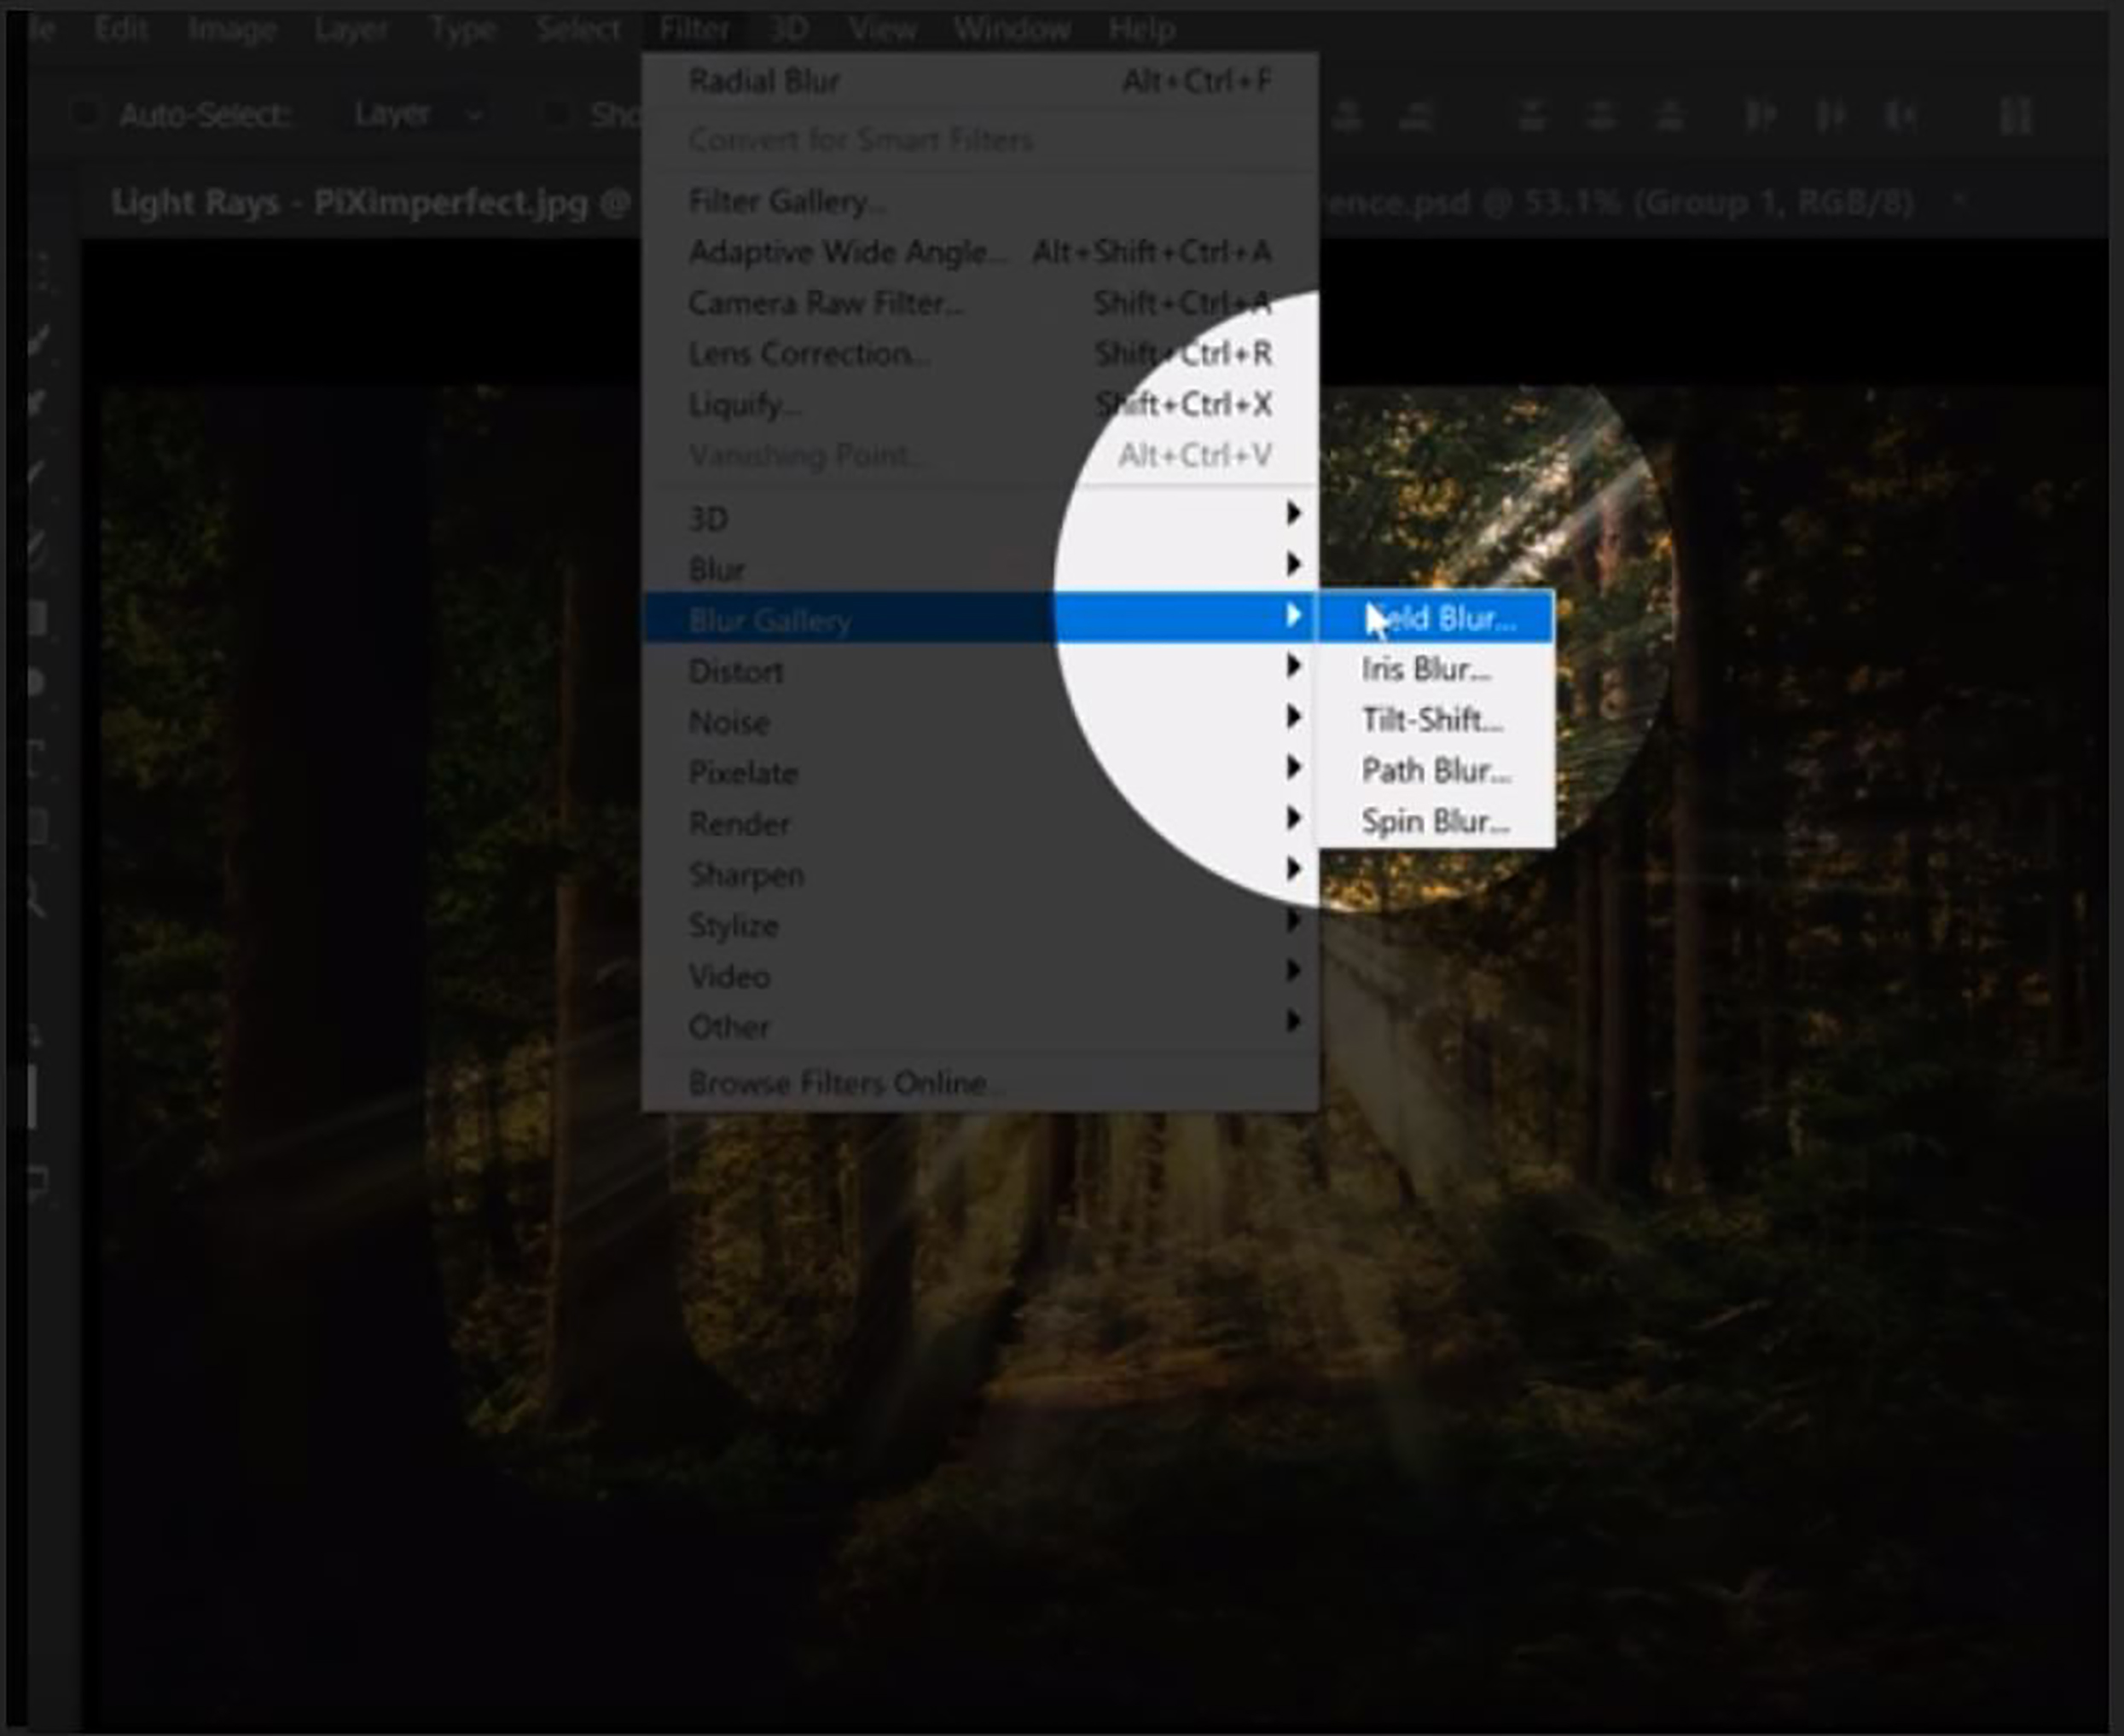
Then open the ‘field blur’ tool in ‘blur gallery’, under the ‘filter’ menu.
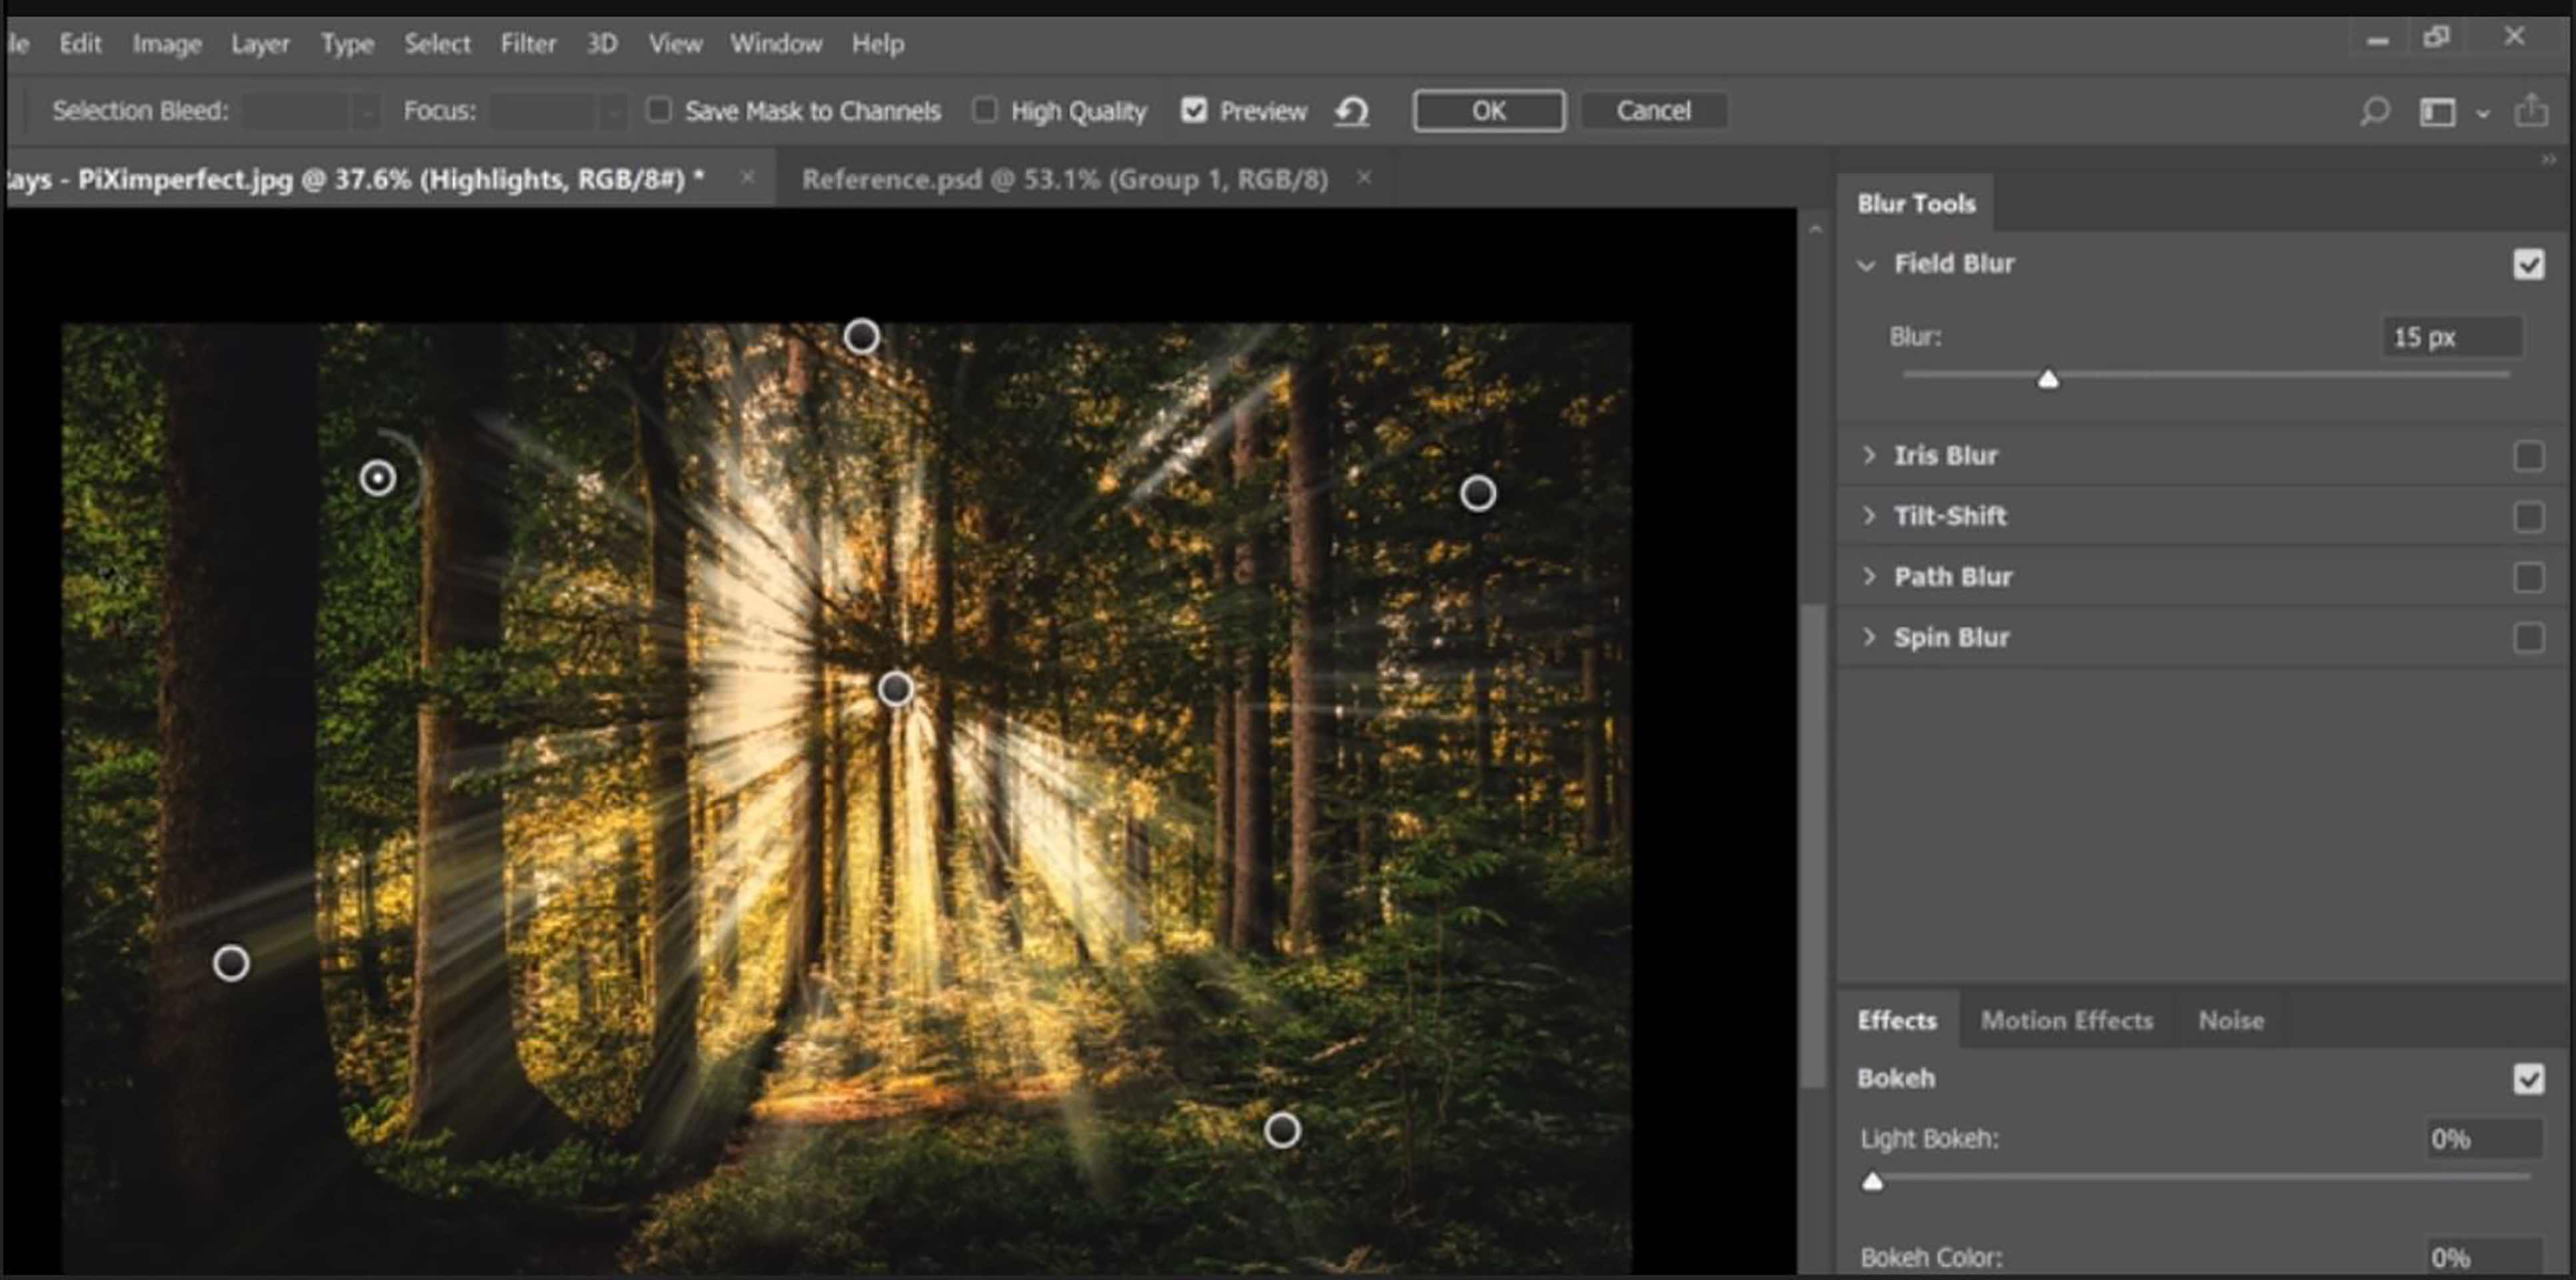
Create blur points in the required areas. Ensure that the blur value is zero at the center and increases radially outwards.
What if you want to add colors to the light? Can you do it? Indeed, you can change the color of the light rays to any color you prefer with just two steps. First, click on the ‘adjustment layer’ icon, and choose a solid color.
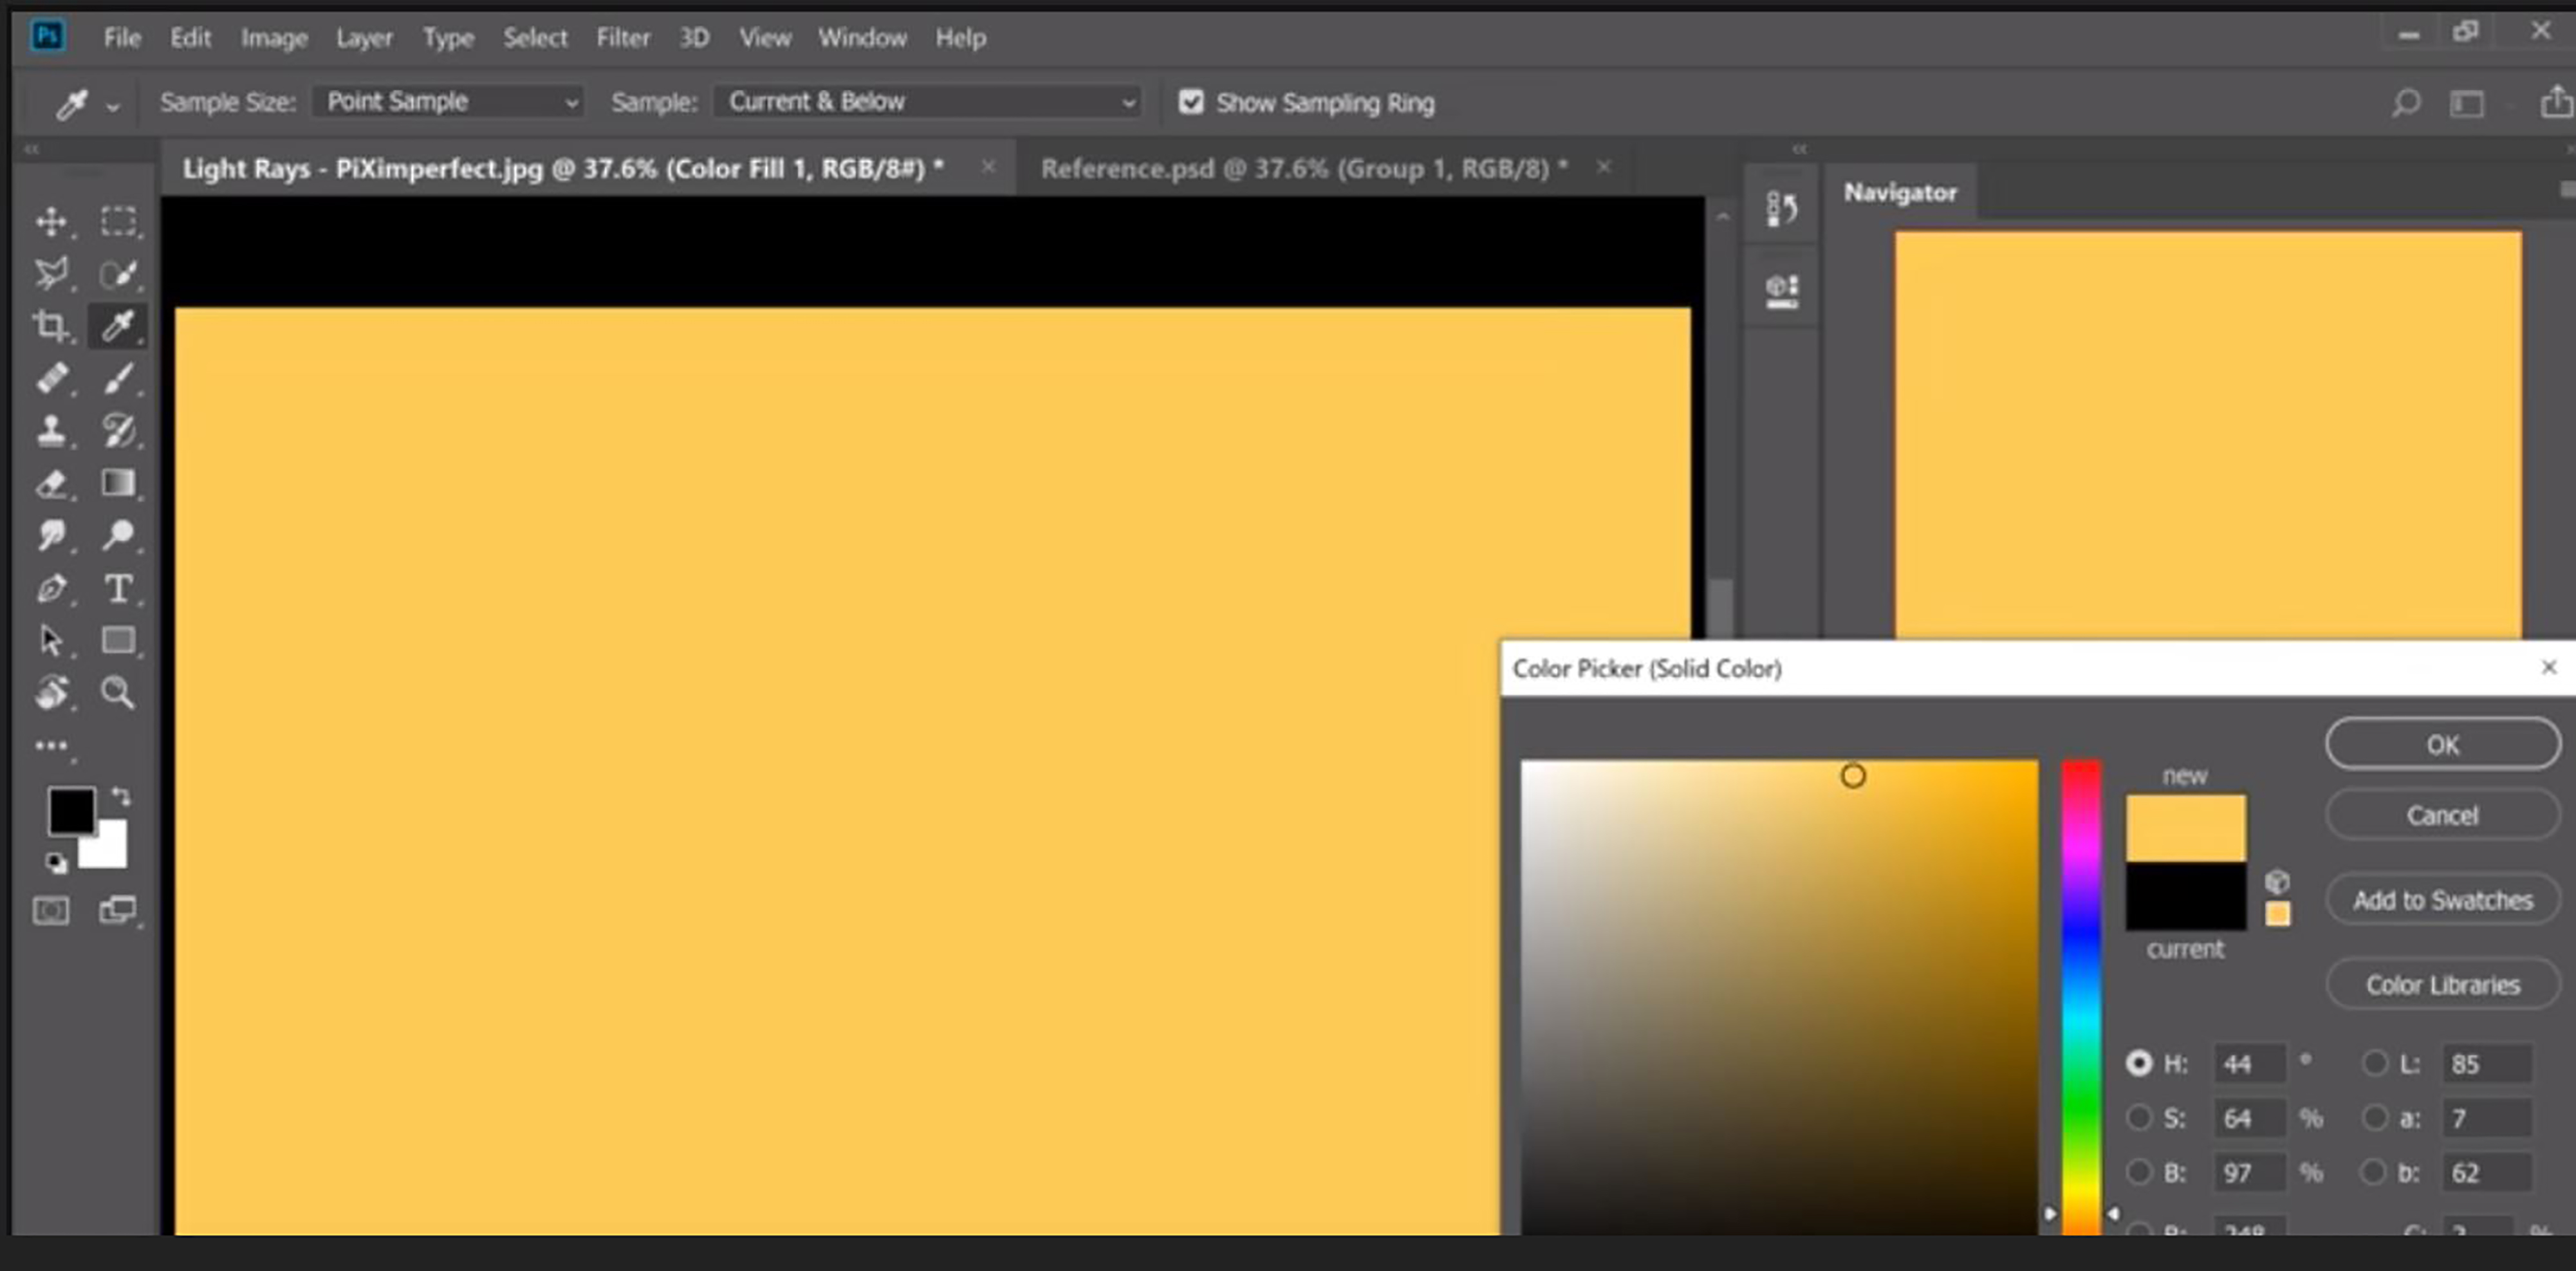
Then, choose a color of your preference and create a clipping mask. A clipping mask could be created by holding the ‘alt’ key and clicking on the line between the ‘color’ and ‘highlights’ in the layer panel.
The above-described tricks are just like the roots of a big banyan tree. There are many more tricks such as creating rain, removing shadows, making objects transparent, turning photos into sketches, creating reflections and even creating lipsticks. Despite the fact that you can learn these through websites and classes, self-exploration is the best. It allows you to learn new things on your own and perhaps you could find your own tricks, which none might know.
Therefore, expertise in Photoshop would enable you to create your own virtual world, which seeps in a feel of omniscience. Doesn’t it sound great? Besides, it holds the potential to be an expert photographer. As mentioned earlier, perhaps it is impossible to take a perfect photo but you can always create a perfect photo. Being good with Photoshop gives you the potential to have a great career in the field of graphic design and photography. In addition, there is scope in the film industry. It is always awesome when you are paid for doing the job you love.
Let me know if you have any questions or comments.
Click the following link to learn why your Photoshop keeps crashing and how to fix it.
For more on photoshop tricks, take a look at this article.


3 comments