Do you think that your images lack details? Here is the way to extract the extra details that are already present in your photos, but are not visible, using Photoshop.
Some methods like high pass sharpening will either give you a way too crunchy look or create halos around the edges of the different elements in your image. However, this is a different approach, which is less prone to these unwanted artifacts.
This method will give you a similar result as if you were using the Nik Collection Detail Extractor filter found in the Color Efex Pro 4 plugin that you can get for free for Photoshop. However, by following the step-by-step instructions below you will learn how to extract inherent details from an image without using external plugins.
Step-by-Step Guide to Enhancing Details in Your Images
First of all, open the image you want to have more details, in Photoshop.
Next, duplicate the layer, by pressing CTRL+j (Win)/CMD+j (Mac) twice.
Call the first layer Blur and the topmost of the two duplicates you should rename to Detail Extractor. Hide the Detail Extractor layer by clicking on the eye icon for this layer in the Layers panel.

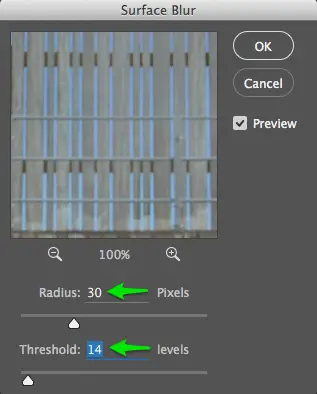
In the dialog chose a radius around 30 and a threshold of 14, and hit Ok to apply it. It may take some time for Photoshop to complete the process, especially if your image is 16-bit.
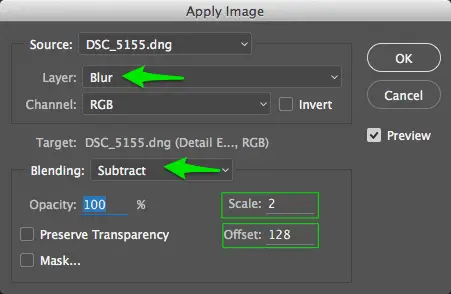
Go to the menu Image > Apply Image. In the Apply Image dialog, select Blur as the Layer and under Blending change the method to Subtract. Changing the blending mode will make further properties appear in the dialog.
Set the Scale to 2 and Offset to 128. Hit the Ok button to close the Apply Image dialog.
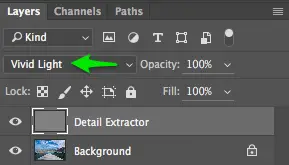
Select the Detail Extractor layer and change the blend mode of the layer. You can change it to either Overlay, Soft Light, Hard Light, Vivid Light or Linear Light. The Overlay blend mode will only give you very little extra details, while Linear light will create you the strongest effect. Choose Vivid light and adjust if you are not satisfied with the result.
Actually, this is all there is to enhancing the inherent details in your image. However, I suggest that instead of just enhancing details all over the image, that you apply it selectively to specific elements in your image, that you want to have extra detail. Being selective about adding details allows you to guide the viewers eye toward to where you want him/her to look.
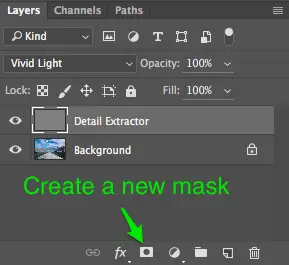
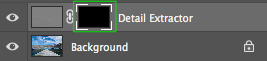
You can do this by creating a blank mask and use a brush to add the extra details from the Detail Extractor layer.
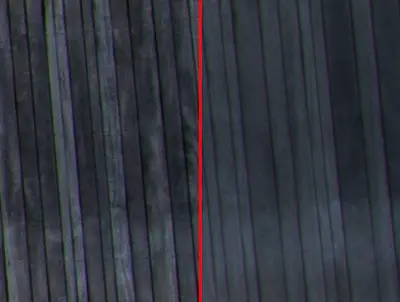
If you compare the left and right side of the image below, you will see the difference. The left side has the effect applied, while the right side shows the original detail level.
If you want to enhance image details in an easy way, I have included this process as one of the Photoshop actions, which you can get as part of my Photoshop Actions for Photographers Package.
Share your thoughts below.
Click the following link to learn if photos lose quality when airdropped.


This is AWESOME. Thank you so much. I’ve been using this technique to bring out more details in my interior design photography.
Hannah Cochran
Lower the contrast to about -10 to -20. Pull the Hilights slider down to the left and the shadows over to the right. Raise the Whites and lower the Blacks. Add Clarity if needed OR press the Auto button in the Camera Raw Filter.