The term “blown out” in photography has nothing to do with tires, explosions, or knees.
In this article, we will discuss what blown-out means, how to avoid and fix blown-out photos, and more. Let’s get started.
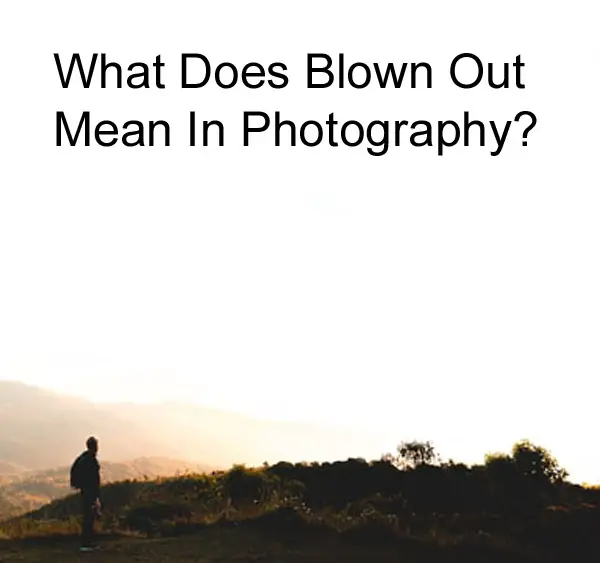
In photography, blown-out means that the picture is overexposed, and some parts of the photo are totally white and have zero detail. In other words, the picture is considered to be blown out when its areas lack details because a large number of the pixels received excessive light.
You can have a blown out background, where it appears as a uniform white color, or you can have blown out highlights, where the photo may appear properly exposed, but smaller brighter areas of the photograph are overexposed.
Both digital images and film can be blown out. You will not be able to see any texture when you look at a blown out portion of a photo, whether it is a sky or snow that is overexposed.

How to Fix/Avoid Blown-out Photos?
Here are some steps you can take at the time of shooting to decrease the chance of overexposure!
1. Use RAW Files
You should shoot in RAW if you want to capture a lot of color and detail.
One of the benefits of shooting JPEGs is that your digital camera completes all the processing of the picture. And settings like tone curve, color saturation, and white balance are applied to the photo. So you don’t have to spend any time processing the picture.
However, one of the drawbacks of using JPEGs is the loss of detail.
When your camera compresses a picture into a JPEG, the picture ends up with less detail. Your photo may appear pixelated, grainy, or blurry due to a compression issue. Know that whenever you resize a photo, you are also enlarging or reducing the pixels of that picture. The loss of detail tends to be more apparent if you are taking an extremely detailed picture. A significant resizing of JPEG photos will lead to a visibly poorer picture.
Further, JPEGs don’t preserve all the details. And usually, every detail matters in photography.
Therefore, ensure you shoot in RAW.
There are some drawbacks to shooting RAW, though.
RAW files are not immediately shareable. You will have to convert them to a compatible format before you can share them with your friends. Your friends and clients might not have the right tools to see these files.
2. Use Exposure Compensation
Overexposure can happen in many ways.
For one, your scene might contain a combination of extremely dark and extremely light elements, and your camera might not be able to capture all that tonal range.
Exposure compensation is a feature on your camera that lets you make your photos look darker or brighter with less difficulty. When there is a significant difference in light between the lighter and darker areas in the frame, you can use this feature to expose the light areas and then recover details in the darker areas using photo editing software post-shoot.
Almost every camera you can purchase right now has this feature. Exposure compensation is extremely easy to use and it can be of great use across several situations, letting you get the picture you want with minimum fuss.
3. Use a Graduated Neutral Density Filter
Using a neutral density filter is another way you can prevent blown-out highlights, particularly at sunset or in the sky. It’s a filter that easily attaches to the front of a camera lens and decreases the amount of light entering the camera. It doesn’t have any impact on sharpness, color, or picture, though.
Click here to find out more about neutral density filters and pricing.
4. Shoot in HDR
HDR stands for high dynamic range in photography. Dynamic range refers to the range of tones in a scene, from the brightest highlights to the darkest shadows. HDR involves shooting multiple images of the same scene using different exposure.
When you combine all the shots, you end up with a picture that is exceptional. Your software will take the darkest areas from the overexposed image, the lightest areas from the underexposed image, and the other tones from the shot in between and you’ll get the best exposure for that situation. Many people recommend shooting HDR on a tripod. Apart from this, you also need post-processing software that can combine the three images into one HDR file.
5. Highlight Alert
The Highlight Alert is an extremely valuable tool that will show you any area of your photo that is overblown or overexposed.
To view the highlight alert, you have to switch it on from the menu system of your camera. The camera menu can be accessed by pushing the Menu button on your camera’s back.
6. Check Your Histogram Regularly
A histogram is a graph that displays the light distribution in your exposure, the brightest areas to the right, and the darkest ones to the left. When taking pictures in challenging conditions, check the histogram after taking the picture.
7. Photo Editing Software
Exposure can be adjusted and details can be restored in the overexposed areas with photo editing software like Lightroom. Try the following methods to fix a blown-out picture.
- A graduated filter allows you to add a dark gradient to a portion of your image. Choose the overexposed area and adjust the settings to darken the overexposed parts and reveal more detail.
- The highlights slider allows you to adjust the lightest parts of your photo. Move it to the right to enhance brightness or move it to the left to reduce brightness in the highlights.
- The white balance slider allows you to adjust the mid-tones of a photo. Move the white balance slider to the left to reduce brightness or move it to the right to increase brightness.
- The exposure slider allows you to add or take away brightness from the picture. Move the exposure slider to the left to reduce exposure or move it to the right to increase exposure.
Watch the tutorial below to know how to fix overexposed pictures in Photoshop CC:
Is It Better to Under or Overexpose?
First, let’s understand a little about underexposure.
A picture that is correctly exposed is neither very dark nor very light. A photo has achieved good exposure when nothing is lost in shadow or blown out in it. Aperture, shutter speed, and ISO work together to determine exposure.
Rich shadows and bright highlights make your pictures memorable and captivating. Highlights are the brightest elements in a picture, whereas shadows are the darkest parts.
- A picture is underexposed if it is very dark. Details will be lost in the darkest parts of the photo and in the shadows.
- And the picture is overexposed if it is very light. Details will be lost in the brightest parts of the picture.
By using a light meter, you will know if the photo is the correct exposure.
A light meter measures the amount of light in a particular environment so that you can determine the settings (Aperture, shutter speed, and ISO) needed for correct exposure.
Here is how to correct an underexposed picture.
1. Open up the aperture of your lens more
You can change the aperture of your lens to a wider opening to allow more light into your camera and prevent underexposing your picture. However, you should keep in mind that you can’t do this when your camera is in automatic mode.
2. Change your camera’s ISO setting
It’s important to know how much light your camera needs to get the correct exposure. Set the ISO number to a higher number, so the sensor of your camera is more light-sensitive. And don’t change any other settings. This will prevent underexposure in your pictures. The downside to this is an increase in digital noise and a reduction in sharpness.
3. Add light to your subject
Use a flash or a big white reflector to add light to your subject. The other way to add light involves either capturing the picture at a different time of day or moving subjects to a well-lit place.
4. Use the exposure compensation feature
You can override the exposure settings of your camera using an exposure compensation feature. This is a great way to darken or brighten a picture.
Now back to our original question: Is it better to under or overexpose?
It’s better to go for an underexposed shot instead of an overexposed one. This is because it is easier to adjust an underexposure with photo editing software than to adjust an overexposure.
Underexposed shots record most of the detail of your image. And you can bring these details out with some tweaking in photoshop. In contrast, overexposed shots tend to record less of the detail of your shot.
Here are some more reasons to intentionally underexpose your pictures.
- Getting skin tones right is extremely important. A beautiful skin tone is something photographers want to get in their photos. Underexposure gives you richer skin texture and tones.
- As mentioned earlier, underexposing excessively can add noise. However, dialing the exposure down by one or two stops will not damage your photograph. It will prevent you from overexposing your pictures and retain details of the lighter background.
I hope that now you know what blown out means and how you can avoid or fix it.
Click the following link to learn what mistakes to avoid in long exposure photography.


