Do you want to take creative photographs, but you’re unsure about where to start? Have no fear! We’re here to help. This article will provide you with creative photography ideas even if you’re a beginner photographer.

The projects are designed with minimal gear and should be fun for anyone interested in photography or creative arts. So, without further ado, let’s get started with the first project!
Flat Lay Photography
Creating a flat lay is one of the easiest creative photography projects for beginners.
A flat lay is an arrangement of objects that creates a compelling photograph. A flat lay, by definition, should be photographed from a 90-degree angle, with the camera directly over the arranged objects.
You can create creative compositions with almost any object around your home, as long as you find the right combination to make a compelling photo.
You can also experiment with lighting styles, shadows, and modes. If you are creative enough, your flat lay photography could look so stunning that you want to frame it!

Anyone could create something similar to the flat lay image above. All you have to do is to choose a background. We suggest something simple so it complements your composition instead of distracting it. (E.g. patterned backgrounds usually don’t work that well.)
It’s always a good idea to decide on a theme or story you’d like to tell. The flat lay above represents the struggles of a creative process, for example.
Typography
Typography is the use of typefaces as creative elements in photography. And it is actually a niche within flat lay photography.
Many beginner photographers do not realize how easily typography can be used to create interesting photos. But once you try this project, you won’t be able to get enough of it!
As with flat lays, it’s a good starting point to decide upon a story you’d like to create with your typography photography.
Do you love gardening? Great! Why not play a bit with the soil next time you plant something and create a masterpiece like this…

While this project might look intimidating at first, once you see how easy the steps are, you’ll have all the confidence you need for this creative photography project.
Take a look at the step-by-step process below:
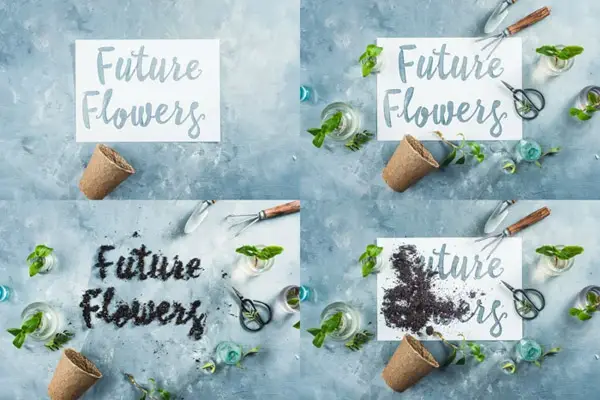
Easy, right?
Just create a template – you can go with more simple fonts. Collect some matching props. And take a photo of your creation from above.
For this project, we recommend that you use a tripod – or anything stable – to avoid unwanted camera movement.
You can see that this is a project that you can do with any kind of camera or even your smartphone.
Levitation Photography
While most magicians never reveal their secret… Photographers, luckily, do. You can create fascinating and mind-blowing levitation photography with only a few household items:
- Cookies
- A transparent surface (e.g. glass table, glass/Plexi in a picture frame, etc.)
- A plane sheet of paper (for the background)
- A tripod (optional but will make your job easier)
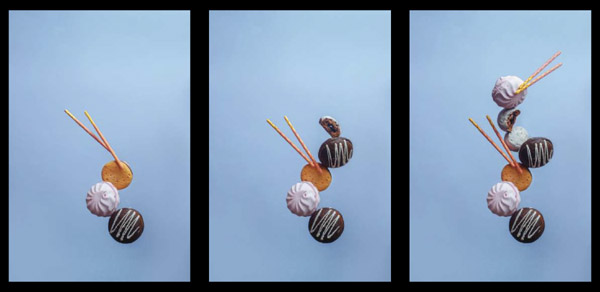
Place your ingredients on the transparent surface and create your composition. You can adjust your items so they look like they are in balance (like on the picture above). Or you can go off-script and create a form, a letter, etc. without caring about balance at all.
You are now ready to take the shot with your hand included. This is the part when the tripod will be very handy.
The best part is that you won’t even need any post-processing tool to achieve a stunning final result.

Waterdrop Photography
If you’re looking for abstract results, and you have some colourful candies at your disposal… The creative waterdrop photography project is for you!
You’ll need to have a camera set to manual mode to take these photos. But the results are so eye-catching that it’s worth the extra effort.
For this project, you’ll need:
- A bag of colourful sweets or stones;
- A glass surface (table, picture frame, etc.);
- Water dropper or sandwich bag with a tiny hole;
- Tripod;
- A camera in manual mode.
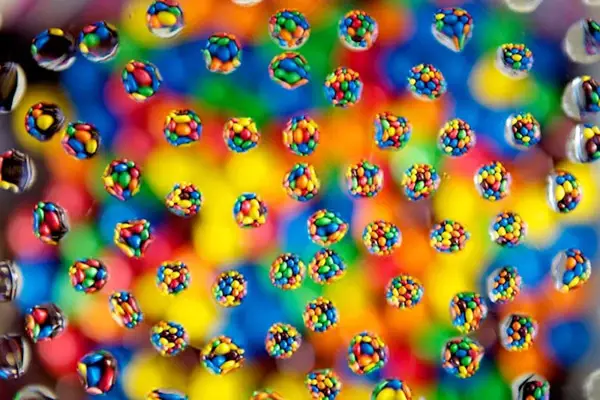
Arrange the colourful items under the glass surface and then you can create your waterdrops on the glass. Expert tip: you may arrange your waterdrops to form a heart or star shape, spell a name or any word, etc.
You’ll have to play with the focus a bit to get the waterdrops in-focus. When choosing your setting, go for a wide aperture (like f/2.8) to create a blurred background. And choose a longer shutter speed (like 1/200). Your ISO settings will depend on the light conditions you’re shooting in.
Chances are that you won’t need to post-process your shots in Lightroom. But to make your colours really pop, we recommend boosting the exposure and adding some contrast. (And, of course, if necessary, cropping the image.)
Smoke and Steam Photography
Capturing images of smoke or steam might sound super simple to you. And while it’s true that such a photo project belongs to the easier ones, you have to be aware of a few tips and tricks to achieve the results you want.
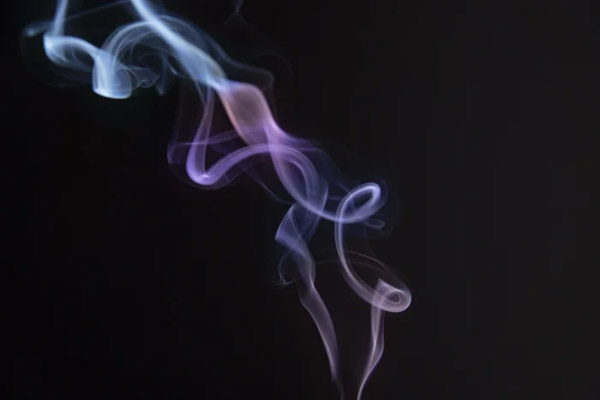
The first thing to pay attention to is your chosen background. In order to add contrast and make the smoke more visible, pick a darker photo backdrop – the best choice is usually black.
To emphasis the smoke’s shape and intriguing details, make sure you use a fast shutter speed. Experiment with 1/30 s to 1/8000 s shutter speed settings to preserve the details. If you go slower than that, you’ll only captured blurred and washed-out smoke trails.
You’ll most likely need to post-process your smoke images to make them really pop. If you’re using Lightroom you should increase contrast, shadow, and black (if that was your background color).
You can even an extra splash of color to your smoke photos with the brush tool like product photographer Chad Verzosa did on the image below.
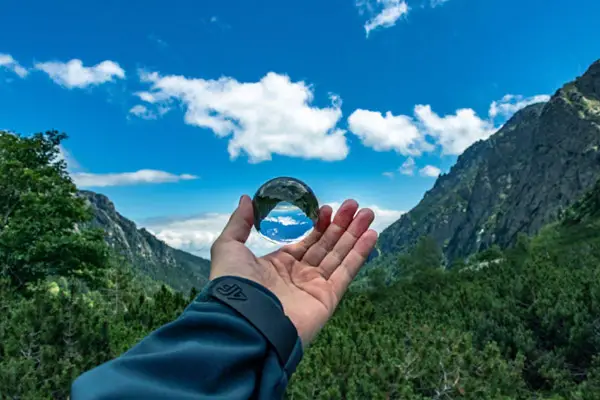
Crystal Ball Photography
The creative idea of photographing a crystal ball is one that has been popular for quite some time. A photo with this prop involves taking pictures at different angles and lighting styles to get the best shot possible.
Good news is that you may take these fascinating photos with nothing more than your smartphone camera. However, if you’d like to enhance your shot – like the image below – we recommend you to tweak the colours in Lightroom.
You may purchase your own lens ball if you click here.
Composite Photography
Composite photography uses multiple photos to create one final image. It is actually more about editing than taking the photos themselves. Nonetheless, you’ll need good photos for a good composite project. A convenient solution may be to use stock images. But you might find that even photos you took with your smartphone are suitable for composite projects.
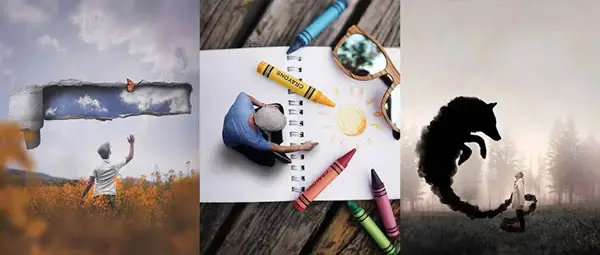
Powerful composite photography is all about storytelling.
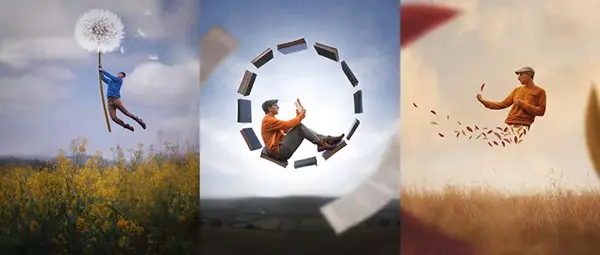
One of our favourite creators in the niche is Joel Robison. Joel is not just a fantastic storyteller via his visual arts… But also an educator and mental health advocate.
Joel bends reality by riding giant snails into adventures… flying through the sky with umbrellas… taking shelter from falling coffee beans under mugs…
Composite photography is, however, somewhat an advanced creative project, it is learnable. With some patience and improved editing skills, you’ll be able to create images like these:
Because these processes are rather complex and consist of multiple steps, we recommend that you check out Joel’s video course, Fantastic Photo Adventures.
Use Paint in Water for Awesome Liquid Photography
The image below sure looks impressive… maybe even mind-bending. However, as you might have already guessed, the ingredients to this photo are super accessible. Paint, syringe, and water.
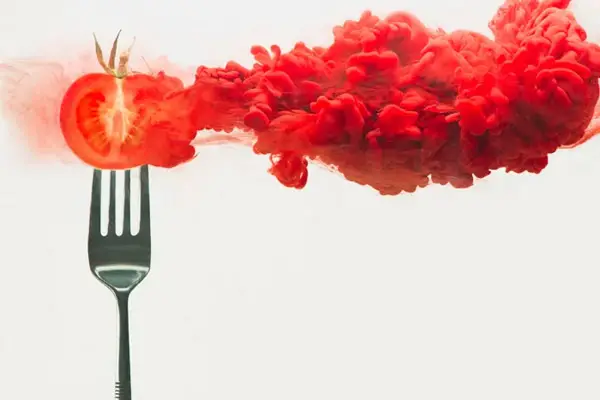
So how do you create liquid photography?
Step 1. Take a syringe filled with some paint (acrylic paint, ink, or food dye).
Step 2. Inject it into some water (a vase or tank).
Step 3. Take photos of the paint disintegrating in the water.
Here’s what it looks like in practice:
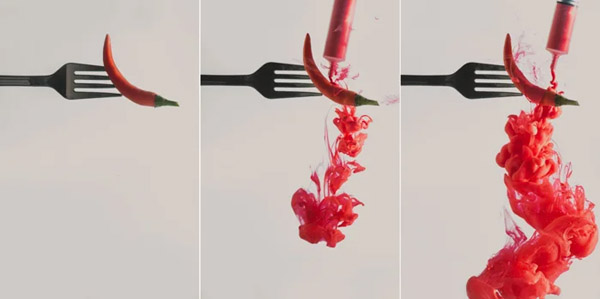
The finishing touch is, of course, post-processing the shot. You’ll want to remove the syringe to achieve the mind-bugging effect. Even if you’re new to Photoshop, it’ll be super easy with the ‘Clone Stamp Tool’. Just choose the area you’d like to remove.
And there you have it. Your own amazing photo of a disintegrating or exploding fruit or any other cool object!
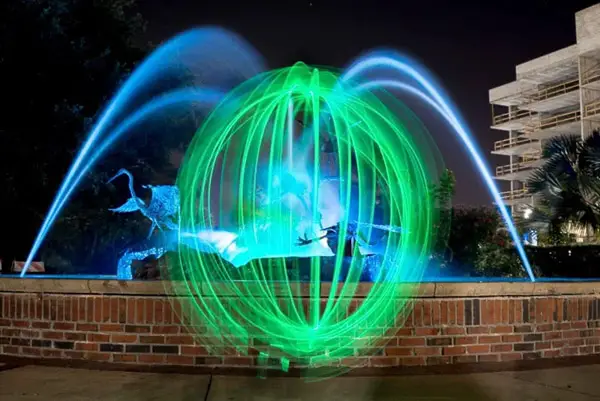
Shoot Light Painting Photography at Night
First of all, you’ll need a light source to do light painting. This can be a fluorescent Led stick, a flashlight, a toy lightsaber, or even your phone in a hanging case. Do as you please with these sources. Write your name, draw hearts, or any other shapes… Or just spin the object around to create a spiral effect.
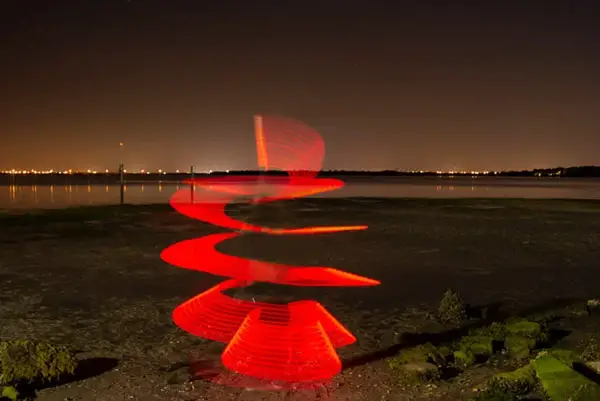
To achieve these light painting results, you’ll have to switch to manual mode. First, adjust your ISO to a lower value – we recommend 100-800. If you go as low as 100, you’re likely to lose your background. Higher values will make the background still visible, like in the picture above.
The aperture setting should be between f/8 – f/22. A higher aperture will let more light go through your lens. We suggest that you start experimenting with a smaller aperture setting and only adjust it if you’re not happy with the result.
Your shutter speed should be relatively long. Remember, it’ll take time to create the shapes you’d like, and write your letters in the air.
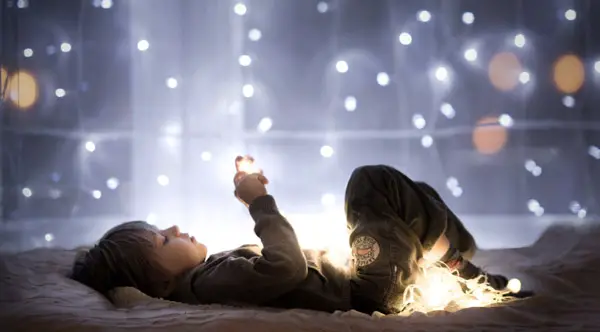
Fairy Light Photography
Another “after dark, play with the lights” project with a prop that you probably already have at home – if not anywhere else, then in your Christmas decorations box. Fairy lights come in different colors and shapes and can be used as versatile photo accessories.
Fairy lights can be your main lightsource. You’ll need to experiment with your settings in order to capture well-exposed images. For a test shot, set a wide aperture to let more light in and your shutter speed to around 1/80 s. Don’t overexpose the areas with lights. If you are using an 85mm lens or longer, watch out for camera shake.
If you find your images to be too dark (i.e. you don’t see details on the face) set a higher ISO. As usual, setting a higher ISO should be your last resort as it can result in noisy photos.
You may include them just in the background to create an enchanted atmosphere, make your subject or model interact with them… Or combine both, like child photographer, Iwona Podlasińska did with her image below. (The settings she used: f/1.4; 1/80 s; ISO 500.)
Macro Photography
Trying out this niche comes with some technical challenges but once you overcome those, you’ll find a whole world of photography inspiration – easily accessible in your home, backyard, or local park.
By definition, macro photography means that the size of the image on your sensor is equal to the size of the item. If you’re enlarging the subject, that is what is called micro photography – e.g. when you see the hair on a fly’s body. There’s also close-up photography which means that you don’t get a life-sized or enlarged image, just one where you’re closer to your subject than usual.
The most popular items to capture with either close-up, macro, or micro photography are flowers and insects.
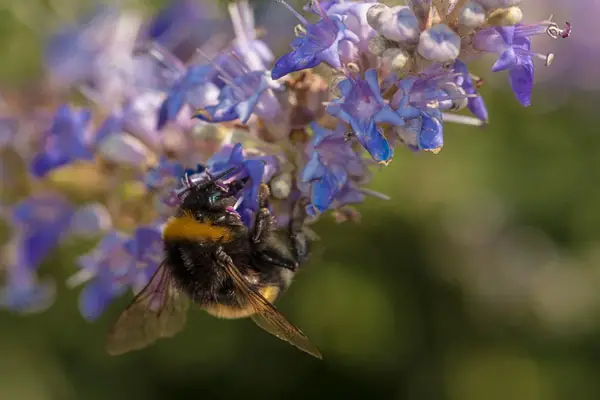
While there’s specialized macro gear that you can buy, if you’re only just starting out, you can experiment with this niche without significant investment.
Check out the video below about cheap ways to turn your lens into macro lens:
Conclusion
If you ever find that you’re having a creative block, just hit this article up. With all of these creative photography ideas and tools at our fingertips, you’ll never be short of inspiration for the next photo project.
And now it’s time to get up and create something beautiful!
Click the following link to learn how to create a street photography project.


