Photography is like anything else in our culture; it tends to hold certain trends for periods of time, then changes based on variables around us. Some trends can reappear, such as we’ve seen with the influx of “vintage” post-processing in the last few years.
The style wasn’t imposed directly during the 60’s and 70’s, it was a result of the equipment, processing and photography techniques used at the time. The idea became popular again in the last 5 years, and photographers began attempting to recreate those tones and colors using the more modern methods available to them.
The results of using the various techniques we’ll discuss are, of course, subjective. We have a huge number of photographers using these techniques, each formulating their own methodology. This produces distinct and differing results, which is part of the beauty of our craft.
We’ve listed five techniques that have appeared time and time again, and have proven to be among the most popular in photography today. I’ve attempted to stay away from pure post-processing techniques, and keep the scope of this article instead in the realm of physical photo-taking methods.
After we’ve finished, I’ll challenge you to tell us about your favorite techniques, and maybe even show us some of the work that you’re most proud of!
Long Exposure Photography
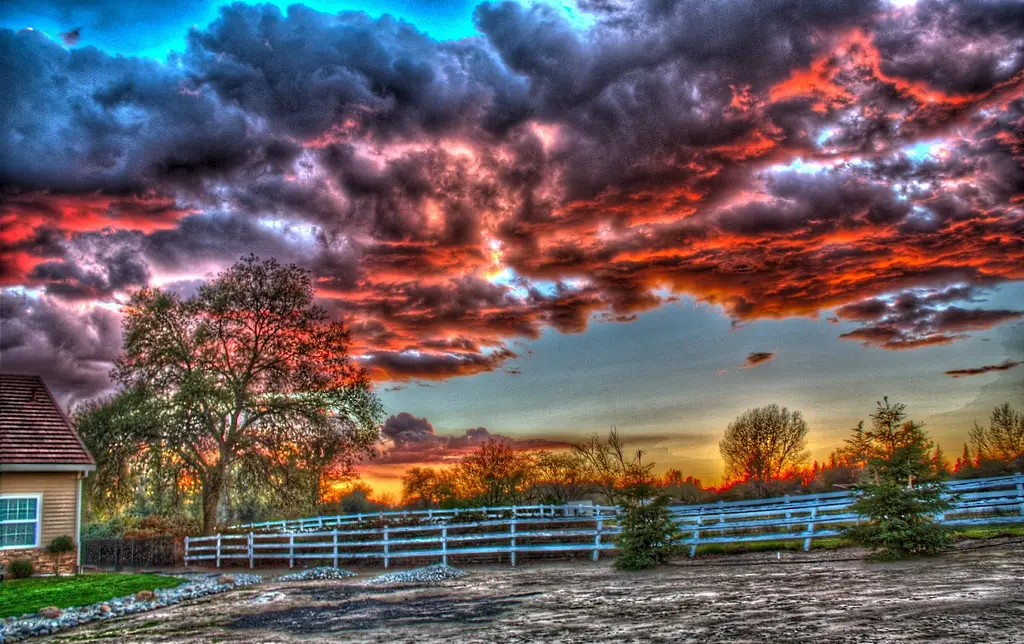
Long exposure photography has recently taken a foothold in the halls of 500px and the like, due to the dramatic effects produced with the technique. The advent of more advanced digital cameras have made it much easier to produce these images, since the calculations, guesswork and luck have mostly been eliminated from the process.
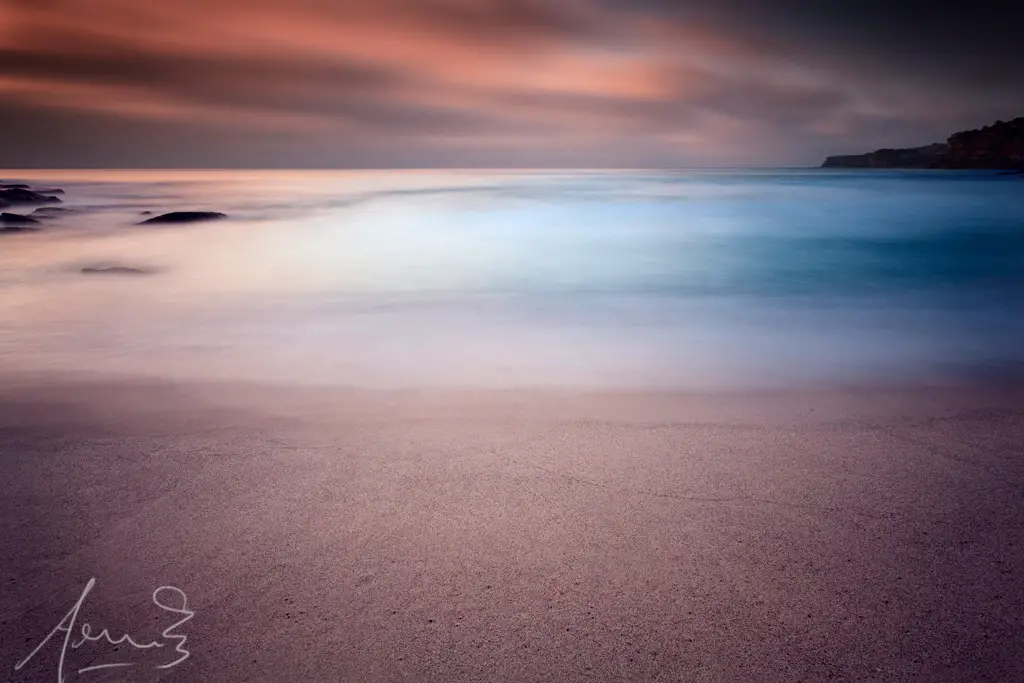
There are essentially two basic ways of capturing these shots; with or without a polarizing or neutral density (ND) filter. Either method requires a tripod, as these shots involve too much open shutter time to attempt holding by hand. The object is to increase your exposure time for the shot without overexposing the image.
Longer exposure times allow you to capture clouds, water, or other moving objects in a smooth, flowing manner, while maintaining sharpness and clarity on still objects. A neutral density filter essentially allows for this extended amount of exposure time, without altering the hue or color of the image. Adding the filter is equivalent to stopping down one or more f-stops, and allows you to avoid making the photo too hot due to the amount of time the shutter will be open.

If you don’t have a ND or polarizing filter available, you’ll need to attempt these captures in lower light, such as in the early morning or late evening (it could be said that if possible, you shouldn’t be shooting at any other time anyway). Many photographers use long exposures to capture shots at night.
Begin experimenting with very small apertures during the golden hour (the hour before sunset or after sunrise) such as f/22 or higher, and bump the aperture up to f/8 or larger after night falls. You’ll end up with several attempts, since nailing a great exposure is largely trial and error. You’ll also need to play around with exposure times, and this depends on what moving object you are capturing.
Clouds need much longer times to properly capture their trek across the frame of the shot; 5 minutes is a good place to start. Rolling or crashing waves at a beach require much less, sometimes 15 to 30 seconds is enough to create the necessary motion in the image.

Due to the sensitivity of the camera during exposure times of this length, a remote shutter release would come in handy. Anything you can do to minimize shake will help preserve the sharpness of the non-moving elements in the photo.
Finally, be sure to do some pre-planning before actually clicking the shutter; try to visualize what the motion of all elements will be in your composition, including flowing elements (clouds, water, car lights), and still elements (rocks, buildings). This can help you better determine what settings you’ll need to capture the image you see in your mind.
Light Painting
Light painting is probably the fastest growing technique seen these days, and for good reason; the creative possibilities are endless, and can make for some stunningly beautiful art when done correctly. At its core, light painting is another long-exposure technique that utilises in-frame or out-of-frame light sources to create patterns within the photo or illuminate an object in specific locations.
It is possible for the artist to actually perform the painting in front of the camera without appearing in the final shot, due to the ratio of time the photographer is painting to the actual exposure duration.

How it’s Done:
Any number of light sources can be used, although generally flashlights are the most common. Light pens, candles, and various fiber optics can be used as well. The sky is the limit, use your imagination! Like with other long-exposure photography methods, a tripod must be used. Set your camera for a long exposure (30 seconds or more), and use a remote shutter release if available (or the timer function available on almost all cameras will work as well).
The actual location you shoot in should be as dark as possible, obviously working at night is best. We want the object you’re drawing or highlighting to stand out as much as possible against the dark background. Since we’re shooting a long exposure, we can set our aperture to a smaller setting; start with f/8 to f/16 and experiment from there. This will ensure crisper shots with a full field of depth.

If you are not painting a stationary object within the frame, you can stand facing the camera, and draw a figure with the light source on. Try to physically stay in frame for as little time as possible, this will help ensure you don’t show up in the final shot. If painting an object, you can highlight various parts with your light source, turning the light off and on as you go to target specific areas.

As I mentioned earlier, the possibilities are literally endless with this technique; try different light sources, locations, objects, and colors. Anything that can change the color of the light, the speed of the movement, or the length of time painting can drastically alter the outcome. Have fun and be creative!
Digital Photography School offers a very nice series on light painting.
HDR Photography
Although not quite as popular today as it was a few years ago, HDR photography is still a relevant artform. HDR shots are finished through your post-processing workflow, but start with your photography itself. HDR stands for High Dynamic Range, and refers to the range of dark and light levels we see in a photograph.
Modern cameras, even the most expensive models, lack the dynamic range we have in our own eyes. We humans are able to see a much broader range of colors and light levels. This is partially why scenes in photographs never quite appear as they did when we saw them for ourselves.
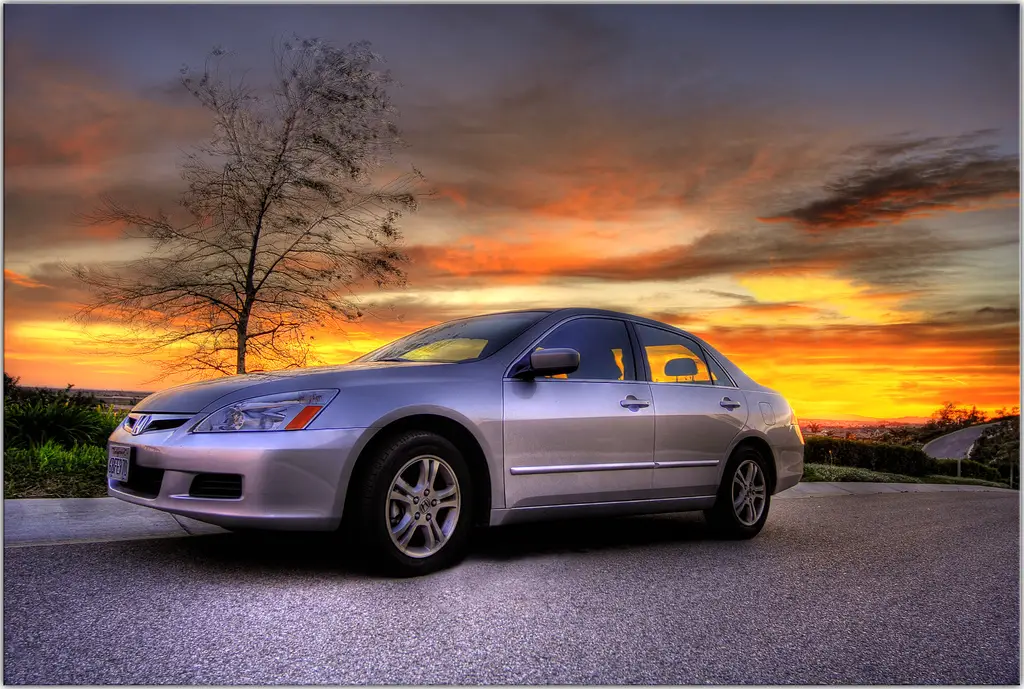
High dynamic range imaging is a technique that can help extend the range of levels beyond what our camera can normally capture. This is done by taking multiple shots of the same scene, at varying exposure levels, and combining them in our post-processing later. By doing this, we ensure that we’ll see the darker levels and colors as they should appear, as well as the lighter levels without the blown-out colors. Although many software suites (including Adobe Photoshop) offer a “one-shot” HDR tool that does not require multiple exposures, the results are usually not as accurate and dynamic as a true HDR photo.
How it’s Done:
Dynamic range in a photo is measured in EV, or exposure value, and is equivalent to one f stop; each increase of one EV doubles the amount of light captured, while each decrease of EV cuts it in half. Originally, a minimum of three images were shot, one being very underexposed, one properly exposed, and another overexposed, or blown out. However, most modern DSLR’s now have an AEB, or auto-bracketing setting. This allows you to set up a number of shots with a predefined EV range.
After being set, the photographer can press the shutter release once for each exposure, completing the range of shots in one instance. Whichever method you prefer, you’ll need to capture each image with a set EV difference between them for best results. Smaller EV values (such as 1) will result in less dynamic and drastic images than using 2 or 3 EV’s between each exposure.
After the images have been captured, the process will need to be completed using software. Adobe Photoshop does offer an HDR assembly action that layers the exposures together, but I’ve found the results tend to be poor, and pale in comparison to a proper HDR-specific software package, such as HDRSoft Photomatix. Available for Windows and Mac systems, Photomatix has become an extremely popular standard for processing HDR shots.
After loading your images into Photomatix, you can adjust a few settings such as alignment (if the exposures were not taken from the exact same angle, for example), reducing noise and ghosting, as well as indicate what EV values were used. After the photos are loaded, you can use of the two methods for actually converting the image to HDR, Tonemapping and Exposure Fusion. The differences in these methods revolve around what point in the process they are applied. I seem to always have better results using the Tonemapping algorithm. After making visual adjustments, you can save the final, layered image as a flat file.
One issue regarding HDR photography is its own subjective nature; as it grew in popularity, people began using it to make extreme changes to their photos, and overusing the process. It’s very easy to use too much tonemapping and “overcook” the image, resulting in unnatural tones and ugly haloing effects. This, in turn, has caused some photographers to be wary of the method altogether. The best advice is to do what looks best to you.
Learn more about HDR by reading “20 HDR Photography Tutorials to Learn This Technique in One Day”.
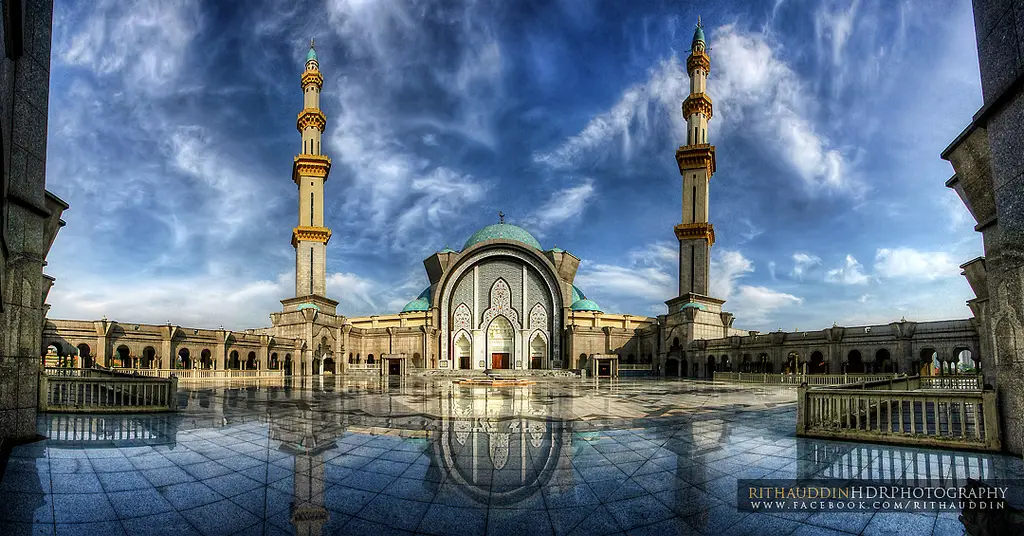
Panoramic
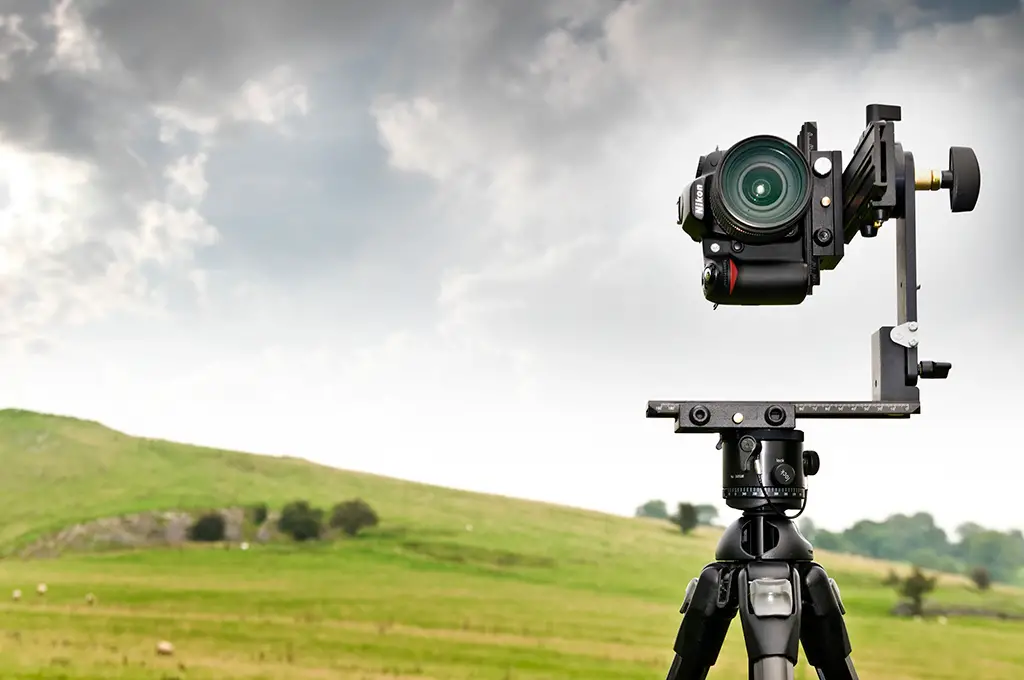
Panoramic photography is another example of a method that has vastly increased in ease of use over time. What was once a long, tedious process in a darkroom, hunkering over photo paper, making cuts and separations to multiple photos, is now as simple as a click of a button on your camera.
Panoramic photos are simply multiple shots of a single scene that have been stitched together to form a continuous image. Even with a wide-angle lens, we can only capture so much of a particular scene. By taking multiple shots, we can combine those later and create a photo with a much wider field of view than previously possible.

As with our previous techniques, panoramic shots are best captured using a sturdy tripod and remote shutter release.
How it’s Done:
There are many cameras nowadays that have a panorama feature; this basically gives you guides and grids on your viewfinder or screen that make it easy to line up your shots. A horizontal photo can be taken by shooting, moving the camera to the left or right (while keeping it level), and taking another shot when the panorama assist shows that you are only minimally overlapping the previous shot. This overlap is necessary to prevent missing a slice of the scene in the final image. The assist usually shows your last shot, and what your current frame looks like next to it; this helps you create a set of accurate images to start with.

Some cameras, especially older DSLR’s, don’t have this feature, and the individual photos will have to be taken manually. This involves alot of guesswork and trial and error. Thankfully, some tools exist to help, specifically panoramic heads, or pano-heads. This is an attachment that sits on top of your tripod head and allows the camera to be rotated around a single axis (instead of the camera itself rotating on a single plane), and eliminates parallax. Parallax is a anomaly that occurs due to differing angles of viewing in a line of sight, and is not something we want in our final photo. Having a panoramic head allows smooth transitions to the next photo, and usually feature stops in regular increments to properly measure the angle of the next shot.
Many software packages out there will help you align and combine separations for a single image, but this is also possible using Adobe Photoshop. Photoshop has a feature called PhotoMerge that will handle this for you. You can access this by going to File > Automate > PhotoMerge. After loading your images, you can select a layout mode (start with auto first) and set a few other options. I recommend checking the blending, vignette removal, and distortion correction boxes. This will help if you’re not using a high-level lens setup.
After clicking OK, you will be presented with a preview of the automatic process. At this point, you might see a bending or curving near the top and bottom edges of the photo, due to improper alignment of the photos when they were taken; simply crop the photo to the desired point.

Of course there is much more to panoramic photography; vertical panoramas can be taken as well, and you can experiment with using more images to create larger and more intricate photos. It’s all up to you!
Digital Photography School has a great article discussing both panoramic setup and Photomerge.
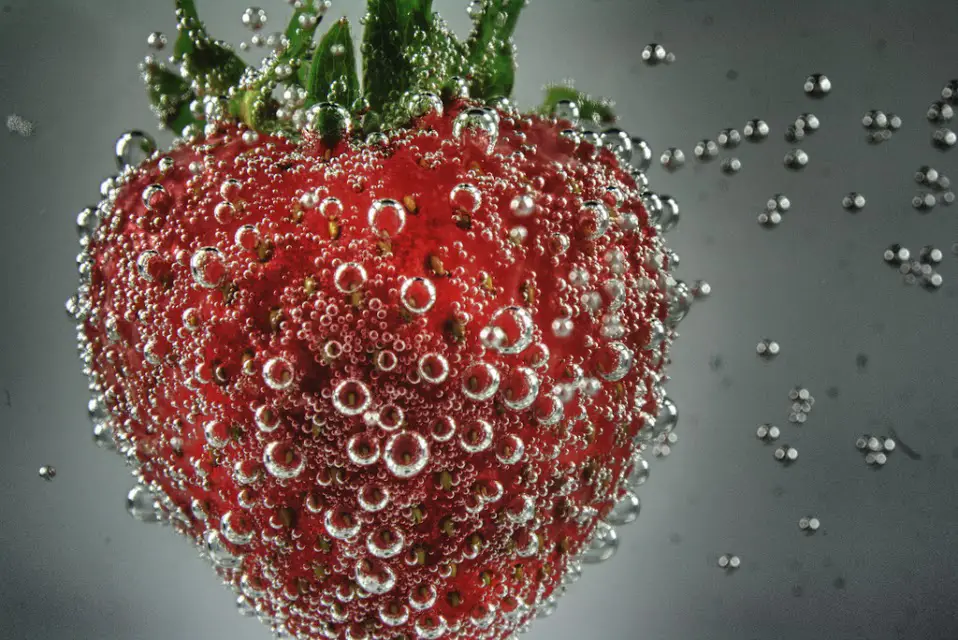
Macro Photography
Macro photography isn’t just popular now; it’s been popular for many years. There’s something intriguing about seeing everyday objects in a way that you never get to see, extremely up close and personal. The beautiful thing about shooting macro is the variety; you can shoot almost anything close up and come away with something totally different.

Macro photography is a bit more equipment-centric than most other methods, meaning for the most part you can’t just go out with whatever you have as your default lens and take great close-up shots. The best results come with having the proper equipment, whether it be lenses, tubes, or reversing rings. That’s not to say you have to spend a small fortune to get the shot you want; many methods of macro shooting can be accomplished using inexpensive equipment. There are generally four categories of equipment that will help you capture those itty bitty details you’re looking for.
Macro Lenses
If you’re serious about macro, the best way to go is by purchasing a dedicated macro lens. This is, of course, the most expensive option. These lenses are available in various focal lengths, generally from 50mm to 200mm. Macro lenses are specifically made for this type of photography, featuring a long barrel that accommodates extremely close focusing.
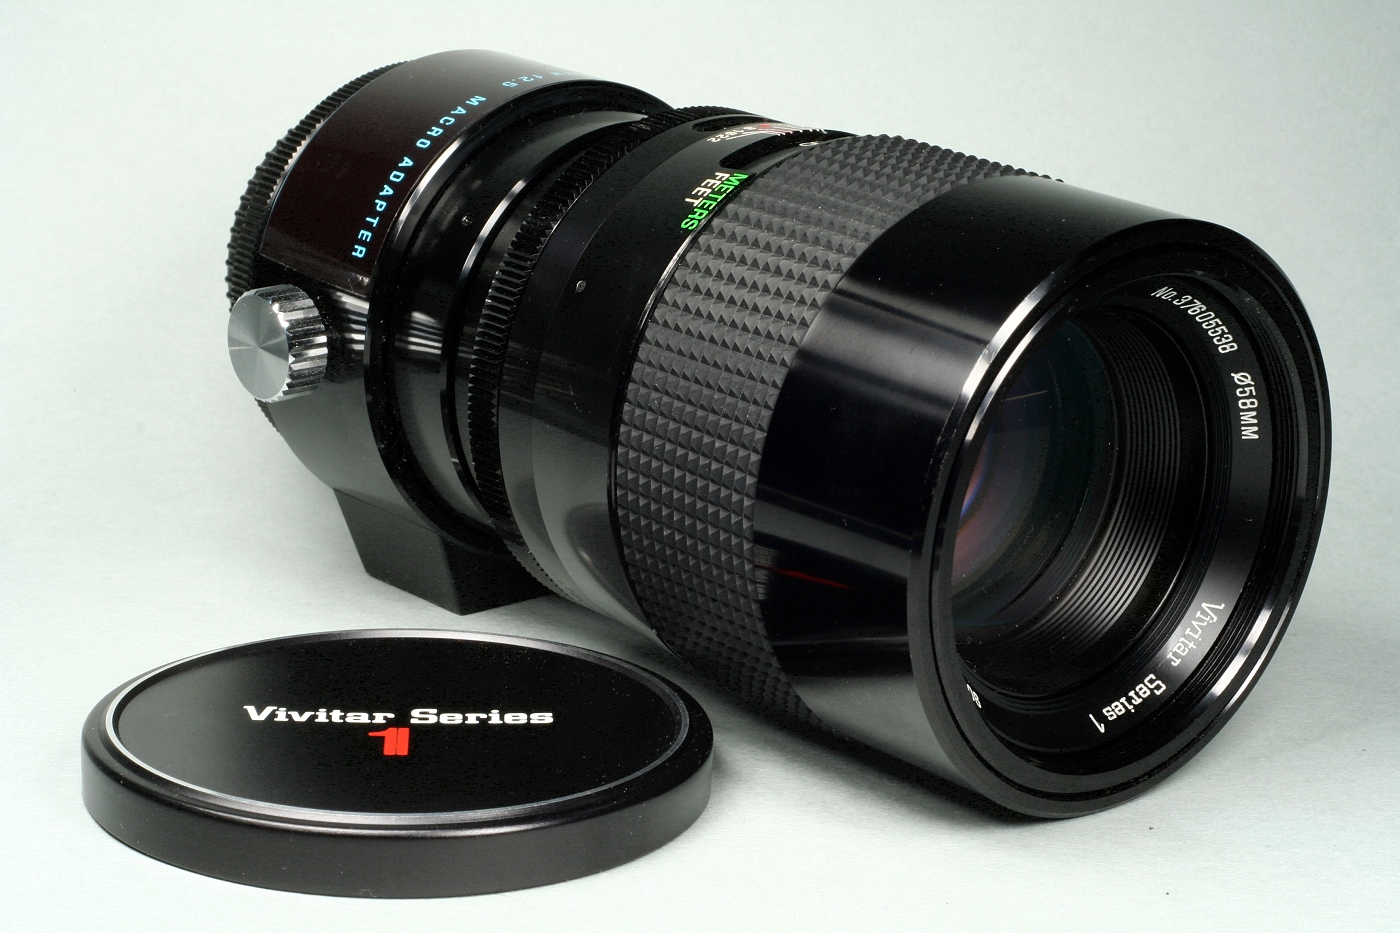
As a general rule, the longer the focal length of the lens, the more distance between yourself and the subject you’ll have available. To capture the details of a butterfly, for example, a 50mm lens would require you to move in much too close. For close-ups of a flower, however, a 50mm would work perfectly. As with any lens, varying degrees of build quality are available, and it’s not impossible to pickup a decent macro lens for less than $200.
Reversing Rings
Reversing rings do just that; they simply allow you to screw your existing lens on your camera body backwards. A camera lens fitted properly is intended to take what it sees and size it down to be recorded on the camera’s sensor; reversing the lens does the opposite, working much like a microscope.
One major caveat to note here, since you’ll no longer have the electronic pins aligned, you’ll lose any automatic or electronic features such as aperture control or automatic focusing. On the upside, you’ll have a dirt-cheap method of getting extremely close and capturing ridiculous depth of field; many reversing rings can be had for $10 or less.
Extension Tubes
Extension tubes are another inexpensive way of getting up close. These are hollow pieces that increase the space between your camera body and your lens, which allows the lens to focus closer. These tubes usually come in sets of three different lengths, so you can choose which lengths to use or combine them for some fairly extreme results. You’ll probably struggle a bit with the razor-thin depth of field, but it’s hard to complain when you can pick up a set for under $50.

Close Up Lenses
Technically, these are filters, not lenses. Just like a neutral density or polarizing filter, these inexpensive pieces screw onto your existing lens. They are cheap, but since they are technically filters, the quality is usually not the bes; any screw-on type filter degrades image quality by some degree.
Learn more about lenses by reading DSLR Lens Reviews 2013: Which Lens To Buy?
Wrapping Up
We’ve taken a short tour through some of the more popular photography techniques around today, but we’ve only scratched the surface. Just with these 5 methods, the creative possibilities are endless. Challenge yourself each time you go out, and try something different.
Ok, your turn. What are your favorite photography techniques? Are they different from ones I outlined here? Where can we see your best light painting attempt? Join the conversation below!


Great article–very inspirational! I’ve been doing 365 projects for the last few years, and since I’ve not missed a day yet, I sometimes feel like I’m in a rut. I’ll try to use some of the ideas here.
Thank you! I definitely believe 365 projects are among the most difficult. Kudos to you for not missing any days though! Not easy to do 🙂
nice article, i really want to practice more at long exposure shots and get the kind of effects i feel some of my cityscape shots are missing. the difference it makes on the sky such as the clouds can really add that extra something to a shot
absolutely John, I noticed that on mine too, water especially, long exposure really does wonders for adding some drama and smoothing that out!
I am at very beginning stage. Just got my DSLR camera and trying to get hands on my Canon. Hope some tutorials will help beginner like me to get into details.
good luck! Just takes some dedication and practice!
Thanks 🙂