Everyone’s heard the horror stories about people who’ve lost their photos, and everyone knows that – no matter what they’re of or what they’re for – losing your pictures can be devastating.
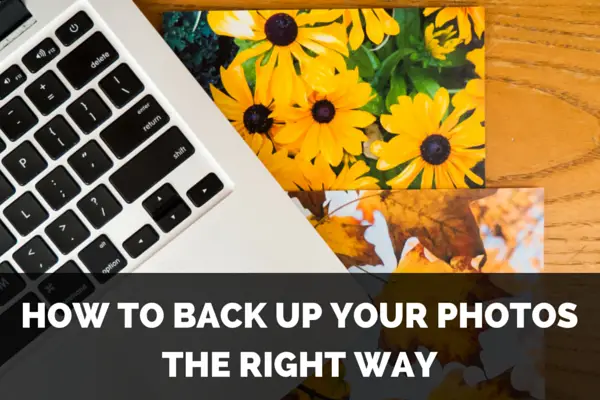
Whether it’s a folder of precious family photos, a portfolio, or a project for a client, replacing what was lost can be time consuming, expensive, and even impossible – which is precisely why photo backups are so important.
So don’t risk your memories, your money, or that perfect shot – follow these 5 top tips for backing up your photos!
1. Sign up with an online backup provider
In the past few years, there have been some big changes in backup solutions – with millions of people (and hundreds of thousands of businesses) moving their data online. There’s a good reason for it too, as storing your files in the Cloud lets you access them from any place at any time, and means that your data will be kept safe from theft and environmental damage in a secure data center hundreds of miles away.
Online backups are pretty cheap too – most accept payment on a yearly or monthly basis, and plans start from as little as $1.99 per month. Depending on which service you pick, you’ll also get all kinds of useful extras – from backup scheduling to file sharing and gallery services. In fact, there’s tons of choice out there – so how do you know which provider to choose?
Decide what you’re looking for
There are two main types of data backup services – Online Backups and Cloud Storage. Online Backup providers (such as CrashPlan, Backblaze and Carbonite) usually offer more storage space and stronger encryption to keep your files private, but less by way of file sharing – and the software can be a bit more technical. Many of them also run automated and scheduled backups – so you can set a time that suits you, and the software will automatically upload all new and/or changed files from selected folders on your desktop to the Cloud.

Cloud Storage, on the other hand, is the complete opposite. Companies like Dropbox and Google Drive dominate this market, and focus much more on sharing your files, synchronising them between devices for quick and easy access, and making software that’s pleasant and simple to use. On the downside, you’ll get less storage space and not much by way of security features, and although plenty of services create desktop sync folders for instant updates, this n get a bit confusing when it comes to navigating your hard drive.
Some services, like IDrive and Memopal, offer something in the middle – giving you a respectable amount of space and some encryption options, as well as the ability to sync and share your pics.
Really, it all depends on what you’re looking for – and fortunately, if you’re still stuck for ideas, there are plenty of sites offering useful lists of the best backup services for photographers.
2. Find a service with seeded backup*
*Seeded Backup goes by many names – mainly because different companies like to put their own mark on the service – IDrive Express being a case in point. So although it’s only offered by a minority of services, don’t give up if you don’t find it on first search! It might be available under a different title.
The big problem that most photographers have with online backup and Cloud storage providers is that they’re slow. Given that most image files are pretty big (especially for those of you that shoot in RAW), getting them on to the internet and safely stored in a backup account can take a long time – as long as a month to upload around 1TB of data in some cases. So how can you avoid the wait?
One answer lies in Seeded Backup – a service designed to get your data onto a backup provider’s servers as quickly as possible. Offered by IDrive and CrashPlan, amongst others, it goes like this:
- 1. Request the service. You’ll need to have an account already, and make sure to check the small print first, as some companies will charge you an extra fee.
- 2. Receive your encrypted hard drive. Your backup provider will post or ship the drive to you, usually within a week or do. Hard drives usually have a capacity of between 1TB and 3TB, although some companies will send you more on request.
- 3. Upload your data onto the hard drive. This shouldn’t take more than a few hours.
- 4. Return the disk. Your backup provider will upload all of its contents directly to their servers – sparing you the battle with slow internet speeds and bandwidth caps, and potentially cutting weeks off of your initial upload time.
While capacity restrictions mean that you might not be able to send all of your data this way, Seeded Backup is an excellent way to overcome the frustration of having to very slowly upload a large back catalogue of files – and once that initial upload is complete, you can be confident that all of your new backups won’t be put at the back of a long queue.
3. Follow a 3-2-1 backup plan
Although online backups do a great job of keeping your files safe, the people in the know recommend that you keep not just one but three copies of your files in three separate locations. The servers of a Cloud storage provider that you trust are a very good place to start – but what about the others?

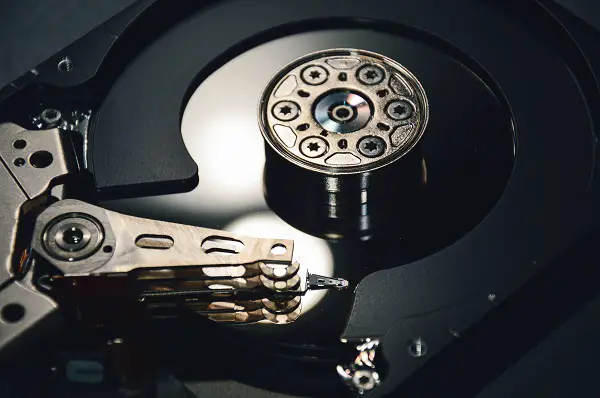
Local storage
Although it might seem a little outdated now, keeping your files on a local storage device is still an extremely good way of keeping them safe in case your computer crashes, your internet goes down at a crucial moment, or you get locked out of your Cloud storage account. They’re very easy to use – just plug in to your computer using a USB cable – and much quicker for both storing and retrieving files than their Cloud counterparts, although they are of course much more vulnerable to environmental damage, and you’ll have to remember to update them when you’ve got new or saved files to save!
For lots of data, your best bet is an external hard drive, which come in sizes from 1TB to 5TB, and will set you back somewhere between $50 and $150. Western Digital, Toshiba, and Seagate are all reputable brands well worth considering.
Network Attached Storage (NAS)
A network attached storage device is a hard drive that you connect to your local network by plugging it into your router – creating a kind of personal Cloud that all of the devices in your network can backup to and restore files from.
Commercial NAS devices typically have similar storage capacities to external hard drives, but they have several distinct advantages:
- 1. Backup from multiple devicesSo long as your device (whether it be a mobile, tablet, Mac or PC) is connected to your NAS’s local network, you can back it up – although administrators can change or deny permissions as they please. This is great if you want to upload pictures straight from your phone, as well as storing camera uploads that are being kept on your laptop. Network devices like printers can also be linked up – cutting out the middle man if you want a hard copy of any images.
- 2. Automatically backup changesUnlike removable storage devices, you won’t need to add data to your NAS device manually – and it can stay plugged into your router around the clock. As a result, there’s no need to worry about uploading files all over again whenever you make changes – your NAS will automate the process for you.
- 3. Data redundancy featuresData redundancy measures are a way of making backups of your backups – making sure that your backed up files are as safe as possible. One of the most common ways to do this is to set up a RAID array.
Photo by Tim Evans This is done by purchasing a NAS device that can accommodate two or more hard disks, and then designating one or more of them to act as a secondary backup location, in case the primary disk fails. This means that everything you save to your NAS will be stored in two places at the same time – and if one disk fails, the second will spring straight into action.
- 4. Direct camera uploadsQNAP offers a ‘One Touch Copy’ function, which lets you plug your camera into the USB port on your NAS and upload your photos directly. Most major file formats (including RAW and video files) are supported, saving you the time required to upload the images to your computer first.
- 5. Speed
Dodge the transfer speed problems associated with online backups by bypassing the wider web altogether – network transfers are significantly quicker, and will be lighter on your CPU usage as well.
Finding your NAS
The two major players in the NAS world are QNAP and Synology, although other manufacturers also make high quality products. Alternatively, if you’re technically inclined, you can make your own from scratch using reclaimed hardware, or by attaching an external hard drive to a DD-WRT router.
A secondary online backup
A simpler option, but certainly not a bad one – although we still recommend keeping one copy of your photos on a local device, in case you need to access them in a hurry. Given the affordability of many online backup services, there’s nothing wrong with simply signing up for two services – so that should one encounter any problems, you’ll still have one copy of your files safe in the Cloud.
If that sounds confusing, then there are tools designed to help you keep on top of multiple online backup accounts – most notably Cloud Storage Manager Services such as Otixo and CloudFuze. On the downside, all those processes are likely to take a big chunk out of your CPU, but if you’re ok with things slowing down for an hour or two when you’re moving photos around, it’s well worth a try.
Finally, if you’re considering using a NAS device, some online backup providers also offer apps that will automate backups from your NAS straight to the Cloud – seamlessly creating two backups in one go, although again this can slow things down a little on your PC.
4. Consider archiving your photos
Although originally aimed at enterprises and small businesses, archiving services are now starting to catch on with home users too. They’re designed to withstand the test of time much better than standard backups, so are perfect for storing lots of old photos that you don’t want to lose, but don’t need regular access to.

Technically, you could put any local storage device in a cupboard and call it an archive, but hard drives have the perennial problem of failing with no warning – so it’s worth considering online options too.
Cloud-based archiving services are enjoying a huge boost in popularity at the moment – thanks in no small part to their pricing strategy of only charging for the space that you use – often at a rate of less than 1 cent per GB. Amazon Glacier, Microsoft Azure and Google Cloud Storage are, unsurprisingly, the three most popular providers – although backup stalwarts Backblaze and IDrive have entered the ring too in recent months.
Still mostly used by corporate clients, there is nonetheless no minimum limit on how much data you can store with these services, and although user interfaces are extremely minimal, some providers offer paid add-ons for additional file management services, and programs like the aforementioned Cloud Storage Managers can provide a friendlier means of navigating your storage space.
5. Manage your workflow
Finally, the biggest trick to keeping all of your files safe, accessible and up to date is to manage your workflow. If you’re struggling with storage space or transfer speeds, there are a few very simple things that can make it all much easier.
1. Organise your photos
If you’re using an online backup service, it can be very tempting to just send all of your newly-uploaded images straight to the Cloud. However, if, like most photographers, you’ve taken 10 disposable photos for every one that you plan to keep, this will end up jamming both your Cloud storage space and your internet connection with huge amounts of data that you don’t need.

Of course, this is a tricky balance to strike (who edits their photos the second they’re uploaded?!) and it’s risky to leave your images resting on your laptop with no backup in place. However, if you’re finding transfer speeds a struggle, or are running out of storage space, then this can be a good way to minimise the impact of your uploads.
2. Get archiving out of the way first
If you’re planning to backup or archive lots of older photos, get that initial upload sorted out before you start backing up newer files. Whether you’re uploading everything to the same backup provider or using a dedicated archiving service, factoring in some time to transfer all of you existing files is well worth doing. Then, once that’s done, you can manage uploads of smaller quantities of new files with the advantage of faster transfer speeds and better computer performance than if you try and do everything at once.
3. Separate out file sharing and storage
Although some backup providers offer file sharing as well as plenty of storage space, they don’t always offer the best or most accessible way of making your data available to clients, colleagues, friends or family. So if you want to share your photos on a regular basis, take a look at some file sharing services and pick one with an interface that you like, and which you think will be easy for your intended audience to use too. This will help you to keep on top of which pictures and being shared and with who, and also give you more control over how your present your photos.
If money is a concern, programs like Dropbox and Google Drive have good free plans and cheap paid options with more storage space, and online galleries like Flickr can be worth considering too. If you’re concerned about privacy, some services will also allow you to change read/write permissions and impose extra security measures like link expiry dates, maxi mum download capacities and password protection.
Conclusion
Photos are precious – and the memories and livelihoods that go along with them doubly so. So don’t risk losing it all- a little money and a few hours of your time will safeguard your pictures no matter what happens.


I’m missing the cheapest and most secure option: optical storage. A double layer (50gb) blu ray disc costs about a dollar, makes the storing cost about 0.02 usd per gb. As long as you keep the disc in it’s holder and don’t expose it to direct heat or sunlight, data should remain there forever. It is true, that after buning, you cannot change it, so I only use it for archiving. For regular back up, I use two external hard disks, synchronised, kept physically separately too (one I keep at home, one in the studio).