Photography has come a long way since the introduction of digital cameras, but film photography is still alive and well. For those looking to get creative with their photos, there’s no better way than using a film camera.
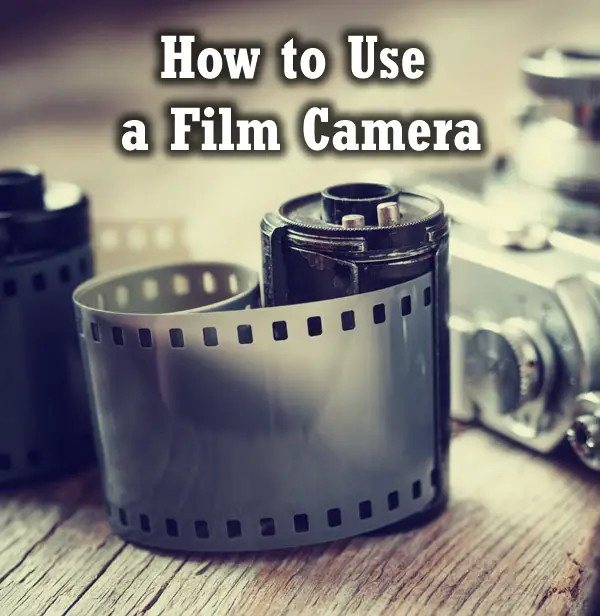
Whether you are an amateur or professional photographer, learning how to use film camera will give you access to unique shooting modes and techniques that can’t be replicated in digital form. From selecting the right type of camera for your needs, setting up for optimal results and tips on taking great shots – this blog post covers it all. So grab your favorite roll of film and let’s start exploring the world of analog photography together.
Types of Film Cameras
Film cameras come in a variety of shapes and sizes, each with its own unique advantages and disadvantages. The most common types are Single Lens Reflex (SLR), Rangefinder, Twin Lens Reflex (TLR), and Point and Shoot cameras.
Single Lens Reflex (SLR) cameras are the most popular type of film camera. They use a mirror system to allow the photographer to see exactly what will be captured by the lens when they take a photo. SLRs offer more control over exposure settings than other types of film cameras, making them ideal for experienced photographers who want precise control over their images.
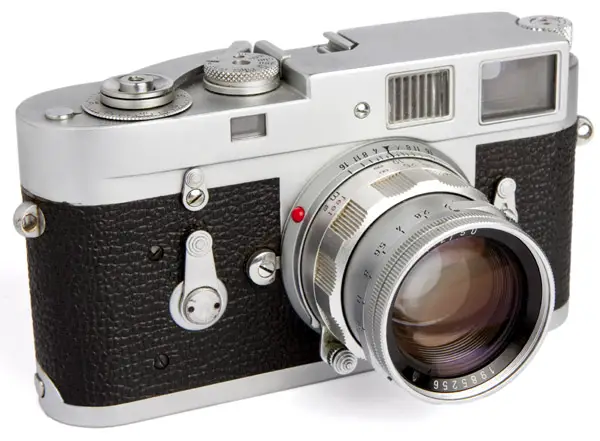
Rangefinder cameras have two separate viewfinders, one for composing an image, and another that shows the range between objects in focus. This makes it easier to accurately set focus without having to look through the lens itself, which can be difficult in low light situations or when using telephoto lenses. Rangefinders also tend to be smaller than SLRs, making them great for travel photography or street photography where size is important.
Twin Lens Reflex (TLR) cameras feature two lenses mounted side-by-side on top of each other – one taking photos while the other acts as a viewfinder so you can compose your shots before taking them. TLRs offer less manual control than SLRs but provide greater depth-of-field due to their twin lens design which allows more light into the camera body at once compared to single lens designs like those found on point & shoot models
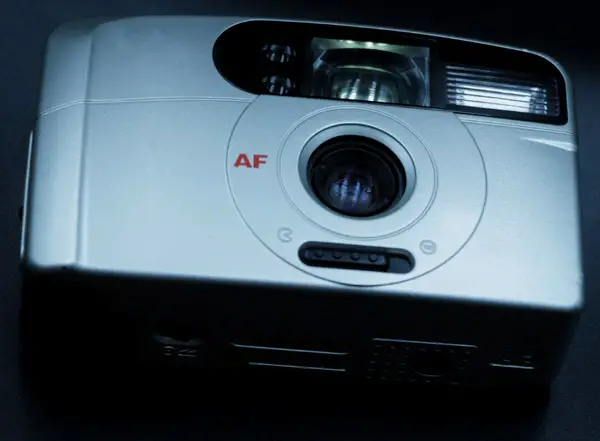
Point & Shoot film cameras are small enough to fit into your pocket or purse easily and still provide good quality images when used correctly. These models usually don’t have any manual controls beyond setting shutter speed and aperture manually, instead relying on automatic modes such as Program Mode or Auto Exposure Bracketing (AEB). Point & Shoots are great for beginners who want an easy way to get started with film photography without having too much technical knowledge about exposure settings yet still achieve good results from their shots quickly and conveniently.
Film cameras come in a variety of shapes and sizes, so it’s important to understand the differences between them before making your purchase. Now that you have an understanding of the types available, let’s take a look at choosing the right film type for your camera.
Choosing the Right Film Type for Your Camera
When it comes to film photography, there are three main types of film that you can choose from: color negative film, color slide film, and black and white negative film. Each type has its own unique characteristics and benefits that make it suitable for different kinds of photography.
Color Negative Film. Color negative films are the most common type of films used in amateur photography today. They produce vibrant colors with a wide range of tones and hues that look great when printed or displayed on digital screens. The downside is that they require more post-processing than other types of films because the colors need to be adjusted after scanning or printing them out.
Color Slide Film. Color slide films produce sharp images with high contrast levels but have limited dynamic range compared to color negative films. This makes them ideal for landscapes where you want to capture all the details without losing any highlights or shadows in your photos. However, they require careful exposure settings since overexposure will cause washed out colors while underexposure will result in muddy looking photos with low saturation levels.
Black and White Negative Film . Black and white negative films give photographers more control over their images by allowing them to adjust contrast levels during development as well as manipulate tonal values through dodging and burning techniques during printing process which can’t be done with color negatives or slides These features make black & white negatives perfect for fine art photography where subtle nuances can really bring an image alive if handled correctly during processing stages
When choosing the right type of film for your camera, consider what kind of results you are trying to achieve first before making a decision based on price alone since some types may offer better quality at higher cost than others depending on your needs. Additionally, take into account how much time you are willing to spend developing each roll since some types take longer than others due to their complex nature. Finally, always store unused rolls away from direct sunlight as this could damage the emulsion over time leading to lower quality prints later down the line.
Below are some factors to consider when making your decision in choosing film:
Camera compatibility: Make sure the film you choose is physically compatible with your camera. For example, some cameras use 35mm film, while others use medium format or large format film.
Film speed (ISO): Film speed refers to the film’s sensitivity to light. A higher ISO means the film is more sensitive and can be used in lower light conditions. However, a higher ISO also results in more grain in the image. If you plan on using your camera in a variety of lighting conditions, a versatile ISO film like 400 or 800 may be a good choice.
Color or black and white: Color film is available in various types, including negative film, slides, and instant film. Black and white film can also produce high-quality images with a unique look and feel that may be what youre looking for.
Film stock: Different film stocks have different characteristics, such as color balance, contrast, and grain. Experimenting with different film stocks can help you find the look and feel you want for your photos. This is best done with practice.
Purpose: Consider why you want to take photos with film. Are you looking to capture specific moments in your life, or do you want to experiment with the artistic potential of film photography? Different films may suit different purposes better. There are films made for artistic prints specifically.
Ultimately, the best way to choose a film for your camera is to experiment and see what works best for you. Try different films and see how they look in different lighting conditions and with different subjects. There is nothing better than practice when it comes to film shooting.
When it comes to film photography, the type of film you choose will depend on your desired results. Once you have chosen the right film for your camera, it is time to move onto setting up your camera for successful shots.
Setting Up Your Camera for Film Photography
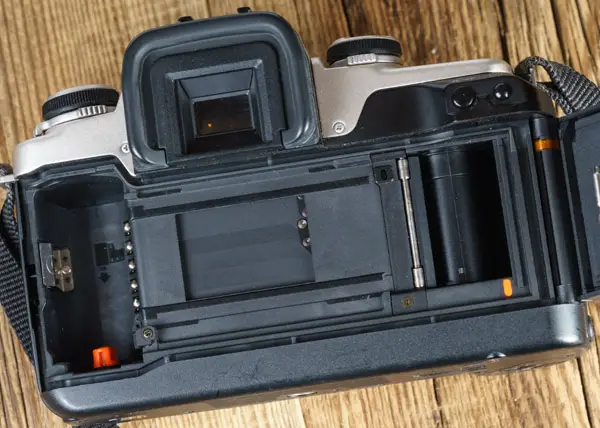
When it comes to setting up your film camera for taking photos, there are a few steps you need to take. First, you’ll need to load the film roll into the camera body. This is usually done by opening the back of the camera and carefully inserting the film roll with its spool facing outward. Once that’s done, close the back of your camera and make sure it’s securely closed before continuing on.
Next, you’ll want to adjust your shutter speed and aperture settings depending on what type of photo you want to take. Shutter speed determines how long light will be exposed onto your film while aperture controls how much light passes through your lens at any given time. You can experiment with different combinations until you find one that works best for what you have in mind.
Once those two settings are adjusted, set both focus mode and ISO rating accordingly as well. Focus mode should be set according to whatever subject matter or scene is being photographed while ISO rating affects both image brightness and graininess so choose an appropriate number based on what kind of photo result you desire (higher numbers mean brighter images but more grain).
Finally, check all other features such as flash settings or timer options if available before pressing down on that shutter button. With these steps taken care of beforehand, all that is left now is actually taking some photos.
Once you have loaded the film roll, adjusted the shutter speed and aperture settings, and set the focus mode and ISO rating, you can move on to understanding shooting modes and exposure compensation when taking photos with a film camera.
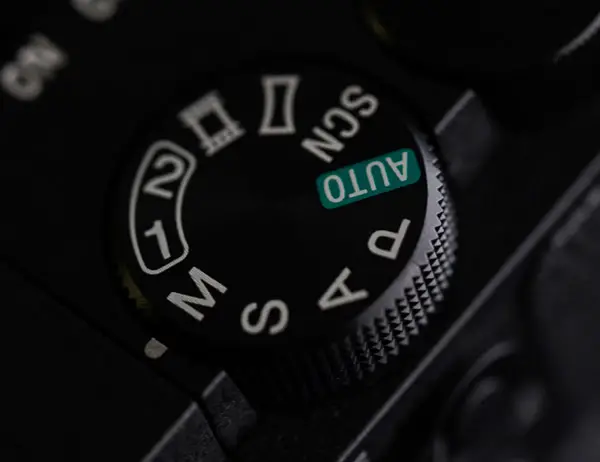
Taking Photos with a Film Camera: Shooting Modes
When shooting with a film camera, you have two main options for setting up your exposure: manual mode and automatic mode. Manual mode allows you to manually adjust the shutter speed, aperture, and ISO rating of your camera in order to achieve the desired effect. This is often preferred by experienced photographers who want full control over their exposures. Automatic mode takes away some of this control but makes it easier for beginners to take great photos without having to worry about all the technical details.
In either case, understanding exposure compensation can help ensure that your photos are correctly exposed even when there’s no digital preview available. Exposure compensation is a technique used to adjust the overall brightness or darkness of an image after taking it by changing either the shutter speed or aperture settings slightly from what was originally set on the camera before taking the photo. For example, if you find that your photo appears too dark after taking it in manual mode, you can use exposure compensation to increase its brightness by increasing either the shutter speed or aperture setting slightly until you get a better result.
Other modes on film cameras, much like with digital cameras, include aperture priority and shutter priority. These work the same as in digital cameras.
Another important factor when shooting with a film camera is knowing how much light will be available at any given time so that you can make sure your settings are appropriate for each shot. If possible, try using natural light whenever possible as this will give more consistent results than artificial lighting sources such as flash units which may cause unwanted glare or shadows in certain situations. Additionally, pay attention to composition when framing shots; consider things like leading lines and symmetry when composing images as these techniques can help create visually interesting compositions that draw viewers into an image rather than just looking at it passively from afar.
Finally, knowing when you’ve reached the end of your film roll is essential in order to avoid wasting shots due to overexposure or underexposure caused by running out of film mid-roll. Developing photos taken with a film camera also requires special care and attention; all steps involved in developing prints should be done properly so as not to damage them during processing or storage afterwards.
With the right knowledge, you can create stunning images with great depth and texture that digital cameras cannot replicate. Now let’s look at some tips for taking great photos with a film camera.
Tips for Taking Great Photos with a Film Camera
Using a film camera to take photos can be an exciting and rewarding experience. It’s important to understand the basics of how they work before you get started, but once you do, it’s time to start shooting.
Here are some tips for taking great photos with a film camera:
Use Natural Light Whenever Possible. Natural light is one of the most important elements in photography. When using a film camera, try to find natural light sources like windows or open doors that will provide soft and even lighting for your shots. If you don’t have access to natural light, consider investing in a reflector or diffuser which can help create softer shadows and more even lighting when shooting indoors.
Pay Attention To Composition. Good composition is essential when taking photos with any type of camera, including film cameras. Pay attention to the placement of objects within your frame as well as their relationship with each other – this will help create interesting images that draw viewers into the scene. Experimenting with different angles or perspectives can also add visual interest and depth to your photographs.
Finally, remember that there are no digital previews when using a film camera so it is important to double check all settings before taking the shot. Taking time beforehand will ensure that all exposures come out correctly and avoid any surprises during the development stage.
By understanding the basics of composition and lighting, you can create stunning photos with a film camera. Now let’s look at how to know when it’s time to switch out your roll of film for a new one.
Knowing When You’ve Reached the End of Your Film Roll
This is important because if you continue to take photos after the last frame has been exposed, it can cause overexposure or underexposure in your images. Knowing when you’ve reached the end of your roll will help ensure that all of your photos turn out correctly and that none are ruined due to running out of frames too soon.
One way to tell when you’ve reached the end of a roll is by counting how many shots you have taken. Most cameras have an indicator on them which shows how many exposures remain on each roll. If this isn’t available, then keeping track manually may be necessary – for example, writing down each shot as it’s taken or counting off every few shots so that an approximate number can be kept in mind at all times.
Another method for knowing when a film roll has come to its conclusion is by looking at the sprocket holes on either side of the exposed frame – these should line up evenly across both sides and indicate that no more frames are left on the roll. Additionally, some cameras also feature indicators such as red flags or arrows which appear once there are no more exposures remaining; this helps make sure photographers don’t accidentally keep taking pictures after they’ve run out.
In order to conserve frames while still getting great shots from a single roll, photographers should plan ahead before beginning their shoot and think about what kind of images they want beforehand. This will help avoid wasting any unnecessary exposures due to indecision during shooting sessions. Photographers should also try not to overshoot scenes; instead take multiple angles but only one or two shots per angle rather than five or six just in case something goes wrong with one image later down the line, such as light leaks. Finally, practice makes perfect – get familiar with different types and brands of films so that less time needs spent adjusting settings mid-shoot.
Knowing when you’ve reached the end of your film roll is an important part of photography with a film camera, and it’s essential to get this step right. Now that you understand how to do that, let’s look at developing your photos after shooting with a film camera.
Developing Your Photos After Shooting with a Film Camera
Developing your photos after shooting with a film camera is an important step in preserving the memories you have captured. Professional services are available to develop and print your photos, but there are also do-it-yourself kits that allow you to develop at home.
When developing at home, it’s important to make sure you have all of the necessary supplies such as chemicals, trays, tongs and a thermometer for temperature control. You will also need access to running water and good ventilation since some of the chemicals used can be hazardous if inhaled or ingested. Once you have everything ready, follow the instructions on your kit carefully so that you get optimal results from your prints.
Once developed, it’s important to store them properly in order to preserve them over time. Prints should be kept away from direct sunlight and moisture in acid free archival sleeves or boxes made specifically for storing photographs. If possible avoid touching the surface of prints with bare hands as oils from skin can damage images over time due to oxidation processes caused by exposure to air pollutants like ozone gas which is found naturally in our atmosphere.
It is also recommended that negatives be stored separately from prints since they require different storage conditions than prints do. Negatives should not be exposed to direct light or heat sources either, as this could cause fading or discoloration over time as well. Finally, consider scanning any particularly special shots onto digital media so that they can easily be shared online without risking damage due to their delicate nature when handled physically (e.g., fingerprints).
FAQs
How do you work a film camera?
Using a film camera is fairly straightforward. First, you need to make sure the battery is charged and the lens cap removed. Then, set your ISO speed by turning the dial on top of the camera body. Set your focus. Next, select your aperture setting by rotating the ring around your lens barrel. Finally, adjust your shutter speed using either a dial or wheel located on top of the camera body and press down on the shutter button to take a photo.
How does a film camera work?
A film camera works by capturing light through a lens and onto photographic film. When the shutter is opened, light passes through the lens and exposes the film, which is then processed to create an image. Film cameras come in various formats such as 35mm, medium format or large format depending on how much of the scene you want to capture. The size of each frame determines how much detail can be captured in a single shot. After exposure, the film needs to be developed with chemicals before it can be printed or viewed.
How do you use a disposable film camera?
Using a disposable film camera is relatively simple. Firstly, make sure the battery is working and loaded into the camera. Then, load the film into the back of the camera and advance it until you hear a click or see a number in the window. Take pictures by looking through the viewfinder and pressing down on the shutter button. When finished with one roll of film, rewind it before opening up your camera to take out your exposed film for developing. Finally, drop off your exposed film at any photo lab for processing.
How do you put 35mm film in a camera?
To load 35mm film into a camera, first remove the lens cap and any existing film. Then, open the back of the camera by pressing down on the release button or sliding a switch. Next, take out the empty spool from inside and insert your new roll of 35mm film with its leader facing away from you. Finally, pull some of the film across to attach it to the empty spool and close up your camera before winding it until you hear a click. Your camera is now ready for use.
Conclusion
Film photography requires more thought and planning than digital photography, and does not give you an instant result, but the results can be stunning. From choosing the right type of film for your camera to setting up your camera for optimal results, there are many steps involved in using a film camera. With practice and patience you will soon become familiar with all aspects of using a film camera. By following these tips, you’ll be able to take beautiful photos that capture special moments that will last forever. So why not give it a try? Start exploring the world of analog photography today by picking up a film camera and learning how to use it –you won’t regret it.
Click on the following link to learn where to get film developed.


