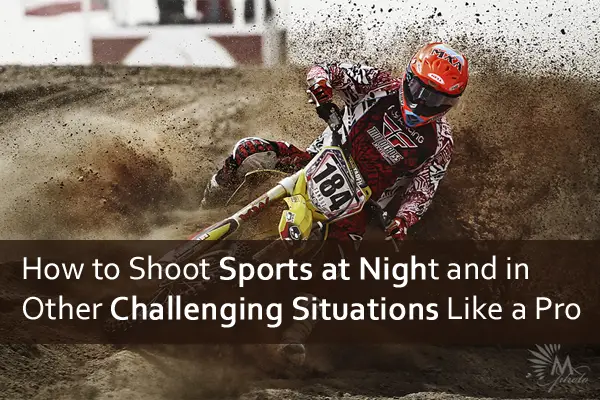
Sports photography is often shot either one of two ways – a 1/1000th shot freezing everything in frame and capturing a single, frenetic moment during a race, or at 1/60th, panning with the subject and creating some motion blur to emphasize the speed of the subject. No matter which method, they’re always taken during the day.
Daylight allows photographers to get light into the sensor and take a better picture, but what do you do if there is no light?
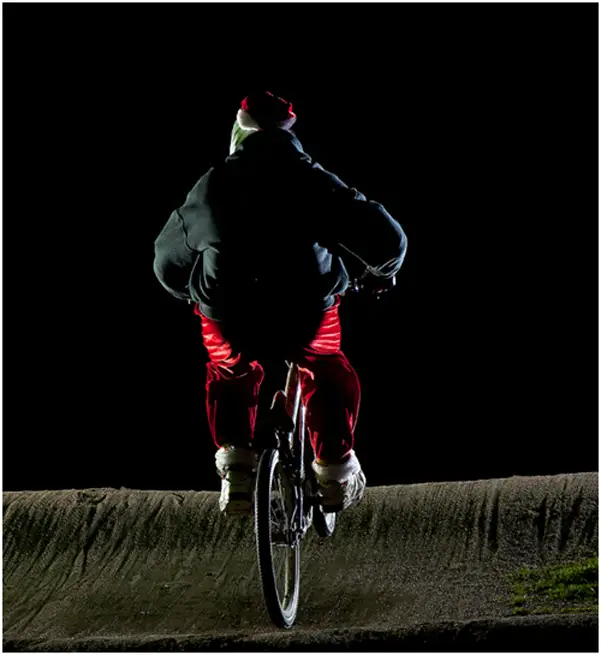
Shooting at night has always presented problems for photographers – lower light levels means a higher ISO and slower shutter speeds, resulting in grainy, blurry images. An on-camera flash won’t solve this either, as anyone who’s ever used one will know. So what’s the solution? Off-camera flash.
Working With Off-camera Flash
Off-camera flashes allow you the freedom to put the light wherever you want it, and using them at night allows you to position the light in the exact place you want to whilst leaving the background dark. This can create some interesting photos, and when combined with different angles, you can create some dynamic images you wouldn’t have otherwise taken in broad daylight. So how do you do it?
First off, don’t be worried by “off-camera flash”. PocketWizard might be the go-to name, but these come with a price. I picked up two receivers, a trigger, a very cheap tripod and a flashgun all for under $100 from eBay, then used a flashgun and tripod I already had. A cheap flashgun will do the same job as an expensive one, and as the tripod will only be supporting a cheap flashgun – not your expensive camera – there’s no need to splurge.
Trial and Error Is Your Friend
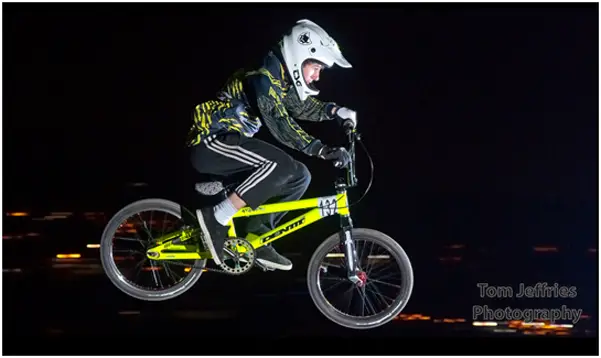
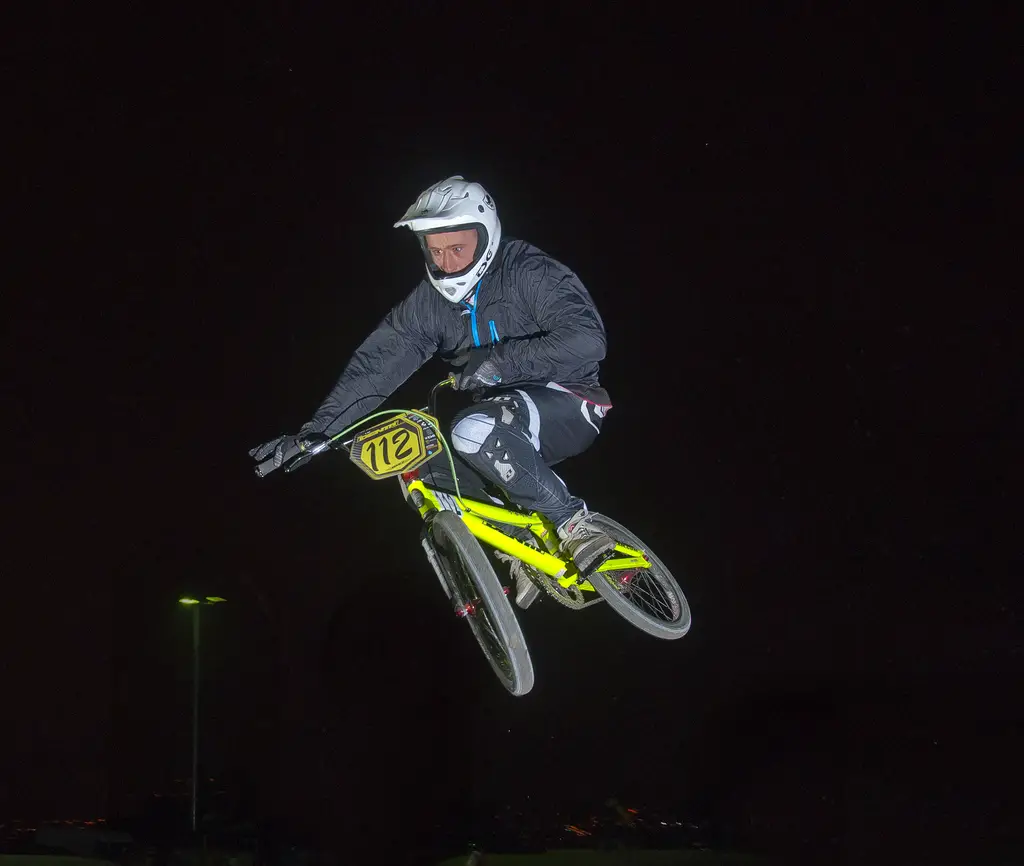
Trial and error will be your biggest friend in this situation, as the best light placement will differ depending on what you’re shooting. When I shot BMX racing, I found having two off-camera flashes worked best. Having one in front (or near enough to front) of where I was shooting from, as well as having one diagonally opposite on the other side of the track allowed for the most flexibility and light dispersion. See below.
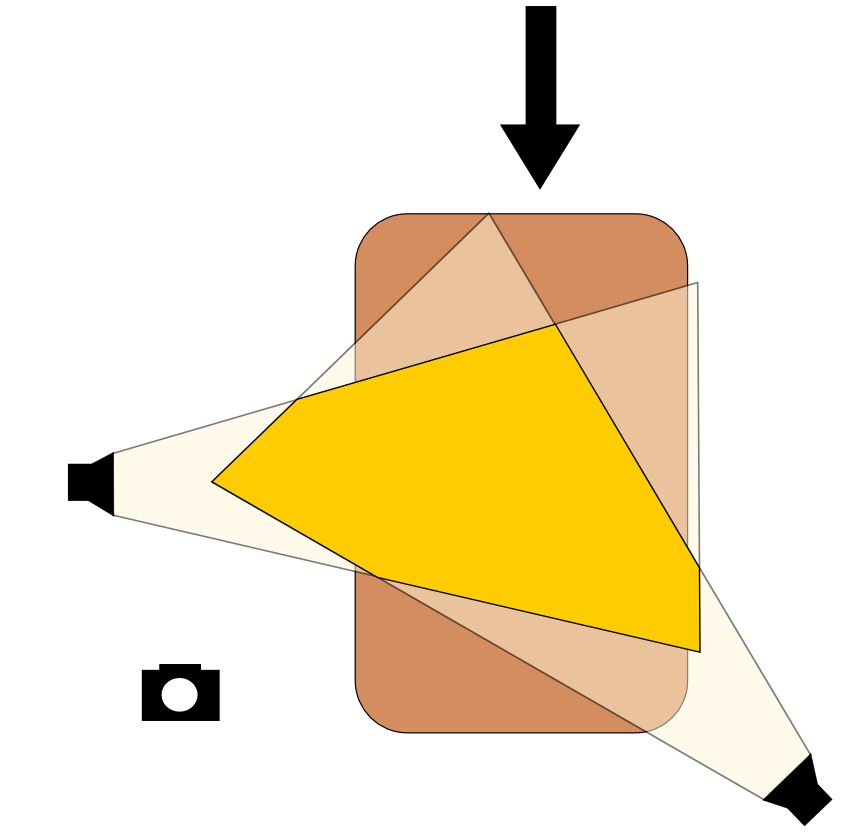
In this diagram, the brown rectangle is the jump, the two black boxes are flashes, the arrow shows the direction of the rider and the yellow boxes are the light from the flashes. The big yellow intersection in the middle is where both lights convene, and thus provides the brightest area to shoot in. Having one flash on the side of the subject lights up the outline and most of the subject, whilst having the other flash at a more frontal position illuminates the other side of the rider and gives more detail to the face and outline. This light also gives you more freedom to move around, as you can get much more straight-on to the subject and still have good light coverage.
Shutter Speed Considerations
Once you’ve identified where the subject(s) will be passing through and where you want to shoot, it’s just a matter of arranging your lights to maximize the coverage from the flashes. This was usually where outlined in the above diagram, however there’s a lot of room for movement in these and as long as you have some light hitting the subject, you’ll come out with a shot.
Cameras generally have a sync speed of 1/200th, which means the fastest shutter speed you’ll want to use is 1/200th. Any faster than your sync speed (the fastest shutter speed your camera can shoot using flash) will result in shutter lag. As you’re shooting at night, you’ll want the widest aperture you can use (f4 and up) and ISO roughly 400/500 depending on your camera as the higher the ISO, the grainier the black areas will be.
Using Manual mode will be the most reliable, as it gives you full control over all the settings and lets you change each one individually as you get your camera “tuned in” to the conditions that night. Of course this doesn’t rule out panning, and using a slower shutter speed can often create some great motion blur whilst the flash freezes the subject.
The Golden Rules to Follow
There are two golden rules with off-camera flashes and sports photography. The first is to listen to the people. If they don’t like how strong the flash is or find it distracts them, you need to move it. No ifs, no buts, just do something about it! The second rule is to keep trying different things. One night can be completely different to another, and continually playing with settings, flash placings and camera positioning is what keeps photography interesting.
If you’re unsure of your timing or where the best place to put your flashes is, try practicing with a stationary object at home. This will teach your about where the light falls best. To practice your timing, make sure you’re focused on an area just before you want to shoot. This way, when the subject enters you can immediately focus and take the photo. It will be one photo too – you’re unlikely to get two consecutive flashes from both your flashguns!
The main point is to get out there and have fun with it. Off-camera flashes are a great tool and can really take your photography to the next level, and changing settings will keep it fun and interesting. Have a go today!
Author’s Bio: Tom Jeffries is an ambitious content writer and photographer. He used the techniques outlined above to shoot some of the photos used in his book, BMX Racing. For more information on photography, see Plusnet’s blog post about it here.


0 comments