NFTs are proving to be an additional income generation method for photographers. Photos sitting on your hard drive can be converted to NFTs and sold. But many photographers still don’t know how to do it, thinking that NFTs are too complex and hard to understand as is blockchain technology.
As a photographer, you need to know which images can be sold as NFTs and what are the best NFT platforms for photography. In this article, I will explain everything about NFTs as simply as possible as I have knowledge of the field. You will also learn how to mint and sell your first NFT without needing to be a crypto expert.
In general, the process of creating an NFT from a photo and selling it involves using an existing digital photo or modifying it via animation or editing methods, minting an NFT to the blockchain, and listing it for sale via auction or fixed price on an NFT marketplace. Lets get into the details.
Definition of NFT
NFT is the short form for Non Fungible Tokens. They are uniquely identifiable digital assets. NFTs are authenticated through the blockchain so they cannot be copied or faked. They are scarce and tradeable. Videos, art, audio, animations, and other creative works can be transformed into NFTs. You can buy and sell NFTs.
Which photos to use as NFTs?
You can use any of your pictures as an NFT. But, you will not be able to sell all your images for the same price. So, your chances of generating income from NFT will be more if you select the right types of images.
You can use a photo as is from your collection. You can convert your photo into a fine art image and turn it into an NFT. Animating the photo is another option. You can use easy-to-use animation programs like Plotagraph or PhotoMirage to animate your pictures. You can also go for an HDR version of your existing image.
When choosing photos to use, think about Collections you can create on a particular theme, not just a random “drop” of several unrelated photos. You can do that in the beginning to get a taste of what will sell but later its better to create themed collections. For example you can have landscapes, cities, portraits, etc. Go through your database and find the best photos you have to sell as is or modify/animate.
Think about what photos people might want to collect and display on their computer or larger screen on the wall. What photos do people collect that are non digital? How can you make photos stand out by editing? Consider mixed media. What is it about a digital photo that can be done which cannot be done to a traditional photo? Look around on marketplaces for ideas.
Animating photos
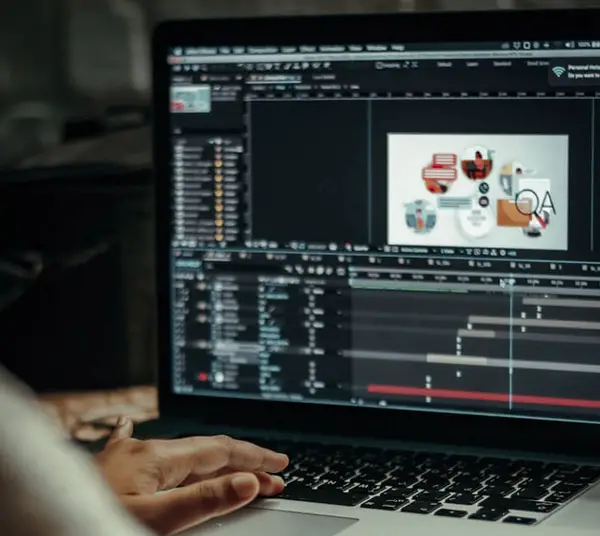
There are many animation packages out there, some are dedicated photo animation programs and others are animation programs that can be used to animate photos, such as After Effects.
Keep in mind when you animate that if you want to loop a photo, anotherwords not make it into a movie clip that suddenly stops and restarts from the beginning, but rather an animation that seems to go on forever seamlessly, you have to make the beginning and end match up visually. This can be done more easily with photo animation apps as they have those features. In other programs like After Effects youd have to create one that repeats a bit and then cut it down.
Below are some ways to animate photos in After Effects and PhotoMirage.
After Effects
In After Effects, you can do the following to animate a photo:
1) use Photoshop first to cut out elements of the photo you want to animate against a background
2) use clone/healing brush to patch the background,
3) blur edges of your new layer
4) repeat for as many layers as you want to animate
5) import the layered PSD file into After Effects as a composition
6) precompose
7) parent layers to higher hierarchy layers
8) adjust anchor points
9) animate elements
PhotoMirage
1) Open your photo
2) Use arrow tool to draw arrows where you want movement (long arrow=fast movement)
3) Use anchor point tool to select areas you dont want to move (place along object edges)
4) Use mask button to mask areas to remain still (similar to anchors)
5) Use play button to test animation
6) Use speed slider to adjust speed
7) Edit and move your anchors and arrows to fix any issues
8) Use delete to remove any unwanted anchors or arrows
9) Use selection tool to move multiple points at once
10) Use save button to save an editable project file
11) Use export button to export animation
12) Use settings such as MP4, 25fps or 30fps, HQ
13) Experiment with loop time (between 6 and 10 sec)
14) Play animation in external video player set to loop to test
Image Size
A good size of images to use is 3000 pixels wide and 300 dpi in a JPG. They can be larger and you can offer different sizes in Unlockable Content (described later) but dont upload small poor quality photos. For animations, different sites have different maximums. File formats such as M4V and MP4 are common.
Some sites have a 40 megabyte maximum for animations or movies, with 20 megabytes being a good size. It also may take a long time to mint if your piece is too large. For video thumbnails, the size can be 300 pixels wide.
NFT marketplaces for photographers
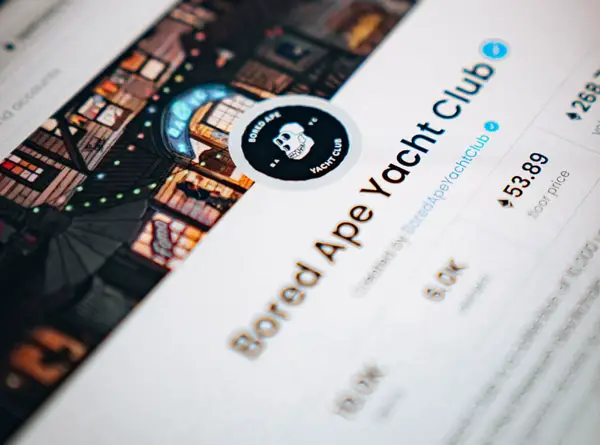
There are several NFT platforms you can choose as a photographer. OpenSea, Foundation, Marketplace, Rarible, & SuperRare are a few popular ones. You can buy, sell, or exchange your NFTs on any of these platforms. OpenSea is the world’s first and the largest marketplace for NFTs. It is built on top of the Ethereum blockchain but now also accepts others.
* Keep in mind there is no way for me to describe the processes used to mint and sell an NFT on all the sites as that would take one hundred pages, so I will use OpenSea as an example, but it is very similar on other platforms. Once you know the process you should be able to do it on other platforms with minor modifications found on their FAQs.
How to create an OpenSea NFT account?
In order to start the process, you need to have some Ethereum in your account. Ethereum is a cryptocurrency.
Ethereum is required to mint the NFT, purchase NFTs and pay gas (transaction) fees. You need to store the purchased Ethereum in a wallet. To buy Ethereum, you can use platforms like FTX or Coinbase. So, you need to create an account on any of these platforms first.
You can make the payment for the cryptocurrency typically through a debit card or bank transfer. The problem with the debit card is that you may not be able to buy enough cryptocurrency since there is a limit on the debit card. The other option is a wire transfer through a bank. It will take 10 to 14 days. So, you need to purchase the cryptocurrency as early as possible to start with the NFT. You can also link your bank account directly to exchanges like Coinbase.
Now, the question is how much money you must convert. It is a good idea to spend at least $200 to $250 initially to purchase the cryptocurrency. If you have more money, you can invest more. Coinbase will charge a small fee for cryptocurrency conversion.
You can use the MetaMask crypto wallet to store Ethereum. It is free and connects easily to marketplaces like OpenSea.
This crypto wallet is required because OpenSea will never keep your NFTs. OpenSea is only a platform that you can use for trading your NFTs. So, go and create an account in Metamask. Install it on your computer. Metamask has a browser extension that you can download and install on your Chrome browser. Thus, you can easily use this wallet on NFT sites.
When you create a wallet in Metamask, you will have to create a password and a seed phrase. The “Seed phrase,” a series of random words is your backup in case something goes wrong. This “Seed phrase” thing is very important. You need to store this password safely. If you forget it, then there is no password reset option here. If you lose the password, you won’t be able to use the cryptocurrency in the wallet.
You need to transfer your purchased cryptocurrency on Coinbase (or another exchange) to Metamask because NFT platforms cannot access exchanges directly. You can find a unique address in your Metamask wallet. You need to copy this address from the Metamask and go to the Send/Receive section in Coinbase. Select the Send option and paste this address here and transfer the amount. It will take a few minutes to reflect this transfer on the Metamask account.
Now, go to Open Sea. Go to the “My Profile” option from your profile section. It will ask you to sign in to the Metamask wallet. Multiple prompts will come to get you connected to the wallet. After the successful connection, you can see your profile as “Unnamed,” and you can see your wallet address below.
Click on the gear icon on the top right corner and customize your profile. Add username, profile picture, bio, and email address in the respective columns. You can browse peoples profiles to get ideas of what works (look to see if their NFTs are selling).
The next thing to do is connect the Metamask to your OpenSea account. Click on the Metamask browser extension and click on Connect to get it connected to the OpenSea account. Now, you are done with the whole process of creating your NFT account.
How to mint your first NFT?
Let us see how to mint your first NFT. The minting is the process of creating the NFT and adding it into the blockchain. Once added to the blockchain, you will not be able to make any further edits (and neither will anyone else which is good).
The process of creating an NFT in OpenSea is a simple one. The first thing to do is to create a Collection. You can go to the profile section and select “My Collections.” Now, click on the “Create a Collection” button. In the new window, you can upload your collection logo, featured image, and banner image. You also need to add the name, open sea URL for your collection, description, and category. Make sure to add all the social media links and your website link here.
*I will emphasize this, the more eyes you get to your collection, and the more popular you are as a photographer with a large following, the more successful you will be selling your work. There are photographers out there making millions this way.
You need to add the royalty fees in this section. The royalty fee is the fee that you get when people resell your NFT in OpenSea. You can add a 5 percent fee. You will have to enter the payout wallet address here.
Click on the Metamask browser plugin to get this address and paste it into OpenSea. You can leave the payment tokens as “Ethereum.” You can also change it to other cryptocurrencies if you are interested. You will get three display theme options for your NFTs. You can select any of these. Recheck all the entries once. If everything is OK, go ahead and click the Create button at the bottom of the page. Now, your collection is created.
Now, you need to add the NFTs to your collection. Click on the “Add item” option. Here, you can add your photo or photo animation of your choice. You can give a name for the NFT. Give the description. If everything is OK, then click on the Create button. You have successfully created your first NFT.
As the creator, you can mint one or several copies of the image or animation. Having only one ever made is likely going to bring the price up as people will compete for it. However, if you have a large following as a photographer and would like many people to own your artwork, feel free to create 5 or 10 limited edition copies.
Ethereum vs Polygon network – which is best for NFTs?
It is a known fact that Ethereum is the leader in the NFT world. Here is a description. But, there are some disadvantages of using Ethereum. The use of Polygon helps to avoid these disadvantages. Two main disadvantages of Ethereum are the high cost and slow speed.
Polygon chain is a layer 2 chain. It can help you buy and mint NFT without any gas fees and fees on Ethereum can be a lot. You may have to spend $100 or more to mint one NFT. It is one of the main advantages of the polygon network. When you use polygon, you are still using Ethereum cryptocurrency. Here, the thing is that your money is added to a different blockchain. Zero gas fees will give you the ability to mint more NFTs as a photographer.
Is It Possible to mint NFTs for free?
All the NFT marketplaces charge gas fees for minting the NFT. Sometimes, these gas fees can be very high due to the increase in network activity. So, the cost of minting goes up. It may be one factor that makes photographers move away from NFTs. But, there are some ways by which you can mint NFT for free. If you are using the Rarible NFT marketplace, then you can use their lazy minting feature. It will help you to mint your NFT for free. This can also be done on Opensea using the Collection Manager.
To create NFTs for free on Opensea:
1) Create a collection
2) Select collection
3) Edit collection settings to your liking
4) For Blockchain choose Polygon
5) Click Add New Item to create new NFT
Unlockable content options
When you mint and NFT there is an option to provide unlockable content that is hidden unlike the image or animation everyone sees. Only the buyer has access to it. It can be anything from a special gift to the buyer, a personal message, more content, etc.
It can also be a higher resolution version of the image like 4k. Some people put higher resolution images only in unlockable content so that someone will not try to screen capture or save the publicly viewable file but I was assured by the platform rep that this is not necessary as the image is on the blockchain and creator and owner is recorded.
Signing images
On a related note, you are always allowed to put your signature on an image like painters do and many photographers do. You dont have to since the blockchain records creator and owners. However, feel free to do so if you want to.
Freezing metadata on the blockchain
There is an option to freeze metadata when you mint an NFT. The process of locking and storing your file metadata in a decentralized storage is called the freezing metadata on the blockchain. It will help your clients to view the metadata. It ensures a way of safe storage of your NFT. The metadata includes the item’s name, media information like JPEG, PNG, SVG, and GIF in the case of image, image description, and the various properties.
Some NFT platforms may charge some fee for freezing the metadata. If you are using OpenSea, then you can do it for free. To freeze the metadata of your NFT in OpenSea, go to “My Collection”, and you can choose the item that you want to freeze. You can do it only after the creation of the item but make sure you do it before selling your item.
Selling Photo NFTs
Now, let us see how to sell an NFT in OpenSea. Go to the profile section in OpenSea and go to MyProfile. The NFT that you have created is now visible in your profile. Click on this NFT. You will see the “Sell” button on the top right of the page.
There are three ways you can sell your NFT. You can either sell it for a fixed price, auction or in a bundle. If you are going for a fixed price option, you can enter the desired cost and click on the “Post your listing” option. There will be a gas fee charged for this listing. Click on the Metamask plugin in the browser to view the gas fees. Click confirm to put your first NFT for sale. You can click on the “Activity” section to see your listing.
Auction vs fixed price listing
The two ways of selling NFTs are regular listing and auction. Each of these methods has got its advantages as well as disadvantages. If you plan to put the NFT in the auction, you can set a base price and the auction date. You need to do all the promotion activities before the auction date to ensure that all the interested collectors know about it.
The auction process will usually run for 24 hours. Whoever bids the highest amount before the closure of the auction will get the NFT. If no one bids for your NFT, it will go on the unsold list. So, go for the auction type only if you are sure that someone will buy that NFT either because of its popularity or the popularity of the creator.
In the case of the regular listing of NFTs, there is no time constraint for the sales. Here, the NFT will get sold for whatever price you have listed in the marketplace. You will not be able to get any price above that. If you have undervalued your NFT, the person who buys your NFT will resell it and make more money. You need to set a reasonable cost for your NFT when you are going for the regular listing. So, it is up to the creator to decide whether to go auction mode or the regular listing.
You can also consider watching this video from the Youtuber Henbu to know more about creating photography NFTs that sell:
How to promote your NFTs?
Just creating an NFT alone will not help you in selling it. You need to promote it. If you are a famous photographer with millions of followers on social media, it is easy to promote your NFTs. But, still, you need to grab the attention of the collectors. There are both free and paid ways for promoting NFTs.
NFT Calendar
One of the best methods that is free to use is the NFT calendar. It is a platform for upcoming NFT releases. You can add your drop to the NFT calendar. It can be done from all the marketplaces. The submission is completely free. You need to enter certain details here. It includes the title of the NFT collection, creator details, description, key visual of drop, marketplace details, time and date of drop, and link to your release. The submitted details will be sent to the NFT calendar team for review. They will feature selected NFTs among their Twitter and Instagram groups.
Social Media
You can also use your social media networks to market NFTs. Many of your fan followers might not know about NFTs. So, it is good to give some informative description about your post. If you have created a collection of multiple NFTs, you can post it on your social media. But, there is a time for doing it. You need to do it at least 2 weeks before making the drop.
Some of the platforms where you can show your drop include Twitter, Instagram, Medium, Telegram and Discord. Some NFT trading platforms have channels where you can actually promote your work, such as the Opensea Discord channel. When you showcase in social media, you should mention the gear that you have used to create it and also the struggles you have taken to do it. You can also ask your followers, friends, and relatives to share it on their social media to increase the reach.
Marketplace Newsletter
This method is a paid one. You can contact the marketplace team and request them to add your NFT details to their next newsletter. They will charge some amount for this promotion. So, be ready to compensate them. But, this method can be really effective since these newsletters will mostly be read by the collectors who are the potential buyers. If you are ready to invest for promotion, then don’t miss this opportunity.
Keep in mind that everyone is out there trying to sell their NFTs and there is a lot of competition. Competition is not so high with photos at the moment but it probably will be in the future so your work should stand out and the more exposure the better.
Influencer Marketing
Another way is to use influencer marketing. Get in touch with the influencers in your art field and ask them to share it on their social media network. You will have to compensate them in return. This method can be effective if you don’t have sufficient social media followers.
Use your website
You can even use your website for the promotion. Create a page on your website sharing details about your NFT release. You might be getting more traffic from certain pages of your website. So, try to link your page that has the NFT details from these popular pages. You can even design and paste your NFT promotional banners on popular pages. If you don’t have a website, then consider creating one.
Organize Giveaways
You can also organize NFT giveaways. The giveaway needs to be scheduled at least one week before the actual launch. You can giveaway your cheaper NFTs. To increase the effectiveness of giveaways, you need to set some rules. Some of the rules you can set include tagging friends, sharing the post, and commenting on the post. It will help to increase your organic traffic.
There you have it, I hope this article will get you started on your way to minting and selling your photography NFTs. Good luck!
Click the following link to read our photographers guide to selling.


1 comment