Online shopping is the wave of the future. Already, e-retail sales account for 14.1% of all retail sales around the globe. That’s expected to grow to 22%.
Every online retailer from small businesses to global giants face the same challenge — how to get customers to buy a product they can’t see. That’s where compelling, true-to-life product photography comes in.

How do you take convincing images that honestly showcase a products features? Hold onto your hat because you’re about to find out.
Best Camera for Product Photography
In the customer’s mind, the quality of a product is directly related to the quality of the photo they are viewing. In the real world, we know that’s not true, but that’s the perception online. No one thinks through the why, but if they did, the reason would probably be that if you’re selling a quality product, wouldn’t you be willing to invest in quality photography?
That being said, product photography doesn’t require the fancy mirrorless 45 MP Canon R5 with superior 8K video that Canon lovers are going crazy over right now. Cameras these days offer good enough quality that you can get good results with an inexpensive point-and-shoot model or even a modern smartphone — as long as you know what you’re doing.
However, if you plan to do a lot of product photography, (i.e. it may become a lucrative income stream), it’s worth investing in something a little more pro.
The much less expensive 24.2 MP Canon EOS Rebel T7i is a great beginner camera. It is easy to use and yields exceptional picture quality. It is equipped with the tried and true APS-C CMOS sensor with a DIGIC 7 image processor. Combine this baby with a good lens and you’ve got a nice little product photography setup.
A very portable option is the Sony a6000. This mirrorless camera is lightweight and equipped with an Electronic Viewfinder that you will fall in love with. It’s a little older (and therefore cheaper!) but still offers excellent picture quality with a 24.3MP APS-C CMOS sensor.
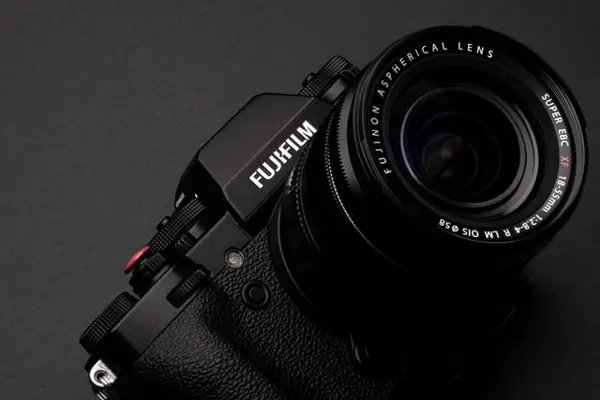
If you’re ready to invest a bit more in your camera, we suggest the Fujifilm X-T30. This mirrorless camera offers a ton of value for the money. Enjoy a brand-new 26.1MP back-illuminated X-Trans CMOS sensor with an X-Processor 4 and X-Trans color filter array that puts out amazing images.
Best Lenses for Product Photos
If you’re going to be shooting with a point-and-shoot or a smartphone, you can skip over this section (although it never hurts to learn something). But if you’re going to be using an interchangeable lens camera, pay close attention. The lens you choose to use for product photography is arguably more important than the camera body itself.
The lens you choose will depend partially on the types of products you’ll be photographing. If you’ll be photographing jewelry or other small items, a macro lens is a must. Even if your products will primarily be larger, a macro lens is still nice for showing close up details. Additionally, if your studio space is small, a wide-angle lens may be helpful if you can’t get far enough away to fit your entire subject in the frame with a longer focal length lens.
Canon users will love Canon’s exceptional 100mm macro lens. If your budget doesn’t permit, try this. Pick up Canon’s nifty-fifty, an extraordinary lens for the price range, and pair it with an inexpensive set of macro filters. Nikon’s nifty-fifty is also a great lens with which you can use the same trick.
For a versatile lens, check out the Sigma 24-105mm f/4.0 DG HSM ART. With a range from wide-angle to telephoto, you have what you need for most types of photography in one lens.
If you have your heart set on macro, but can’t afford the name brand lenses, this Tokina 100mm F2.8 D Macro lens is a great budget choice.
Lighting Your Product Pictures
Now that we’ve got the basic camera gear out of the way, it’s time to look at the lighting. The right lighting is arguably the most important piece of the puzzle when it comes to amazing product photography images. A horribly lit photo taken with a top of the line full-frame mirrorless camera will be worth less than a properly-lit photo taken with a smartphone.
Choose natural lighting or LED lights to light your images. Incandescent bulbs and fluorescent bulbs can create either a yellow or blue cast in your photos. You want your images to look as true-to-life as possible so this is not ideal.
Set up your workspace perpendicular to a large window or glass door. The light should be streaming in and gently falling on the front/side of the product you want to photograph. Use a bounce card or fill light on the other side so there aren’t harsh shadows on the front of the product.
If you use a flash as fill light, set it at low intensity and use a diffuser to avoid harsh light or shadows on the object.
Special Tools for Product Photographers
Most product photos are taken against a solid white background. This is to showcase the product and avoid distracting the user with other elements. Some types of product photos include other props or even people to show the product in a real-life setting.
For now, let’s just focus on a basic white background setup.
Background Sweep
For an easy, clean white background, you’ll need a background sweep. You can either buy a professional white background sweep or create your own out of a large piece of paper or fabric. Take care that the material you choose doesn’t show a lot of wrinkles or you’ll be spending a lot of frustrating time editing. Set it up on both the floor and the wall with a gentle curve so there isn’t a crease behind the product where the floor meets the wall.
Tripod
Product photos need to be tack sharp with little to no noise in the photo. For this reason, we recommend using a tripod. This will eliminate any camera shake and allow you to keep your ISO down regardless of how bright the light is. It’s also easier to get the shot perfectly straight on.
Plus, it tends to be faster when photographing multiple products, especially similar-sized ones. Your camera is already set up for the shot, all you have to do is switch out the products.
Lightbox
A lightbox can be a handy tool, particularly if you will be photographing products in different places. Simply set up the portable box wherever you want to photograph. The background sweep is already in place and many boxes come with several colors other than white. Stay tuned, we’ll be talking about how to photograph against different colored backgrounds in a minute.
LED lights are built into the box, making the lighting setup simple and easy. You won’t even need a window nearby!
Lightboxes come in different sizes. This mid-sized 20-inch one is a versatile setup useful for many types of product photography. You can also get smaller 12-inch boxes that are perfect for photographing jewelry, cosmetics, tableware, and other small items. Larger boxes are also available, although they are more expensive. If you don’t need the portability of a box, it is usually cheaper to set up a background sweep and light separately for large items. This depends on the cost of your setup, of course.
Set Up Your Shooting Space
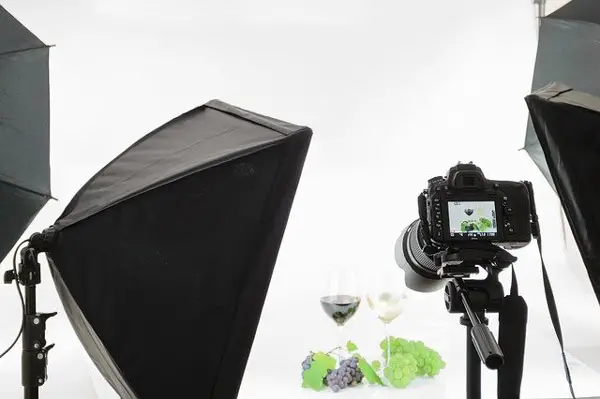
Now it’s time to set up your space. As mentioned, you can set up your background sweep in front of a large window for lots of natural light. If this isn’t possible, or if you prefer total control over the light, set up your sweep in a dark studio space.
The product must be fully lit so there are no dark shadows or distracting contrast. To do this, you need light sources on both sides of the product and possibly one above.
When working with natural light, the window can be one source. To fill in the other side, simply place a large reflector or (diffused) LED light on the opposite side.
In a studio, you’ll need LED lights on both sides. Play with the positioning (height of the light, distance to the product, etc.) until you get the desired effect. Once you find a setup you like, stick with it for all the photos for a consistent look.
If you have a lightbox, setup is decidedly easier. If possible, set up your box on a table to save your back. Once finished your backdrop and lights will already be in place. Many boxes allow you to adjust the color and brightness of the light so you can customize the lighting for your images.
Check out B&H Photo Video’s tips for in-home product photography in this quick video.
Using Colored Backgrounds for Product Photos
Far and away the most popular background for product photos is plain white or another neutral tone. They make the product stand out starkly and there is nothing to confuse or distract the eye (unless you add props). White backgrounds help to make strong product images.
However, white backgrounds are also boring. Life is more exciting than that!
In the studio, you can change up your background by changing out the background sweep for a different color. Lightboxes often come with a few options, which is handy.
However, you have to carefully choose the color of your background. You don’t want the colors to clash or otherwise detract from the pleasing quality of the photograph. Colored backgrounds also usually aren’t the best choice for patterned products. If the product itself already stands out, a colorful background might be too much.
But for black, white, and other neutral-colored products, colored backgrounds can really make the product pop.
It is especially important to get your white balance correct when shooting against a colored backdrop. The product’s colors need to be true to life. Take a few test shots first and adjust your white balance settings accordingly.

Camera Settings for Product Photos
Now it’s time to choose your camera settings for the shoot. It’s important to keep your product photos tack sharp and noise-free as much as possible. Customers will often zoom in on photos to more closely examine the product and they need to be able to see what they’re looking at.
To that end, you want to keep your ISO as low as possible — 100 on most cameras — and use a small aperture. Remember, you’re not shooting a dreamy portrait with beautiful bokeh in the background, you want the entire product in complete focus. If your product is very small, you may have to use focus stacking to get the entire piece in focus.
A small aperture is noted by a bigger f-stop number. You’ll have to play around with your specific product and camera gear, but something around f/16 is ideal.
Depending on your lighting setup, the shutter speed may have to be relatively slow to get the correct exposure. That’s another bonus to using the tripod. Also, set your camera up with a remote trigger or put it on a timer to eliminate camera shake from pressing the button.
To keep your white background white, you need to have the right white balance setting. It’s surprisingly easy for it to end up looking gray in the photo. Try setting your white balance to auto and snap a pic to see how the camera does on its own. Most of the time in a simple setup like this, the camera will get it right. If it doesn’t, choose one of your camera’s white balance settings or set it exactly at the temperature you want with your Kelvin setting. You’ll thank yourself later when photo editing goes a bit quicker.
Composition Tips for Product Photos
Now that the camera is primed, all that’s left is to set up your first product. However, it isn’t merely a matter of tossing it in front of your camera and clicking away. Put a little thought into how to present your product and you’ll create a compelling image that will make your products jump out at buyers as they browse a page of similar products.
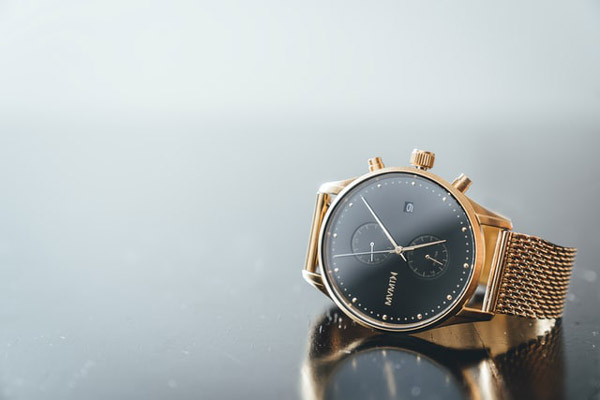
Negative Space
Including negative space is a powerful composition technique in product photography. Photographing only the product and leaving the space blank around it is an excellent way for the product to strongly command the attention of the viewer.
With no distracting elements and (usually) no props, the product takes center stage and shines. While not all product photos have to be shot this way (variety is always good) is it a common technique because it works so well.
Many companies will also request that at least some of the photos be shot with a significant amount of negative space. This allows them to add their logo or other text to the image to further showcase the product.
Incorporate Human Elements
In some cases, you may use models to showcase the products. This is a great way to draw customers to the products. Always choose models that fit your target demographic. People are drawn to pictures of people that look like them, are the same age, and have the same style, etc.
Obviously, models are often used for clothing and accessories, but they can also be used to demonstrate how to use the product. For example, you may photograph someone chopping vegetables with the kitchen knives you want to showcase.
Keep in mind that the entire person doesn’t need to appear in the photo either. It is common to use hand models for cosmetics, jewelry, skincare products, and a myriad of other products.
Simply adding a hand or other type of human element to a photo creates a more compelling image that will sell products.
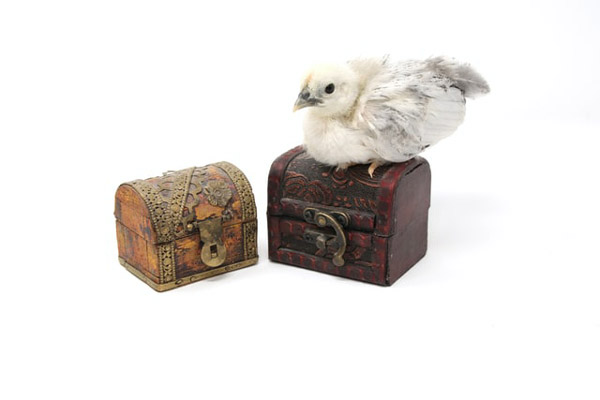
Incorporate Props
Props are an excellent way to make an unexciting product more exciting. For example, if you were photographing the pitcher in the photo below, shooting the pitcher by itself against a white background would be rather boring. However, with the lemons, honey, and mint sprigs, that pitcher looks a whole lot more appealing.

However, don’t go overboard with the props. Be careful not to use props that the customer could easily mistake for the product or think is included with the product when they purchase it. In our pitcher example, the viewer will clearly know that the lemons and honeycomb are not included, but seeing them adds interest to the photo.
The Right Rule of Thirds
If you know anything about composition rules in photography, you’re already aware of the rule of thirds. Instead of placing the subject in the center of the photo, you imagine a tic-tac-toe grid on your photo and place your subject along one of the lines. Bonus points if you put the most important part of your subject, the eye for example, right where the lines intersect.
This composition technique is so pervasive that many cameras even offer a setting that shows the grid while you’re taking a photo to help line up the image.
Your natural inclination might be to put the product smack dab in the center of your photo, which can also work. It may even be required for some photography projects or the client may request it.
However, you can use the rule of thirds to gently add impact to the image. For the strongest composition, try placing your subject on the right line. Our eyes naturally flow this direction so it will stand out the most. Plus, if you use text in the negative space on the left, it is natural for us to read from left to right and the eye finishes on the image.
Think About Your Angles
The angle from which you take the photo is very important. Your inclination might be to photograph the object straight on. After all, it’s not an artistic photo, you’re trying to showcase a product. Take that photo so you have it in your arsenal and then begin to play around with the angles.
Shooting at a slightly downward angle can help show off features on top of the product. For example, shooting down on a doll will allow you to show off the bow in her hair that might be hard to see from straight on. You can also shoot straight down. Some products, like shoes, will really benefit from this technique.
This won’t work for all products (or be acceptable to all clients) but another way to add interest is to tilt the camera. Many product photos don’t have a horizon line, but if they did it should be way off-kilter. When taking a photo that “breaks” a composition rule you have to own it or it will just look like you just forgot to make sure your horizon line was straight.
This can be especially effective if you’re having trouble fitting the product straight up and down in the frame. Put it on the diagonal and now you’ve got more room to work with.
Get Creative
It won’t always make sense to get crazy with your product photos in Photoshop. However, when you do, you can create unique photos that will most certainly catch some eyes. This is also a great way to upsell your images when shooting products for a client as you can charge more for creating images that are not your typical product photos.
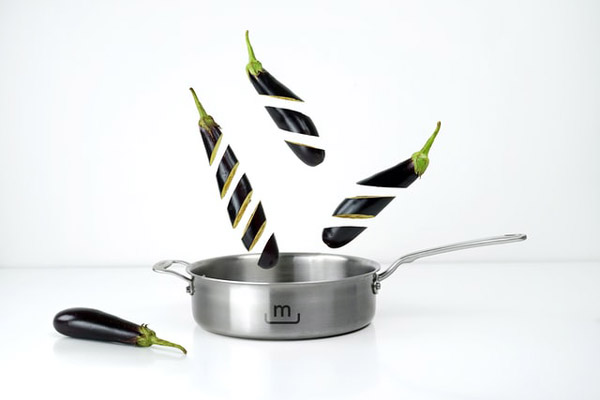
Another advantage is that you can add interesting props to the image without fear that they will be confused with the product. For example, in the image below, the sliced eggplants falling into the pan add an interesting element that makes a photo of a frying pan 1000 times more exciting. Plus, everyone knows that the frying pan won’t come with flying eggplants so there is no danger of disappointed customers.
Ready, Set, Shoot!
Once you’ve got everything set up, it’s time to start shooting. You went to a lot of work to get to this point, don’t be afraid to take lots of photos to ensure you get what you need.
As you work, carefully examine the photos to ensure they are in complete focus. Don’t be afraid to zoom in and pay close attention to the edges of the product to make sure they stand out from the background.
Keep an eye out for extraneous details. Sometimes a bounce card might end up in the shot, or a smudge appears on the background sweep. Keeping an eye out for and eliminating these little distractions during the shoot will save you a lot of time later. Sure, you might be able to photoshop that little corner of the table out — but do you want to do it on 50 photos?
Also, take careful note of how the product looks. How are the colors? Are they crisp and true-to-life? Check the shadows as well. You want some shadows to make the product look more lifelike, but strong shadows will detract from the image.
Be sure to turn the product and shoot it from different angles as you work. Photos from several angles give the customer a better idea of the overall look of the product, making it more likely that they will buy it.
Editing Product Images
Yes, we said you need to keep everything true-to-life but that doesn’t mean you should discount using editing software altogether. Nearly all images can benefit from at least light photo editing.
Even if you did everything perfectly, the background will probably look a tiny bit gray. You may want to soften (or strengthen) the shadows. Plus, colors will pop and really bring the product to life with a little retouching.
That being said, we should note that you should never heavily edit product images. It can be tempting to adjust the colors a bit here or slim the fit of that shirt a bit there. Your photo would look so much better with these minor tweaks. However, remember that customers are using these photos to determine whether they want to buy a product. If they get something that doesn’t look like the picture, they won’t be happy.
Powerful Product Photos
There you have it. Everything you ever wanted to know about how to take compelling product photos. Whether you’re interested in photographing your own products or adding the genre to your professional repertoire, we hope this guide has helped.
The composition we’ve talked about here can apply regardless of the type of camera you use, but our setup is mostly based around a DSLR or mirrorless camera. If you want to learn more about smartphone product photography, check out this article on our blog!


3 comments