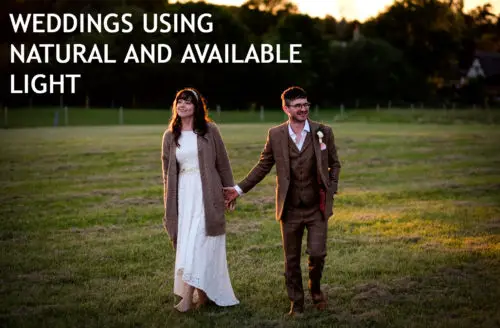
As photographers, light is our raw material. It doesn’t really matter what we are trying to say or capture in an image – if we don’t have light we don’t have a picture! Light has to be the prime consideration and the quality, direction, color temperature, source, quantity (as well as a host of other variable factors) of the light are the elements which can make or break an image no matter how good the composition or the moment being captured.
Many wedding photographers use just natural/available light and the whole idea of natural light photography and photographing the wedding “as it happens” is very popular.
Of course, it’s not the only approach and there are a number of photographers who use flash in beautiful and creative ways as well and this is very much part of their signature look. However, just using natural light, to me at least, has many advantages as it requires no extra equipment, there’s no setting up time, there’s an infinite variety of light, it challenges me to be creative, it’s authentic and real and most importantly it’s beautiful!
However, I think most photographers would be extremely challenged not to use flash at some point in the day, for example on the dance floor in the evening, but, particularly as the years have gone by and my experience and confidence has increased, I’ve used flash less and less. There are some weddings where I haven’t used it at all but for a majority I use natural light for the whole day apart from the dance floor!
So, how do you go about using just natural and available light to photograph a wedding day with all it’s challenges and variety?
Prioritize the light
Light, composition and moment – In documentary style wedding photography these three considerations are vital. All strong images will tick the box in at least two of those categories. It might be that a really strong moment will carry a poorly lit or composed image through but generally speaking looking for great light is the prime starting point.
I do, in fact, spend most of a wedding day “looking at the light”! Throughout the day I’m always presented with numerous fast changing scenarios to photograph in and it can be a bit overwhelming sometimes to know where on earth to start!
I might well be with the bride and bridesmaids for a start in a hotel room, then out with the groom getting ready at home, then into a crowd of guests at the venue, into the ceremony room itself, into a small vestry for signing the register etc etc! All of these fast changing settings require a slightly different approach and this can be a real challenge.
However, the first thing I always do when going into a new situation is ask myself “where’s the light?”. If I know this then everything else can be slotted into place. The answer to the question involves assessing the quantity, direction, temperature and quality of the light and allows me to adjust my camera settings as appropriate and also decide where and what and how I’m going to photograph.
This might sound a bit strange from a documentary style photographer as you might imagine that I am just being “reactive” and photographing things as they happen in front of me and this is, to a certain extent true. However, I don’t really spend my time “chasing” good photographs – many times they just happen and that’s great but by making informed choices and taking control of the shooting environment I am increasing my chances of getting a great photograph with good composition and a good moment (most importantly) in good light by looking for the light first.
For example, imagine walking into a large reception hall full of wedding guests chatting away. Obviously your job is to capture images of people laughing, interacting and enjoying themselves and, whilst to a certain extent, you will photograph the people who catch your eye and are behaving in a more animated fashion you will have a lot more success with the actual quality of the images by assessing the light first.

Imagine that the room is lit by light from windows to one side only, it’s a cloudy day and the light is therefore brighter by the windows and fall off towards the centre of the room. In this instance, ideally, I would try not to photograph people in the darkest corners obviously and also probably not right in the windows where the light will be relatively harsh. I would look for the region in the room, probably towards the middle, where the light starts to gently fall off and is much softer.
Positioning myself so that this light is to the side gives me the possibility of beautiful soft side lighting on the face. All I need now is a subject in the right spot which I wait to find, carefully compose in the frame and then wait for the right moment when they maybe laugh or interact in an interesting way.
This is a far more successful approach than starting off by just looking for subjects and moments irrespective of the lighting conditions and composition. Yes, you will get some images and probably some good moments but if they are consistently poorly lit they really amount to snapshots that anyone could take.
There’s little point in “chasing” pictures. You need to find the light, compose the image and wait for the moment. This does sound like it could take ages and sometimes it does but this can also be a fluid and almost instantaneous process. The point is that it is deliberate and proactive rather than being reactive.
Accept the light you have and work with it
To a certain extent any light is good light in that, if there’s enough light to see, there is essentially enough light to photograph with. It’s very much a case of looking at the available light and considering what you can actually do with it. I know that I frequently will go into a situation expecting a certain type of light so that I can produce a pre conceived image only to be presented with light that is, in fact completely the opposite.
As a documentary photographer, the key is to accept, and work with the light that you already have. The alternative is to modify the light in some way, maybe add flash or use reflectors or to move and direct your subject. Of course this is perfectly acceptable and the results can be fantastic but, from a purely documentary point of view the photographer is now creating a version of what he/she thinks the wedding and the light should look like rather than faithfully and authentically recording what the wedding day actually looks like. This is an important difference and essentially boils down to the photographer’s style and approach.
So, assuming that you are going to remain faithful to the purely documentary and natural light approach – what do you do when you are faced with such a variety of lighting conditions and how do you go about getting the best results in each one?
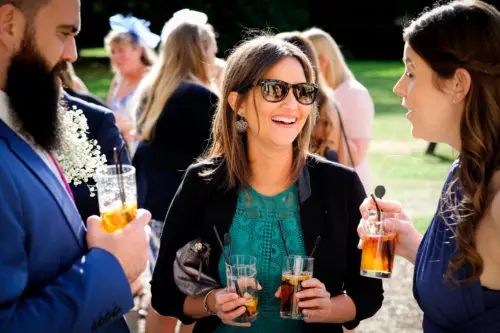
Harsh sunlight
Many photographers hate working in harsh sunlight. Unfortunately, many outdoor summer wedding receptions are held in the heat of the day when the sun is more or less overhead and casts strong shadows.
The first thing to say is that you just have to accept the conditions and work with it. You do need to be acutely aware of where the sun is at all times and accept that there will be some images that you won’t be able to make. A close up of the bride’s face for example with the sun at 90 degrees will be a disaster with one side of her face possibly overexposed and the other in harsh shadow.
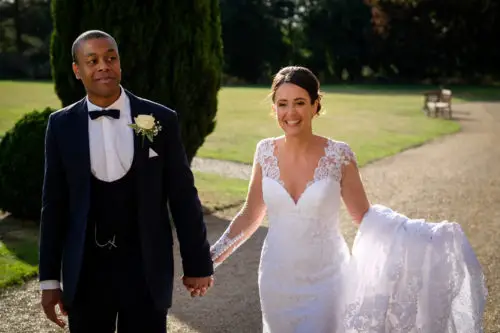
You can however, in most circumstances, shoot very well into the sun with the sun behind your subject. This means that they are essentially back lit by a flattering halo of light and that the light on the face is even and warm.
This is a great solution and one that I frequently use and it allows even close up portraits of people to be taken. Your only limitation is the direction of the light and you do, as when entering the room in the example above, need to be constantly in the right position and wait for images to present themselves.
I would always prefer to make half a dozen beautifully lit images rather than 20 – 30 poorly lit ones though so it is a case of quality over quantity when you are limited like this.
Technically speaking you might find that you either need to spot meter off the face or, a little more practically over expose by half a stop or so to ensure that the camera’s meter isn’t fooled by the bright background light. In terms of white balance you are essentially looking to get a good skin tone in the shade and you might find that a slightly warmer setting than a full sunshine setting will produce the best results.
Personally I find that a little over exposure and some fine tuning to the RAW file for exposure and color balance in post production is all that is needed to make this technique work.
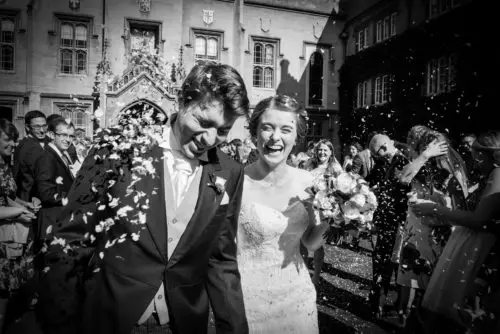
You could, of course be presented with a situation where you just have to shoot with strong sun to the side and it is out of your control. If the bride and groom come out of the ceremony into the sunshine for example or walk down a confetti tunnel with the sun at 90 degrees there is little you can do about changing your position!
The solution here is to assess what type of image you can successfully make in the given circumstance. Clearly, close up face shots would just highlight the harsh shadows so you might well go for shooting much wider and including a lot more context into the image. It will still tell the story of the moment and you are using the available light to the best advantage.
Another technique that can be very effective is actually exposing for the highlights and allowing the shadows to fill in. You do need to make a manual exposure setting for the amount of light on faces in the full sun to make this technique work as the camera meter will get very confused otherwise. You can then make pictures just of the highlights in the scene. Imagine a spotlight effect where the sun is landing and use the situation to your advantage. This is a technique to use sparingly as too many shots like this in a wedding set will look a bit strange but it can be an effective way of interpreting the scene and one that can look natural and creatively interesting.
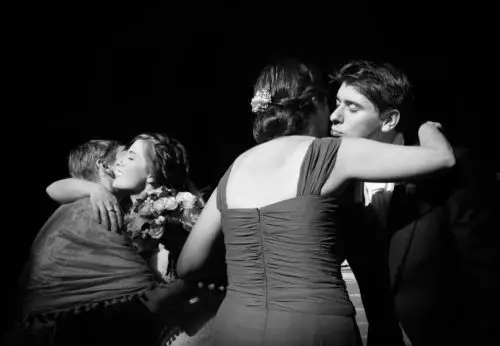
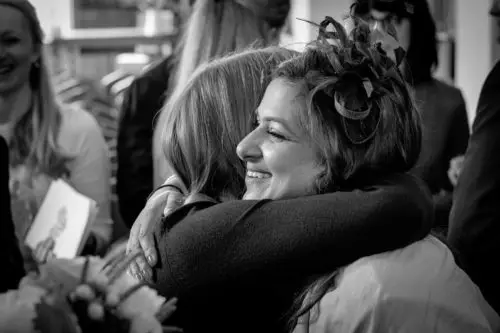
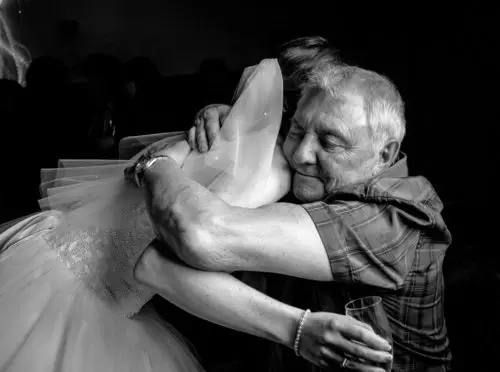
Very low levels of light
Often you will find low levels of light in the evening possibly during the speeches, maybe as the guests are milling around chatting waiting for the evening reception and during the dancing itself later on.
I think photographing the speeches in low light is one of the most challenging situations for a photographer as you want to capture the ambience of the room at the same time as capturing guests laughing, gesticulating and responding to the speeches. This can be incredibly difficult as people’s movements are often quite fast and the amount of light available would suggest that you might well need to use a slow shutter speed.
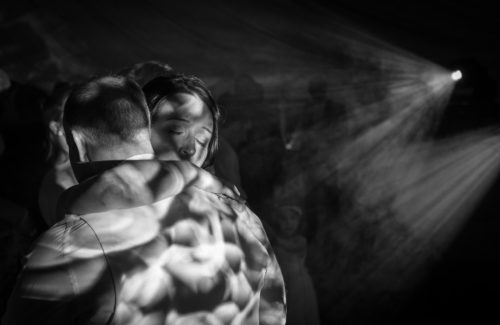
You have a similar problem on the dance floor later in the evening ie low light and movement but it is much less intrusive to use flash at this time and the timing of the exposures is less critical. The guests will be dancing for quite a while in comparison with maybe a laugh or an expression that might well be very fleeting during the speeches.
Obviously having to use flash during the speeches can be very distracting as well and it’s, for me at least, very much a last resort. I would far rather open my aperture and bump up my ISO rating even if it is at the expense of a little noise in order to be able to shoot freely and without drawing attention to myself in the room.
However, often there are a number of ways of using the situation to your advantage. Firstly, there will be some light coming from somewhere and it will be falling on certain parts of the room more than others and some areas might well be beautifully and much more brightly illuminated than others. It’s often just a case of again looking for the right light in the right area and waiting for the right moment to make the image.
Often you will need to expose for the illuminated highlights and this can give such pictures a much more authentic and representative feel than simply blasting away with a speed light. Candle light, for example, can look beautiful and candle illuminated faces make lovely images. You need to expose for the amount of light on the face though rather than for the amount of light in the whole scene and you will often find that there is plenty of light available if you take this approach.
In extreme cases shooting on a fast wide angle prime lens can help a great deal. A 35mm F1.4 will let in a huge amount of light, allowing you to almost photograph successfully in the dark provided there is some sort of light and it will also force you to get up close to your subjects which, in terms of making interesting pictures can only be a good thing.
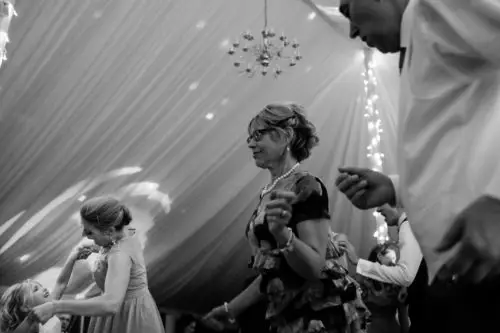
Flat, Boring Light
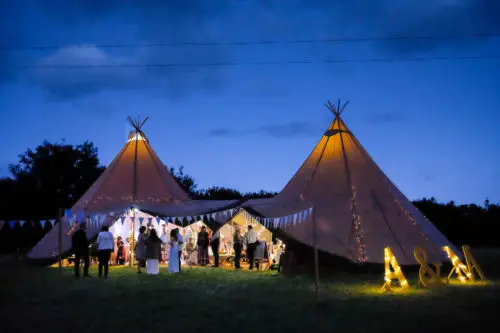
This can occur outdoors on a dull cloudy day and also inside in some venues where there are uplighters on the walls only or some sort of blanket lighting effect that makes it very difficult to photograph detail and texture.
The key with this sort of light is to “cut the top light” and to try to make it as directional as possible. Outside on a cloudy day try to avoid shooting out in the open where the flat overhead lighting will give a sort of “panda eye” effect to your subjects. If you can shoot under the cover of some tree branches, under an archway, walkway or awning then the light becomes more directional and much more interesting. If this isn’t possible then shooting near buildings will have a similar effect in that the light will be more dissipated the closer to a wall you get – anything to try to avoid the flat overhead light will improve things.
Indoors, flat top light can be a real problem and sometimes you just have to go with the light and, using what’s available avoid close ups and include more context. It is sometimes possible to use the wall technique above inside as well and often there will be directional light coming from a window or other light source as well which can add some direction and interest.
One awful scenario is where you have uplighters that illuminate the walls brightly and then throw a flat light downwards from above. Every image will have a horrible back light problem and you will also have to contend with the “panda eyes” from the top light as well. If all else fails then using a small amount of flash to fill the shadows might just be the only thing you can do although I would explore every other avenue first.
Shooting with artificial indoor lighting
The main issue with indoor lighting is how varied it can be in temperature, how it can come from varying awkward angles and also, as discussed above how there can be very little of it!
Temperature- wise you are always better, even when shooting in RAW in my opinion, to try to get the color balance as close as you can in camera. Currently, my camera generally does a good job using either auto color balance or one of the presets but, not so long ago, using a slightly older camera, I still found myself doing custom white balances quite frequently. Both the presets and making a custom white balance are easy to do and you should work at becoming completely familiar with them.
The other issue with indoor lighting is that there are often multiple sources of light and you need to work out, at any given location, where the main light source is and adjust accordingly. This is easy outside as you just have the sun but indoors you might have all manner of spotlights, table lights and ceiling lights to contend with. Work out where the strongest light is coming from and work with this – you might have to do this much more frequently than outside and it might vary for every shot.
Coping with mixed lighting
Often you will be faced with warm indoor tungsten light and combined with light coming in from a North facing window (in the UK) and the color balance of the two will be poles apart. Leaving the auto white balance to do it’s thing will often result in the window light being unnaturally cold and the indoor light being sickly yellow. This is a really difficult mixed lighting situation and one where only a bit of compromise and post processing magic will provide a solution. You can also get the same problem at night where you have indoor and outdoor elements to the shot and the outdoors will look blue and cold. Inside mixed fluorescent and tungsten lighting can be difficult giving green and yellow hues to the pictures as well.
To a certain extent, you have to choose which light is the most important and make your color balance decision based on that. You must also be shooting in RAW so that you can isolate and adjust the parts of the picture where the color balance is out in post processing as well. For me, I would always choose to get the skin tone correct and let the other parts of the picture go out. It’s always very noticeable if skin isn’t correct but the eye can be very forgiving of other things if the color isn’t quite right so I always give priority to skin tone.
Some techniques:
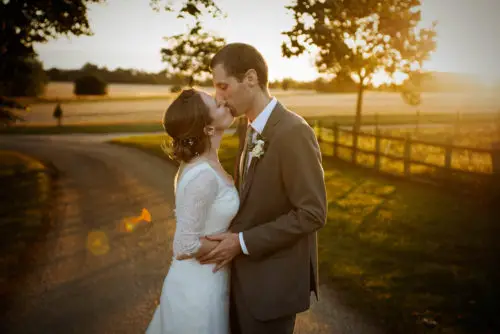
Using the golden hour
Just because you’re shooting in a documentary style I don’t think that precludes you from suggesting to your clients that they might like to take a walk or at least be outside during golden hour. It’s such a magical opportunity to make lovely pictures and one that can often be missed as, in the UK at least, we can often be in the middle of dinner as the sun is setting depending upon the time of year.
My clients frequently say that they would like me to photograph the day as unobtrusively as possible but, if there are any obvious moments when the light is really great to let them know. Often a few private moments for the couple between courses in the golden setting sun can be really quick and simple to photograph but produce great results.
Metering
No matter how good modern metering is, and it really is brilliant for 90% of the time at least, it still can’t read the mind of the photographer. Also, a meter will always give a bit of an average or safe reading based on what it thinks the image should look like rather than what the photographer thinks it should look like. It can be very easy to just rely on the meter and to accept it’s judgement but to do so risks our pictures becoming bland and predictable, safe and middle of the road.
In many ways the worst case scenario is to use matrix, center weighted metering and to just leave the camera to do it’s thing. The meter will basically take an average of what it sees in the middle of the viewfinder and expose for that. Often, the most boring pictures are where the subject is just plonked in the middle and to have an average exposure as well is just plain lazy!
The first decision is to ascertain exactly which part of the image is key in terms of exposure. For my type of photography it’s usually the face and the face can be lit by any manner of light coming from any direction. The face must be correctly exposed and if it’s placed within the context of light coming from other directions or reflective or dark surfaces it will not be. The camera will make a judgement based on the overall amount of light in the frame rather than the amount of light falling on the face.
There are also many fine adjustments to the “correct” exposure on the face as well according to the effect the photographer is trying to get so, as you can see, relying just on the camera to meter is using a very blunt edged tool!
The key is to either spot meter, or, more efficiently to either set your exposure manually or at least let the camera make a ball part exposure and then to either use exposure compensation or switch to manual mode. Whichever way will allow you, as the photographer to have creative control over the image, rather than the camera.
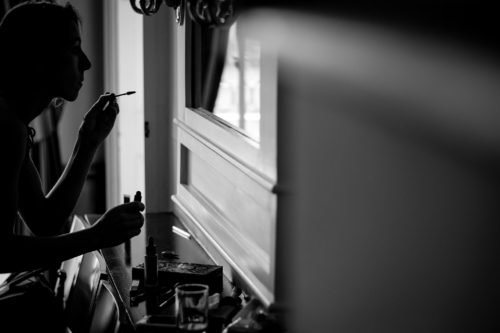
Shooting into the light – Silhouettes
This is a well used effect and can be utilized at a number of points during a lot of weddings. Silhouettes of bridesmaids applying make up in front of windows or maybe the bride and her father in the church doorway for example. It’s a technique that should be used relatively sparingly and tastefully and you do need to make an artistic judgement as to how much detail you are going to show in the front of the image by judging the exposure very carefully.
Take the example of the back lit bride in the church doorway. You probably don’t want to lose all of the detail of her dress and face in a blacked out mass in the middle of the picture and so you have to expose accordingly. Primarily, a meter reading taken from the floor at her feet will give a good starting point for the exposure and you can work from there. It can be a good idea to bracket a few shots either side of your starting exposure and also to use your histogram and screen to make a more accurate judgement of the effect.
Often speed is of the essence and you might not have the luxury of time to make multiple exposures. Shooting in RAW will give you a little more leeway in post production for fine adjustments but mainly experience will tell you by how much you need to compensate for the backlight whilst also keeping some detail in the shadows.
More recently the electronic viewfinder facilities of mirror-less cameras have made this type of image much easier and quicker to achieve although, as is common with more traditional DSLRs they may well struggle to find focus in these types of conditions. The key is to know your camera and know how it behaves, what it’s limitations are and how it’s sensor reads the light in different conditions.
Equipment for natural light shooting
Fast prime lenses are the natural companions for the available light photographer as they allow in as much light as possible particularly if they are relatively wide angle. There’s very few scenarios in terms of light levels that a 35mm F1.4 can’t cope with particularly if the camera is set to a reasonably high ISO for example.
A camera that is happy shooting up to ISO 6400 or even 12800 makes life much easier and a real purist would argue that a full frame DSLR will make shooting at higher ISO levels more acceptable and will give more flexibility. You will also need a camera that is capable of shooting RAW as well as some post processing software such as Lightroom to get the very best out of the files.
Mirrorless cameras are excellent for shooting with available light as you can of course see what you are getting in terms of the image using the electronic viewfinders. They are also small, light and don’t have a mirror to move around as you do in a DSLR so hand holding them for shooting at slower shutterspeeds is much easier. These advantages are offset by the fact that a majority of mirrorless cameras aren’t full frame but this is gradually changing.
For me, natural/available light photography is the way that I choose to shoot whenever I can. I find it the most inspiring, the quickest and most interesting way to go. However, it’s not always the easiest path to follow and it can be restricting in some ways. I think this can be a good thing, often the most frightening thing is a blank canvas where literally anything is possible. Putting some constraints and restrictions in place can be creatively liberating and inspiring.
I hope that this post has inspired you to grapple with natural light and learn to use it to your advantage. You need to almost feel it and sense it and when you start to be able to “see the light” your photography will improve immeasurably.


3 comments