Waterfall photography is a captivating and challenging genre of landscape photography, offering endless opportunities to capture the beauty and power of nature.
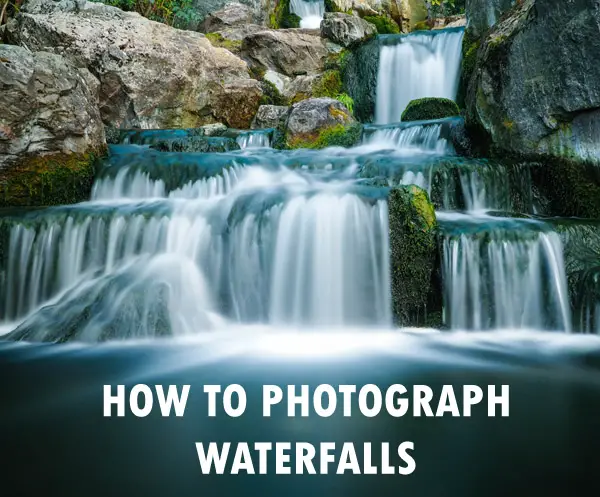
In this article, we will explore various techniques and tips that will help you create stunning waterfall shots.
We’ll begin by discussing essential equipment for waterfall photography such as tripods, cameras with manual controls, filters, timers, and intervalometers. Then we’ll delve into mastering composition in your photographs through the rule of thirds, leading lines, and balancing static elements with dynamic movement.
Understanding shutter speeds and aperture settings are crucial for capturing water’s movement effectively; therefore we’ll cover their effects on moving water along with freezing action by increasing shutter speed. Exploring the correlation between aperture size and depth-of-field is essential to achieving a balanced exposure in waterfall photography.
In order to achieve optimal exposure in your waterfall photographs while maintaining creative control over the final image output; manipulating exposure triangle elements becomes necessary. We will discuss how to balance shutter speed and aperture for desired effect as well as adjusting ISO sensitivity levels accordingly.
Last but not least; using neutral density filters for long exposures can greatly enhance your waterfall images by creating silky-smooth effects – our tutorial provides guidance on choosing appropriate strength ND filters along with effective techniques for their use.
Essential Equipment for Capturing Stunning Waterfall Photos
To snap breathtaking waterfall shots, you need the right gear. This includes a sturdy tripod to keep your camera steady during long exposures, a digital SLR camera with manual settings to control aperture and shutter speed, filters such as neutral density filters or polarizing filters to manage light and reflections, and a timer or intervalometer for precise timing of shots.
Choosing the Perfect Tripod for Stability
A sturdy tripod is crucial when shooting waterfalls because it helps eliminate any unwanted motion blur caused by shaky hands. A good quality tripod will also allow you to shoot at slower shutter speeds, which are essential in capturing the smooth flow of water. Look for tripods that have adjustable legs and can support the weight of your camera setup comfortably.
Digital SLR Cameras with Manual Controls
When photographing waterfalls, having full control over your camera’s settings is key. Digital SLR cameras offer this level of control through their manual modes. By adjusting settings like aperture size, shutter speed, ISO sensitivity levels, and focus points manually, photographers gain complete creative freedom, allowing them to create unique images featuring different aspects of the environment present within each scene captured throughout various sessions spent practicing these techniques together out in nature.
The Best DSLRs for Waterfall Photography:
Filters that Enhance Waterfall Photography
Using filters can greatly improve your waterfall photography. Two of the most popular types are neutral density (ND) and polarizing filters. ND filters decrease the light that gets to your camera, making it possible for you to take pictures with slower shutter speeds without over-illuminating the picture. Polarizing filters help cut down on glare and reflections from wet surfaces, enhancing color saturation in your photos.
Popular Filter Brands:
Using Timers and Intervalometers for Precise Timing of Shots
A timer or an intervalometer is a valuable tool when shooting waterfalls as it allows you to set specific time intervals between each shot taken during long exposure sessions spent practicing this skillset and also moving forward into future endeavors focused primarily on photographing stunning landscapes featuring flowing bodies of water prominently displayed front and center stage. These devices enable photographers to capture multiple images at once while also providing them with the ability to control the exact moment their camera’s shutter opens/releases, ensuring the best possible results are achieved.
In summary, investing in essential equipment like a sturdy tripod, digital SLR camera with manual controls, appropriate filters, along with timers/intervalometers will significantly improve the overall quality of photographs captured by beginner, amateur, and professional photographers alike interested in learning more about mastering waterfall photography.
Mastering Composition in Waterfall Photography
Before snapping any waterfall photo, get your composition right. Framing the scene correctly can make all the difference between an average photo and an eye-catching masterpiece. In this section, we’ll discuss various techniques for positioning elements within your frame while considering factors such as perspective distortion due to lens choice.
Rule of Thirds in Waterfall Photography
The rule of thirds is a fundamental principle in photography that helps create balanced and visually appealing images. To apply this rule, imagine dividing your frame into nine equal parts using two equally spaced horizontal lines and two vertical lines. The points where these lines intersect are known as “power points,” which are ideal locations for placing key elements within your composition.
In waterfall photography, align the main subject (the waterfall) along one of these vertical lines or at one intersection point. This will draw more attention to the waterfall itself while also creating a sense of balance with other elements present in the scene.
Leading Lines Guiding Viewer’s Eyes Through The Scene
Leading lines are another essential compositional tool that guides viewers’ eyes through a photograph towards its focal point(s). These could be natural features like rivers or man-made structures such as bridges – anything that creates a path for our eyes to follow from one part of an image towards another area where important subjects reside prominently displayed front center stage.
To incorporate leading lines into your waterfall photos effectively; try finding nearby pathways formed either via flowing bodies of water themselves or perhaps even surrounding landscape elements (e.g., tree branches) that help direct attention towards primary subjects being showcased within each frame.
Balancing Static Elements with Dynamic Movement
Waterfall photography is all about capturing the contrast between static and dynamic elements. Rocks, trees, and other stationary objects provide a sense of stability to your composition while the moving water creates a feeling of energy and motion.
- Static elements: To create balance in your photos, include some solid structures like rocks or trees as anchor points for viewers’ eyes – these can be placed using rule-of-thirds guidelines mentioned earlier.
- Dynamic movement: The waterfall itself represents dynamic movement within an image; therefore it’s essential to not only capture its beauty but also convey a sense of fluidity present at any given time by adjusting shutter speeds accordingly. Experiment with different settings until finding the perfect combination that works best under specific lighting conditions
Understanding how to compose waterfall photographs effectively is crucial for creating captivating images. By applying techniques like the rule of thirds, leading lines, and balancing static vs. dynamic elements within your compositions; you’ll be well on your way towards capturing stunning shots consistently throughout all sessions spent practicing this art form out in nature.
Don’t forget to always keep experimenting new ideas and approaches.
Understanding Shutter Speeds & Aperture Settings
When capturing waterfalls, it is critical to comprehend the impacts of varying shutter speeds and aperture settings on streaming water. By adjusting these settings based on available lighting conditions, photographers can manipulate their images to achieve the desired outcome.
Effects of Slow Shutter Speeds on Moving Water
Extending the exposure time to allow more light into the camera sensor produces a soft, graceful look in waterfall photography. This creates a silky-smooth effect, emphasizing the flow and gracefulness of the waterfall. To achieve this effect without overexposing your image, consider utilizing neutral density filters or shooting during early morning/late afternoon hours when natural sunlight isn’t as intense.
- TIP: Use a sturdy tripod to avoid camera shake and dark shadows in your images.
Freezing Action by Increasing Shutter Speed
If you want to capture every droplet and splash within your waterfall shots, increasing your shutter speed is essential. A faster shutter speed effectively “freezes” any movement present within the scenes being photographed. Try experimenting with speeds around 1/250th second or faster, adjusting other exposure triangle elements (aperture, ISO) accordingly to maintain overall image quality.
- TIP: When shooting waterfalls, be mindful of your surroundings and the impact different lighting conditions can have on achieving desired results.
Relationship Between Aperture Size & Depth-of-Field
Understanding how aperture size affects depth-of-field is crucial for creating stunning waterfall photographs. A larger aperture (represented by a smaller f-number like f/2.8) will result in a shallower depth-of-field, while a smaller aperture (such as f/11 or higher) will ensure all elements present are rendered clearly throughout the entire scene photographed.
- TIP: When adjusting aperture settings, remember to compensate for changes in light by also modifying shutter speed and/or ISO sensitivity levels accordingly.
With these waterfall photography tips, you’ll be able to capture the beauty of falling water in all its glory. So grab your camera, head out into nature, and start shooting.
Mastering Waterfall Photography: Manipulating the Exposure Triangle
If you want to capture stunning waterfall shots, you need to learn how to manipulate the exposure triangle elements: shutter speed, aperture, and ISO. By adjusting these settings, you can control the amount of light entering your camera and change the properties of your image. Here are some tips to help you get started.
Shutter Speed and Aperture: Finding the Right Balance
Shutter speed and aperture work together to determine how much light enters your camera and how your image looks. For silky-smooth water movement, use slow shutter speeds (e.g., 1/4 second or longer). For frozen droplets, opt for faster shutter speeds (e.g., 1/500 second or shorter). Experiment with different combinations until you achieve your desired effect.
ISO Sensitivity: Adjusting for Optimal Exposure
Your camera’s ISO setting affects its sensitivity to light. In dimmer lighting, set your ISO to a medium level (400-800) and in dark conditions choose high sensitivity (1600+). Taking test shots can help you determine the best combination of settings for each waterfall scene.
Experimenting with the Exposure Triangle
The key to successful waterfall photography is experimentation. Try different combinations of aperture, shutter speed, and ISO to find what works best for your specific situation. Use a small aperture (high f-number) for depth, fast shutter speeds for dramatic splashes, and different shutter speeds to find the perfect balance between motion blur and sharpness.
Using Neutral Density Filters for Long Exposures
Neutral density (ND) filters are essential tools in waterfall photography. They allow you to capture long exposures without overexposing your images due to bright ambient lighting conditions. By reducing the amount of light entering your camera, ND filters enable you to use slower shutter speeds and achieve silky-smooth waterfall effects. In this section, we’ll discuss how to choose the appropriate strength ND filter for your needs and provide tips on using them effectively.
Choosing the Right Strength ND Filter
Selecting the right strength of an ND filter depends on various factors such as available light, desired shutter speed, and aperture settings. They come in different strengths or “stops,” which indicate how much light is reduced by the filter:
- 1-stop: Reduces incoming light by half.
- 2-stops: Reduces incoming light by a quarter.
- 3-stops: Reduces incoming light by an eighth.
- <.– add more stops if needed>
To determine which strength is best suited for your specific situation, consider these guidelines:
- If you’re shooting during golden hour or under cloudy skies with less intense sunlight, a lower stop value (e.g., 1- or 2-stop) may suffice.
- In brighter conditions like midday sun or when photographing highly reflective surfaces such as waterfalls surrounded by rocks that bounce off sunlight onto the cascading water itself; higher stop values (e.g., up-to-10 stops) will be necessary in order to maintain proper exposure levels.
- Experiment with different strengths to find the perfect balance between achieving your desired effect and maintaining proper exposure. You may need to stack multiple ND filters or use a variable ND filter that allows you to adjust its strength as needed.
Techniques for Using ND Filters Effectively
To ensure the best possible results when using an ND filter, follow these tips:
- Use a tripod: A sturdy tripod is essential for long exposures. It will help keep your camera steady and eliminate any unwanted motion blur caused by camera shake during extended shutter speeds.
- Fine-tune focus manually: Autofocus can struggle in low-light situations created by using an ND filter; therefore, it’s crucial to switch over manual focusing mode ensuring sharpness maintained throughout entire scene captured within frame itself.
- Meter without the filter first: To get accurate exposure readings before attaching your chosen neutral density filter onto lens being utilized at time; take initial metering measurements directly from subject matter present there on location (e.g., waterfall) without any additional equipment added into the mix yet. This way adjustments made later once everything is set up properly won’t result in drastic changes occurring unexpectedly mid-shoot.
Achieving Silky-Smooth Waterfall Effects
The key to capturing stunning waterfall images with smooth water flow lies in mastering long-exposure techniques while utilizing appropriate strength neutral density filters effectively throughout process involved overall. Here are some steps to achieve those breathtaking shots consistently:
- Manual mode, giving you full control over shutter speed, aperture and ISO.
- Select a slow shutter speed (e.g., between 1-30 seconds) depending on desired level motion blur effect wanted.
- Adjust aperture size accordingly based upon depth-of-field preferences chosen personally.
- If necessary increase ISO sensitivity levels slightly so as to maintain proper exposure balance achieved consistently throughout entire shoot; however keep mind higher values may introduce unwanted digital noise artifacts into images captured therefore use sparingly only when absolutely needed.
By following these guidelines and experimenting with different ND filter strengths combined with various exposure triangle element adjustments made along the way, photographers of all skill levels can learn how create breathtaking waterfall photographs featuring silky-smooth water effects time after again.
FAQs
How to capture stunning waterfall photos?
Use a sturdy tripod for stability, choose the right shutter speed to control water movement, and apply the rule of thirds in composition.
Experiment with various exposure settings and consider using neutral density filters for long exposures. Learn more about waterfalls.
What focal length is best for waterfall photography?
Wide-angle lenses (14-35mm) are great for capturing expansive scenes and foreground elements, while telephoto lenses (70-200mm) allow you to focus on specific details or isolate sections of the falls.
What is the best aperture for waterfall photography?
A smaller aperture (higher f-number) like f/11-f/16 will provide greater depth-of-field ensuring both foreground and background elements remain sharp.
Use larger apertures such as f/2.8-f/5.6 to emphasize a particular area or create a shallow depth-of-field effect.
What is the best filter for waterfall photography?
Neutral Density (ND) filters are essential tools that help photographers achieve longer exposures without overexposing images due to bright ambient lighting conditions around them at any given time during day or night shoots alike.
Conclusion
Get ready to capture stunning waterfall photos with these essential tips for equipment, composition, and exposure settings.
- Invest in a sturdy tripod to keep your camera steady and avoid blurry shots.
- Use a polarizing filter to reduce glare and enhance colors in your waterfall photos.
- Master composition techniques like the rule of thirds and leading lines to create visually appealing images.
- Experiment with different shutter speeds and aperture settings to achieve the desired effect on your waterfall photos.
- Manipulate the elements of the exposure triangle – shutter speed, aperture, and ISO – to control the amount of light in your photos.
- Use neutral density filters for long exposures to create silky-smooth waterfall effects.
Click the following link to learn how to focus stack a waterfall.


