Drones have brought in a fresh new perspective to a lot of photography and videography genres. Thanks to their ability to capture these unique aerial perspectives drones are being increasingly used across all genres of photography. Landscape photography is no exception.
Having dabbled with drones for the past 1 and 1/2 years, almost exclusively for landscape photography I’m in a position to summarize my experience for your benefit so that if you are also looking to make a start in drone photography you can start on the right footing.
If you always thought that drone photography is easy and all you need is a drone and a camera you are probably only 50% right. Drone photography is dependent on the right kind of drone. One with a camera that is capable of capturing high-quality still images. Now, as a beginner drone photographer, there might be a million questions in your head. What kind of drones should I buy for landscape photography? Or maybe what are the best settings for landscape drone photography? Or even what time to fly and what precautions to take?
In this discussion, I shall answer these and several other questions on drone photography. These will be specifically related to landscape photography.
In general, when using a drone for landscape photography, use a built in camera, apps to plan location, weather and time of day, shoot in RAW with a low aperture, exposure bracketing, auto ISO, use filters, incorporate the rule of thirds, and experiment with angles. Read on to learn more.
DSLR Vs Built-in Camera
Let’s get this out of the way. Only larger drones with heavier payload capacity can carry a DSLR along with a lens attached to the body of the camera up into the air. Remember, the heavier the payload, the higher the payload capacity required for the drone.
Lighter drones like the DJI Mavic Pro or the DJI Mavic Air as great as they are, are incapable of lifting DSLRs and accompanying lenses off the ground. On the other hand, professional Phantom Series drones have a larger payload capacity and they come built-in with 1-inch sensor-powered camera systems capable of shooting 4K+ resolution videos.
I recommend that you opt for built-in camera systems rather than a drone that you can fit a DSLR and a lens on as an addition. Built-in camera systems are lighter and yet they tend to do the job well.
DSLRs, needlessly add a lot of weight to the overall payload and therefore you need drones with higher payload capacity. Those drones are expensive and attract stricter rules to fly, not to mention taking up more space and being more complicated to put together.
Location for Landscape Drone Images
You cannot simply hope that you will turn up at the location and fly your drone and get stunning images. This is not how things work. Instead, what you can do is you can do extensive research of the location you are planning to shoot in.
Try Google Maps which is an excellent source for identifying potential locations. I would also suggest you use Google Earth which is yet another excellent source for research.
Google Earth will give you precise details about the point where the first rays of the sun will appear from and the point where the sun will set. Weather and forecast applications such as Fotocast will give you information about the precise time of sunrise and sunset as well as the weather conditions for the day.
All these data are important for planning your drone flight and deciding on the precise flight path.
With this data, you can always fine-tune the shoot according to your specific requirements.
Time Of Day
The million-dollar question often asked by beginner drone photographers is – what is the best time to shoot pictures using a drone.
Drones can be flown at any time of the day for shooting images. But the best images are shot when the sun is directly overhead. During mid-day when the sun is directly behind the drone, the light falls perpendicular to the camera and is reflected without getting diffused. The result is saturated colors and beautiful contrast along with a greater quantity of detail.
Normally, when you are shooting landscapes with a hand-held camera, the best light is the one during the golden hour and or the blue hour. However, when you are shooting from an elevated angle, lateral light is not always the one that gives you the best results.
That said, early morning and late afternoon light can also be useful if you are shooting silhouettes or doing any kind of backlit stills or video work.
Alternatively, what you can do is shoot at different times of the day to see which one gets you the best results depending on the location you are in. If you’re traveling and can spend an entire day at a location, try to expand the shot selection by shooting at different times of the day.
This will give you footage from the golden hour, the blue hour, and the time in between to expand your options for shot selection.
Shooting Mode
Many beginner drone photographers ask how do I become a good drone photographer? It is always a combination of preparation, research, planning, and execution. Under this heading, I shall discuss a few key aspects to get the best drone landscape photos.
Shoot In RAW
No matter what you do, always ensure that the camera is set to shoot in RAW. The RAW format retains all the details that the sensor captures without any post-processing algorithm applied to the images.
Once post-processing is applied there is no way to revert to the original format of the image.
Choice Of Aperture And Depth Of Field
Select the lowest aperture that your camera can shoot in without inducing lens diffraction into the equation. Lens diffraction is one of the prime reasons for image softness and is a common thing with cheaper lenses.
If the drone you are going to use comes with a built-in camera and a fixed lens your choice of aperture could very well be limited. Choose the smallest aperture or the largest F-stop that is guaranteed to give you the largest depth of field.
For larger drones that have a bigger payload capacity and are capable of lifting a DSLR mounted with a lens off the ground, you are free to choose whatever F-stop you want to.
The choice of the aperture will also depend on the camera angle. If the camera angle is going to be straight down pointing at the ground you can always choose a smaller F-stop or a larger aperture to maximize the amount of light that enters the camera.
With the camera lens pointing straight down, even a wide-open aperture will give you a decent depth of field because all of the frames will be located on the same plane of focus.
Compositional Rules – Incorporate The Rule Of Thirds
It is important to fulfill some of the rules of composition, because whether it is drone-based photography or handheld photography the basic rules are always the same.
One of the rules of photography that I would recommend is the rule of thirds. You can read more about this rule to understand how it can be incorporated into your photography.
Settings- Exposure, Noise Etc.
I would recommend shooting in aperture priority mode, because once the drone is in the air you may not have the option to manually alter the exposure settings. Choosing aperture priority mode allows you to fix one aspect of the exposure triangle, allowing the camera to choose the other two parameters automatically.
Regarding ISO, I would recommend that you choose auto ISO because it is the best option in terms of getting the best balance between proper exposure versus capturing a lot of noise in the process.
Ideally, the lowest ISO setting should give you the best noise threshold. With the maximum shutter speed set reasonably high ISO should hover around a small number.
Use Auto Exposure Bracketing
Auto exposure bracketing is a very useful feature available on all interchangeable lens cameras. It is a sort of an overriding property that overrides the exposure settings determined by the camera and sets a different set of exposure values according to the specifications dialed in by the photographer.
Please note that I mentioned different sets of exposure values. Auto exposure bracketing always uses more than one exposure.
The way it works is the photographer manually sets in the incremental values in terms of the difference in exposure value to the one that is selected by the camera automatically for each frame to be captured.
Let’s say that the camera meters a scene at aperture F/8 and a shutter speed of 1/250 sec. The photographer then sets the camera to auto exposure bracketing mode by selecting the number of shots, say, three (one below and two above the metered exposure value) and setting the incremental value in exposure to 1/3 of a stop.
The camera will take the first shot at the exposure value that is automatically metered by the camera. It will take the next shot at 1/3 of a stop below the metered value. It will take the next two shots at incremental values of 1/3 of a stop over the metered value.
Stills Quality Including Sharpness
The quality of the still images, especially the sharpness, will depend on several factors. These factors include the sharpness of the lens in question, how steady the drone is in mid-air, the quality of the gimbal that stabilizes the lens and the camera while the drone is in the air, and your handling capabilities of the drone.
The sharp quality of the lens is just one of the parameters for getting sharp images. Its ability to handle chromatic aberrations and distortions are other major factors for image sharpness. The best landscape lenses come with a lot of lens coatings and specialized elements that handle color fringing, distortion, and other aberrations.
It is very unlikely that a built-in camera on a drone will have the same kind of features as a proper photography lens.
Weather
Always choose good weather to fly your drones. By good weather, I mean good visibility, mild breeze, and no chance of rain, snow, hail, or storm.
Good weather increases visibility and reduces any chances of crashing your drone and injuring people and or destroying property.
Most consumer-grade drones including the likes of the DJI Mavic series and the DJI Air series are incapable of sustained flight during bad weather, much like anything other than heavy helicopters.
You should not even attempt to fly the smaller drones when there is a strong wind or the weather is turning bad fast.
Wind
As detailed above it is pertinent that you don’t fly the cheaper prosumer models in bad weather, especially in a strong breeze. The best flying conditions are when wind speed is within a few miles per hour. When you hit a 15-25 mph forecast, be very careful about what you launch in the air.
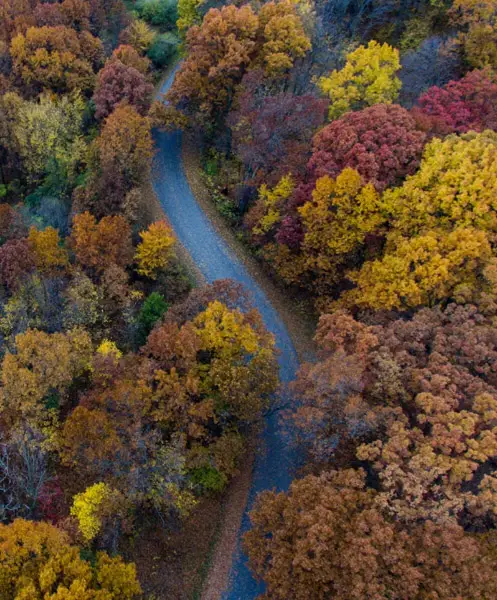
Angles
The best camera angle is not always the one looking straight down. You can experiment with the camera angle by using the joystick on your controller to make the camera look forward instead of straight down.
An angled point of view looking at a landscape from an elevation is a better point of view than a camera that is looking straight down in certain lighting conditions. For example when you are shooting during the golden hour, or during the blue hour keeping your drone camera at an angle looking into the horizon is a better option than shooting straight down.
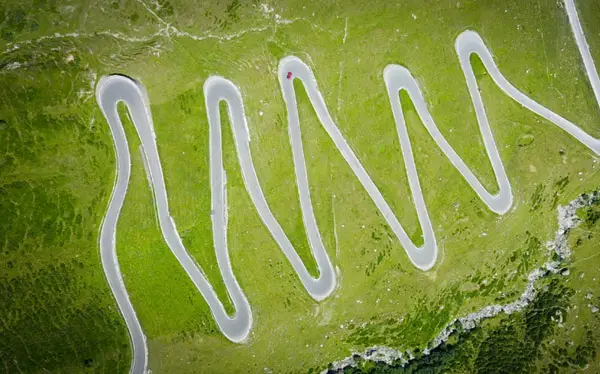
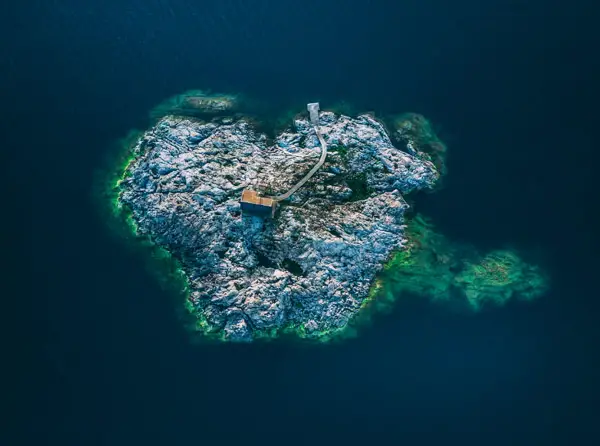
Then again, when the sun is at mid-day or at least when the golden hour has passed by you can switch to a camera angle looking straight down. Looking straight down allows you to capture some really interesting perspectives that other camera angles won’t let you get.
For example, you can capture the stunning architecture of the ground below especially if the surface is decked with trees and natural formations. It can be almost abstract at times.
Composition
I have briefly talked about the rule of thirds in one of the above paragraphs. There are several other compositional rules that you can use to capture beautiful drone photos.
Incorporating patterns in your composition especially when you’re flying a drone pointing at the vegetation below is a very good way of capturing something abstract and interesting at the same time.
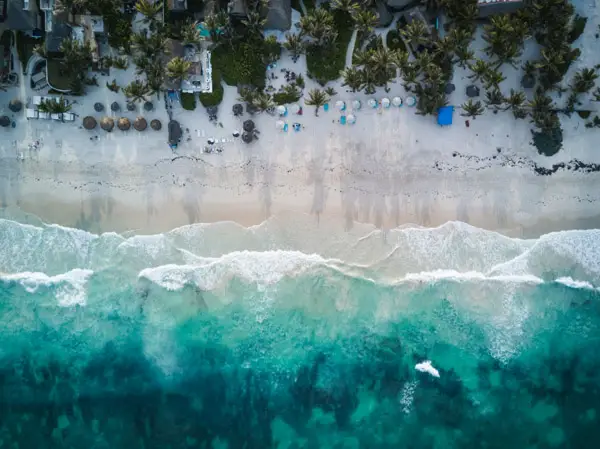
Another way of composing interesting drone landscape photos is to look for contrast in your composition. A patch of a brown color field surrounded by green vegetation makes for an interesting contrast and so does blue water against the white sand.
There are millions of different ways in which you can find contrast to fill your composition. All you have to do is keep experimenting and keep your eyes open when flying the drone.
Filters
Filters denote photography filters. These are used primarily to control the amount of light that enters a camera. Now, you would wonder why would somebody take the pain to stop any amount of light from getting inside a camera? Isn’t photography all about capturing light? Well, photography is about capturing light, but it is also about capturing the right quantity of light to ensure that you capture the right exposure.
To capture the right quantity of light you may have to block some quantity of light using tools like filters. Now, when I say filters I specifically mean ND filters and Variable ND filters.
ND filters have a fixed light stopping power across the filter surface. That means regardless of the orientation of the filter it will stop the same amount of light.
Variable ND filters on the other hand are filters that have different strengths of light stopping power across the surface of the filter.
Basically with filters like these, you attach them to the front of the lens and that allows you to use a longer shutter speed, or use a shallow depth of field by opening up the aperture.
You can find filters available for many popular drones. Click here.
Permissions
One of the most important aspects of flying a drone in any country is to have the right clearances for flying one. Most countries have some sort of rules regarding the operation of drones. The USA, for example, makes it illegal to fly drones over populated areas, at night time, and over national parks without specific authorization.
In addition to that, if you are not licensed to fly a drone and not specifically licensed under part 107 of the FAA you are not authorized to fly a drone for commercial purposes. It will be very difficult for you to convince the authorities otherwise if you do not have the right permits.
Outside the United States, different countries have different rules regarding flying drones for commercial or recreational purposes. It is always best to check the local laws regarding the flying of drones before making your plans.
Notwithstanding, avoid flying drones over populated areas, government buildings, military establishments, and law enforcement establishments to avoid getting penalized or shot down.
Practice Practice Practice
Drones have been around for a while but the commercial applications of drones such as drone photography and drone videography are recent. Photographers have only started to scratch the surface of what is possible with drones as photography tools.
Initially, you will find it a bit difficult to control the drone and make images with it. I recommend that your initial efforts should be focused on controlling the drone and making sure that you are in control at every moment.
Only when the basic controls of the drone have been mastered by you should you switch to photographing.
This will prevent any unwanted incidents where you crash the drone in a public space and harm anybody or damage any property.
Initially, it is best not to fly over populated areas. Move towards an open area where there are fewer risks of flying the drone.
Hopefully, the above tips will help you master the basics of drone photography. As you keep shooting with your drone you are only going to get better. You will have more control over the exposure and the composition of your images.
Here is a useful video on drone landscape photography including Lightroom settings:
For more details about drone photography, or how to master the basics of composition and exposure I recommend that you check out the related resources on our website.


1 comment