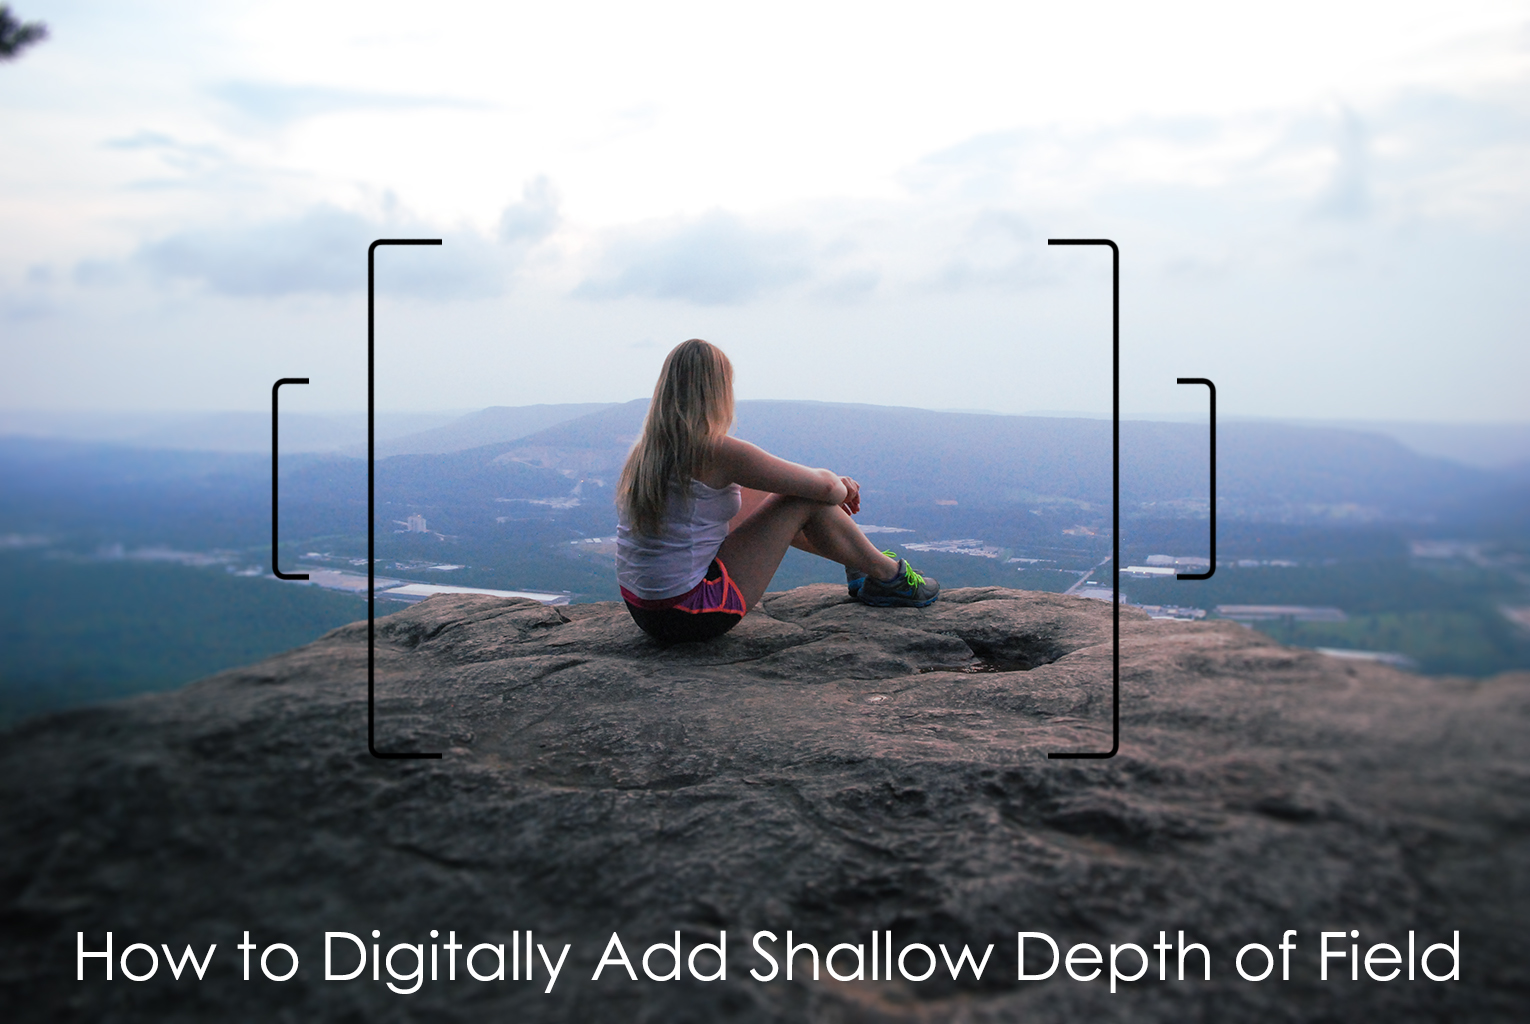
One of the easiest and most common techniques that photographers use to make their photos look more interesting and professional is to use a shallow depth of field. Depth of field refers to the distance between the nearest and farthest parts of an image that appear sharp or in focus. When a photo has a shallow depth of field, only a small portion is in focus, while the rest is blurry.
It may seem a bit counter-intuitive that photographers purposefully create mostly-blurred photographs; however the shallow depth of field effect is actually closer to the way we see with our eyes. As you look at this page, for example, only the text is in focus, while everything else in your vision blurry.
Taking photographs that have shallow depth of field usually requires a nice lens, or at least, an expensive camera. However, it is possible to digitally simulate shallow depth of field using Adobe Photoshop.
This tutorial will show you how to add visual interest to your photographs by creating a shallow depth of field effect using 3 different techniques: the Iris Blur tool, the Lens Blur Filter & Depth Maps, and Photoshop Plugins.
Method 1: Iris Blur
The Iris Blur tool is the quickest way to give your photographs the appearance of shallow depth of field. This technique does not offer as much customization as the other two methods; however, it does a pretty good job, and it only takes about 2 minutes.
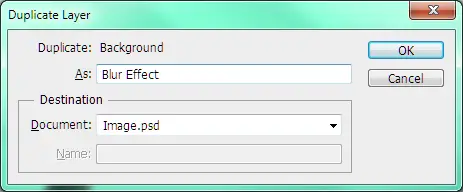
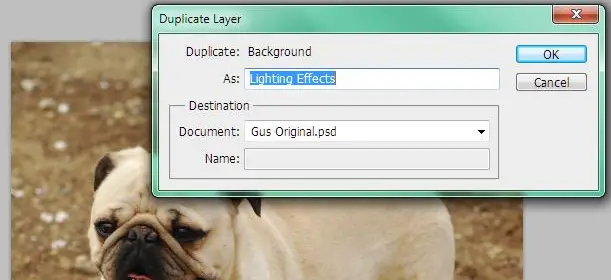
Step 1: Right-click the layer “Background” in the Layer’s box. Select “Duplicate Layer” and name the new layer “Blur Effect.”
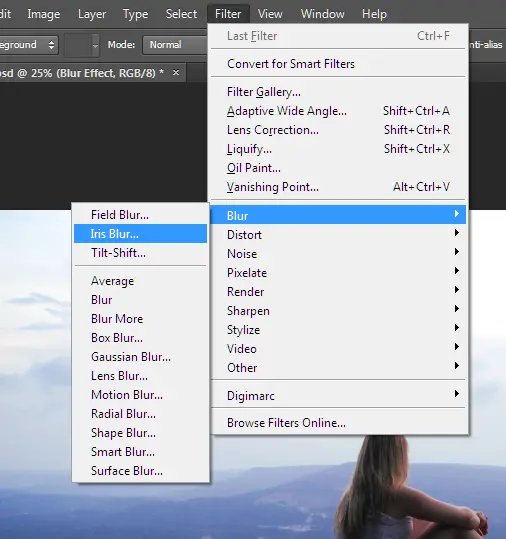
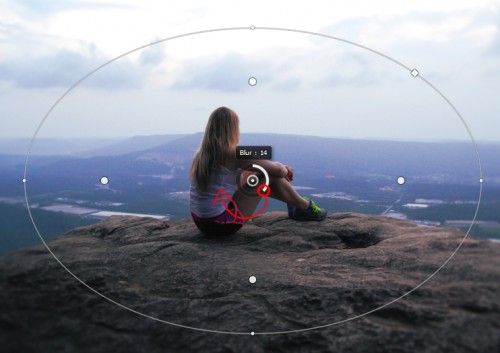
Step 2: Select Filter > Blur > Iris Blur This will open the Blur Gallery tool with the Iris Blur tool selected and a default Iris Blur will be placed on your image. Move the circle in the center to the part of your image that you want to stay sharp. For my photo, I wanted the young woman and the edge of the cliff to remain in focus.
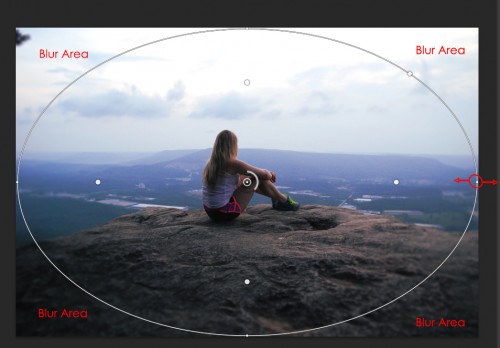
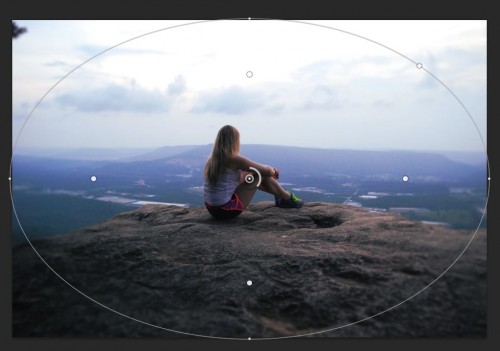
Step 3: Click and drag the outer edge of the selection to change the size of the blur. Click outside of the selection and drag diagonally to rotate the selection. Everything outside of the selection is called the “Blur Area,” since this part of the image will receive the full intensity of the blur effect. If you want more of your photo to be intensely blurred, make the selection smaller and the area outside of the selection bigger. Make the selection touch the edges of your image, leaving only the corners outside of the selection, for a gradual, more subtle effect.
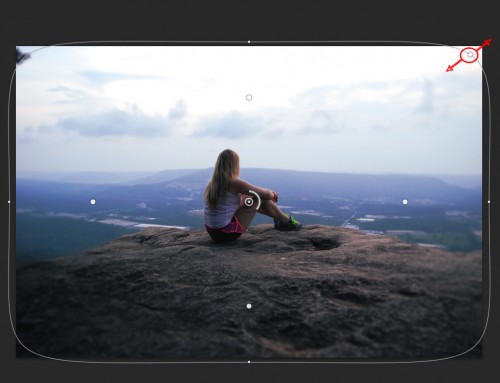
Step 4: Move the little white square in the upper-right to make the selection more rectangular or elliptical. I chose to keep the selection elliptical so that the corners would be more intensely blurred.
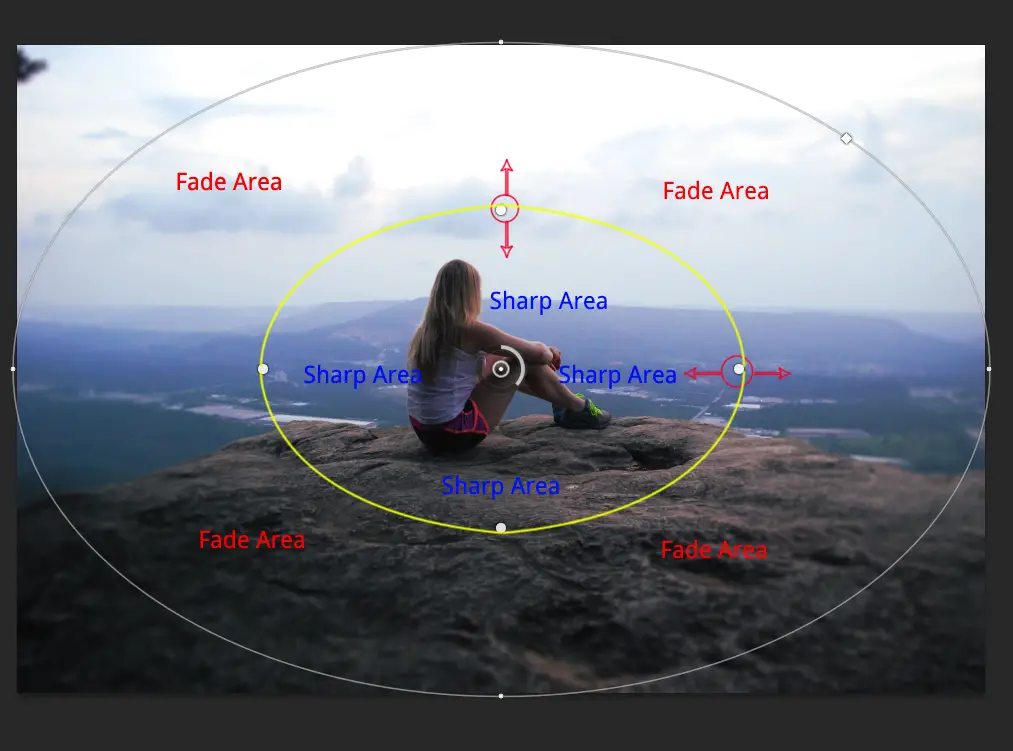
Step 5: Adjust the handles that look like little white circles to frame which part of the photo you want to stay sharp. The area between these handles and the selection is called the “Fade Area.” In the Fade Area, the photo will gradually change from sharp to blurry. The area within the handles is the “Sharp Area,” and will remain in full focus. The smaller you make this area, the shallower the depth of field will appear.
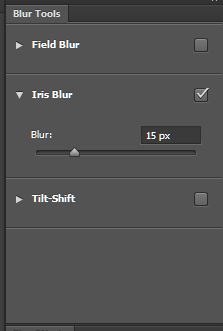
Step 6: Adjust the intensity of the blur. You can do this either by clicking inside of the thin circle in the center and dragging clock-wise, or you can use the “Blur” slider on the right. If you want to achieve a macro, or extreme “close-up” effect, you can apply a more generous blur (34 px +), but for most other types of photographs, a subtle blur of 15 px or less will look more authentic.
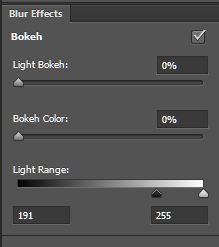
Step 7: If you want to brighten the “Blur Area” of the picture, head over to the Blur Effects box and adjust the “Light Bokeh” slider. This tool is especially useful for photographs taken at night or indoors. Adjust the “Bokeh Color” slider to increase the vividness of the colors in the lightened areas. Adjust the Light Range sliders to select the range of tones Blur Effects settings will affect. I chose to leave the Blur Effects settings at zero for this particular photo.
Step 8: Click the box at the top next to “High Quality” so that Photoshop will render a full-quality blur. You can click anywhere else on the image if you would like to create additional Iris Blur filters. Once you are happy with your settings, click OK.
Voila! Instant shallow depth of field!


Method 2: Lens Blur Filter & Depth Map
Creating a depth map to use with the Lens Blur Filter is a bit more complicated; however, it will allow you to apply different amounts of blur to different parts of the photo, which in the end looks much more realistic.
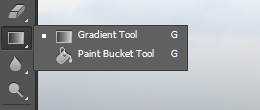
Step 1: Create a new layer (Ctrl+Shift+N) and name it “Gradient.” Set the Opacity to 50%. Press G to activate the Gradient Tool. If the Paint Bucket Tool is selected instead, right-click the Paint Bucket Tool icon and select Gradient Tool. Make the foreground color Black and the background color White.
Step 2: Starting on the edge of the part of the photo that you want to stay in focus, click while holding Shift (to make a straight line) and drag across the image toward the area that you want to blur. Keep in mind that areas that are black will be 100% transparent (i.e. they will not receive a Lens Blur effect); areas that are white will be 100% visible (i.e. they will receive a Lens Blur Effect); and areas of grey that are lighter will be more visible while areas that are darker grey will be more transparent.
For my photo, I chose the “Reflected Gradient” option at the top of the screen, and I clicked-and-dragged across the middle of the photo (from top-to-bottom) to keep the middle Black and to make the photo fade to white toward the edges. The whiter areas of the photo will receive a more intense blur, while the blacker areas will receive a weaker blur. When you are finished, change the Opacity of the layer to 100% and select the small eye icon to temporarily hide the layer.

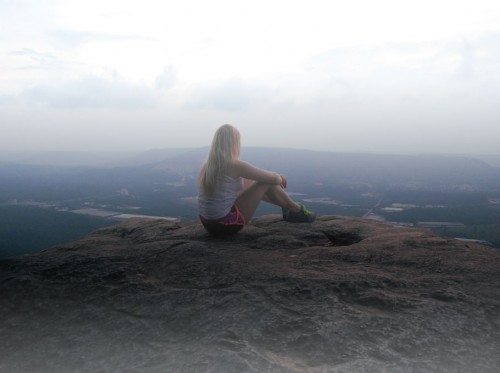

Step 3: Create a new layer (Ctrl+Shift+N) and name it “Subject.” Press B to activate the Brush Tool and change the brush settings to ~ 100 px Size and 0% Hardness. With Black set as the foreground color, color over the subject of your image, or the part that you want to remain in focus. If you feel uncomfortable with coloring freehand, you can press W to select the Quick Select Tool, select the Background layer, and repeatedly click around inside of the subject to make a selection of the subject. Then, you can color over the selection on the Subject layer with the Brush tool. For my photograph, I used the quick selection tool to select the top edge of the rock and the young woman. I then filled in the selection with Black using the Brush tool.
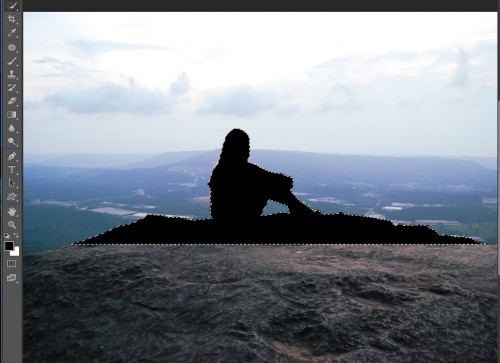
Step 4: If there are secondary subjects in your photo that you want to be partially focused, you can use this same technique, but color them gray. Remember that the darker the grey, the more in-focus the subject will be. If you do not have secondary subjects, skip this step.
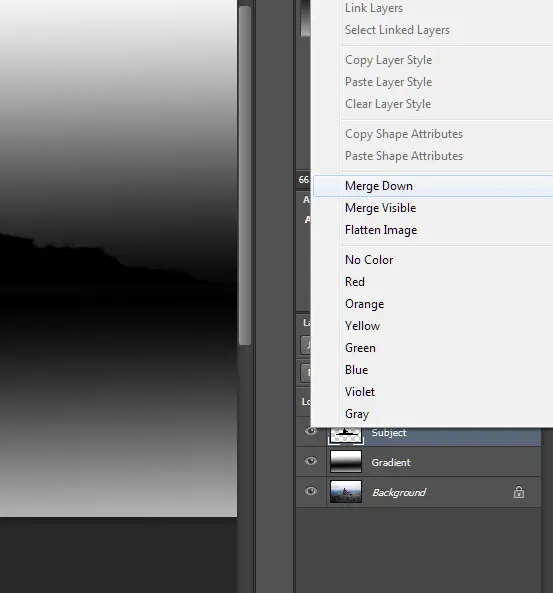
Step 5: Set the Opacity of the “Subject” layer back to 100%. Click the small eye icon to un-hide the “Gradient” layer. Right-click the “Subject” layer and select “Merge Down.” Press Ctrl+A to select the entire image and press Ctrl+C to copy the image. Press the little eye icon to hide this layer.
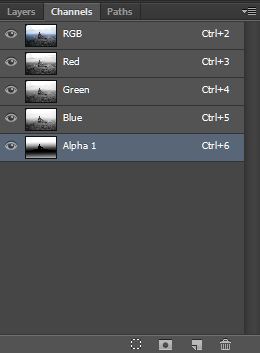
Step 6: Select the Channels tab in the Layer box. Click the icon at the bottom that says “Create new channel” when you hover over it. Press Ctrl+V to paste the merged Gradient + Subject layer. Click the little eye icon next to the Alpha 1 channel to hide it.
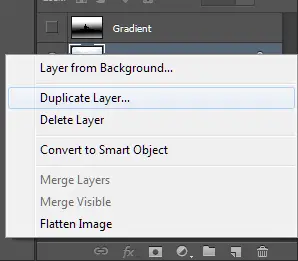
Step 7: Click the Layers tab and right-click the Background layer and select Duplicate Layer. Name the new layer “Lens Blur.”
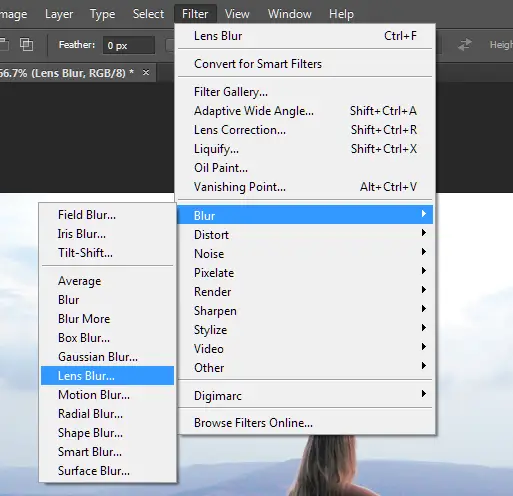
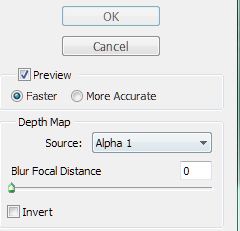
Step 8: Select Filter > Blur > Lens Blur. Select the “Faster” option and make sure the box next to Preview has a check in it. In the Depth Map section, choose “Alpha 1” in the drop-down menu next to Source. This will apply the depth map that you created in the Channels tab. Notice how the areas that you colored black do not receive the blur, while the areas that were closer to white are more greatly affected by the blur.
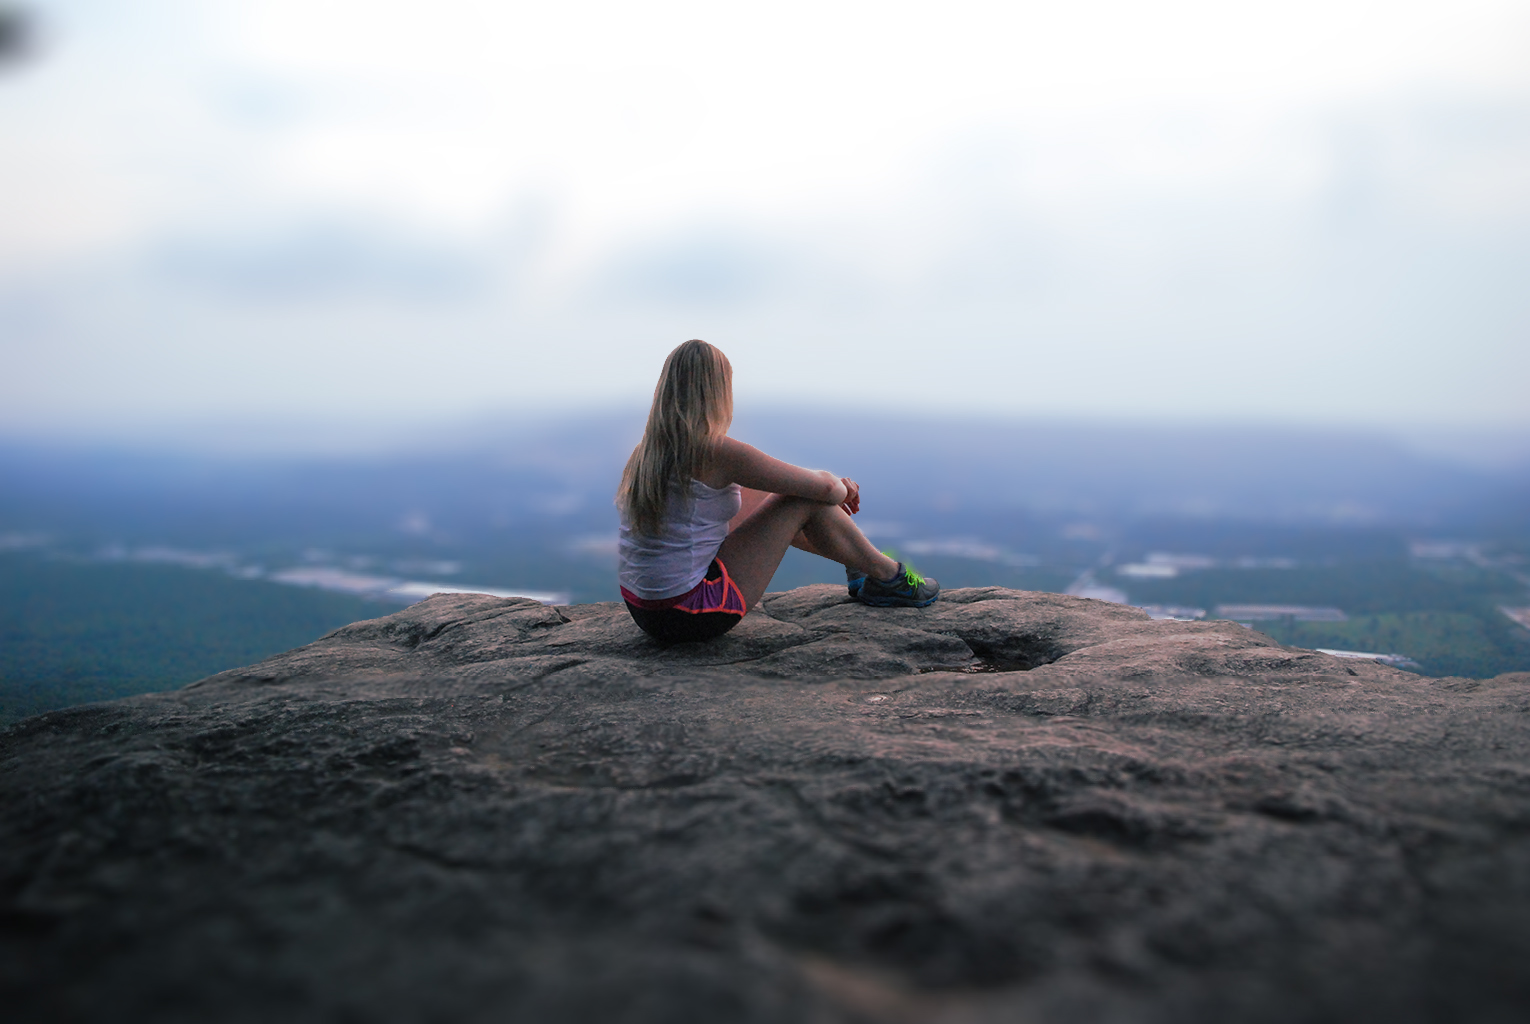
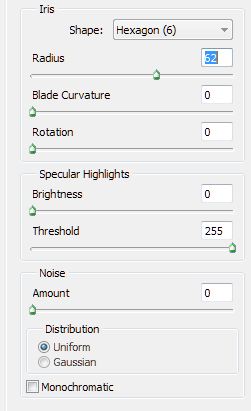
Step 9: Adjust the sliders in the Iris section to specify the size and shape of the artificial camera lens’s aperture. I chose to leave the default settings, except for the Radius, which I changed to 62 to increase the intensity of the blur. Click Ok.
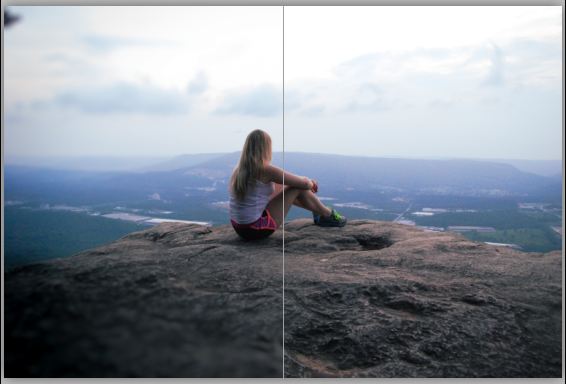
Compare the images below to see the final effect:


Method 3: Plugins
In addition to using built-in Photoshop filters, you can also create shallow depth of field with plugins. Plugins are quick and easy to install and convenient to use.
Plugin 1: Alien Skin Bokeh 2
Step 1: Follow the instructions on the Alien Skin website to download and install the Alien Skin Bokeh 2 plugin.
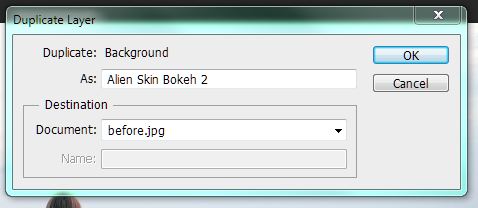
Step 2: Open your image in Photoshop. Right-click the Background layer. Select “Duplicate Layer” and name the new layer “Alien Skin Bokeh 2.” Go to Filter > Alien Skin Bokeh 2 > Bokeh . Click the drop-down menu next to the “Fit” box and select the last icon in the list. This option will display a preview of what the effect will look like on the left side and what the original looks like the the right so that you can compare.
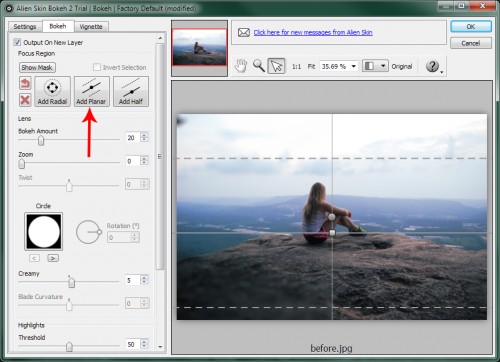
Step 3: Select the Bokeh tab. If you want your blur to have a circular shape, click the “Add Radial” button. If you want your blur to follow along a line, select “Add Planar.” I chose to use the “Add Planar” option.
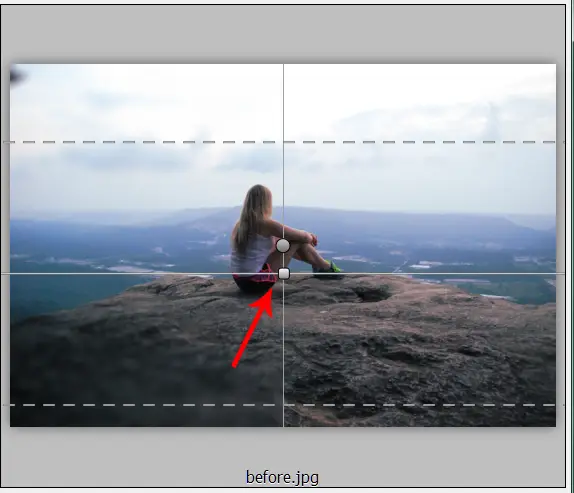
Step 4: Move the square in the middle of the preview window so that it is even with the part of the image that you want to stay sharp.
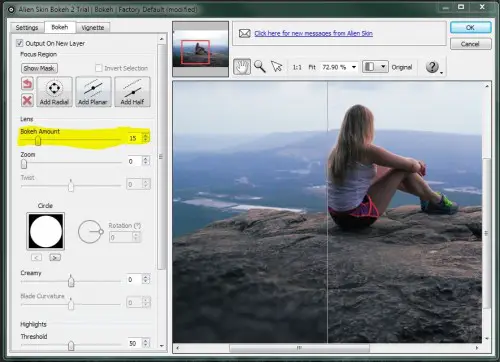
Step 5: Adjust the “Bokeh Amount” slider to increase or decrease the intensity of the blur. I chose 15 for my image so that the blur would be more subtle. If you want to add movement distortion to the blur, you can adjust the slider under zoom—just don’t increase this value so much that the blur is no longer gradual.
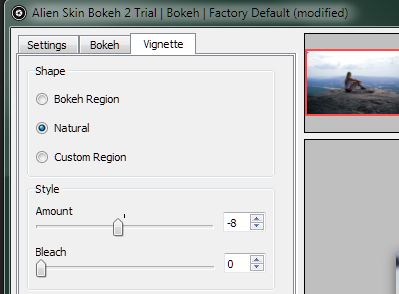
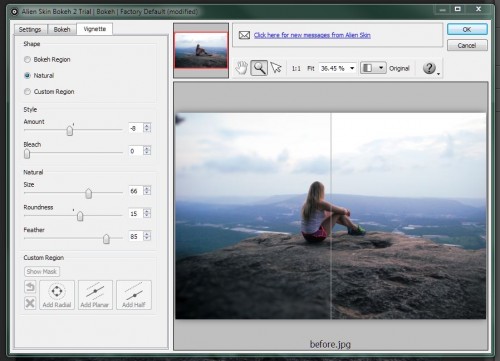
Step 6: Select the Vignette tab to make the edges of the photo darker. Often, real camera lenses create vignetting on photographs that have shallow depth of field, so this setting will increase the intensity of the effect. Select a “Natural” shape for the vignetting, and move the slider under Amount to the left so that the corners and edges of the photo become darker.
Step 7: Adjust the Size slider to make the Vignetting effect cover more or less of the photo (a lower value will affect more of the photo, and a higher value will affect less). Adjust the Roundness slider to control how circular the Vignetting effect is. Choose a high value for Feather (I chose 85) to create a softer, more realistic Vignetting effect.
Step 8: Feel free to play around with the rest of the settings on the Plugin. Pay attention to the before and after preview of the image to create a depth of field effect that is both dramatic and subtle. Press OK when you are happy with your settings.


Plugin 2: DOF Pro
Step 1: Download DOF Pro from the DOF Pro website and follow the instructions in the manual to install the plugin.
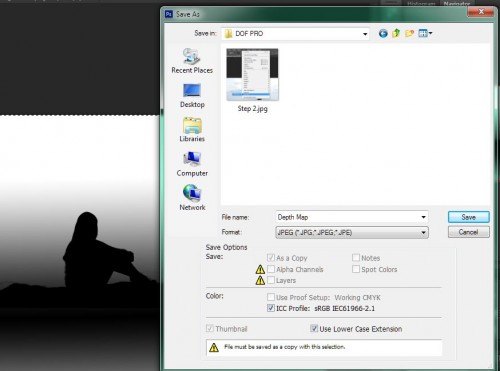
Step 2: Create a depth map of your image. To do this, head over to the “Lens Blur Filter & Depth Map” section of this tutorial and follow steps 1 through 6. Save the depth map as a JPEG.
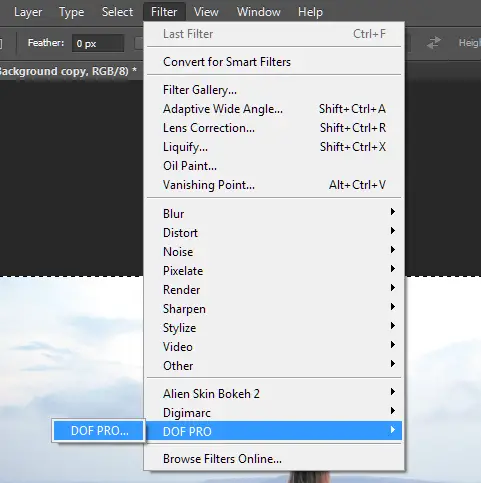
Step 3: Right-click the Background layer and select Duplicate Layer. Name the new layer “DOF Pro Filter Effect.” Select Filter > DOF Pro > DOF Pro.
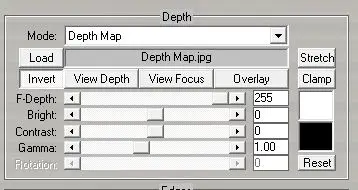
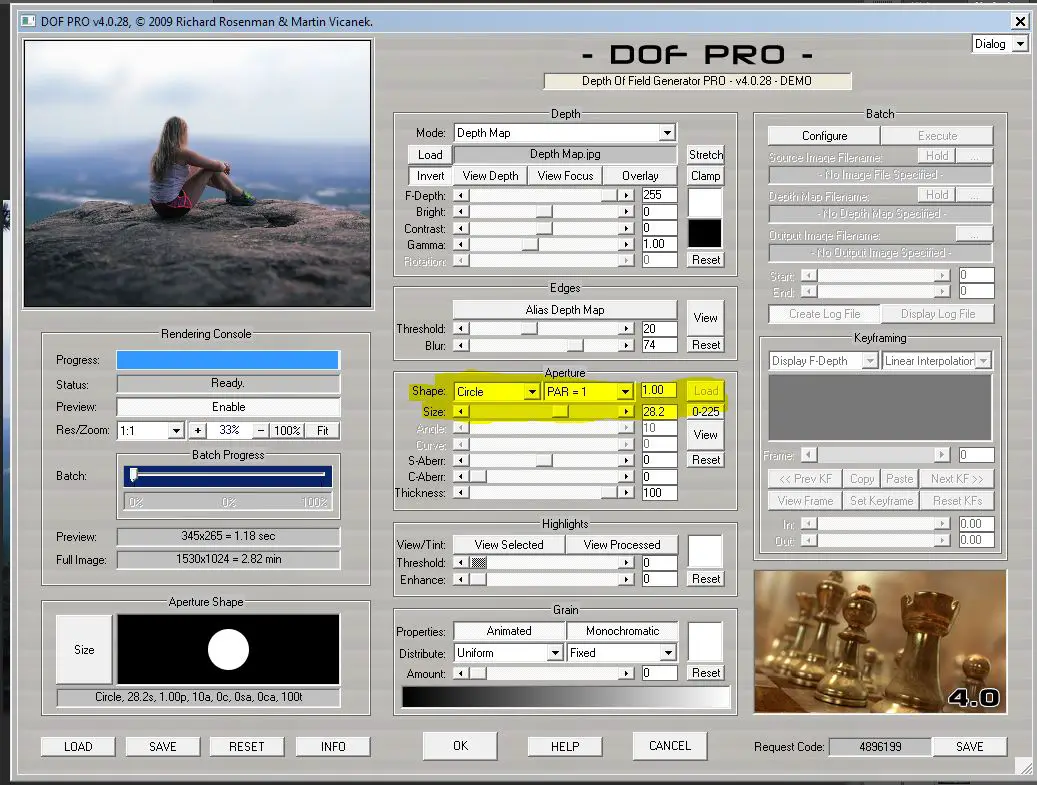
Step 4: In the Depth section, change the Mode to “Depth Map” and click the Load button. Select the depth map file and click Open. This will apply the depth map that you created earlier to the blur filter. Click the “Invert” button to load the Depth Map properly.
Step 5: Increase the amount of blur by moving the Size slider in the Aperture section. You can also change the shape of the aperture using the drop-down menu. I chose to use a Circle shape and I set my blur value at 28.2 to add strong blur. Adjust the other settings to experiment with different levels of grain and highlights. Once you are happy with your image, click OK.
Before & After DOF Pro Plugin Effect:


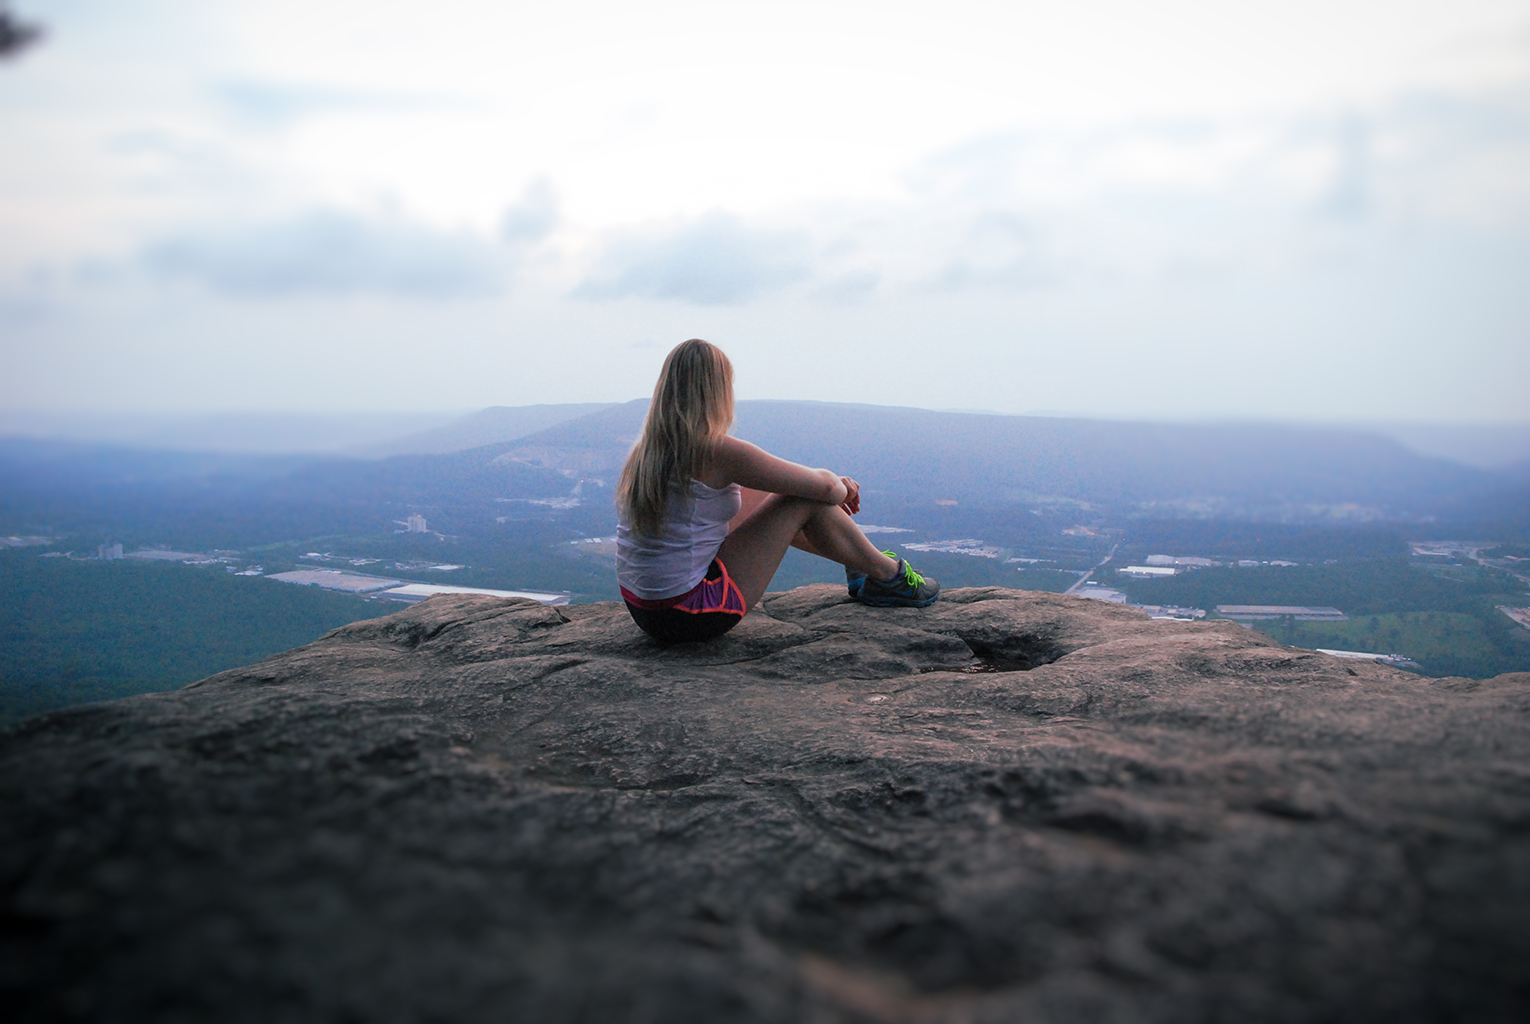
Not sure which method you want to use? Here are all of the images together for comparison. Choose the image that looks most appealing to you, and follow the corresponding section of the tutorial to achieve the effect.



Click on the following link to learn how to get thermal imaging on your cell phone.






Wonderful Article…
Thanks!
Amazing tutorial! Thanks for sharing.
Method 2: Lens Blur Filter & Depth Map is not to be done using this tutorial. You cant color the subject black. Its one time action. First you need to copy selected subject and then color it black.
Only a true photographer can manipulate a picture with finest details! with a f2.8 Lens or below along with HDR we can definitely get same results. Perfect Tutorial Malanie. A lot of effort and in depth thoughts can be seen in this tutorial. Good Job!
Awsome Effect !!, Thanks 🙂
fantastic! Thank you.
What version of photoshop do I need for this. I was trying to do find the Iris Blur filter but I was unable to find it. I have CS4
hOW TO DOWNLOAD PHOTOSHOP CS6+CRACK
That is excellent excellent and excellent work and Thanks to ‘Melanie Mayne’ for sharing with us.