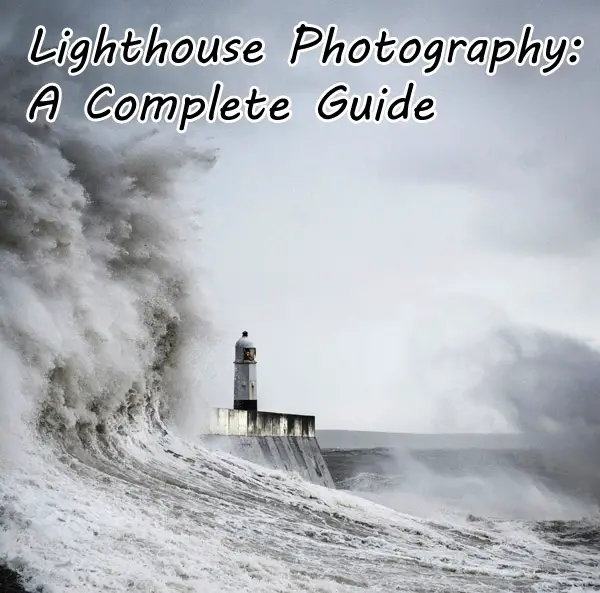
There’s a dance of light and shadow you can’t quite grasp until you’ve seen a lighthouse cut through the fog. Mastering lighthouse photography means capturing that silent symphony between nature and human ingenuity, each photo telling its own epic tale.
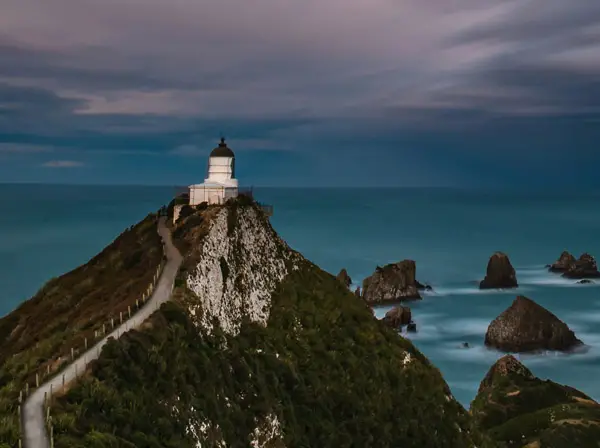
I remember setting up my tripod on rocky shores, waiting for that perfect moment when the sun dips low enough to paint everything in gold. You’ll get why timing is crucial, how early morning or late afternoon gives your shots character with just the right color wash over stunning structures.
This journey will equip you with gear know-how—like picking out wide-angle lenses for grand scenes or telephoto ones for details—and dive into camera settings so those beams look as majestic in photos as they do slicing through ocean mist.
Capturing the Romance of Lighthouses Through Photography
Lighthouse photography captures more than just a structure; it seizes the tales of human ingenuity and nature’s raw beauty. These coastal sentinels have long stood against time, their beams slicing through fog and darkness, guiding sailors home.
The Allure of Coastal Sentinels
There’s something inherently romantic about lighthouses. Maybe it’s their solitary elegance or how they symbolize hope in literature and lore. Photographing these monuments allows us to explore that romance—transforming a static image into a narrative about adventure, danger, and safety.
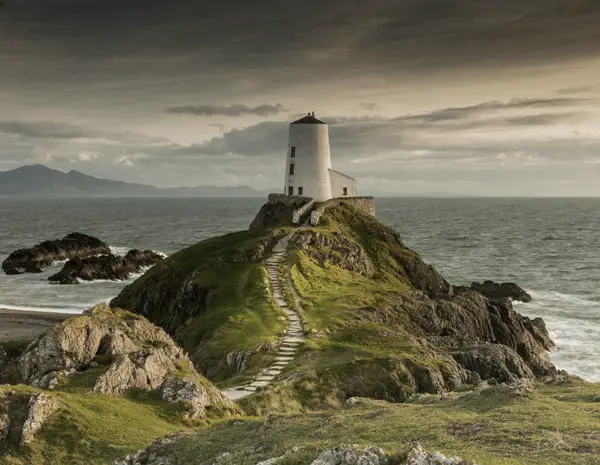
When we aim our lenses at an island lighthouse or one perched on rocky shores, we’re not just capturing architecture; we’re framing history itself. From remote offshore rock stations to accessible beacons near bustling ports, each offers unique photo opportunities that can convey this sense of story if approached with care.
Preparing for Your Lighthouse Photography Adventure
To capture stunning lighthouse photos requires some groundwork before you hit the shutter button. Scouting iconic locations is your first step toward breathtaking imagery—a task made easier with location suggestions from seasoned photographers who’ve shared GPS coordinates online for finding those perfect shots.
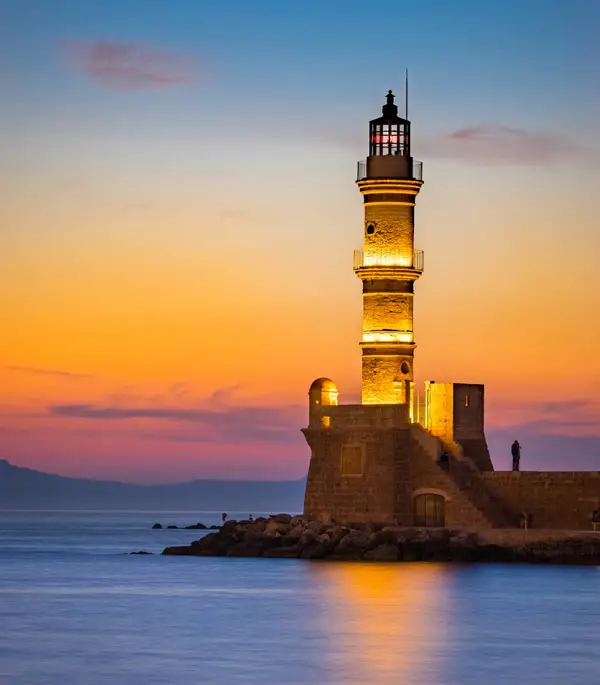
Finding yourself physically close to a towering beacon during golden hour might give your images that sought-after color wash only early morning or late afternoon light can provide—illuminating cloud bases in hues matching the sea below them—or maybe aiming for midday light will cast dramatic shadows along the structure’s walls revealing details otherwise missed.
Your Visual Toolbox
Your gear plays a pivotal role in this photographic quest too—you wouldn’t embark without your trusty camera after all. When choosing equipment remember: cameras need different lenses like short telephoto lens options around 70 mm f/4 for getting up close while wide-angle lens selections help encapsulate surrounding landscapes within frame digital bounds easily when standing back further away from structures themselves).
Tripods are essential too—not just any but steady ones capable enough so even during long exposures camera shake won’t turn potential masterpieces into blurry disappointments. And let’s not forget filters—they’re great tools indeed. Polarizing filters reduce glare off water surfaces while neutral density filters allow longer exposure times without overexposing parts making them particularly useful on stormy days where waves crash energetically against rocks beneath warning beacons above).
Mastering Camera Settings to Capture Stunning Images
Adjusting camera settings ensures technical precision meets creative vision, seamlessly creating compelling photographs. Understanding shutter speed, aperture, and ISO is crucial for capturing the perfect shot—each element plays a significant role in the final image. Master these controls and you’ll elevate your photography to new heights.
Preparing for Your Lighthouse Photography Adventure
Embarking on a lighthouse photography journey is like setting sail into the vast ocean of creativity. It’s not just about snapping shots; it’s about capturing history, engineering marvels, and nature’s brilliance all in one frame.
Scouting Iconic Locations
Finding the perfect lighthouse subject means diving deep into research. Scouring through location suggestions can unearth some hidden gems with compelling stories to tell through your lens. When you get those GPS coordinates right, they lead you straight to photographic treasure troves – be it an island lighthouse showcasing human ingenuity or a remote offshore rock station standing tall against Atlantic waves.
A quick tip: This site has an extensive list of accessible lighthouses that might just become your next muse. By visiting their website, you’ll find information ranging from coordinates to access ranges which are vital when planning your shoot.
Timing Your Visit Perfectly
The magic hour isn’t a myth; early morning light washes over structures with softness while late golden hour hues give them an ethereal glow. That said, don’t discount midday light either; sometimes its harshness can play up textures and shapes in ways dawn or dusk cannot match.
Beyond just time of day though consider weather conditions too – stormy weather brings drama as fierce cloud base formations contrast sharply against stoic towers whereas blue skies offer calm backdrops highlighting these coastal sentinels’ warning beacon roles. Remember timing is everything because exposure undoubtedly dictates mood.
Essential Gear for Photographing Lighthouses
To snag those dreamy lighthouse photos, you’ve got to have the right gear. Think of it like packing a treasure hunter’s kit—you need tools that won’t let you down when you’re chasing the gold.
Selecting Your Visual Toolbox
Choosing the right camera is step one in your quest for epic lighthouse photography. Go with a sturdy DSLR or mirrorless system; they’re both great picks but remember, weather sealing is your friend here because salt water and electronics are not best buds. Lens choice can make or break your shot—a wide-angle lens will capture sprawling coastal scenes while a short telephoto lens zooms in on distant details without getting physically close.
Tripods are non-negotiable if crisp shots are what you’re after—camera shake from gusty ocean winds can blur an otherwise perfect moment. And hey, don’t forget filters. A polarizing filter cuts glare off the water and amps up blue skies, whereas neutral density filters give long exposures even under bright midday light so that lighthouse beams turn into silky smooth ribbons of light.
A golden rule: always bring extra batteries and memory cards because there’s nothing worse than running out of juice at sunset during golden hour when everything looks magical.
Stability for Lighthouse Photography
You’re perched on rocky terrain as waves crash around—an unsteady tripod would mean disaster here. Look for something with enough heft to stand firm against strong sea breezes yet lightweight enough to trek across beaches without breaking your back. A steady tripod paired with a remote shutter release means saying goodbye to any unintentional blurring from eager button-pressing fingers.
The pros know that sometimes using unconventional gear pays off too—a cable release could save your shot on stormy days when touching the camera might cause shake despite all other precautions taken.
Lens Selection for Lighthouse Photography
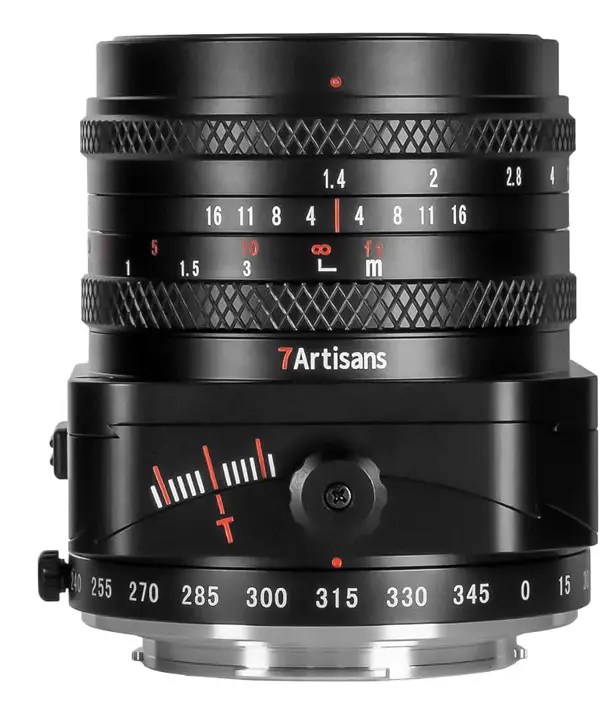
Your story-telling tool—the lens—is pivotal in painting pictures worth a thousand words about human ingenuity seen through these maritime sentinels’ architecture. From capturing grandeur using wide angle lenses offering vast landscapes inclusive of surrounding elements such as rock stations offshore or employing tilt-shift lenses (also known as PC lenses) which serve as excellent perspective correction tools—they keep vertical lines straight rather than converging due to angle distortion common when shooting tall structures like lighthouses.
Dabbling with different focal lengths opens up photo opportunities, whether it’s highlighting textures close-up or framing vast landscapes. Playing with lens types lets you capture the world in a variety of perspectives—each unique and telling its own story.
Mastering Camera Settings to Capture Stunning Images
Capturing the stoic beauty of lighthouses requires more than just pointing and shooting. It’s about understanding your camera settings and manipulating them to work in harmony with the coastal elements.
Understanding Shutter Speed for Lighthouse Photography
The shutter speed is pivotal when photographing these towering beacons. For a still day, faster shutter speeds can freeze motion, like seagulls mid-flight or waves crashing against rocks. On stormy days, slow down that shutter; long exposures stabilized correctly turn turbulent waters into a mystical blur while keeping the lighthouse sharp as a tack—a technique often referred to as “the big stopper.”
Aiming for that dreamy streak of light from rotating beams? Long exposure undoubtedly nails it. But remember, any longer than 15 seconds might overdo it—the beam could get lost in translation.
Aperture and Depth of Field in Lighthouse Photography
An aperture like f/8 gives you enough depth of field ensuring both foreground rocks and distant horizons are crisply defined alongside our main star: the lighthouse structure itself. Meanwhile, f/4 helps isolate these architectural giants from their surroundings—making them pop.
If up close and personal is what you’re after—a short telephoto lens does wonders by compressing distance between foreground interest points and our vertical subject without distortion.
ISO and Noise Control in Lighthouse Photography
Noisy photos can ruin an otherwise perfect shot but don’t let low-light situations bully you into cranking ISO too high. Start modestly; bump up only if needed because every increase means more digital “grain.” Sometimes though, a touch of noise adds character—an echo from an era when film was king.
Balancing ISO with other settings preserves image quality across different lighting scenarios—bright blue skies at noon or during golden hour when everything takes on warm hues. A neutral density filter might help keep things steady if light opportunities prove too bright for wide apertures or slow shutters.
With precision control over shutter speed, aperture size—and managing ISO levels—you’ll snap not just pictures but stories framed by timelessness against changing tides.
Composing Your Shot with Artistic Flair
When it comes to lighthouse photography, composition is your secret weapon. It’s not just about capturing the structure but telling its story through your lens. Let’s unlock the potential of each shot by focusing on where you stand and how you frame that majestic beacon.
Finding the Perfect Point of View for Lighthouse Images
Your point of view can make or break a lighthouse photo. Sometimes getting physically close allows for an imposing perspective, making the lighthouse tower over viewers in awe-inspiring grandeur. On other occasions, distance works wonders, especially when incorporating elements like stormy weather or blue skies into your backdrop which highlight nature’s dance around these coastal guardians.
A wide-angle lens could be your best friend here; it lets you capture more of those dramatic skies and surrounding landscape without losing focus on our main character—the lighthouse itself. Conversely, a telephoto lens might help isolate it from distractions if simplicity speaks louder to your artistic vision.
Creating Dynamic Perspectives
Perspective correction tools such as tilt-shift lenses are great allies in this visual journey—they keep vertical lines straight rather than converging as they rise up towards cloud bases high above sea level. A pc lens offers unparalleled control over depth-of-field too—essential when every detail counts—from rock stations nestling at its base to distant ships relying on its warning beacon during early morning hours or late at night.
Tilt-shifts aren’t just technical marvels though; they permeate images with emotion—a certain ethereal quality that feels both grounded and transcendent all at once. So if there ever was a time to try out one of these lenses while photographing headlands adorned by human ingenuity against Mother Nature’s canvas—it would be now.
Techniques That Bring Out the Drama in Your Photos
Lighthouse photography isn’t just about capturing a structure; it’s about seizing the drama of isolation and guidance that these coastal sentinels represent. To transform your lighthouse photos from simple snapshots into powerful stories, let’s explore some techniques that add impact to your images.
Capturing Light Conditions
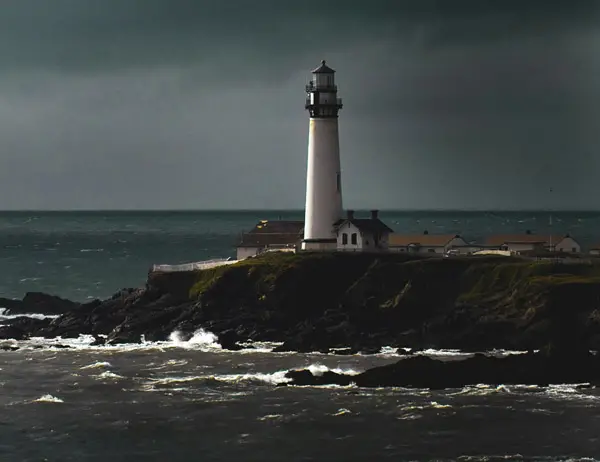
The right light conditions can turn a plain lighthouse photo into a visual masterpiece. You know those days when the sky brews storm clouds? They’re not just good for staying in with hot cocoa—they’re perfect for photographing lighthouses. The contrast between dark skies and the solid, steadfast presence of a lighthouse is pure gold. If you’re lucky enough to catch lightning as well, you’ve hit the jackpot on moodiness.
But don’t forget about golden hour—the time around sunrise or sunset—when everything gets bathed in warm hues. This magical lighting can give your lighthouse images an ethereal glow that screams romance novel cover material.
Long Exposure Techniques
A long exposure undoubtedly adds drama like no other technique—it turns crashing waves into mystical fog hugging rocky shores and captures those spinning beams of light in ways our eyes never could. Imagine this: shutter speeds slow enough to make seconds feel like eternity while headlight beams stretch across time itself—a true spectacle. But be warned, without stability, camera shake will turn what should have been epic sagas into blurry disappointments faster than you can say ‘missed opportunity.’
Navigating Post-Processing To Enhance Your Images
So you’ve snapped that majestic lighthouse photo, but it’s not quite popping like the beacon it is. Fret not; post-processing is here to save the day. With a few strategic tweaks, your good photos can become great ones, standing tall and proud like the lighthouses they depict.
Enhancing Images with Basic Adjustments
The first step in your digital darkroom should be basic adjustments. It’s like adding salt to a dish—it brings out flavors or, in this case, colors and contrasts that were hiding in plain sight. By playing around with exposure levels and contrast settings, you’ll start seeing those lighthouse images come alive with color washes that reflect their true beauty. Don’t forget about sharpening details too; just enough can make textures stand out without overdoing it.
If there are any distracting elements messing up your otherwise perfect shot of an island lighthouse—a stray bird or perhaps some rogue litter—cloning tools are great for cleaning up unwanted items from the frame without leaving behind telltale signs of editing.
Correcting Perspective Distortion
Lighthouses tower high into the skies—but sometimes camera angles don’t do them justice leading to wonky vertical lines that lean more than Pisa’s famed tower. Enter perspective correction tools: these nifty features straighten things right back up so every line on that towering structure looks as stable as Trinity House intended them to be when guiding sailors home through stormy weather.
Tilt-shift lenses offer an alternative method by allowing photographers control over which parts remain sharp while shifting focus elsewhere – handy if you’re trying to draw attention away from less interesting foregrounds towards grander architectural feats above.
Using Filters For Creative Effects
Sometimes what takes a photograph from “meh” to mesmerizing isn’t reality itself but how we choose to interpret it through our artistic lens (pun absolutely intended). Adding filters can imbue shots with moodiness fit for brooding Atlantic Ocean vistas or sun-soaked warmth ideal during golden hour sessions at coastal locales. But remember folks: moderation is key because nobody likes an image drowning in effects no matter how tempting those slider bars may be.
Polarizing filters deserve special mention—they reduce glare off water surfaces making them indispensable companions when shooting near vast bodies of salty seas where light opportunities abound yet challenges persist due hefty reflections often encountered along shores housing these warning beacons against treacherous tides.
With all said and done, though nothing beats hands-on experience—you’ve got all the necessary gear, including cameras equipped and ready to go? Then why wait? Grab your tripod, set it up, and dive into capturing those stunning shots that you’ve been planning for. There’s no better time than now to start creating your visual masterpiece.
The Ethical Side Of Photographing Historic Structures
When you’re out there, camera in hand, ready to capture the stoic beauty of a lighthouse against the roaring sea, remember: your snapshot holds more than just pixels. It carries responsibility. Respecting property and surroundings isn’t merely about not trespassing; it’s about honoring history and those who maintain these beacons.
Respecting Property And Surroundings
Beyond the basics of ‘look but don’t touch,’ photographing historic structures like lighthouses means recognizing their role as guardians of maritime safety. Before setting up your tripod or getting that close-up shot, ask yourself if you’ve gotten permission from local authorities where required. Remember, some island lighthouses are off-limits for good reason – they might be on delicate ecosystems or private land.
Consider this: by maintaining distance when necessary and sticking to accessible lighthouses only when conditions permit (and never during stormy weather), we pay homage to both human ingenuity and nature’s balance.
Protecting Gear From Saltwater
Salt water is no friend to photography gear. But let’s face it – shooting near an Atlantic Ocean spray makes for dramatic images that tell stories of endurance amid tempestuous seas. So what do you do? Suit up with rain gear before heading out on a stormy day – this protects both you and your beloved equipment from salt corrosion while letting you brave elements for that compelling photograph.
If ocean mist threatens during long exposures (think capturing those hypnotizing lighthouse beams at night), use protective filters like polarizing filters or neutral density filters such as ‘big stopper’ types which can also enhance color wash in skies without harming lenses.
Navigating Local Regulations
Lighthouses stand proud because they adhere to rules set forth by coastal stewards—so should photographers aiming for ethical practice. Make sure GPS coordinates align with permitted access ranges. Respect posted signs around offshore rock stations warning beacon seekers away due to unsafe conditions. Follow guidelines designed to protect wildlife habitats nestled among rocky shores near headlight houses often overseen by organizations committed to conservation efforts. This ensures everyone enjoys longevity of these storied sentinels without causing disruption to native flora and fauna.
Photography adventures await, but so does our duty toward preservation through mindful practice.
Showcasing And Sharing Your Work With The World
After capturing the stoic beauty of lighthouses, it’s time to share your art with an audience. Showcasing photos on social media and websites is not just about posting images; it’s a strategic move that can turn your passion into recognition.
Selecting Platforms That Fit Your Style
Every platform has its vibe. Instagram might love the drama of golden hour shots, while Pinterest users could pin your stormy day captures for their mood boards. Choose platforms where the community resonates with your aesthetic—this is how you build a following that cares.
But remember, showcasing work online goes beyond uploading and waiting for likes. Engage with fellow enthusiasts by commenting on similar content or sharing behind-the-scenes stories in blog entries. Let people feel they’re part of your creative process.
Crafting Posts That Pop
Your posts should be more than pretty pictures—they should tell a story or offer value to viewers who may want tips on visiting accessible lighthouses themselves, whether for photography or just an adventure. When writing captions, don’t just drop GPS coordinates; add context like why this location at midday light beats early morning shoots sometimes.
Use hashtags strategically—not as afterthoughts but as breadcrumbs leading interested parties back to you. Include words related to lighthouse photography but also mix in broader tags like #travelphotography or even #humaningenuity when showcasing structures defying Atlantic Ocean storms.
The Art Of Timing And Frequency
You’ve heard about ‘the best times to post,’ right? Well, here’s where it gets real: If most of your followers are active during certain hours (say hello analytics.), then make those times count with new uploads—the blue skies over island lighthouse won’t look any less stunning.
A steady rhythm keeps followers engaged without overwhelming them—or worse—making them forget you between long gaps. Consistency means reliability in the digital world’s fleeting attention spans.
Remember these pointers when curating what hits the feed:
- Analyze lighting conditions before selecting which image makes the cut—a compelling photograph needs no filter if captured right;
- If using filters like neutral density for those dreamy long exposures near rock stations at sea—it helps emphasize technique mastery;
- Mix it up in your posts to keep things fresh—this way, you’ll hold the attention of folks who love a good change-up now and then.
FAQs
What is the best lens for lighthouse photography?
A wide-angle lens works wonders, capturing both the towering height and surrounding landscape of a lighthouse.
What settings are needed for light trail photography?
Dial in a slow shutter speed, drop your ISO low, and adjust aperture to fine-tune exposure. Steady as she goes.
How do you capture light rays in photography?
To snag those beams, shoot when sunlight breaks through clouds or mist; narrow aperture helps carve out crisp rays.
What is the best shutter speed for light trails?
Aim for a long exposure; start around 10 seconds and tweak it based on how busy traffic flow lights up your shot.
Conclusion
Now you’ve navigated the waters of lighthouse photography, and what a voyage it’s been. You’ve discovered how vital timing is, catching that golden hour for the perfect light wash. You understand gear selection – from wide-angle lenses capturing vast landscapes to telephoto ones zooming in on intricate details.
You’ve learned that settings are your rudder; they steer your photos clear of common pitfalls like camera shake or poor exposure. And let’s not forget composition – it turns simple shots into stories worth telling.
Capture those beams with long exposures, embrace dramatic weather for moodier scenes, and always respect the space around these historic beacons. Armed with these insights, every lighthouse photo you take can now stand as a testament to nature meeting human ingenuity head-on. Click the following link to learn how to do surf photography.


