In an ideal world, every photo you take would be perfectly composed. However, in real life, many pictures could use some improvement. Often, thoughtful cropping can make the difference between a mediocre image and a better one. Cropping a picture just means eliminating or trimming off edges.
Some cameras can crop images before printing. Check your manual to see if your camera is one of these. The manual may use the word “trim” rather than “crop.” Otherwise, crop pictures by using a photo-editing program.
The process is simple. First you select the area that you want to keep. Usually, you place the cursor or crop tool where you want one corner of this image to be. Then click and drag to select the area that will appear in the new image. That area will appear lighter or darker than the parts to be trimmed off. Most programs allow you to crop either to certain specific sizes or to a random size of your choice. If you like the cropped version, you then direct the program to complete the crop.
Do not crop your only version of a photo. Always crop on a duplicate or copy. In many programs, cropping destroys the original and replaces it with the cropped version. Depending on your skill, you may wish you had never altered the original.
However, successful cropping can serve many useful functions, including the following:
Eliminate distracting parts of the photo
The uncropped version shows bits and pieces of many elements. You can see parts of two houses, as well as a corner of a sign. By cropping out two of those distracters, the subject of the photo is clear


Emphasize part of the image to give it more importance
Here the photographer cut out everything but the eyes, nose, glasses, and sign. If this had been part of a busy scene, a viewer might not have noticed the sign and its human example.
Change the composition by moving the subject out of dead center
Some subjects, particularly symmetrical ones, lend themselves to being placed dead center in a picture. However, most other subjects are more interesting if placed off-center. (To learn more about composition, see “Learning composition: basic concepts and framing,” April 19, 2006.) If your original picture looks a bit bland, first duplicate it and then try different crops.


Change the orientation by making a horizontal image vertical
In some instances, your page design may require either a vertical or horizontal format. In many cases, you can crop a horizontal image and make it into a vertical one. The trick is to select a part of the whole that works well by itself.


Make a pair or series of images uniform in size or shape
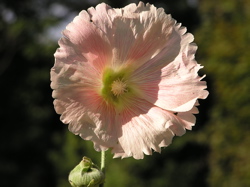
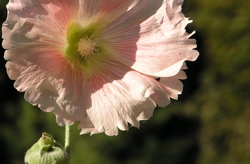
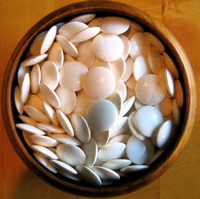
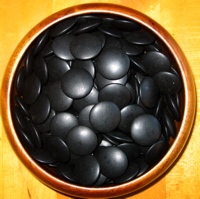
Images that are the same size can be building blocks in a larger composition. Perhaps you want a border of small images that are the same size. Maybe you want to emphasize the round shape of several flowers. Or suppose you want to contrast two similar items. Cropping them to the same size and shape emphasizes differences.


One final warning. Remember that when you crop, you are eliminating pixels. That means that your cropped version will have fewer pixels than your original. Therefore, depending on how much you cut off, you may not be able to make a crisp enlargement that is the same size as you could make from the uncropped image. However, if you are displaying your image online, that is seldom a problem.


good croping tactic there.
That’s cool,didn’t know about some of that stuff before…
I used to be recommended this blog by my cousin.
I’m not certain whether or not this post is written by way of him as no one else recognize such exact approximately my trouble. You’re incredible!
Thanks!
Great article 🙂
That looks pretty cool
Also a nice trick is to not totally crop it but leave some background there and blur it so the subject is the main thing on the photo.
only here cuz of digital photo