To a photographer, the mood of the sun means everything. Natural light is temperamental — fluxing, fading, and shifting to an invisible rhythm. Working at the mercy of the elements means photographers often find themselves stuck in unsuitable situations, especially when it comes to lighting.
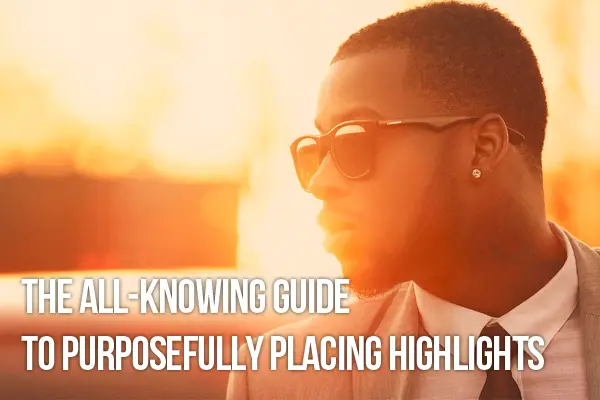
Seasoned photographers Lindsay Adler and Erik Valind have developed a bag of tricks to get around such unlucky traps in their new book, Shooting in Sh*tty Light. According to the pair, learning to purposefully place your highlights is central to conquering the worst lighting situations. As it turns out, placing highlights can be done a few different ways.
Turn the Tables
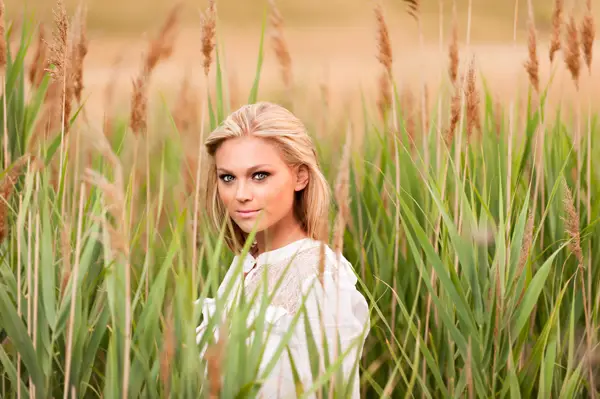
In Adler and Valind’s collective opinion, one key strategy to conquering terrible lighting lies in shifting the situation to your advantage. Dappled light, for example, confronts the photographer with a sometimes unmanageably vast range of tonalities. Adjusting for either the bright highlights or the deep shadows will end up blowing out the bright spots or casting the whole exposure into darkness.

In lieu of manipulating the dappled light into something it’s not, as the situation tempts most photographers to do, Adler and Valind suggest experimenting with bright spots and shadows to create drama, to focus the eye. Direct the subject of the photograph under the bright spots, use the shadows to create mystery. Let the shadow of a fence fall across a face, use a beam through slats of wood to throw light on the subjects eyes. Be unconventional with it, and you may be surprised.
Steer the Light
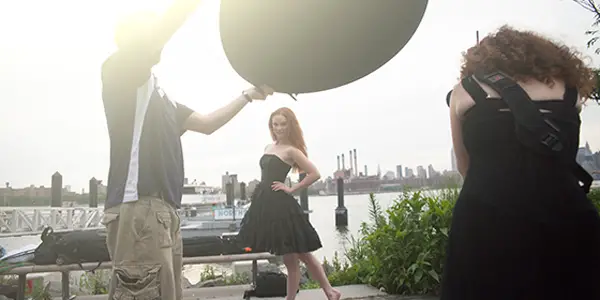
Under dappled light, a reflector does a magnificent job of filling in the shadows. Angling the reflector to bounce ambient light across the darkest areas of your subject lessens contrast, adds depth, and makes it easier to nail an even exposure. Be wary, though—reflectors are meant to fill shadows and even out the range between highlights, not to provide a second source of light.
Bending a strong beam of light back at the shadowed side of a subject creates conflicting light sources. Instead, “feather” the light, or direct the reflector’s beam just past your subject to create a gradient, a gentle range of light to dark that appears more realistic.
Block Highlights
If a reflector doesn’t quite do the trick, blocking—or “flagging off”—the highlights is the next best step. Flagging off involves cutting off the overhead light source using a “flag,” or a dark cloth stretched over a frame. Holding the flag between the subject and the light source helps lessen the range of tonalities in the frame, making exposure easier.
Sometimes, however, this can darken the image too much, and using a reflector below the subject to lighten up the shadows even more can make for more even lighting.
Diffuse
Diffusing light is a perennially popular way of softening lighting and evening out a vast, uneven range of highlights. Instead of blocking the light, as one does when flagging off, a diffuser disperses light into a soft, even shower of illumination.

If dappled light is subtle, diffusing can effectively eliminate highlights without stripping the subject of light. Hold the diffuser above the subject, and, if needed, use a reflector to bounce soft light back into the shadows. This often makes for an ideal solution, eliminating stark contrast while adding subtlety and depth to a subject.
Use a Flash
Typically, defaulting to using a flash is not recommended. Using a flash on full power can make a subject appear flat and overlit, but filling underlit areas with a flash at half or quarter power can kick light back onto important features. Adler and Valind recommend using a flash off-camera for the most realistic way of filling shadows.
Before deciding on or experimenting with any of these methods, choose what is important in the frame. Before placing highlights, you must know precisely where you are aiming to draw attention. Deciding on your emphasis early on will go a long way towards taking a photo that looks beautiful, tells a story, and appears natural.
If you want to learn more about Lindsay and Erik’s lighting techniques in general, check out their Conquering Crappy Light course on creativeLIVE.
About the Authors: Topher Kelly is a San Francisco based freelance writer and editor at creativeLIVE– an online education platform dedicated to providing free interactive photography, business and design courses taught by some of the world’s best instructors.
Lindsay Adler is a professional portrait and fashion photographer based in New York. Her editorials have appeared in dozens of publications internationally including Bullett Magazine, Zink Magazine, Fault and more. She regularly contributes to a variety of major photo publications including Professional Photographer, Rangefinder Magazine, and Popular Photography.


0 comments