A light box is basically a miniature photography studio. Lit from the sides, front, top or any combination, a light box provides even illumination of any subject which can fit inside of it. Boxes like this are perfect for product photos (think eBay) and general macro and closeup photography. There are a lot of tutorials out there for making light boxes. There’s a good one for making one out of a cardboard box over on Strobist. I’ve had an idea for making one of my own kicking around for a few weeks and decided to build it this week. Here’s what I came up with. And it’ll only cost you about $5 (assuming you’ve got some scissors and glue) and 30 minutes of your time.
To build this you’ll need two pieces of poster board (mine were about 28″x22″), a pair of scissors, a sharp knife, a straight edge, glue, and tape. Start by cutting one of the pieces of poster board in half so that you end up with two 14″x22″ pieces. Then fold down two edges to create about 1″ tabs. Glue or tape them up.
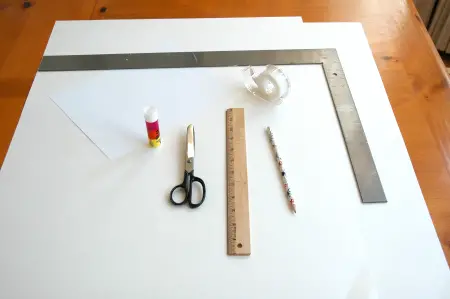
Two pieces of poster board, scissors, straight edge, glue, tape, knife
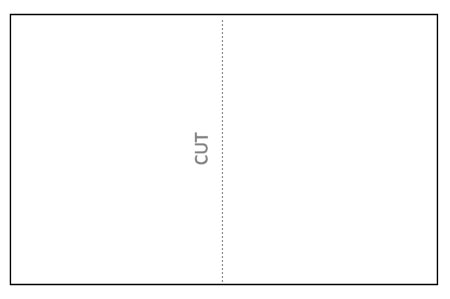
Cut one board in half; you should now have three pieces of poster board
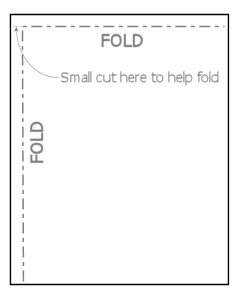
Fold 1″ of two edges down on each half
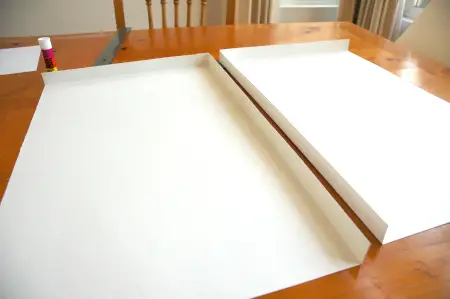
Two box sides; cut 10×15″ windows in each side
At this point you’ve got your sides, but now you need to cut some windows so we can get light into the box. Use a sharp knife and cut 10″x15″ windows in each side. Leave enough material around the window edges to retain some strength. Then glue the poster board you didn’t cut together with the two pieces you just made to create your finished box.
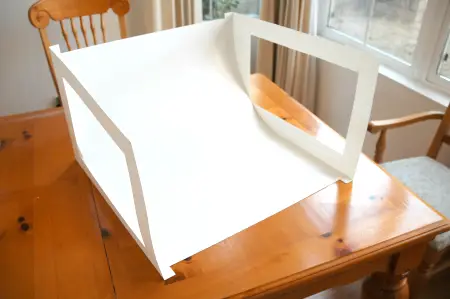
Glue the three pieces together for final assembly
You’re all set. What I’ve done now is loosely tape two pieces of 8.5×11 paper over the windows on each side to create diffusion panels. You can use a variety of different materials on the windows to adjust the quality of the light. Your lights will shine through these to illuminate the interior of the box. As for the lights themselves, I’m using wireless flashes. But you can easily use table lamps or any other light source you like.
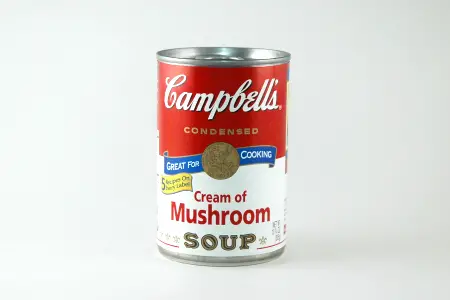
Mmm, mmm good
Straight down angle into the box
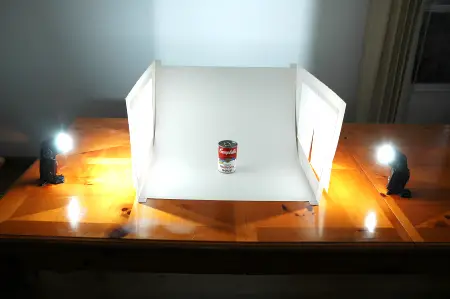
Wide view; two flashes set at 1/16 power
Since this box doesn’t have a top, you won’t get perfect illumination on relatively tall objects without adding a light from above or a reflector (an umbrella works nicely here). But it is quite large (you can fit a laptop computer in there) and you get the freedom to shoot from a lot of different angles without having to fiddle with anything. For objects shorter than the box itself, it works fantastically.
There are a lot of different approaches to making one of these things. But hopefully I’ve shown you that it’s really pretty easy, it doesn’t have to cost a lot of money, and you can get some very good shots using it.


This was a very helpful article. I was having a terrible time getting decent photographs of our products, specifically my jewely, and I can’t afford a Cloud Dome anytime soon. It never dawned on me to try to make my own and even it if had, I would have had no idea how to go about it. This is Perfect! Thank you so much for putting this article on the internet.
This will come in very handy for those items we need pictures of. Thanks for this, just bookmarked to come back later.
Kim is right, this helps a lot of us DIY types.
I am so excited to try this. What a wonderful and easy(and inexpensive) way for a beginner like me to get started. I think your pics look perfect. I would never know it takes about $5 to get that look.
This is such a great idea! The box is so simple to make and with the right lighting my pictures come out very nicely!Thanks for the great idea!
Brilliant! Thanks so much! Can’t wait to get started. There is only so much I can do with a scanner. Now I can actually photograph my jewelry. Kudos!
Heather
This looks very easy to make, I can’t wait to try it.
Very helpful article. I will try your technique. Thanks for sharing.
I just made it and am taking pretty good pictures (not like yours yet but I have to fix the lighting) I wanted to say thank you. So… Thank you!
Tyler
This is the best example of a DIY light box I have come across yet. I’ve seen some other ways but this looks like the most inexpensive and straightforward. Thank you for sharing. I can’t wait to see how my pictures will turn out.
Came here from http://thebestofetsy.blogspot.com and I’m so glad I did! This is a great tutorial that really stands out from the rest and it doesn’t hurt that it looks quite nice too 🙂
Great tuto… I love this , and I need to make this one… for my projects to photograph my products for my shop…
Thanks for shared!
Danny – from Brazil 🙂
Great DIY solution 🙂
I spent way too much time and effort on this and my pictures looked like dookie. I’m spending the money on a real light box.
A great alternative to poster board is CoroPlast, otherwise known as Corrugated Plastic. You can buy it at most hardware stores, and white is a very common colour. The advantage to using it is that it is MUCH stronger than poster board, and any spills or stains can just be wiped off with water.