Post-processing can be a great tool to improve your photography, whether you do it step-by-step, use Photoshop actions, Lightroom presets or any other product (or app!) for enhancing your images.
Retouching a photo is the last step in creating a good photo, and it adds that last touch of the artist.
But when is retouching too much? The type and amount of editing you decide to do to your picture could be the difference between a “cool” and an “amazing” picture and one that is “too fake.”
Please note this little article doesn’t intend to offend anyone, as there are a lot of styles out there. Anyway, it is your art, so do whatever you want! Here are just some suggestions if you are just learning about photo editing and want to know how to approach it.
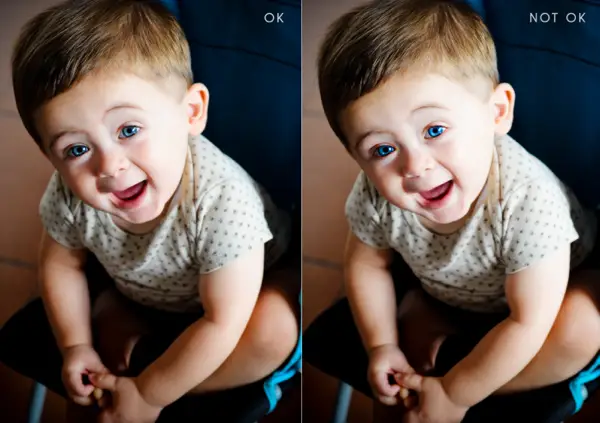
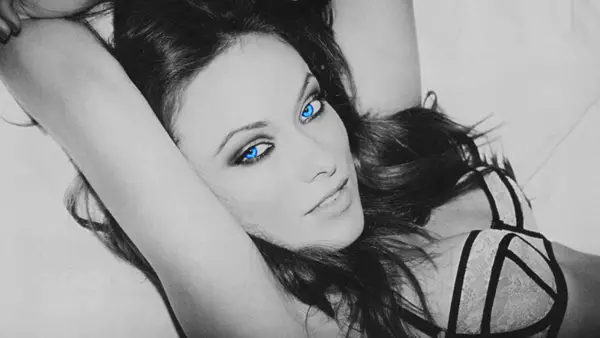
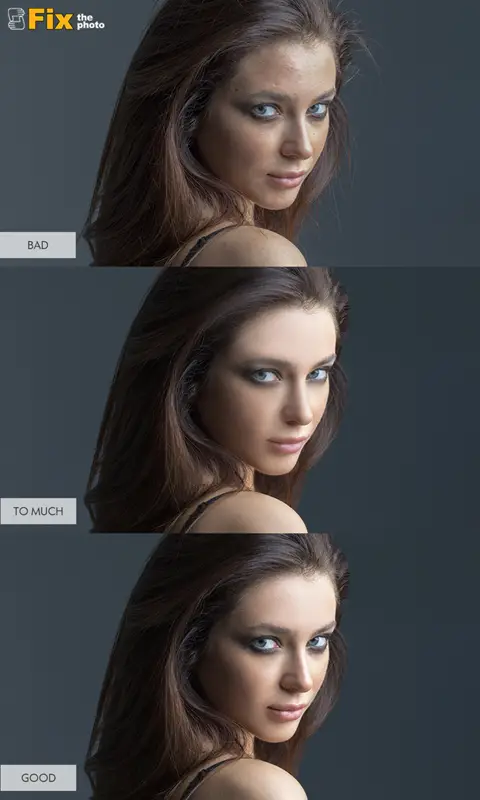
1. Too Much Skin Retouching
Above, you will find a really subtle example on how you can retouch the skin too much to the point that it looks unreal. It doesn’t stand out immediately, but there is something strange in the face, especially once you compare it to the original.
Skin is not flawless; it has some texture and some lines! Faces are not flat surfaces, so consider the light you use and the normal shadows it will create. You can fix some blemishes or skin marks here and there, soften the skin a little bit and brighten the eyes up as well, but try to keep it to a minimum, almost like there is no evidence of it.
A common mistake is to remove the normal shadows under the eyes or clear the facial lines absolutely. Over-smoothing the skin is another popular one, very much seen after crazy filters.
2. Overexposing and Over-contrasting
Some brightening up is okay, especially if you need to fix an exposure mistake in post-production. But don’t brighten the picture too much. This is far from looking good!
Watch out for blown-out patches of white, check your histogram and try to preserve the details (especially for skin).
In hand with this one, you might be tempted to add some contrast to your picture, and then add a little more, and a little more, and make it look so dramatic and intense. Stop! High contrast might work in some situations (especially with black and white), but in some cases where it is too much, it is simply unflattering to the skin, and it can blow up your picture!
3. Over Doing the Eyes
It’s great to use editing tools to enhance your portraits. It really is! Sometimes, you can add life to an otherwise normal image, or you can even save an image!
The eyes are the center of the photo in a lot of cases. It’s where we are immediately drawn to and where we can read the sentiment.
There are many ways to intensify the spark and add a little boost of color to the eyes, and it’s a great tip to capture the viewer’s attention. However, as in previous examples, excessive editing might lead you to end up with unrealistic and unwanted results.
Remember, if you make your eyes look too blue, too green or way too bright, you can easily ruin the picture.
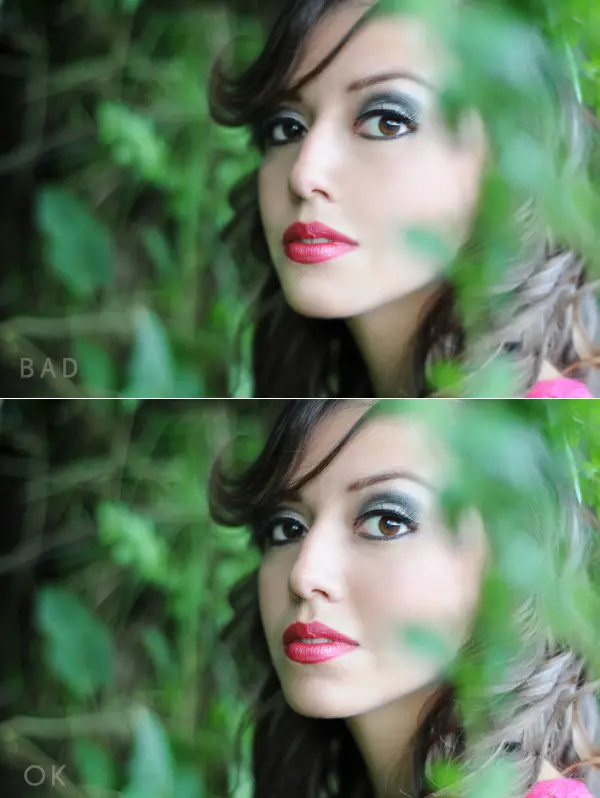
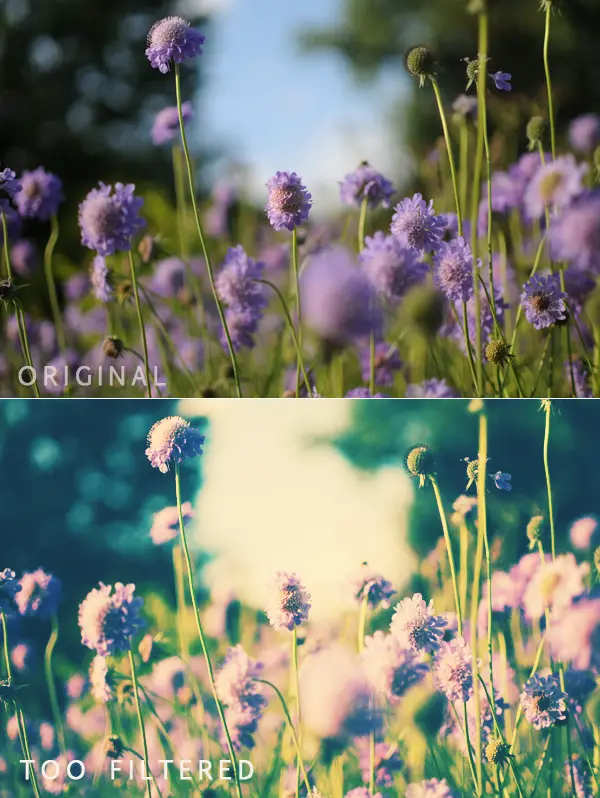
4. Reaching the Magic Greens and Blurs
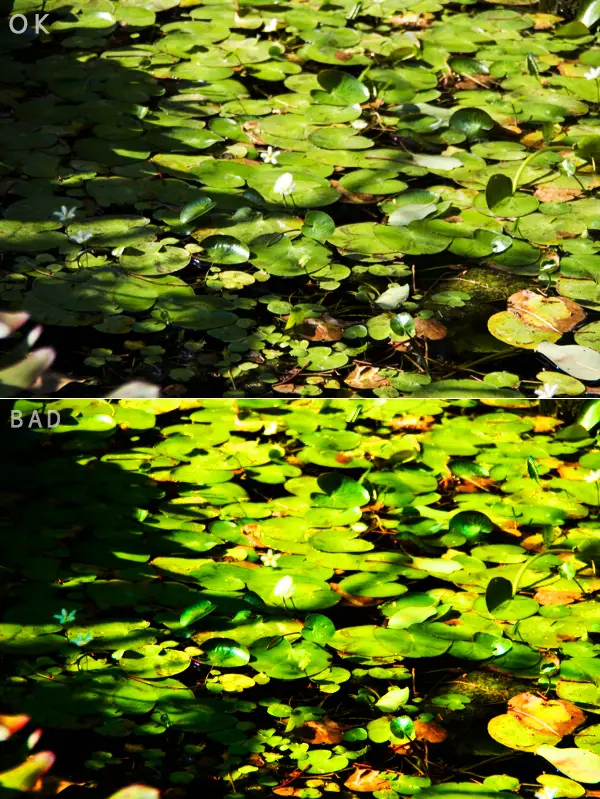
In relation to our previous point, there is also the issue of overdoing saturation.
Saturation refers to the colorfulness of a color. What this basically means is: If the color is green, how green is this green?
A lot of editing tools and applications will let you increase the saturation and, with it, the intensity and vivacity of your picture. In some cases, the filters will also add a glow to your picture, making it look like it came straight from a fantasy land!
Try to avoid such high levels of color, especially if your picture contains a lot of green, because it is so easy to tell it isn’t real and that you tried too hard.
Tip: Always check your monitor saturation levels, too! It might be incorrectly calibrated so you might end up with over-saturated pictures without even knowing it!
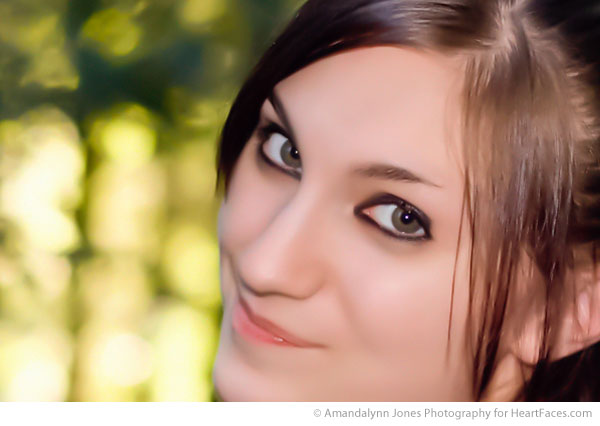
5. Fake Blur
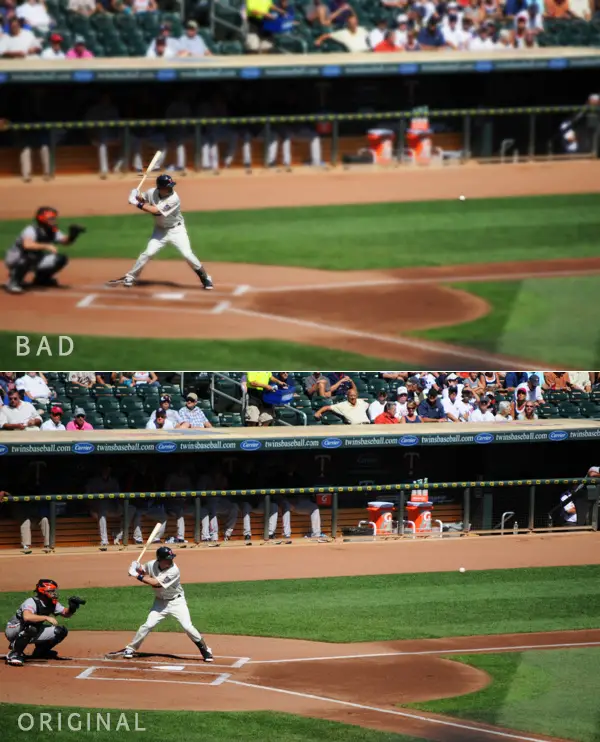
Oh, the fake blur is a very noble mistake!
It happens shortly after you get into photography, and then you try to emulate those amazing pictures where everything in the background is blurred out, except the main subject!
This instance is incredibly easy to spot, and in most cases, it is because how poorly done it is. In some cases, it might work while, in some other cases, it might be necessary, in which case you should make sure you spend some hours on it until it’s absolutely perfect. Also ensure that it makes sense, in contrast to the picture above. Since the catcher is at the same distance as the batter, he shouldn’t have been blurred out).
Or you can also learn how to do it in camera.
Once you learn to use the camera and the different manual modes, you can achieve this effect in-camera by using the right aperture and shutter-speed combination. And it will look awesome!
6. Selective Coloring
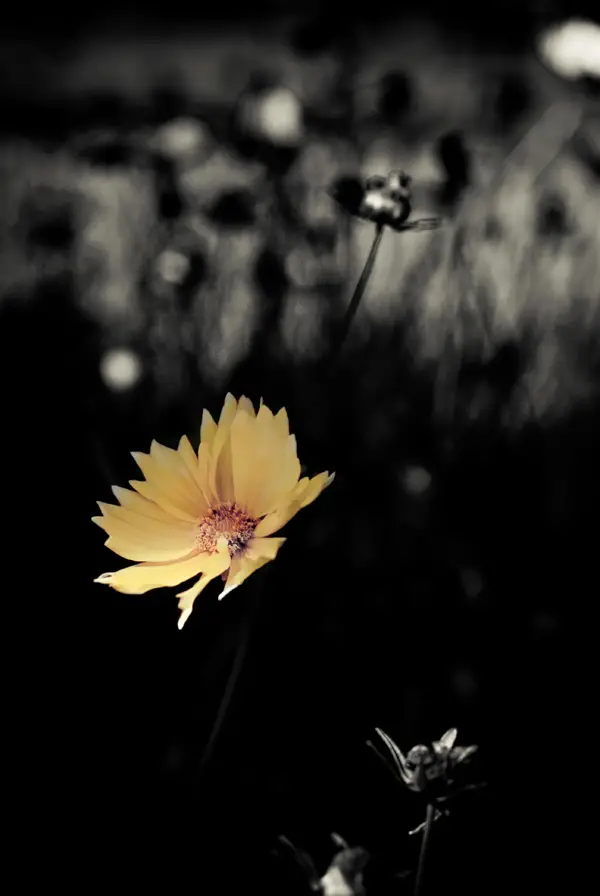
This is one of the most trendy bad kinds of editing , and, for some reason, it is still a trend. You might even have had a friend or client ask you for the effect where “everything is black and white except the roses.”
We sincerely hope you ran away from that, very far away.
Selective coloring has been even used in films, such as Sin City and Schindler’s List. But we would like to believe there was a reason and a big, symbolic undertone.
In any other case, selective coloring is, well, cheesy! It instantly converts your photo into unrealistic proof of “you-don’t-know-what-you-are-doing.”
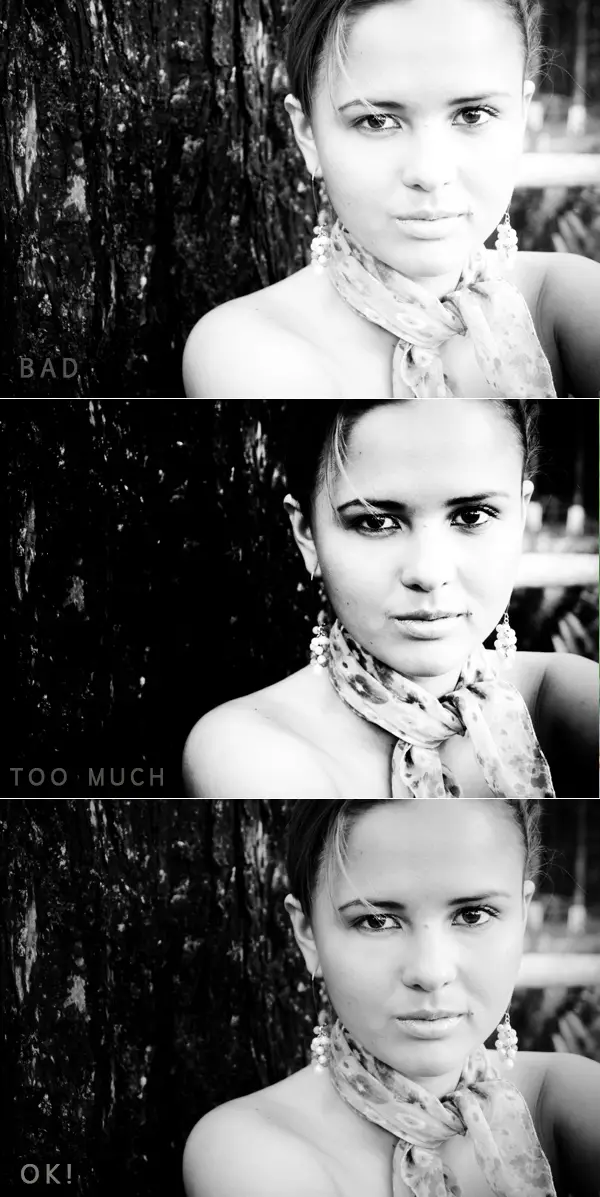
7. Boring Black and Whites
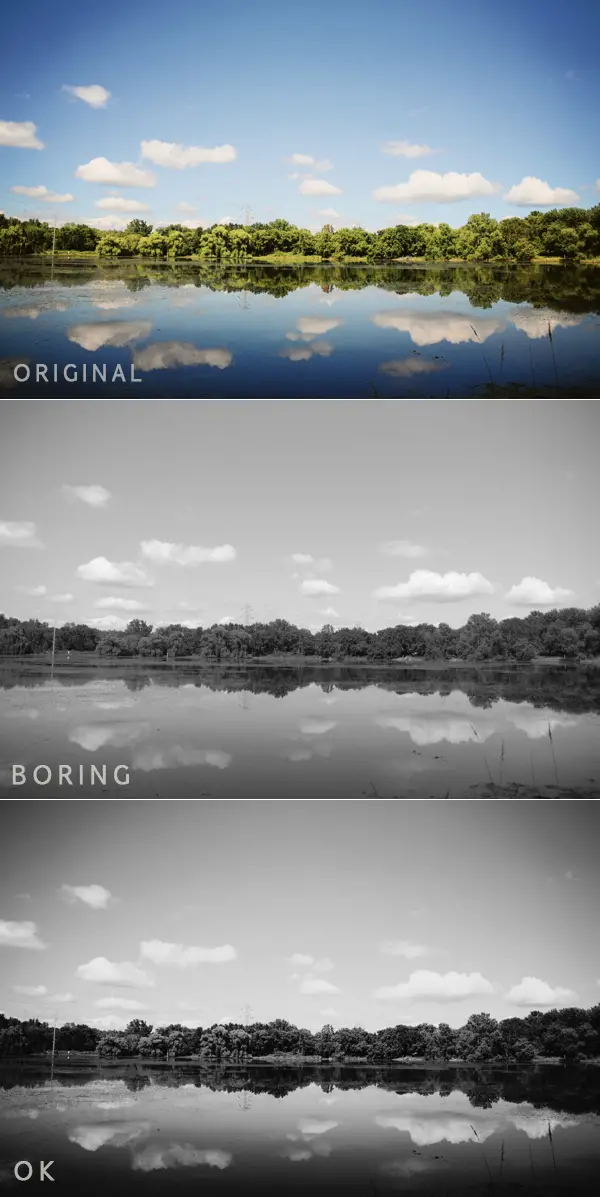
Black-and-white photography is one of the greatest expressions of artistic photography. You can reveal a whole different picture, even an amazing one, once it’s converted to a black-and-white.
However, if you are going for a black-and-white, don’t just limit it to desaturation. Explore the different methods: Channel Mixer, Grayscale conversion between others and contrast addition.
Inspect the color tones and play with the brightness and contrast until you are satisfied. If you can, find a black-and-white editing method that allows you to edit the tones and hues for a deeper contrast.
8. Artistic Filters
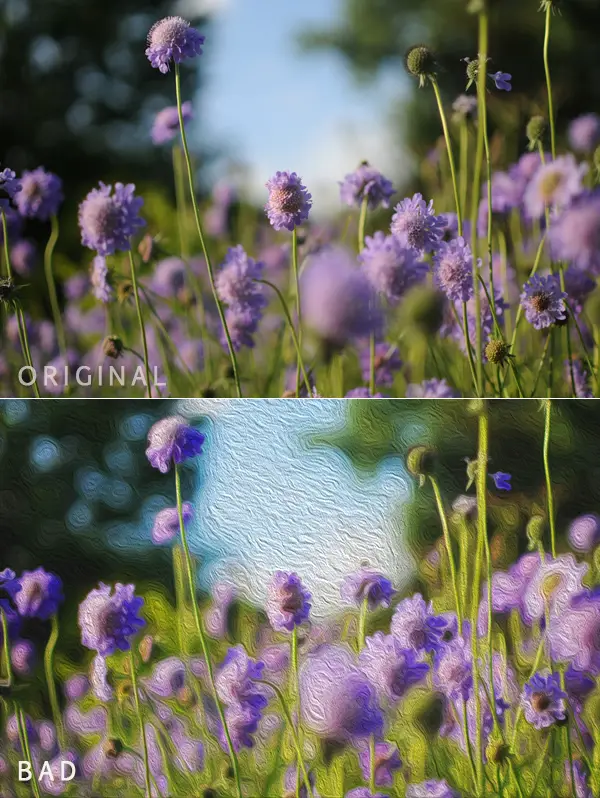
The use of artistic filters has always been a trend since there have been tools to do it. Like any trend, be careful of the excessive use of these and the application you choose.
There are some filters out there that convert your picture to another kind of image that isn’t your picture any more. They are more photo manipulation.
Why does Photoshop come with these filters anyways? The answer remains unknown.
All we know is that this is a perfect way to ruin a picture.
9. Too Many Filters
Following our previous example, some filters that are out there and trending right now are really interesting and visually attractive. However, try not to use a filter over another one and another one to the point where your original photo is unrecognizable.
Using a filter over a filter can destroy your image, and you can lose the detail, end up with unreal colors and suffer with an image that might be worth nothing in five years from now.
10. Fake HDR
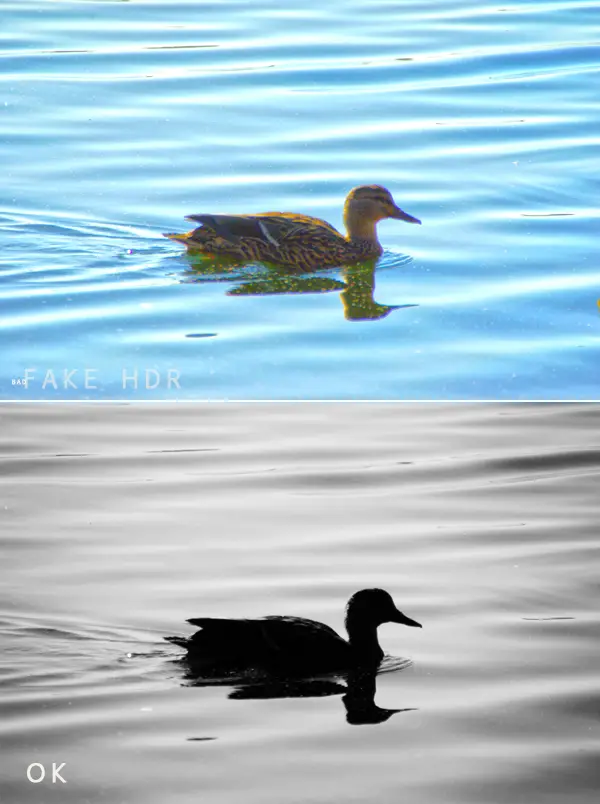
HDR stands for High-dynamic-range imaging, an editing method (or methods) used to reproduce wider ranges of luminosity in a photography.
A lot of HDR images are amazing and sincerely breathtaking, especially when done properly in the camera. In some cases, HDR is done just solely with post-production or with an app or phone filter, a process called “fake HDR.” This process might make your image look too unreal and strange.
Try another simpler approach, like in the example above: a black-and-white silhouette. A little more classic and pleasant to the eye.
Steer Clear of These Bad Edits
A good idea of how to approach editing is to look for non-destructive editing techniques and tutorials that explain the use of layers, smart objects and other tools to preserve your image! This is a great way to go back a couple of steps or remove the contrast when you notice your image is no longer recognizable.
Read more on how to avoid over-editing mistakes! You might jump into great tutorials to learn how to edit correctly.
And always, share your thoughts with us! What are some other bad edits that you have seen?
If you can’t do photo editing on your own, professionals from FixThePhoto can edit your photos for affordable prices realistically. You can ask for color correction, natural skin smoothing, eye brightening, blurring background, etc.


Some very good points here Laura! Seeing the fake HDR and selective coloring shots made me shudder!
Thanks ! They say some selective coloring you find out there could even hurt your eyes! hehe
I cracked up at some of these but especially the selective coloring. Ugh. I’ve always despised it. It seems people with horrible taste just can’t get enough of it. I was asked by an acquaintance to do it. I explained that they could do whatever they’d like to the images afterward but it simply wasn’t my style.
I have always disliked it too! I am glad you kept to your style 🙂 I have had clients that have edited my images like that… I just feel like something breaks inside .. hehe but at least I didn’t do it.
Nice- I’m guilty of two of these- too much saturation, and the fake HDR (although I do think lightening can be used effectively sometimes- but unfortunately I tend to overdo it for some reason) Probably another ‘DON’T’ is to steer away from too much contrast- too much of a leap between blacks and whites in the photos- which I am guilty of sometimes too, and perhaps one more “DON’T’ might be too much vignette which I don’t do but see a lot of. I wish I could process photos better- but am usually guilty of the thinking ‘if a little is good, a lot must be better’ I’m afraid